Are you ready to embark on an exciting adventure into the world of fabric bonding? Whether you’re a seasoned pro or just dipping your toes into the crafting pool, this blog post is here to be your trusty guide on how to permanently glue fabric to fabric.
Now, let’s talk about the glue. Choosing the right adhesive is like finding your crafting soulmate – it’s crucial for a lasting bond. But fear not. We’ll explore all the adhesive options out there, taking into account fabric types, project complexity, and durability requirements. So no matter what you’re working on – from delicate silk scarves to sturdy denim patches – we’ve got you covered.
But wait, there’s more. We’ll also dive deep into the nitty-gritty of preparation techniques. Because let’s face it, gluing fabrics together isn’t as simple as slapping them together and hoping for the best. Oh no, my friend. We’ll show you how to prep those fabrics with finesse and precision so that your creations turn out seamless and stunning every time.
So grab your favorite crafting tools, unleash that creative spirit within you, and get ready for an exhilarating journey through the magical realm of permanently gluing fabric to fabric. Trust us when we say that once you master this art, endless possibilities will unfold before your very eyes.
Stay tuned for our upcoming posts where we’ll share step-by-step tutorials and insider tips from fellow fabric aficionados. Until then, happy gluing.
Types of Fabric Glues and Their Benefits
Contents
- 1 Types of Fabric Glues and Their Benefits
- 2 Fusible Web or Interfacing: An Alternative to Fabric Glue
- 3 Sewing Techniques for Permanently Attaching Fabrics Together
- 4 Preparing the Fabric Surfaces for Optimal Adhesion
- 5 Testing the Adhesive on a Small Area
- 6 Manufacturer’s Instructions: Important Considerations Before Applying Adhesives
- 7 Common Mistakes to Avoid When Gluing Fabrics Together
- 8 Tips for Working with Different Types of Fabrics
- 9 Conclusion
Among these tools, fabric glue stands out as a game-changer when it comes to bonding fabric to fabric. The world of fabric glues is vast and varied, with each type offering its own unique benefits. Let’s embark on an exploration of the wonderful world of fabric glues and discover how they can transform your fabric projects.
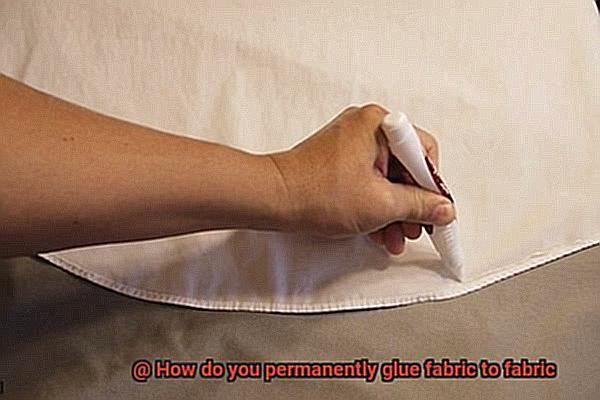
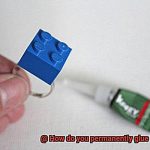
Liquid Fabric Glue:
Liquid fabric glue is like a magician in a bottle, enchanting fabrics with its quick-drying and strong bonding powers. This versatile adhesive is perfect for adding embellishments like sequins or beads to your fabric creations. Additionally, liquid fabric glue is machine washable, ensuring that your beautiful designs remain intact even after a spin in the laundry.
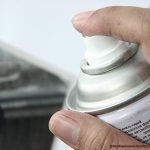
Spray Fabric Adhesive:
Imagine wielding a magic spray that effortlessly binds fabrics together. Enter spray fabric adhesive, available in a convenient aerosol can. This adhesive allows you to temporarily position fabrics before permanently bonding them. It excels in larger projects such as upholstery or quilting and possesses the remarkable ability to withstand washing and dry cleaning.
Fusible Web:
Behold the superhero of fabric projects – fusible web. This adhesive comes in sheets or rolls with a heat-activated side. Simply place it between two layers of fabric and apply heat with an iron to create a powerful bond. Fusible web is particularly suited for appliqué work or attaching patches to garments, ensuring precision and fine details.
Fabric Glue Stick:
For those seeking mess-free convenience, fabric glue sticks are your trusty allies. Functioning much like regular glue sticks, they are specially designed for fabrics. Perfect for smaller projects or securing delicate pieces together, these sticks shine when working with lightweight fabrics, leaving no sticky residue behind.
Permanent Fabric Adhesive:
When you need a bond that can withstand the test of time, permanent fabric adhesive is your secret weapon. This heavy-duty adhesive is specifically formulated to endure repeated washings and dry cleanings. Whether you’re repairing torn seams or hemming garments, permanent fabric adhesive ensures a steadfast hold.
Benefits of Using Fabric Glue:
- Convenience: Fabric glues offer a quick and hassle-free alternative to traditional sewing methods, requiring no sewing skills or special equipment.
- Versatility: These glues work on a wide range of fabrics, allowing you to unleash your creativity without limitations.
- Durability: With the right fabric glue, your creations will stand the test of time, bid farewell to loose seams or decorations falling off.
Fabric glue is an essential tool for any fabric enthusiast. From liquid glue for embellishments to spray adhesive for larger projects, there is a fabric glue tailored to every need. Embrace the power of fabric glues and watch your fabric projects soar to new heights of creativity and durability.
Fusible Web or Interfacing: An Alternative to Fabric Glue
Well, I have good news for you. There are alternatives to fabric glue that can make your crafting experience a breeze. Two popular options are fusible web and interfacing. Let’s take a closer look at the advantages and considerations of using these alternatives.
Fusible web is a thin, adhesive material that is activated by heat. It typically comes in the form of a sheet or tape. One side of the fusible web has a heat-activated adhesive, which is placed between two layers of fabric. When heat is applied, such as with an iron, the adhesive melts and fuses the two layers of fabric together. This method provides a strong bond that is durable and long-lasting.
Interfacing, on the other hand, is a stiff fabric that is used to provide structure and support to garments or craft projects. It can be sewn or fused onto the fabric. When used as an alternative to fabric glue, interfacing can be fused between two layers of fabric using heat and pressure. This creates a sturdy bond that helps maintain the shape and structure of your project.
Both fusible web and interfacing offer several advantages over fabric glue. First and foremost, they provide a strong bond that is reliable and long-lasting. This means that your projects will withstand regular wear and tear without falling apart. Additionally, they eliminate the need for sewing, making them convenient options for those who don’t have access to a sewing machine or prefer not to sew.
Another advantage of fusible web and interfacing is their versatility. They come in different weights or thicknesses, allowing you to choose the right one for your specific project. Lighter weights are suitable for lightweight fabrics, while heavier weights are better for heavyweight fabrics. This versatility ensures that you can achieve the desired level of adhesion without compromising the integrity of your materials.
However, it’s important to consider a few things before diving into the world of fusible web and interfacing. First, you need to carefully follow the manufacturer’s instructions when working with these alternatives. The correct temperature, pressure, and time needed for fusing may vary depending on the product. It’s always a good idea to test on scrap fabric before applying it to your project to ensure desired results.
Furthermore, fusible web and interfacing may not be suitable for all projects. Fabrics that cannot withstand heat or pressure, such as delicate fabrics like silk or lace, may not be compatible with these methods. In such cases, fabric glue or sewing may be more appropriate options.
Sewing Techniques for Permanently Attaching Fabrics Together
In this comprehensive guide, we’ll explore various sewing techniques that can be used to permanently attach fabrics together. From the basic straight stitch to the advanced flat-felled seam, we’ll cover it all. And if you’re thinking about using glue as an alternative, stick around to find out why sewing is often a better choice. So grab your needle and thread, and let’s dive into the wonderful world of sewing.
The Straight Stitch:
Let’s start with the tried and true straight stitch. This classic sewing technique involves stitching in a straight line along the edge of the fabric to join it with another piece. The straight stitch is simple yet strong, making it suitable for a wide range of projects. Whether you’re repairing a torn seam or constructing a garment, the straight stitch is your go-to choice. Just keep in mind that it may not be suitable for stretchy fabrics or delicate materials.
The Zigzag Stitch:
When it comes to stretchy fabrics or adding decorative finishes, the zigzag stitch steals the spotlight. This versatile technique creates a zigzag pattern along the fabric edge, providing extra strength and flexibility to the seam. It’s like giving your fabric an elastic hug. Not only does it accommodate fabric stretch, but it also prevents fraying. However, beware of potential downsides such as bulkier seams or uneven stitching if not executed carefully.
Specialized Techniques:
For delicate or intricate fabrics like lace or silk, specialized sewing techniques come to the rescue. French seams and rolled hems are two such techniques that guarantee both functionality and aesthetics. French seams create a neat finish while securely attaching fabric edges, making them ideal for sheer fabrics. Rolled hems, on the other hand, create a clean edge without any visible stitches, perfect for lightweight fabrics. These techniques demand more time and precision, but the end result is well worth the effort.
Advanced Techniques:
If you’re up for a challenge, advanced sewing techniques will take your skills to new heights. Flat-felled seams and bound seams are two such techniques that can elevate your sewing game. Flat-felled seams, commonly seen in denim jeans, provide a strong and durable finish, perfect for heavy-duty projects. Bound seams, often found in high-end garment construction, add a touch of elegance and reinforce fabric edges. These techniques require practice and expertise but deliver unparalleled strength and longevity.
Preparing the Fabric Surfaces for Optimal Adhesion
Today, we’re going to dive into the world of glue and its magical ability to fuse fabric surfaces together. But before we embark on this adhesive adventure, it’s important to prep our fabric surfaces for optimal adhesion. So, grab your favorite fabric and let’s get started.
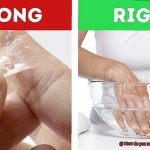
Step 1: Cleanliness is Key
Like any good superhero, we need to start with a clean slate. Gently wash your fabrics using mild detergent and water or a fabric-specific cleaner. Ensure you rinse and dry them thoroughly to remove any dirt or residue that could hinder the bonding process.
Step 2: Coating Conundrums
Some fabrics come with a coating or finish that can act as a barrier to adhesion. In such cases, grab your sandpaper or a suitable solvent (follow the manufacturer’s instructions.) to lightly sand the surface or remove the coating. This step will allow the adhesive to grip onto the fabric more effectively.
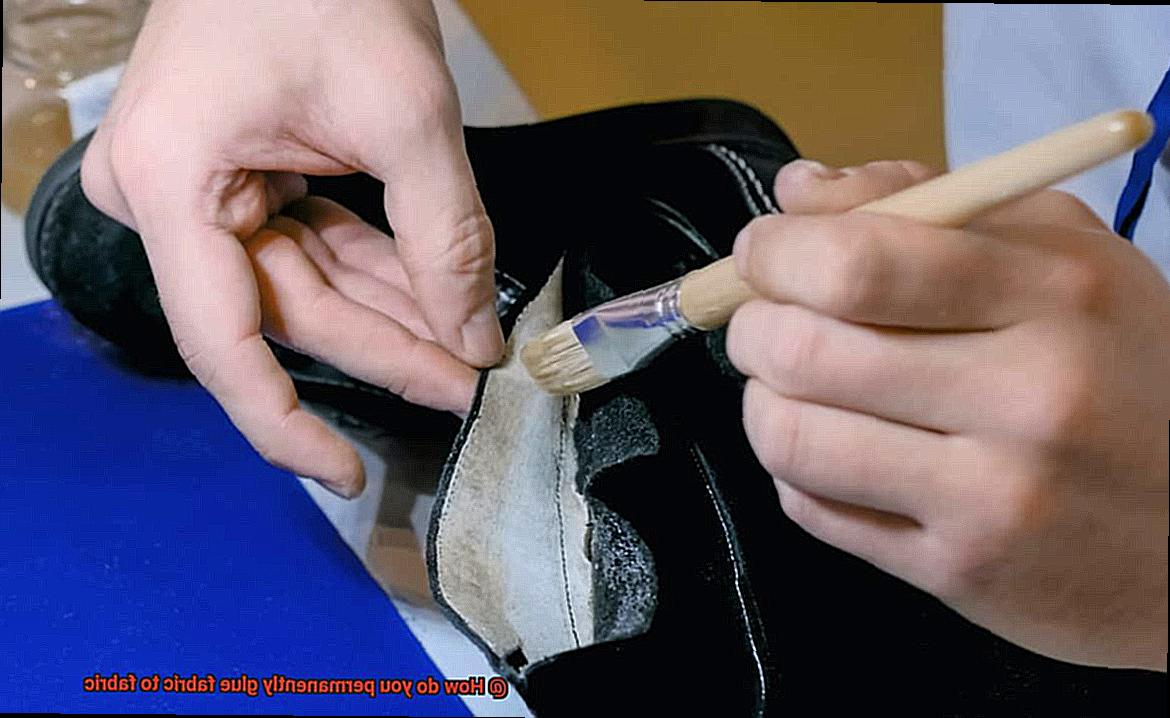
Step 3: Roughening the Surface
Let’s give our adhesive some extra grip. Use sandpaper or an abrasive pad to create tiny grooves or scratches on the fabric’s surface. These roughened areas provide more surface area for the adhesive to cling to, resulting in a stronger bond between the fabrics.
Step 4: Taming Low Surface Energy Fabrics
Some fabrics, like polyester or nylon, have a low surface energy that makes them resistant to adhesion. Fear not. Treat these fabrics with a primer or bonding agent specially designed for such materials. These products work their magic by altering the fabric’s surface energy and making it more receptive to adhesive bonding.
Step 5: Dry is King
Before applying any adhesive, make sure both fabric surfaces are completely dry. Moisture can compromise the adhesive bond and leave you with a weak or failed adhesion. Air dry your fabrics or use a gentle heat source, like a hairdryer, to speed up the drying process.
By following these steps, you are now equipped with the knowledge to prepare fabric surfaces for optimal adhesion. Remember, cleanliness, coating removal, surface roughening, treating low surface energy fabrics, and ensuring dryness are the key ingredients to achieving a superhero-worthy bond.
So, go forth and create with confidence, knowing that your fabric projects will stay together through thick and thin.
Research:
Preparing the fabric surfaces is a crucial step in achieving optimal adhesion when gluing fabric to fabric. This process involves cleaning the fabrics to remove any dirt, dust, or debris that may interfere with the bonding process. Additionally, it may also require the use of certain products or techniques to improve the fabric’s ability to adhere to one another.
Testing the Adhesive on a Small Area
When it comes to gluing fabric to fabric, there’s one crucial step that you should never skip: testing the adhesive on a small area. This simple precaution can save you from potential disasters and ensure a successful outcome for your project.
So why is this step so important? Let’s dive into the details. First and foremost, testing the adhesive on a small area allows you to check its compatibility with the fabrics you’re working with. Different adhesives may react differently to different types of fabric. That means what works perfectly for one fabric may not work at all for another. By testing on a small area, you can observe any adverse reactions like discoloration or damage and make an informed decision about whether or not to proceed.
This testing phase also gives you an opportunity to assess the strength and durability of the adhesive bond. After letting the adhesive dry on the test area, give those bonded fabrics a gentle pull to see if they hold together firmly.
If there’s any sign of weakness or peeling, it may indicate that the adhesive isn’t strong enough for your intended use. It’s better to find out now rather than after you’ve glued your entire project together.
And that’s not all folks. Testing on a small area also lets you evaluate the appearance of the adhesive on the fabric. Some adhesives may leave visible residue or create a glossy or matte finish on the fabric. And let’s be honest, that might not be the look you’re going for. By testing first, you can explore alternative adhesives that offer a more aesthetically pleasing result.
Last but certainly not least, testing on a small area serves as a preventive measure to avoid any irreversible damage to your fabric project. Picture this: you apply the adhesive directly to your entire fabric only to find out later that it caused discoloration or damage. Talk about a nightmare. By taking the time to test on a small area, you can avoid these potential disasters and ensure that your project turns out exactly as you envisioned.
Manufacturer’s Instructions: Important Considerations Before Applying Adhesives
Are you planning to embark on a fabric project that involves gluing fabric to fabric? If so, it’s crucial to adhere to the manufacturer’s instructions when applying adhesives. Trust me, it may seem like an extra step, but it’s one that can make a world of difference in the success of your project. Let me break down the reasons why following these instructions is so important.
- Bonding Strength Maximization: Adhesives come in different forms, such as glue sticks, liquid adhesives, and fabric adhesives. Each type has specific instructions for optimal application. By following these instructions, you ensure that the adhesive is used correctly, resulting in maximum bonding strength. This means your fabric project will withstand the test of time.
- Surface Recommendations: The manufacturer’s instructions often include information on the recommended surfaces to be bonded. By following these recommendations, you avoid potential damage to your fabric or compromising the bond strength. It’s like having a secret recipe for success – just follow it.
- Safety Guidelines: Your safety matters, and the manufacturer’s instructions may provide safety guidelines such as wearing protective equipment or working in a well-ventilated area. These guidelines ensure that you’re using the adhesive in a safe manner and protecting yourself from any potential harm.
- Compatibility with Fabric Types: Different adhesives work better on certain types of fabrics, while others may not adhere well or cause damage. By following the manufacturer’s instructions, you can choose an adhesive that is suitable for both the fabrics being bonded and the intended use of your final product. It’s all about finding the perfect match.
- Pre-Treatment Considerations: The instructions may specify any pre-treatment required for the fabrics before applying the adhesive. Ignoring these steps can result in a weaker bond or even adhesive failure. So take the time to clean or roughen the surface if needed – it’s worth it.
- Permanence Level: Some adhesives offer temporary bonds, while others provide permanent adhesion. Understanding the intended use of your fabric project will help you choose the right adhesive. Following the manufacturer’s instructions will guide you in making the best decision for your specific needs.
Common Mistakes to Avoid When Gluing Fabrics Together
By following a few simple guidelines, you can ensure a strong bond and avoid any mishaps along the way. In this article, we’ll explore the most common mistakes people make when gluing fabrics together and provide you with expert tips on how to avoid them.
Properly Prepare Your Fabrics:
Before diving into the gluing process, take the time to properly prepare your fabrics. Thoroughly clean and dry them to eliminate any dirt, oils, or residue that can hinder the adhesive’s ability to stick properly. A quick hand wash or machine wash (if suitable) should do the trick. Remember, a clean surface is vital for achieving a strong bond.
Choose the Right Glue for Your Fabric:
Using the wrong type of glue is a recipe for disaster. Each fabric requires a specific adhesive. For example, what works well on cotton may not be suitable for silk or synthetic fabrics. Research and select a glue specifically designed for the fabric you’re working with. This smart choice will ensure a successful bond that stands the test of time.
Apply an Even Layer of Glue:
Excessive glue can lead to seepage, staining, and uncomfortable stiffness in your fabric project. To avoid these issues and achieve a clean and seamless bond, remember that less is more. Apply a thin, even layer of glue for optimal results.
Allow Sufficient Drying Time:
Patience is key when it comes to gluing fabrics together. Hastening the drying process can result in a weak bond that easily comes apart. Follow the manufacturer’s instructions regarding drying time for the specific glue you’re using. Allowing ample time for the glue to fully dry and set will ensure a strong and long-lasting bond.
Test Before Going All In:
Before committing to gluing the entire project, it’s essential to test the glue on a small, inconspicuous area of the fabric. This step allows you to check for any discoloration or damage that the glue may cause. Better safe than sorry, right? Taking this extra precaution can save you from potential disappointment or ruined fabric.
Tips for Working with Different Types of Fabrics
We’ve got you covered with these expert tips and tricks. Whether you’re dealing with cotton, silk, polyester, denim, upholstery fabrics, or sheer fabrics, we’ve compiled the best advice to ensure your fabric creations are a success.
Cotton – Smooth and Strong:
Cotton is a versatile fabric perfect for a range of projects. For a secure bond, opt for a fabric glue specifically designed for cotton. Apply the glue evenly and press firmly to keep the fabric in place. Choose a fabric glue that can withstand washing and wear for long-lasting results.
Silk – Delicate But Not Impossible:
Silk requires extra care when gluing due to its delicate nature. Use a fabric glue formulated for silk to prevent discoloration or damage. Test the adhesive on a hidden area first to ensure compatibility. Apply the glue sparingly to avoid excessive pressure that could tear or stretch the fabric.
Polyester – Smooth and Fray-Prone:
Polyester fabrics have a smooth surface, making them relatively easy to work with. Choose a fabric glue suitable for polyester to ensure optimal adhesion. To prevent fraying, apply a small amount of fray check or clear nail polish along the edges before gluing.
Denim – Tough But Tricky:
Denim is known for its durability but can pose a challenge when gluing. Use a strong adhesive designed specifically for denim or heavy-duty fabrics. For better adhesion, roughen the denim surface with sandpaper before applying the glue.
Upholstery Fabrics – Thick and Heavy:
Upholstery fabrics are thick and heavy, requiring special attention when working with them. Opt for a fabric glue formulated specifically for upholstery fabrics to ensure a strong bond. Consider using clamps or heavy objects to hold the fabrics in place while the glue dries, ensuring a secure attachment.
Sheer Fabrics – Light as a Feather:
Sheer fabrics like chiffon or organza need gentle handling. Choose a fabric glue specially formulated for delicate fabrics and apply it sparingly to prevent tearing or stretching. Take your time and let the glue dry completely before continuing with your project.
Conclusion
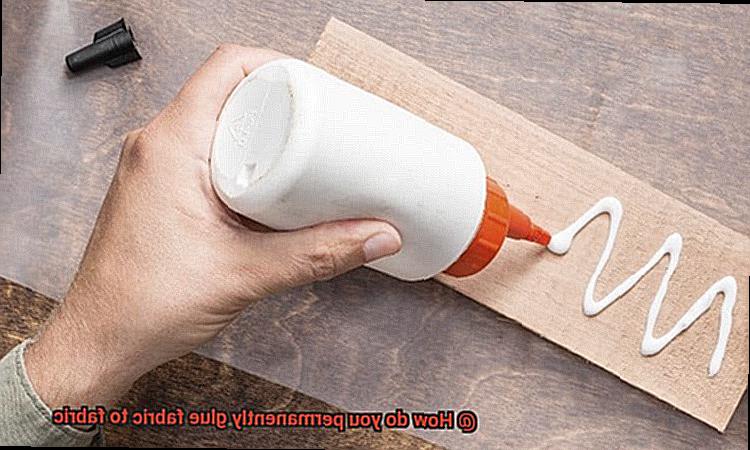
To permanently glue fabric to fabric, there are a few methods you can try.
One option is using fabric glue, which is specifically designed for bonding fabrics together. This adhesive creates a strong and durable bond that will withstand washing and wear.
Another option is using fusible web or adhesive tape, which involves applying heat to activate the adhesive and create a permanent bond between the fabrics. Additionally, sewing can be used in conjunction with glue for added strength and security.
Whichever method you choose, it’s important to follow the instructions carefully and test on a small area of fabric before applying it to your entire project.