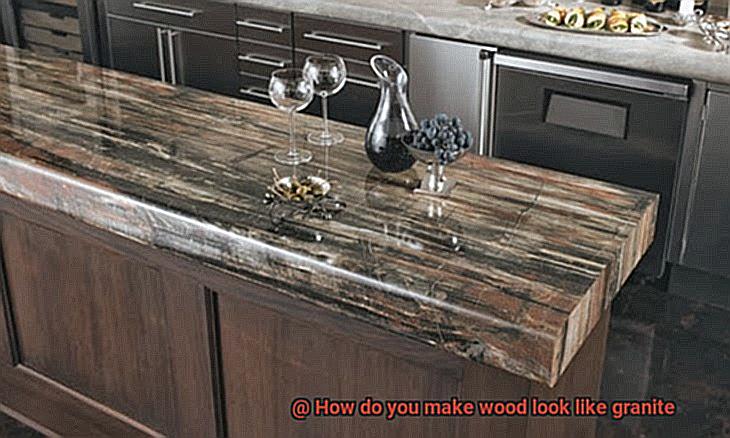
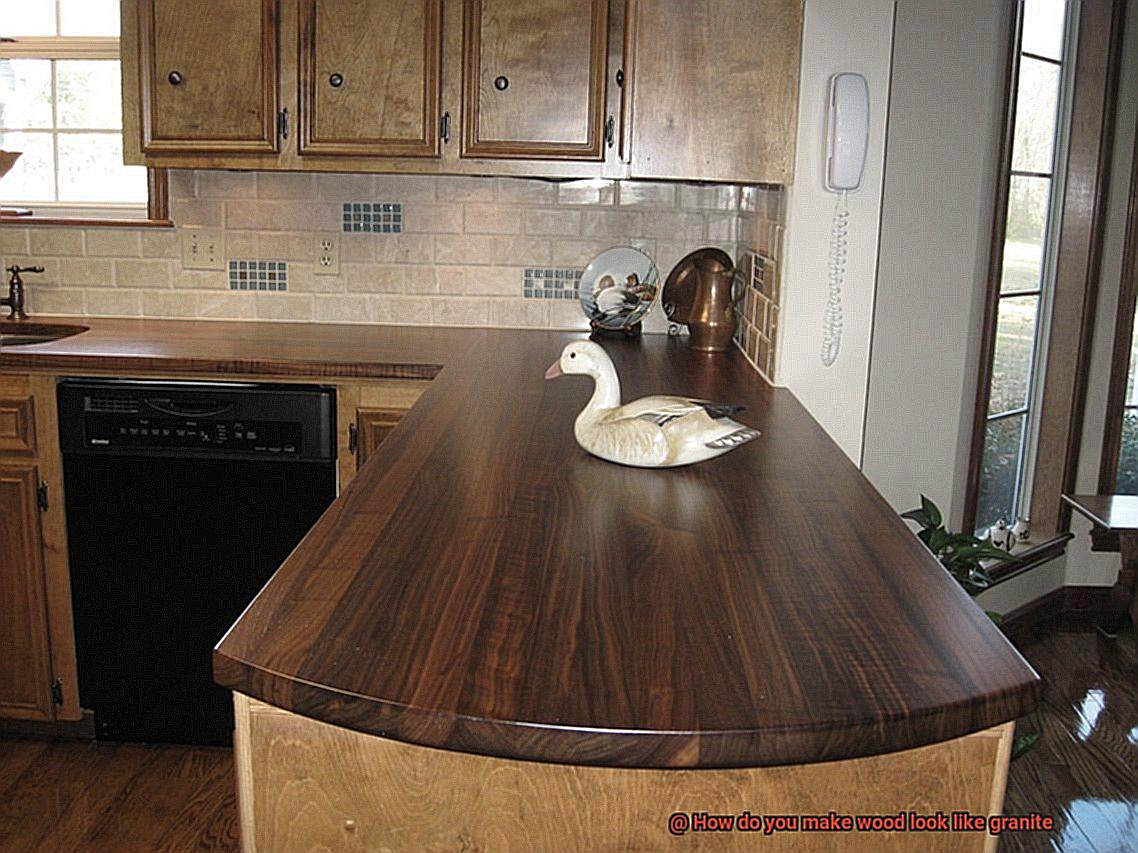
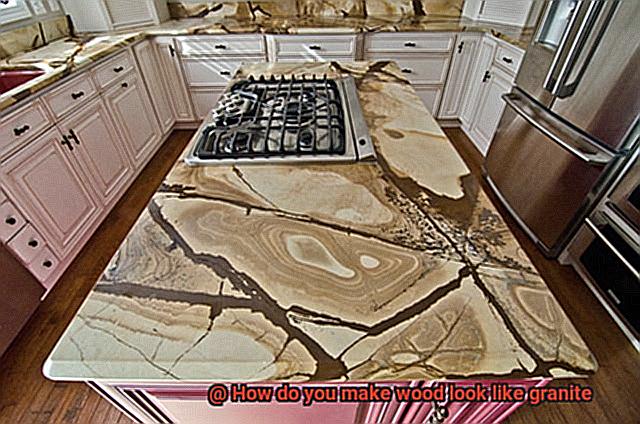
Picture this – you walk into a room and are immediately captivated by the sight of what seems to be a magnificent granite surface, with its intricate patterns and mesmerizing colors. But here’s the twist – when you reach out to touch it, you feel the warmth and authenticity of wood beneath your fingertips instead. It sounds like an impossible fusion of beauty, right? Well, get ready to have your mind blown as we unveil the secret behind this mystical transformation.
In the world of interior design and home décor, there are no limits to creativity. From painting techniques to faux finishes, experts have discovered ingenious ways to mimic materials, turning ordinary elements into extraordinary features. And among these groundbreaking methods lies the splendid art of making wood imitate the grandeur of granite – a captivating marriage between nature’s beauty and human ingenuity.
In this blog post, we’re going to take you on a transformative journey, revealing the tricks of the trade and guiding you through each step required to achieve this awe-inspiring effect. So buckle up and prepare yourself for an adventure as we explore how wood can be transformed into granite.
Main Points:
- Choosing the Perfect Base: Let’s dive into understanding the unique characteristics of different types of wood and their grain patterns, ensuring we start with a suitable foundation.
- Preparing the Surface: Before any magic can happen, we need to sand, clean, and prime our wood surface – essential steps for achieving that flawless finish.
- Paint and Glazing Techniques: Get ready to discover the perfect combination of colors, textures, and realistic brushstrokes that will bring our wooden masterpiece one step closer to resembling stunning granite.
- Veining and Mottling: Now it’s time for some artistic finesse. Learn how to recreate those intricate details and patterns found in natural granite, adding that wow factor to your wood-turned-granite creation.
- Finishing Touches: No transformation is complete without the right final touches. We’ll explore the use of sealants, topcoats, and polishes to ensure durability and a polished look that will leave everyone in awe.
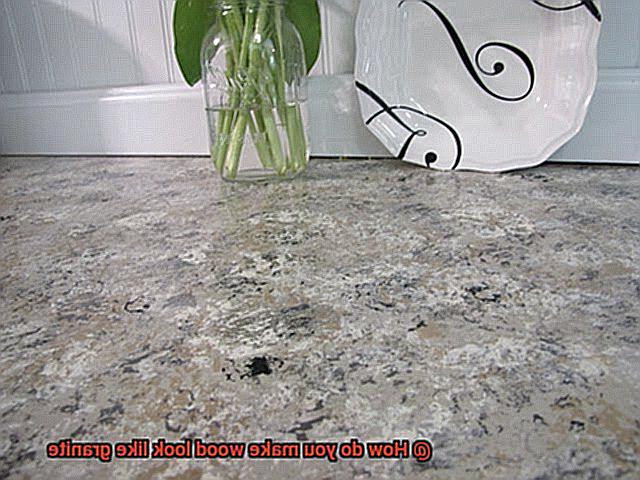
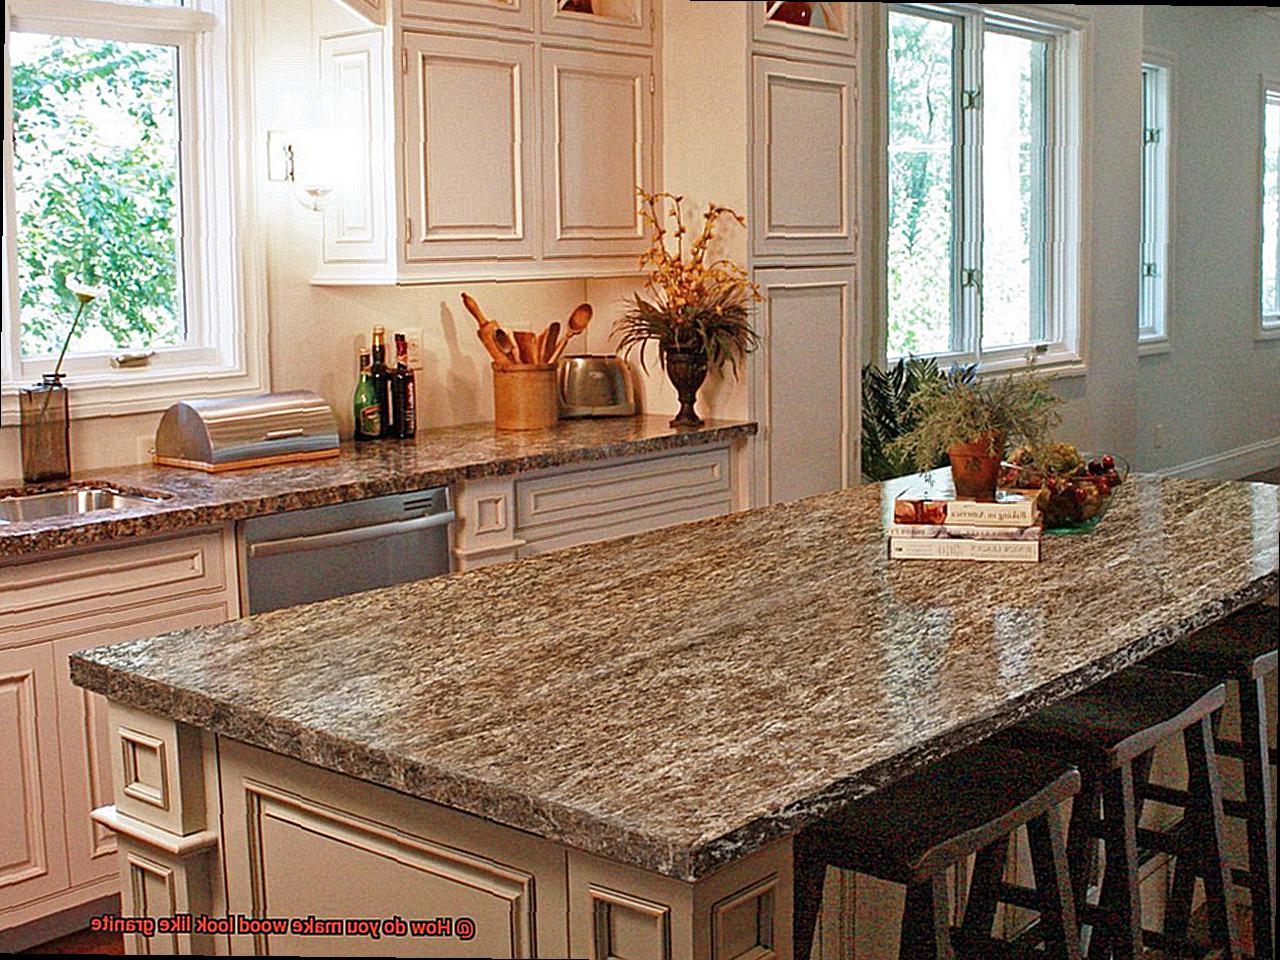
The idea of making wood look like granite may seem far-fetched, but with the right techniques and a sprinkle of creativity, it’s absolutely achievable. Whether you’re looking to revamp your kitchen countertops, add a touch of elegance to your furniture, or make a bold
What is Granite?
Contents
- 1 What is Granite?
- 2 Techniques for Making Wood Look Like Granite
- 3 Faux Finish Technique: Wood Graining/Faux Bois
- 3.1 Step 1: Prepare the Wood Surface
- 3.2 Step 2: Bring the Wood Grain Pattern to Life
- 3.3 Step 3: Layer Different Shades for Depth and Dimension
- 3.4 Step 4: Blend Colors Seamlessly
- 3.5 Step 5: Add a Touch of Glamour with Glaze
- 3.6 Step 6: Subtle Highlights and Color Variations
- 3.7 Step 7: Enhance Realism with Veining Techniques
- 3.8 Step 8: Protect and Seal your Creation
- 4 Applying Paint and Glaze to Achieve a Granite-Like Effect
- 5 Using Epoxy Resin to Create a Granite-Like Appearance
- 6 Preparing the Wood Surface for Epoxy Resin
- 7 Mixing the Epoxy Resin and Pigments
- 8 Applying Lines or Swirls of Contrasting Color onto the Wet Epoxy Resin
- 9 Conclusion
Join us as we embark on a journey to unravel the secrets of this natural wonder. From its composition and grain structure to its diverse colors and global presence, we will explore the fascinating characteristics of granite. Discover why it has become the go-to choice for countertops, flooring, and monuments, and uncover its practical benefits in various applications.
Composition: A Harmonious Blend of Minerals
At the heart of granite lies a harmonious blend of quartz and feldspar minerals. Complemented by traces of mica and amphibole, this unique composition bestows upon granite its exceptional qualities. The interlocking grain structure formed by these minerals contributes not only to its visual allure but also to its remarkable durability.
Grain Structure: Nature’s Artistry Unveiled
The interplay of minerals within granite gives rise to its enthralling grain structure. As molten magma gradually cools and solidifies over eons, mineral crystals grow and intertwine, forming grains larger than 1 millimeter in size. This coarse-grained nature grants granite its distinct texture and pattern, transforming it into a work of art crafted by nature itself.
Color Variations: A Kaleidoscope of Natural Splendor
Prepare to be captivated by the kaleidoscope of colors found in granite. From ethereal whites and grays to enchanting pinks and blacks, each slab tells a unique story. The presence of different minerals in varying proportions creates stunning color patterns, ensuring that no two pieces of granite are ever alike. Let your imagination run wild as you explore the endless possibilities for personalized design.
Formation Process: Time’s Imprint on Earth’s Canvas
To witness the birth of granite is to behold a masterpiece in the making. Deep within the Earth’s crust, molten magma slowly cools, allowing minerals to crystallize and grow. Over millions of years, this gradual solidification gives birth to the interlocking grain structure that defines granite. Its creation is a testament to the artistry of time itself, a masterpiece waiting to be discovered.
Techniques for Making Wood Look Like Granite
Prepare to be enthralled as we embark on a journey through the captivating world of wood-to-granite transformation. In this exploration, we will uncover the secrets of faux painting, stain and glaze, epoxy resin, wood veneer, and specialized paint products. Join me as we unlock the artistry behind these techniques and witness the remarkable metamorphosis of humble wood into a breathtaking granite-like masterpiece.
Faux Painting Technique:
Immerse yourself in the enchanting realm of faux painting, where layers of paint and glaze work together to bestow wood with the allure of granite. Begin with a base coat resembling your desired granite color, then utilize sponges, brushes, or rags to add texture and pattern. Seal the painted surface with a clear coat to ensure a long-lasting finish that captivates all who lay eyes upon it.
Stain and Glaze Technique:
Embrace the natural beauty of wood grain with the stain and glaze technique. Start by staining the wood with a base color that mirrors your desired granite shade. Once dry, apply a glaze mixture over the stained surface, using brushes or rags to create depth and texture. Seal it all with a protective topcoat to enhance durability while capturing the mesmerizing allure of granite.
Epoxy Resin Technique:
Prepare to be spellbound by the transformative powers of epoxy resin. Mix this magical substance with pigments or metallic powders that mimic granite’s captivating colors. Pour or spread the mixture over the wood surface, allowing it to self-level and cure into a hard, glossy coating. Add more layers for depth and texture, then sand and polish to perfection, unveiling a smooth, granite-like appearance that will leave you breathless.
Wood Veneer Technique:
Experience the harmonious marriage of wood’s warmth and granite’s beauty with the wood veneer technique. Adhere veneer sheets with granite patterns or textures to the wood surface using adhesive. Seal it all with a protective finish, allowing the natural texture and warmth of wood to shine through, while still achieving a remarkably realistic appearance of granite.
Faux Finish Technique: Wood Graining/Faux Bois
Today, we are diving into the enchanting art of wood graining, also known as faux bois. Prepare to be amazed as we unravel the secrets behind creating a realistic wood grain pattern that will make your surfaces resemble the majestic allure of granite.
Step 1: Prepare the Wood Surface
Smooth out imperfections by sanding it down and apply a neutral base coat of paint. This base coat will serve as the backdrop for our faux bois masterpiece.
Step 2: Bring the Wood Grain Pattern to Life
Grab your brushes, combs, or even feathers and sponges – we’re about to embark on a creative journey. Using a variety of tools, carefully create the illusion of wood grain on our surface. Think of it as painting with texture.
Step 3: Layer Different Shades for Depth and Dimension
We’re not just using one shade of paint. Oh no, that would be too simple. Layer different shades to add depth and dimension to our faux bois finish. Start with the darkest shade to create stunning grain lines. Then, gradually build up lighter shades for realistic variation.
Step 4: Blend Colors Seamlessly
Take it one small section at a time and blend those colors together seamlessly for a truly authentic look. We want our faux bois finish to fool even the most discerning eye.
Step 5: Add a Touch of Glamour with Glaze
Enter the glaze – tinted with metallic pigments or mica powders for that lustrous shine reminiscent of granite. Brush or wipe it onto your surface, allowing it to settle into the recesses of the wood grain and highlight its texture.
Step 6: Subtle Highlights and Color Variations
Let’s add some subtle highlights and variations in color. Use a dry brush technique with a lighter shade of paint to create mesmerizing highlights. We’re all about the details here.
Step 7: Enhance Realism with Veining Techniques
What’s a faux bois finish without exquisite mineral veins found in granite? Get creative and add veining techniques to enhance the realism of your masterpiece. This will truly make your wood surface resemble the natural beauty of granite.
Step 8: Protect and Seal your Creation
Now that our faux bois finish is complete, it’s time to protect and seal our creation. Applying a clear topcoat or varnish will not only safeguard the finish but also enhance its sheen and durability.
Applying Paint and Glaze to Achieve a Granite-Like Effect
In this article, we will guide you through the fascinating process of applying paint and glaze to achieve a truly realistic granite-like effect on wood surfaces. Get ready to turn your project into a work of art.
Applying paint and glaze is the go-to technique for achieving a granite-like effect on wood surfaces. It allows you to play with colors, shades, and textures, replicating the natural variations found in granite. So, let’s start by choosing the perfect colors for your paint and glaze. Typically, shades of gray, black, and white are used to capture the organic beauty of granite and create a true-to-life appearance.
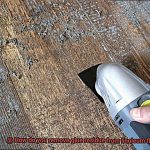
Before diving into the painting process, it’s crucial to properly prepare the wood surface. This involves sanding, cleaning, and priming the wood to ensure a smooth and even application. Trust us, taking the time to prepare your canvas will make all the difference in achieving a professional-looking finish that truly captures the essence of granite.
Now that your wood is prepped and ready, it’s time to apply a base coat of paint. Choose a light gray or white color as your background for the granite effect. Allow this coat to dry completely before proceeding. Remember, patience is key here. This base coat will serve as the foundation for your granite-like masterpiece.
Next comes the fun part – creating a glaze mixture using darker shades of gray and black paint. This glaze will add depth and texture to your wood surface, mimicking the characteristic veining patterns found in granite. Now it’s time to unleash your creativity. Apply the glaze using a brush or sponge, focusing on creating organic and irregular patterns that imitate the natural variations in granite. This step requires some artistic skill and experimentation to achieve just the right effect.
To ensure a seamless transition between colors and avoid harsh lines or unevenness, it’s important to work in small sections at a time. Blend the glaze while it’s still wet, meticulously creating that natural look that granite is known for. Take your time and enjoy the process – after all, art is all about the journey.
Using Epoxy Resin to Create a Granite-Like Appearance
Prepare to be captivated by the enchanting world of epoxy resin as we dive into the art of creating a mesmerizing granite-like appearance on wood surfaces. In this guide, we will explore the boundless creativity and versatility that epoxy resin offers. Get ready to embark on a journey filled with endless possibilities.
Step 1: Preparing the Wood Surface
Before immersing yourself in the magic of epoxy resin, take the time to properly prepare the wood surface. Begin by meticulously cleansing it, banishing any trace of dust, dirt, or grease. Then, delicately sand the surface to achieve a flawlessly smooth texture that ensures optimal adhesion.
Step 2: Mixing the Epoxy Resin
With your wood surface primed and poised for transformation, it’s time to mix the epoxy resin. Follow the manufacturer’s instructions with unwavering dedication, blending the resin and hardener in precise proportions. This step is of utmost importance as it determines proper curing and bonding – a critical foundation for your masterpiece.
Step 3: Applying the Epoxy Resin
Armed with your carefully mixed epoxy resin, unleash your artistic prowess by applying it to the wood surface. Employ a brush or roller to achieve an even distribution of resin, aiming for a uniform granite-like appearance. For added dimension and texture, consider layering multiple coats of epoxy resin.
Step 4: Unleashing Creativity
To truly emulate the authentic allure of natural granite, embrace your creative spirit. Blend different hues of epoxy resin to create captivating speckled or veined effects reminiscent of genuine granite patterns. Don’t hesitate to experiment with additives like metallic powders or mica flakes – they add an enthralling visual interest to your masterpiece.
Step 5: Curing and Finishing Touches
Having applied the epoxy resin, exercise patience as you allow it to cure according to the manufacturer’s instructions. Proper curing guarantees a robust and long-lasting work of art. Once cured, gently sand the surface to eliminate any imperfections or irregularities. For that final touch of brilliance, apply a clear topcoat that accentuates the shine and safeguards the beauty of your epoxy resin creation.
Preparing the Wood Surface for Epoxy Resin
Preparing the wood surface for epoxy resin is a crucial step in creating a breathtaking granite-like finish that will leave everyone in awe. To ensure a flawless result, follow these key points when preparing the wood surface:
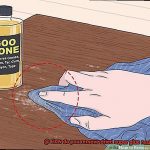
- Cleanse the Surface: Start by giving the wood surface a thorough cleaning to remove any dirt, dust, or debris. Mix a mild detergent with water and use a soft cloth or sponge to gently scrub away any impurities. Rinse with clean water and allow the surface to dry completely before moving forward.
- Smooth it Out: Achieving a smooth and even surface is essential for optimal epoxy resin adhesion. Begin by using coarse-grit sandpaper (around 80 or 120 grit) to eliminate any rough spots, imperfections, or previous finishes. Gradually transition to finer-grit sandpapers (such as 220 or 320) to obtain that velvety texture that will complement the epoxy resin beautifully. Always sand with the grain of the wood to avoid undesirable scratches.
- Fill in the Gaps: Don’t let cracks, holes, or gaps steal the spotlight from your epoxy resin masterpiece. Prior to applying the resin, fill any imperfections with an appropriate wood filler that matches both the color and texture of the wood. Follow the manufacturer’s instructions to ensure proper application and allow it to dry completely. Once dry, sand down the filler until it seamlessly blends with the surrounding wood surface.
- Shield with Sealant: Guard your wood against moisture infiltration by applying a high-quality wood sealer. Opt for clear polyurethane or epoxy-based sealers that are suitable for your specific project. Apply multiple thin coats, following the manufacturer’s instructions, and allow each coat to dry thoroughly before proceeding. This step will not only protect your masterpiece but also enhance its longevity.
- Create Boundaries: If there are areas on the wood surface that you wish to keep epoxy-free, utilize painter’s tape or masking tape to establish clear boundaries. By doing so, you’ll ensure clean edges and prevent the epoxy resin from spreading into unwanted areas.
- Final Touch of Cleanliness: Just before applying the epoxy resin, take a moment to give the wood surface one more thorough cleaning. Remove any lingering dust or debris with a tack cloth or a lint-free cloth slightly dampened with denatured alcohol. This final step is crucial for optimal adhesion and a flawless finish that will leave everyone speechless.
Mixing the Epoxy Resin and Pigments
Unlock the secrets of transforming ordinary wood into a mesmerizing masterpiece that mimics the beauty of granite. In this captivating exploration, we delve into the intricate process of mixing epoxy resin and pigments to achieve the breathtaking granite effect on wood. Prepare to unleash your inner artist as we dissect sub-topics and unveil expert tips for achieving a flawless blend.
Choosing the Right Materials:
Embark on your granite creation journey by selecting top-notch epoxy resin and pigments specifically designed for this artistic endeavor. Don’t settle for mediocrity; invest in high-quality materials that will elevate your work to new heights of brilliance.
Following Manufacturer Instructions:
Begin your mixing adventure by immersing yourself in the wisdom of the manufacturers. These guiding instructions hold the key to unlocking the perfect ratios of epoxy resin to pigment, enabling you to attain your desired color and consistency. Precision is paramount, so arm yourself with measuring tools and infuse accuracy into your creative process.
Mixing Techniques:
Embrace the rhythm of creativity as you embark on a slow and thorough mixing process. Whether you opt for a trusty stir stick or an elegant mixing paddle, ensure that every stroke infuses the pigment evenly throughout the epoxy resin. Revel in the joy of working in small batches, granting you complete control over the mesmerizing color and pattern of your granite effect. Let each movement be a dance, bringing your creation to life with finesse.
Gradual Pigment Addition:
Like an artist applying brushstrokes to a canvas, add pigments to the epoxy resin in measured increments. Begin with small amounts and gradually increase until you achieve the desired intensity without overpowering the resin’s inherent beauty. Revel in the symphony of colors as you meticulously mix between each addition, guiding your creation towards a harmonious blend.
Exploring Colors:
Immerse yourself in a kaleidoscope of possibilities as you explore the diverse range of pigments available. Experiment with the timeless elegance of black, the pure allure of white, the sophisticated charm of gray, and the earthy richness of various shades of brown. Let your imagination soar as you defy convention and create a granite effect uniquely yours.
Applying Lines or Swirls of Contrasting Color onto the Wet Epoxy Resin
Step into the enchanting realm of epoxy resin artistry, where wood surfaces undergo a breathtaking metamorphosis, emerging as exquisite granite-like creations. Today, we invite you to explore an expert technique that will elevate your resin artistry to unparalleled heights – the application of lines and swirls of contrasting color onto wet epoxy resin. Buckle up, fellow resin enthusiasts, as we embark on a journey that will ignite your creativity and leave you in awe.
Preparing for the Journey:
Before we unleash our artistic prowess, let us first lay a solid foundation for success. With utmost precision, follow the manufacturer’s instructions to prepare the epoxy resin mixture. This meticulous process ensures flawless curing and a resplendent finish. Remember, attention to detail is paramount as we set the stage for our artistic symphony.
Brushing the Canvas:
With your epoxy resin mixture prepared to perfection, it is time to grace your wood canvas with its transformative touch. Like a skilled conductor wielding a baton, pour the resin onto the surface and spread it evenly using a foam brush or trusty squeegee. Swift yet controlled strokes are called for as the clock ticks – epoxy resin waits for no artist. And thus, our canvas awaits our artistic expression.
Creating the Granite Effect:
Now, let us delve into the heart of our artistic endeavor – crafting a granite-like masterpiece. Equip yourself with a pipette or dropper, indispensable tools in our artistic arsenal. With finesse and intention, release droplets of colored epoxy onto the receptive resin surface. Choose hues that dance in contrast to the wood’s base color, echoing nature’s captivating granite tapestry.
The Dance of Colors:
Behold. The magic unfolds as we commence our rhythmic dance of colors. Armed with a toothpick, skewer, or specialized epoxy spreader tool, gently glide through the colored droplets, tracing lines and swirling patterns. Witness the birth of intricate designs that mirror granite’s natural veining and mesmerizing variations. But heed this: let your artistic strokes be slightly exaggerated, for the epoxy resin’s self-leveling nature may subtly blur your creation during the curing process.
a90vnPYFzeo” >
Conclusion
Achieving the appearance of granite on wood is a captivating way to transform ordinary furniture and surfaces into extraordinary works of art. By employing a few simple techniques and utilizing the right materials, you can create an illusion that will leave people marveling at your craftsmanship. With careful attention to detail and a touch of creativity, you can make wood look like granite and elevate its aesthetic allure to new heights.
One method to achieve this effect involves using paint and glaze. Start by selecting a base color that closely resembles the shade of granite you desire. Apply multiple coats of this base color, allowing each layer to dry thoroughly before proceeding. Once the base color has been applied, it’s time to add depth and texture with a glaze. Mix together darker shades of paint with a clear glaze medium, creating a translucent mixture that mimics the veining patterns found in natural granite. Using a brush or sponge, apply this glaze mixture in sweeping motions, following the grain of the wood for a realistic appearance.
Another technique for transforming wood into granite involves using epoxy resin. This method allows for greater control over the final result and creates a stunning three-dimensional effect. Begin by preparing the surface of the wood, ensuring it is clean and free from any imperfections or debris. Next, mix together epoxy resin with pigments that match your desired granite colors. Pour this mixture onto the wood surface, spreading it evenly with a brush or roller. To mimic the veining patterns found in granite, use a thin tool such as a toothpick or small brush to create swirls and lines within the resin while it is still wet. Allow the resin to cure according to manufacturer instructions, resulting in a glossy finish that resembles polished granite.
In addition to these techniques, you can also consider using specialized faux finishing products designed specifically for replicating granite textures on wood surfaces. These products often come in kits that include all necessary materials and step-by-step instructions, making the process even more accessible for beginners. By following the provided guidelines and experimenting with different application methods, you can achieve a remarkably realistic granite effect on your wood projects.
In conclusion, making wood look like granite is an art form that requires patience, precision, and a keen eye for detail. Whether you choose to use paint and glaze, epoxy resin, or specialized faux finishing products, the key is to pay attention to the nuances of granite’s appearance and replicate them as faithfully as possible.