You know that trusty adhesive we all love? Well, get ready to see it in a whole new light – literally. We’re going to spill the beans on some simple yet mind-blowingly effective methods to turn your regular old super glue into a transparent powerhouse. Whether you’re a DIY wizard with a specific project in mind or simply crave the sleek and stealthy look of invisible bonds, this post is your ultimate guide. So buckle up and prepare to unlock the secrets behind this jaw-dropping transformation. Get ready to witness pure adhesion magic as we dive headfirst into the world of crystal-clear connections.
What is Super Glue?
Contents
Super glue, also known as cyanoacrylate adhesive, is a highly versatile and popular adhesive that forms an incredibly strong bond between different materials. Derived from cyanoacrylate, a family of strong and fast-acting adhesives, super glue is a go-to choice for many household repairs, crafting projects, and industrial applications.
The main ingredient in super glue is cyanoacrylate, which was first discovered during World War II when scientists were searching for materials to make clear plastic gun sights. It wasn’t until the 1950s that cyanoacrylate adhesives were developed for commercial use.
Super glue works by rapidly polymerizing when it comes into contact with moisture. This transformation from a liquid to a solid state creates a strong bond. The reaction generates heat, speeding up the bonding process.
One of the standout features of super glue is its ability to bond quickly and strongly to various materials like plastic, metal, rubber, ceramic, wood, and even skin. Its versatility makes it suitable for a wide range of applications.
Super glue is typically sold in small tubes or bottles with tightly sealed caps to prevent premature curing. It should be stored in a cool and dry place to maintain its effectiveness.
When super glue dries, it becomes clear or translucent, blending seamlessly with surrounding materials. Its aesthetically pleasing finish makes it an ideal choice for bonding objects where appearance matters.
If super glue dries and needs to be cleared again, acetone can be used as a solvent. However, caution must be exercised when using acetone on certain materials like leather or fabric as it may cause damage.
What is Acetone?
Acetone, a remarkable and versatile chemical compound, is an indispensable ingredient in countless industries and households. With its colorless appearance and sweet aroma, this volatile liquid belongs to the ketone group and can be represented by the molecular formula C3H6O. Its highly flammable nature and rapid evaporation at room temperature make it a force to be reckoned with.
At the heart of acetone’s prowess lies its exceptional solvency properties. This means that it has an unparalleled ability to dissolve a wide array of substances, including plastics, resins, and synthetic fibers. Consequently, it serves as a vital component in various industrial processes like paint thinners, cleaning agents, and even nail polish removers.
In the realm of super glue transparency, acetone assumes a pivotal role. Super glue, also known as cyanoacrylate adhesive, is renowned for its rapid bonding capabilities. However, it often solidifies with an undesirable cloudy or hazy appearance. Enter acetone – when this powerful solvent comes into contact with dried super glue, it exhibits its might by removing or dissolving the cured adhesive.
By carefully applying acetone to the affected area and gently rubbing or scraping the surface, the once cloudy super glue can regain its clarity. Acetone achieves this by breaking down the polymer chains present in the super glue, causing it to soften and become more transparent.
Naturally, such potent properties come with a word of caution. Acetone must be handled with care when dealing with super glue or any other adhesive substance. Due to its highly volatile nature, it can irritate the skin, eyes, and respiratory system. It is crucial to ensure proper ventilation and utilize protective measures when working with acetone.
Beyond its role in enhancing super glue transparency, acetone finds itself indispensable in numerous other applications. From being a common solvent in the production of plastics, fibers, and pharmaceuticals to its effectiveness in cleaning laboratory glassware and equipment by dissolving organic compounds, its versatility knows no bounds.
Given its widespread utility, it comes as no surprise that acetone is readily available in most hardware stores, pharmacies, and beauty supply shops. Typically packaged in small containers for household use, larger quantities can also be procured to meet industrial demands.
Gather Necessary Materials
Before we dive into the process, let’s gather all the necessary materials like a seasoned explorer preparing for an adventure. With these essential tools in hand, you’ll be well-equipped to conquer the challenge and restore your super glue to its crystal-clear glory.
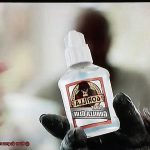
- First and foremost, we need the star of the show – super glue. Seek out a fresh bottle of high-quality super glue, ensuring it hasn’t expired or dried out. Remember, only the best will do when it comes to achieving that pristine transparency.
- Next on our list is the secret ingredient – acetone. This powerful solvent possesses the unique ability to break down the adhesive properties of the glue, unveiling its clear nature once more. Find a small bottle of acetone, commonly found in nail polish removers, ready to unleash its magic.
To facilitate the alchemical union of super glue and acetone, we require a container – a vessel fit for this transformative process. Opt for a plastic or glass container, steering clear of metals that may provoke unwanted reactions or damage.
As any master craftsman knows, a stirring tool is essential for achieving a homogeneous mixture. Arm yourself with a wooden stick or a disposable plastic stirrer, effortlessly gliding through the concoction to blend it perfectly.
Safety should always be a priority in any scientific endeavor. Shield yourself from harm’s way by donning protective gear such as sturdy gloves and goggles. These trusty guardians will safeguard your skin and eyes from any potential hazards.
Accidents are bound to happen during this ambitious undertaking. Prepare for mishaps by keeping a clean cloth or a stack of absorbent paper towels within reach. This contingency plan will swiftly mop up spills and eliminate any excess glue or acetone.
Lastly, remember that fresh air is your ally in this aromatic endeavor. Set up shop in a well-ventilated area, where open windows or doors invite a gentle breeze to whisk away any fumes that may arise from the acetone. Inhale the sweet scent of success, not the pungent odor of chemicals.
Applying Acetone
When it comes to making super glue clear, acetone is your secret weapon. With just a few simple steps, you can restore your super glue to its crystal-clear glory. Let’s dive into the process of applying acetone and unleash the power of this solvent.
First and foremost, preparation is key. Before applying acetone, ensure that the surface you are working on is clean and free from any dirt or debris. This will guarantee a smooth and successful application. Remember, a clean canvas is essential for a masterpiece.
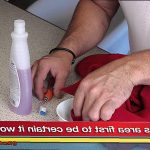
Now, armed with your clean surface, it’s time to apply the acetone. You have two options here: a trusty cotton swab or a soft cloth. Choose whichever you prefer, as long as it allows you to gently dab the acetone onto the super glue. Be sure to cover the entire area that needs to be cleared.
Once the acetone has been applied, give it some time to work its magic. Allow it to sit for a few minutes, giving the acetone ample opportunity to react with the super glue and start dissolving it. Patience is a virtue in this process.
As the acetone reacts with the super glue, a miraculous transformation unfolds before your eyes – the super glue becomes clear. The time it takes for this process to occur may vary depending on factors such as the amount of super glue and the type of surface it is applied to. But rest assured, clarity will prevail.
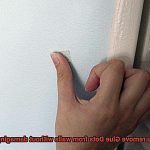
However, tread cautiously. Acetone has its limits and can potentially damage certain surfaces. To avoid any unwanted mishaps, always test it on a small, inconspicuous area first before applying it on a larger scale. A little precaution goes a long way.
Once the super glue has achieved its newfound clarity, wipe away any excess acetone with a clean cloth or paper towel. This final step ensures that any remaining residue is removed, leaving behind a clean finish that would make even the most discerning eyes proud.
In some cases, particularly when dealing with stubborn or larger amounts of super glue, you may need to repeat this process multiple times. Persistence is key. Don’t give up until the desired clarity is achieved. Your dedication will be rewarded with a flawless result.
One last crucial detail: patience doesn’t end with the acetone application. After the super glue has been cleared and excess acetone has been removed, allow it to fully cure before utilizing its adhesive powers. This will ensure that it is completely dry and ready for whatever task you have in mind. Good things come to those who wait.
Letting the Acetone Penetrate
Letting the acetone penetrate super glue is a process that involves careful steps to ensure effective removal. Here’s how you can make it happen:
- Gather your materials: You will need a small container, acetone, and a cotton swab or cloth.
- Prepare your workspace: Work in a well-ventilated area to avoid inhaling fumes. Wear gloves to protect your hands.
- Pour acetone into the container: Start by pouring a small amount of acetone into the container. You don’t need much, just enough to dip your cotton swab or cloth.
- Dip and dab: Gently dip the cotton swab or cloth into the acetone, making sure it is fully saturated but not dripping. Then carefully dab the acetone-soaked cotton swab or cloth onto the super glue you want to make clear. Avoid applying too much pressure to prevent damage.
- Let it sit: Allow the acetone to penetrate the super glue for a few minutes. The time needed may vary depending on the glue’s thickness and material it is bonded to. Be patient and resist the urge to rush this step.
- Rub gently: After a few minutes, gently rub the area with the acetone-soaked swab or cloth. This will help loosen and dissolve the super glue further. Repeat this step if necessary.
- Clean up: Once you have removed as much of the super glue as possible, clean the area with warm soapy water using a clean cloth or sponge. This will remove any remaining residue from both the glue and acetone.
Remember to test a small inconspicuous area first to ensure that the acetone does not damage or discolor the surface. Additionally, exercise caution when handling acetone due to its flammability and potential skin irritation.
Wiping Away Dissolved Glue
Wiping away dissolved glue can be a simple yet effective process when done correctly. The key is to use the right methods and techniques to ensure that you remove the glue residue without causing any damage to the surface. Here are some tried and tested methods that you can use:
- Acetone or Nail Polish Remover: This powerful solvent is known for its ability to break down the bonds of super glue. Apply a small amount of acetone or nail polish remover onto a clean cloth or cotton ball. Gently wipe the affected area, being careful not to use too much acetone as it can damage certain surfaces.
- Isopropyl Alcohol: Another effective solvent is isopropyl alcohol, also known as rubbing alcohol. Dampen a cloth or cotton ball with isopropyl alcohol and gently rub the affected area until the residue is removed.
- Warm Soapy Water: For more delicate surfaces or materials that may be sensitive to harsh solvents, warm soapy water is a safe and effective option. Mix a small amount of mild dish soap with warm water. Dip a cloth into the solution and gently rub the affected area, ensuring not to saturate the surface. Rinse with clean water and pat dry with a towel.
- Adhesive Removers: If you prefer using commercially available products, there are adhesive removers specifically designed for removing glue residue. Follow the manufacturer’s instructions when using these products.
It’s important to work in small sections when using any of these methods to prevent damage to the surface. Avoid excessive rubbing or scrubbing, as this can cause scratches or discoloration. Always test any cleaning solution on a small, inconspicuous area first to ensure it does not cause any damage or discoloration.
Repeating the Process
Well, fear not. I’m here to share with you a step-by-step process to make that super glue clear and give your project the professional finish it deserves.
To start off, gather your materials. You’ll need a bottle of super glue, a small container, acetone or nail polish remover, a cotton swab or soft cloth, and a clear varnish or epoxy resin.
Step 1: Remove the dried glue
Dip your cotton swab or cloth into the acetone or nail polish remover and gently rub the surface of the dried super glue. Focus on the cloudy areas and take your time to ensure you remove as much as possible.
Step 2: Rinse the area
Once you’ve removed as much of the dried glue as you can, rinse the area with water. This will help remove any residue from the acetone or nail polish remover.
Step 3: Apply clear varnish or epoxy resin
Now it’s time to give your project that clear and glossy finish. Prepare your clear varnish or epoxy resin according to the manufacturer’s instructions. Apply a thin layer onto the surface where the super glue was previously applied, making sure to cover the entire area evenly.
Step 4: Let it dry
Allow the clear varnish or epoxy resin to dry completely. This step will provide a protective coating over the area and give it that crystal-clear appearance you desire.
Step 5: Repeat if necessary
If you’re not satisfied with the results, don’t worry. You can repeat the process of applying acetone or nail polish remover and removing any leftover dried glue before applying another layer of clear varnish or epoxy resin. This may further enhance the clarity and smoothness of the surface.
It’s important to keep in mind that while this process can certainly improve the clarity of super glue, it may not always produce perfect results. The effectiveness may vary depending on factors such as the type and brand of super glue used, as well as the surface it is applied to. But with a little patience and some experimentation, you’ll be well on your way to achieving that crystal-clear finish for your projects.
Soaking in Acetone for Transparent Materials
The strong solvent properties of acetone make it capable of dissolving many types of adhesives, including super glue. By soaking the bonded materials in acetone, any residual adhesive can be easily removed, enhancing the transparency of the glued area.
Before diving into the soaking process, it is crucial to perform a compatibility test by applying acetone to a small, inconspicuous area. This ensures that the acetone won’t damage the particular type of super glue or surface. Once confirmed, there are two methods for soaking: full submersion or applying acetone-soaked cotton balls or cloth directly onto the glued area.
The duration of soaking may vary depending on the thickness of the adhesive and the material being treated. It’s wise to follow manufacturer instructions or experiment with shorter durations initially. After the soaking process, gently scrubbing the area with a soft brush or cloth will help eliminate any remaining adhesive residue.
To ensure no traces of acetone remain, thorough rinsing with water is essential. This step guarantees that no residual solvent is left behind, which could potentially damage the material or affect future applications.
Handle acetone with caution due to its flammable nature and potential harm if ingested or inhaled. Always use it in a well-ventilated area and keep it away from open flames or sparks.
8g2REE6z9V8″ >
Conclusion
In conclusion, achieving a clear super glue is within your grasp with the aid of the mighty solvent known as acetone. With its power to dismantle the bonds of super glue, acetone can restore its transparency and bring back its invisible charm. By delicately applying acetone to the dried adhesive and allowing it to seep in, you can dissolve the glue and unveil a flawless, crystal-clear finish.
To make your super glue clear, gather your arsenal of materials: super glue, acetone or nail polish remover, a soft cloth or cotton swab, and a coat of clear varnish or epoxy resin. Begin by eliminating any remnants of dried glue using acetone or nail polish remover, ensuring a clean slate for your transformation. Rinse the area with water to remove any residue. Next, apply a thin layer of clear varnish or epoxy resin for an exquisite glossy sheen. If desired, repeat this process until you achieve the level of clarity that satisfies your discerning eye.
Caution must be exercised when handling acetone due to its flammability and potential skin irritation. Always conduct a small compatibility test on an inconspicuous area before proceeding with treating the surface.
For transparent materials, soaking in acetone can also work wonders. However, it is imperative that you perform a thorough compatibility test and adhere strictly to the manufacturer’s instructions regarding duration and rinsing.
With patience as your ally and meticulous application of acetone as your secret weapon, you have the power to transform ordinary super glue into an ethereal adhesive that seamlessly blends with any surrounding material.