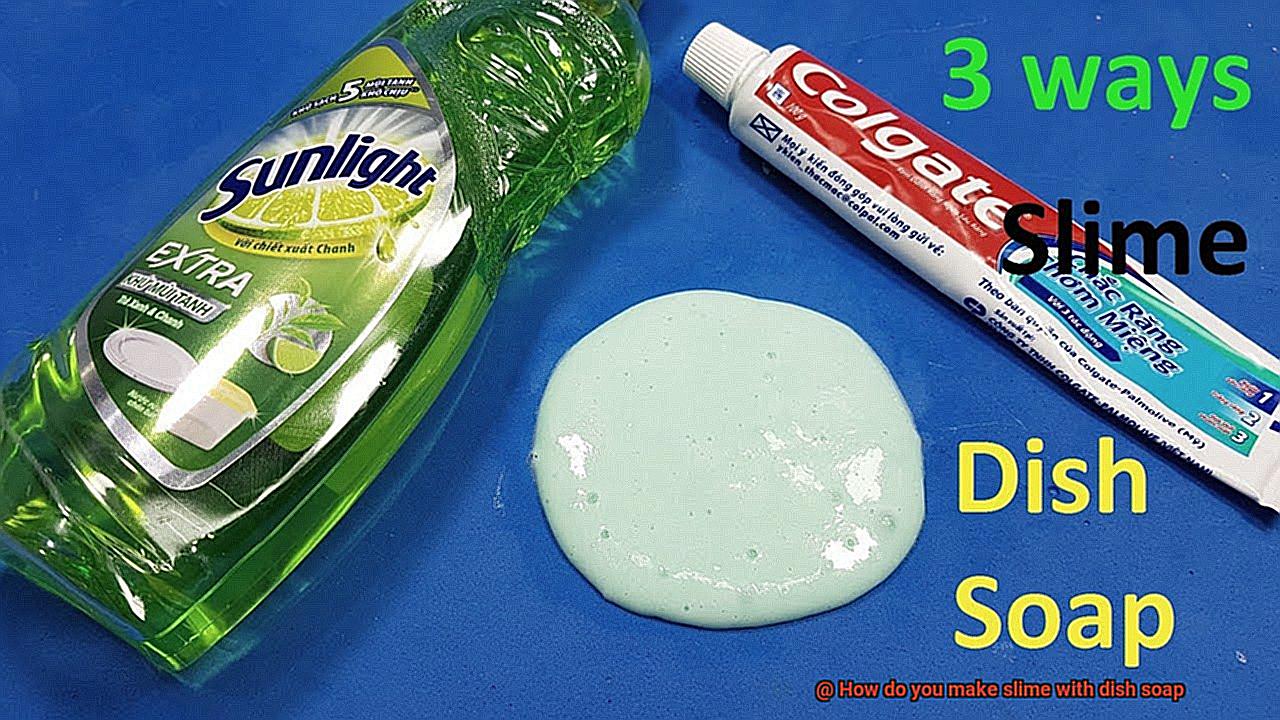
Ready to dive into the world of slimy goodness? If you’re like me, you’ve probably been on the hunt for the perfect slime recipe – one that’s easy to whip up and uses ingredients you already have in your kitchen pantry.
Well, guess what? Today, we’re going to explore the fascinating realm of making slime with dish soap.
Yes, you heard that right – dish soap. This everyday household item isn’t just for getting your dishes sparkling clean; it can also transform into a stretchy and oh-so-satisfying slime that will keep you entertained for hours on end.
So grab some dish soap and get ready to unleash your inner scientist, because we’re about to embark on a slimetastic adventure like no other.
Understanding the role of dish soap in slime-making: How dish soap acts as a binding agent and activator.
Contents
- 1 Understanding the role of dish soap in slime-making: How dish soap acts as a binding agent and activator.
- 2 Gathering the necessary ingredients: Clear or transparent dish soap, white school glue, and a mixing bowl.
- 3 Measuring the glue: Determining the desired amount of glue based on the desired slime quantity.
- 4 Adding dish soap to the glue: Starting with a few drops and adjusting as needed for consistency.
- 5 Mixing everything together: Combining the glue and dish soap until a cohesive slime is formed.
- 6 Adjusting texture and stretchiness: Adding more dish soap gradually if needed for desired properties.
- 7 Enhancing color and sparkle: Incorporating food coloring or glitter to make the slime more vibrant.
- 8 Proper storage and longevity: Tips for storing slime in an airtight container to prevent drying out.
- 9 Conclusion
Slime has taken the world by storm, capturing the imaginations of both young and old. But have you ever pondered the secret behind dish soap’s crucial role in creating that irresistible, gooey delight? In this article, we will embark on a fascinating journey into the science of dish soap as a binding agent and activator in the mesmerizing world of slime-making.
The Binding Agent: Forging Unity
Dish soap serves as a vital binding agent in slime-making, expertly melding all the ingredients together to form a harmonious texture. When combined with glue, dish soap enables the glue molecules to intertwine and create a stretchy and slimy consistency. How does it work? Dish soap possesses surfactant properties that reduce the surface tension of water, allowing the glue molecules to seamlessly mix with other components. By reducing surface tension, dish soap ensures optimal dispersion and distribution of the glue particles throughout the slime.
Breaking Down Polymers: Crafting Perfection
The challenge arises when attempting to mix thicker glues or those with higher polymer concentrations. Enter dish soap, riding valiantly to the rescue. Its unique abilities aid in breaking down the polymers present in the glue, rendering it more fluid and easier to blend. By disassembling these long chains of molecules, dish soap guarantees a smoother and more consistent texture during the slime-making process.
Activating the Slime: A Chemical Tango
Apart from its binding properties, dish soap also takes center stage as an activator in slime-making. When combined with slime activators like borax or alternative options such as liquid laundry detergent or saline solution, dish soap initiates a chemical reaction. This reaction catalyzes cross-linking among the polymers in the glue, establishing stronger bonds between molecules. As a result, the slime becomes delightfully elastic and stretchy, ensuring hours of slimy fun.
The Impact of Different Types and Amounts of Dish Soap
The type and quantity of dish soap used exert a significant influence on the consistency and texture of the slime. Distinct brands or formulations may contain varying levels of surfactants or additional additives, which can affect how the slime takes shape and behaves. To achieve optimal results, it is essential to follow a recipe specifically designed for dish soap slime. For those seeking diverse textures and properties in their slime, experimenting with different ratios of dish soap and other ingredients is highly encouraged.
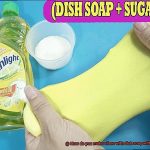
Gathering the necessary ingredients: Clear or transparent dish soap, white school glue, and a mixing bowl.
Get ready to dive into the captivating world of slime-making. But before you plunge your hands into this gooey adventure, let’s gather all the essential ingredients that will take your slime creation to the next level. In this article, we’ll explore why clear or transparent dish soap, white school glue, and a trusty mixing bowl are paramount in concocting the ultimate slime experience.
First and foremost, we have clear or transparent dish soap. Now, you might be wondering, why is this particular soap so crucial? Well, my friend, clear dish soap ensures that the color of your slime remains untouched and untainted, granting it that mesmerizing transparent appearance. Just imagine crafting a stunningly vibrant green slime, only to have its brilliance fade away due to the soap’s color. Trust me, that’s not a pretty sight. So, make sure to opt for clear dish soaps with minimal additives or fragrances to avoid any unwanted interference with your slime-making process.
Next up on our list is the unsung hero of slime-making: white school glue. This glue acts as the backbone of your slime, providing it with that oh-so-satisfying stickiness and stretchiness we all adore. But why white glue specifically? Well, my friend, other glues simply cannot match the consistency and results that white glue delivers. So be sure to grab a bottle of non-toxic and washable white school glue for a safe and enjoyable slime-making experience.
Now that we have our key ingredients sorted, let’s not forget about the indispensable mixing bowl. This humble vessel plays an instrumental role in bringing together all the elements of your slime and creating that perfect mixture. It’s important to select a bowl that is spacious enough to comfortably accommodate all your ingredients while allowing for easy stirring and mixing. Whether you choose a plastic or glass bowl, ensure that it provides ample room for you to work your magical slime-making skills.
While these three ingredients are the essentials for creating slime, don’t forget about the plethora of optional ingredients that can elevate your slime to new heights. Think vibrant food coloring for a rainbow of hues, shimmering glitter for a touch of enchantment, or even aromatic essential oils for a delightful scent experience. However, it’s important to note that these additional ingredients are not mandatory and can be omitted if desired.
Before we wrap up, let’s address the matter of safety. Always ensure that the dish soap and glue you use are non-toxic and safe for use, especially if children are involved in the slime-making process. Additionally, exercise caution when handling any optional ingredients such as food coloring or glitter to avoid any allergic reactions or irritations.
Measuring the glue: Determining the desired amount of glue based on the desired slime quantity.
If you’ve ever wondered how much glue you need to achieve your desired slime quantity, fear not, for I am here to guide you through this mesmerizing process.
Determining your desired slime quantity is the first step to unlocking the perfect amount of glue. Are you looking to create a small batch of slime for personal enjoyment or planning a larger batch for a slime party extravaganza? The size of your slime dreams will determine the amount of glue you’ll need.
When using dish soap as your magical slime-making companion, a good starting point is to use equal parts of glue and dish soap. Imagine half a cup of glue dancing in harmony with half a cup of dish soap. This balanced ratio sets the stage for some seriously satisfying sliminess. Of course, feel free to adjust this ratio based on your personal preference and the consistency of slime you desire.
For those brave enough to venture into the land of larger slime batches, simply double or triple the amount of glue and dish soap accordingly. More glue means a thicker and more stretchy slime experience. But why not start with a smaller amount of glue first and gradually add more if needed? This way, you can fine-tune the consistency and avoid any sticky mishaps.
However, it’s important to consider the type and brand of glue you choose. Different glues have different consistencies and strengths, which can impact the final outcome of your slime masterpiece. To ensure a safe and enjoyable experience, opt for a non-toxic, washable glue that is suitable for children.
Adding dish soap to the glue: Starting with a few drops and adjusting as needed for consistency.
Today, we embark on an exciting journey into the enigmatic world of slime making, focusing on the crucial step of adding dish soap to glue. With just a few drops and a discerning eye for consistency, you’ll soon be creating slime that’s delightfully stretchy, gloriously gooey, and incredibly satisfying. So grab your favorite glue, some dish soap, and let’s dive into the slimy wonderland.
Finding the Right Container:
Before we plunge into our slimy adventure, it’s essential to select the perfect container for your slime-making escapades. Opt for a plastic bowl or a ziplock bag – they’re not only easy to clean but also provide ample space for mixing and molding.
The Glue Foundation:
Begin by pouring a generous amount of glue into your chosen container. Half a cup is an excellent starting point, but feel free to adjust based on your desired slime quantity. Remember, more glue means more slime to revel in.
Adding Dish Soap:
Now comes the moment of truth – adding dish soap. Start with just a few drops of any clear or transparent dish soap. These types won’t alter the color of your slime, allowing it to radiate in all its vibrant glory. Mix the glue and dish soap together, and behold as the enchantment unfolds before your very eyes.
Adjusting Consistency:
As you blend the dish soap and glue, you’ll witness a fascinating transformation in consistency. It will become increasingly stretchy and elastic – precisely what we’re aiming for. However, should you find your slime veering towards stickiness or runniness, fear not. You can effortlessly fine-tune its texture by adding more dish soap. Just a few drops at a time should work wonders. Keep blending until you achieve that perfect balance of sliminess.
A Word of Caution:
Bear in mind that adding excessive dish soap can render your slime watery and less stretchy. Proceed with caution, adding it gradually until you attain the desired consistency. We’re striving for that ideal equilibrium of slimy goodness.
Let Your Creativity Shine:
Once you’ve achieved the perfect slime texture, it’s time to unleash your creative prowess. Customize your slime by adding color, glitter, or any other whimsical embellishments of your choice. Simply blend them in with the dish soap and glue mixture until they’re evenly distributed. This is where the true magic transpires.
Mixing everything together: Combining the glue and dish soap until a cohesive slime is formed.
Step into the mesmerizing world of slime making and prepare to create a slimy masterpiece that will leave you in awe. The secret to achieving a cohesive slime lies in the perfect combination of glue and dish soap. Whether you’re a seasoned slime enthusiast or a curious beginner, this guide will take you on a captivating journey through the process of mixing these magical ingredients to create a gooey delight that will astound your senses.
Before we dive into the exciting part, let’s gather our supplies. You’ll need some glue – whether it’s white or clear is entirely up to you – and don’t forget the dish soap. Grab a mixing bowl and a trusty spoon or spatula for stirring. Are you ready? Let’s get started.
Pour a generous amount of glue into the mixing bowl, but if you’re unsure, start with a small quantity. However, be warned, once you experience the joy of playing with slime, you’ll be craving for more. Now, it’s time to add a few drops of dish soap to the glue. Remember, less is more at this stage. You can always add more later if needed.
Take your trusty spoon or spatula and start mixing the glue and dish soap together. Take your time, ensuring they are thoroughly combined. Watch in amazement as the sticky mess begins its transformation into something elastic and stretchy right before your eyes. That’s the magic happening right there.
If the mixture still feels too sticky after thorough mixing, fret not. A little lotion or oil comes to the rescue. Add a small amount and continue stirring until you achieve the desired consistency. Remember, slime making is all about experimentation, so feel free to add additional ingredients like food coloring or glitter to make your slime truly unique.
Now, behold as the mixture forms a cohesive mass. It’s time to get your hands dirty – quite literally. Knead the slime with your hands, working it until it becomes less sticky and more enjoyable to play with. If it’s still too sticky, don’t panic. Just add a bit more dish soap or glue in small increments until it reaches the perfect slimy texture.
Pause for a moment to admire your creation. Congratulations, you’ve successfully mixed glue and dish soap to create your very own slime masterpiece. To keep it fresh and ready for endless hours of slimy fun, store it in an airtight container.
Remember, slime making is all about embracing your creativity and enjoying the process. So don’t be afraid to experiment with different amounts of glue, dish soap, and additional ingredients. Let your imagination run wild, and let the gooey goodness take over.
Adjusting texture and stretchiness: Adding more dish soap gradually if needed for desired properties.
Adjusting the texture and stretchiness of slime is an exciting journey that can be achieved by gradually adding more dish soap. This simple technique adds a touch of magic to your slime, allowing you to create captivating and mesmerizing creations.
Dish soap plays a crucial role in slime making as it acts as the ultimate binding agent, giving your slime the perfect stickiness and viscosity. However, not all dish soaps are created equal. Different brands and types have varying levels of thickness and foaming properties, which can significantly impact the final outcome of your slime.
To begin your adventure in texture and stretchiness adjustment, start by assessing your slime’s consistency. If it feels too sticky or lacks the desired level of stretchiness, fear not. Adding more dish soap can come to the rescue. However, it’s essential to proceed with caution and take a slow and steady approach.
Begin by adding small amounts of dish soap at a time, thoroughly mixing it into your slime. Take note of any changes in consistency as you go along. This gradual method allows you to maintain control over the process, preventing you from ending up with a slimy disaster that is overly watery or runny.
As you add more dish soap, prepare to witness a mesmerizing transformation. Your slime will become smoother and less sticky, while also becoming more elastic and stretchy. It’s like injecting a burst of playfulness and excitement into your creation.
However, be mindful not to go overboard with your dish soap extravaganza. Adding too much dish soap can turn your beloved slime into a slimy catastrophe. Trust me when I say that a runny mess is not what you want on your hands. In case disaster strikes, don’t panic. You can rectify the situation by adding small amounts of other thickening agents like cornstarch or flour to restore your slime’s desired consistency.
Remember, the joy of making slime lies in experimentation. Feel free to play around with different amounts of dish soap and other ingredients until you find the perfect balance that gives you the slimy, stretchy, and enjoyable playtime experience you desire. Who knows, you might stumble upon a creation that will leave everyone in awe.
So, my fellow slime enthusiasts, embark on this slimy adventure and embrace the process of adjusting texture and stretchiness by gradually adding more dish soap. Watch in awe as your slime transforms into a mesmerizing creation that captivates your senses and provides endless hours of fun. It’s time to create your own unique slime masterpieces that will leave everyone eager to join in on the slimy fun.
Enhancing color and sparkle: Incorporating food coloring or glitter to make the slime more vibrant.
Are you ready to take your slime game to the next level and make it truly captivating? Look no further than the magic of food coloring and glitter.
In this blog post, we will delve into the secrets of enhancing the color and sparkle of your slime, transforming it into a vibrant and eye-catching masterpiece.
Adding Color with Food Coloring:
Let’s start by exploring the enchanting possibilities of food coloring. This fantastic option allows you to infuse your slime with vivid hues that will leave everyone in awe. With its safety, accessibility, and an extensive range of colors, food coloring is a dream come true for slime enthusiasts. Simply add a few drops of your desired color to the mixture before or after adding the dish soap.
Gradually, increase the amount until you achieve your desired shade, ensuring that you mix it thoroughly for an even distribution. Remember, a little goes a long way in creating a kaleidoscope of colors.
Sparkling with Glitter:
If you crave a more dazzling and mesmerizing slime experience, glitter is your best friend. Prepare to be spellbound as you sprinkle glitter into your slime mixture, kneading it together to create a captivating effect.
The world of glitter offers endless possibilities with its assortment of sizes and colors. Start with a small amount and let your creativity guide you as you add more to achieve the perfect balance. But beware, too much glitter can make your slime clumpy – so tread lightly on this sparkling journey.
Colored and Glitter Glue:
For those seeking convenience without compromising on color and sparkle, colored or glitter glue is your gateway to slime perfection. These glues come in a variety of shades and finishes, eliminating the need for additional coloring or glitter. With colored or glitter glue as your base, you can save time and ensure an even distribution of color and sparkle throughout your slime. It’s a shortcut to sublime slime artistry.
Experimentation is Key:
In the realm of slime, experimentation knows no bounds. Let your imagination run wild as you explore different combinations of colors and types of glitter. Mix and match shades and sizes to create stunning effects and unique textures that will leave everyone in awe.
The possibilities are endless, and your slime creations will be nothing short of extraordinary.
Proper storage and longevity: Tips for storing slime in an airtight container to prevent drying out.
Slime has taken the world by storm, captivating both children and adults with its gooey texture and endless possibilities. However, keeping slime in optimal condition can be a challenge. But fear not. We have gathered expert tips to help you store your slime in an airtight container, preventing it from drying out and ensuring its longevity. By following these guidelines, you can enjoy the slimy goodness of your creation for weeks to come.
Embrace the Power of Airtight Containers:
When slime is exposed to air, it gradually loses moisture, causing it to dry out and lose its stretchiness. This is where airtight containers become essential. These containers create a protective barrier between the slime and the environment, ensuring it remains moist and pliable. Opt for plastic containers with tight-fitting lids or resealable bags to keep your slime safe from air exposure.
Prioritize Cleanliness:
Before storing your slime, ensure it is clean and free from any debris or contaminants. Thoroughly wash your hands to avoid transferring dirt or oils onto the slime. If you notice any particles or residue on the slime, gently remove them using a clean cloth or paper towel.
Create an Impenetrable Seal:
To maintain the freshness of your slime, it is crucial to remove excess air from the container before sealing it. Squeeze out as much air as possible and press the lid or bag tightly to create a complete seal. This step ensures that no air can penetrate the container and cause your slime to dry out.
Ideal Storage Conditions:
Slime thrives in cool and dry environments, making it essential to store it away from direct sunlight and heat sources. Excessive heat can cause the slime to melt or become sticky, compromising its texture. Find a cool spot in your room or cupboard where your slime can rest undisturbed.
Regular Moisture Check:
Keep a vigilant eye on your stored slime to ensure it remains moist and hasn’t dried out. If you notice any signs of dryness, such as stiffness or cracks, fear not. You can revive your slime by adding a few drops of water. Gently knead the water into the slime until it regains its stretchiness and gooeyness.
Conclusion
In conclusion, making slime with dish soap is a simple and fun activity that can be enjoyed by both kids and adults.
By following the easy steps outlined in this guide, you can create your own slimy masterpiece in no time. So go ahead, gather your ingredients and get ready to unleash your creativity.