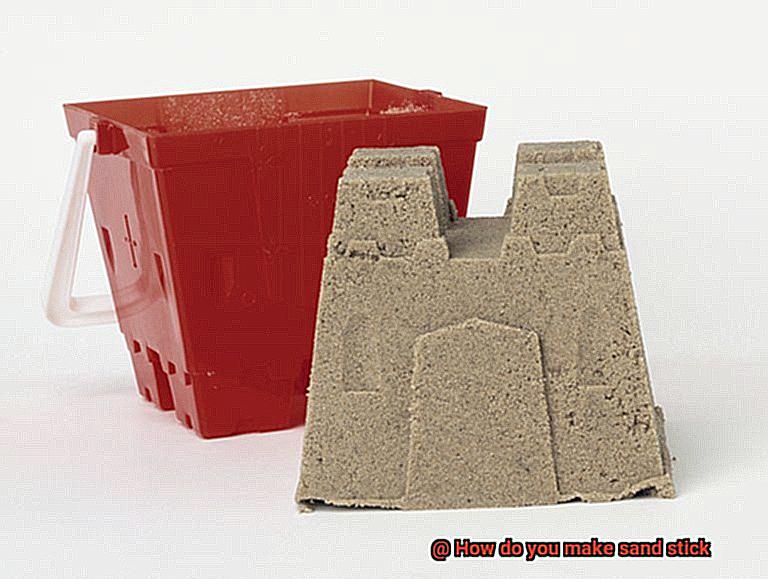
Today, we’re diving into the captivating world of making sand stick. Have you ever attempted to build sandcastles on the beach, only to watch your fragile creations crumble away?
Well, worry not. We’re here to unveil the secrets behind making sand stick, so you can construct magnificent structures that endure the test of time (or at least the relentless crashing waves).
So grab your trusty bucket and shovel, and let’s embark on an enchanting journey into the realm of making sand stick.
What is Glue?
Contents
- 1 What is Glue?
- 2 Types of Glue for Making Sand Stick
- 2.1 White Glue: The Versatile Wonder
- 2.2 Craft Glue: Unleash Your Creativity
- 2.3 Epoxy Resin: The Glossy Marvel
- 2.4 For those seeking a glossy finish and a rock-solid bond, epoxy resin is the way to go. This adhesive is commonly used in jewelry-making or decorative projects involving sand. Although it requires careful mixing and longer curing time, the end result is a stunning piece of art that will leave everyone in awe. The glass-like finish provided by epoxy resin adds depth and shine to your sand creation, enhancing its visual appeal. So if you’re aiming for a professional-looking masterpiece that will stand the test of time, give epoxy resin a try.
- 2.5 Super Glue: Quick and Secure
- 3 Preparing the Glue Mixture
- 4 Applying the Glue to the Sand
- 5 Drying Time
- 6 Advantages and Disadvantages of White Glue
- 7 Alternative Adhesives for Stronger Bonding
- 8 Conclusion
Glue, a seemingly unassuming substance, possesses an extraordinary power to bind materials together. Whether you’re a DIY aficionado, an artistic enthusiast, or a seasoned professional in diverse industries, comprehending the captivating world of glue is indispensable. In this captivating blog post, we will embark on a mesmerizing journey into the realm of glue, delving into its composition, types, and limitless applications.
The Composition of Glue: Unveiling the Building Blocks of Stickiness
Glue is an alchemical fusion of three elemental components: the adhesive, the solvent, and the filler. The adhesive reigns supreme as the mystical elixir that forges unyielding connections between surfaces.
It manifests as either natural or synthetic polymers, weaving an unbreakable bond with diverse materials. Accompanying this sorcerer’s potion is the solvent, acting as a nimble courier for the adhesive’s magical properties, facilitating its seamless diffusion. Water, alcohol, or organic compounds dance harmoniously within the glue’s alchemical concoction.
And let us not forget the filler – an enchanting ingredient that fortifies viscosity and empowers bond strength. These mystical particles, such as calcium carbonate or silica, elevate glue to new realms of adhesive supremacy.
Types of Glue: Unleashing the Glue Arsenal
- White Glue (PVA): This versatile warrior is your trusted ally for household endeavors, artistic exploits, and scholastic triumphs. Fearlessly bonding paper, wood, fabric, and plastic with ease, it leaves a trail of creative conquest in its wake.
- Super Glue (Cyanoacrylate adhesive): Behold the lightning-fast prowess of this adhesive marvel. Renowned for its swift-drying enchantment and unyielding grip, it forms an unbreakable pact with metal, glass, ceramics, and rubber. A force to be reckoned with in the realm of bonding.
- Epoxy Glue: A magnificent duet of a resin and a hardener, this formidable adhesive duo emerges as the champion of durability and resilience. Unyielding to the temptations of heat and chemicals, it fortifies structures in the domains of construction and automotive marvels.
- Hot Glue: Witness the molten magnificence of this dynamic adhesive sorcery. Flowing like liquid fire from a magical wand known as a hot glue gun, it solidifies in an instant, conjuring bonds for crafts, DIY quests, and fleeting repairs.
Types of Glue for Making Sand Stick
Prepare to be amazed as we dive into the fascinating world of glues that will turn your sand projects from ordinary to extraordinary. Whether you’re a budding artist or a DIY enthusiast, knowing the right glue to make sand stick is essential. So grab your safety goggles and get ready to explore the glue-rious possibilities.
White Glue: The Versatile Wonder
If you’re looking for an all-around glue that’s safe and easy to use, white glue is your go-to. Also known as school glue or craft glue, this water-based adhesive is non-toxic and dries clear. Its versatility makes it perfect for projects where the sand needs to shine through.
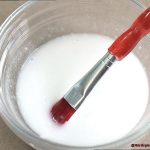
Just mix it with a little water, brush it on, and watch your sand masterpiece come to life. The smooth consistency of white glue ensures even coverage and a strong bond, giving your creation a solid foundation. Get ready to unleash your creativity with this tried-and-true option.
Craft Glue: Unleash Your Creativity
When you’re ready to take your sand art game up a notch, craft glue swoops in to save the day. Similar to white glue but with a stronger adhesive strength, this glue is perfect for intricate sand art projects or when working with heavier materials alongside the sand.
Craft glue allows you to explore new dimensions and push the boundaries of your creativity. Its enhanced bonding properties ensure that every grain of sand stays in place, so you can create mesmerizing patterns and textures that will captivate your audience.
Epoxy Resin: The Glossy Marvel
For those seeking a glossy finish and a rock-solid bond, epoxy resin is the way to go. This adhesive is commonly used in jewelry-making or decorative projects involving sand. Although it requires careful mixing and longer curing time, the end result is a stunning piece of art that will leave everyone in awe.
The glass-like finish provided by epoxy resin adds depth and shine to your sand creation, enhancing its visual appeal. So if you’re aiming for a professional-looking masterpiece that will stand the test of time, give epoxy resin a try.
Super Glue: Quick and Secure
When time is of the essence and you need an instant bond, super glue (also known as cyanoacrylate glue) comes to the rescue. Its fast-drying nature ensures a quick and secure hold, perfect for those impromptu sand art sessions or when you simply can’t wait to see the final result.
However, be cautious when using super glue, as its strong adhesive properties can make it challenging to control the amount applied. So keep your sand grains ready and your fingers nimble, because super glue is here to make your sand stick with lightning speed.
Preparing the Glue Mixture
Get ready to dive into the world of glue and discover how to make sand stick together like never before. In this guide, we will explore the process of preparing a glue mixture that will bind those stubborn sand particles into a solid surface.
Let’s start by gathering our materials. You’ll need non-toxic and washable glue, which you can find in craft stores or household supply stores. Grab some water to dilute the glue and achieve the perfect consistency. Don’t forget a mixing bowl and a trusty stirring tool like a spoon or whisk.
Now, let’s get down to business. Pour the desired amount of glue into your mixing bowl – think about the size of your project and the amount of sand you plan on using. Aim for around one part glue to three parts sand, but feel free to adjust this ratio.
With the glue in the bowl, start adding water gradually while stirring continuously. Small increments are key here – we don’t want a runny mixture. This step thins out the glue and prepares it for the sand.
Once you’ve achieved a smooth consistency, slowly pour in the sand while stirring continuously. Coat those sand particles evenly with the glorious glue mixture. Adjust the amounts of sand or glue if you want to tweak the thickness and texture.
Now that everything is beautifully mixed together, give your glue mixture a few minutes to settle. Those pesky air bubbles will rise to the surface and pop, leaving you with a smoother and more even application of the mixture on the sand.
Your glue mixture is now ready to be applied to the sand surface. Brush or pour it on, ensuring an even distribution that covers all those sandy particles. If you’re working with a large area, tackle it in small sections for better control.
Now comes the waiting game. Allow your glue mixture to dry completely before handling or moving the sand. The drying time can vary, so be patient. Leave the sand undisturbed for at least 24 hours for a proper drying and bonding process.
Applying the Glue to the Sand
Step into the captivating world of applying glue to sand and unlock the secrets of creating mesmerizing projects. Whether you’re a sand art enthusiast, a diorama hobbyist, or someone who simply loves sensory play, this guide will take you on a magical journey.
So, grab your glue and get ready to witness the captivating transformation of sand into captivating works of art.
Choosing the Right Glue:
Before you dive into the enchanting process of applying glue to sand, it’s essential to choose the perfect adhesive that will create an unbreakable bond. PVA glue, also known as white glue or school glue, is a remarkable choice. Its non-toxic nature and ability to dry clear make it ideal for various sand-related crafts.
Preparing the Sand:
To ensure flawless adhesion, preparing your sand is crucial. Cleanse it of any impurities or debris by sifting it through a fine mesh screen or using a sieve. This simple step guarantees a clean canvas ready for your masterpiece.
Applying the Glue:
Now comes the exhilarating part – applying the glue. Pour a small amount onto a clean surface or into a container and prepare to work your magic. Use a brush or applicator to spread a thin, even layer of glue over the desired area of sand. Remember, less is more. Avoid excessive application that could lead to clumps or uneven drying.
Pressing and Distributing the Sand:
As you apply the glue, gently press the sand onto it, watching as each grain finds its place in harmony with the adhesive. Use your fingers or a tool to evenly distribute the sand, ensuring that every particle adheres well. This step is vital in creating a sturdy bond that will bring your project to life.
Drying Time:
Patience is key in the magical alchemy of glue and sand. Allow your masterpiece to dry completely before touching or moving it. The drying time varies depending on the type of glue used, so follow the manufacturer’s instructions closely. During this waiting period, the glue works its magic, solidifying the bond between the sand particles.
Unleashing Your Creativity:
Once your glued sand creation is dry, let your creativity soar. Craft vibrant sand art pieces, construct miniature dioramas, or indulge in sensory play – the possibilities are endless. Your bonded sand will stay firmly in place, ready to captivate and inspire.
Drying Time
If you’ve ever marveled at the intricacy of sand sculptures or wondered about the secrets behind their creation, one essential factor you must consider is drying time. In this article, we will embark on a journey to unravel the mysteries of drying time, exploring how various elements such as adhesive type, environmental conditions, and sand layer thickness can influence this crucial aspect of sand art.
Let’s begin our exploration by delving into the realm of adhesives. Picture this: you’re crafting a magnificent sandcastle or an awe-inspiring sand painting. The choice of adhesive can make or break your masterpiece.
Different adhesives possess distinct drying times. Some adhesives offer swift drying, allowing you to progress with your project in no time. Conversely, others may take hours, or even days, to fully dry and set. It is paramount to select an adhesive that aligns with your vision and provides a reasonable drying time suitable for your artistic endeavor.
Now that we have acquainted ourselves with the world of adhesives, let us venture into the realm of environmental conditions. Imagine standing on a sandy beach under the blazing sun, surrounded by salty sea air. These atmospheric elements wield immense power over drying time. Temperature, humidity, and air circulation are the key players in this cosmic dance.
When temperatures soar and humidity levels decline, drying time accelerates like a speeding bullet. Conversely, when temperatures cool and humidity levels rise, time stretches its limbs languidly, prolonging the drying process. Furthermore, proper air circulation acts as an ally, enhancing evaporation and expediting drying time.
As we continue our quest for knowledge, let us turn our attention to the thickness of the sand layer being applied. The depth of your artistic creation can impact drying time significantly.
Picture a slender layer of sand versus a mighty mound of granules. The thicker the layer, the more time it will demand to dry. It is imperative to heed the manufacturer’s instructions regarding drying time for the specific adhesive you employ. These instructions often provide guidance on optimal environmental conditions conducive to swift drying.
To deepen your understanding of this enchanting world, there are numerous resources available to explore the wonders of glues and adhesives. You can immerse yourself in a treasure trove of adhesive types, such as PVA glue, epoxy resin, or even specialty sand adhesives. By embracing the diverse properties and characteristics of these adhesive wonders, you will acquire the wisdom needed to select the perfect adhesive for your sand art projects.
Advantages and Disadvantages of White Glue
White glue, also known as school glue or craft glue, offers a range of advantages and disadvantages that should be carefully considered before deciding to use it.
On the positive side, white glue is incredibly versatile. It can be used on various surfaces, including paper, fabric, wood, and some plastics. This makes it a convenient option for a variety of projects, from arts and crafts to household repairs. Its ease of use is another advantage, especially for beginners or children. With its squeeze bottle or brush applicator, applying white glue is simple and mess-free.
Moreover, white glue has the advantage of drying clear. This feature is particularly useful when working on projects where the visibility of the adhesive is undesirable. The clear drying ensures that the focus remains on the project itself rather than any visible glue lines.
Additionally, most white glues are non-toxic, making them safe for children to use. This aspect has contributed to their popularity in school projects and activities. Parents can have peace of mind knowing that their children are using a safe adhesive.
However, there are some disadvantages to using white glue that need to be taken into account. One major drawback is its longer drying time compared to other adhesives. This can be inconvenient when you need to complete a project quickly. Planning ahead and allowing sufficient drying time is essential when using white glue.
Another disadvantage is that white glue may not provide the strongest bond compared to other types of adhesives. It might not be suitable for heavy-duty repairs or projects that require a high level of strength.
Additionally, white glue is not particularly water-resistant. If you are working on an outdoor project or an item that will be exposed to moisture, you may need to consider using a different type of adhesive that offers better water resistance.
Alternative Adhesives for Stronger Bonding
When it comes to bonding sand particles, traditional adhesives may fall short in providing the strength and durability needed. Fortunately, there are alternative adhesives available that can create a stronger bond, ensuring your projects or constructions stand the test of time. In this article, we will delve into the world of alternative adhesives and explore their benefits and drawbacks, equipping you with the knowledge to make an informed choice.
Epoxy Resin: The Champion of Strength and Durability
Epoxy resin stands tall as a champion adhesive choice due to its exceptional strength and durability. When combined with a hardener, it forms a bond that can withstand various conditions, making it ideal for demanding applications. However, it demands precision in mixing ratios and patience with longer curing times—factors that may not be suitable for time-sensitive projects.
Polyurethane Glue: Filling in the Gaps
Polyurethane glue fills the gaps and creates a strong bond that is resistant to water and heat. Its unique feature lies in its ability to expand as it cures, ensuring a tight bond even on irregular or uneven surfaces. This makes polyurethane glue perfect for bonding sand particles with ease. However, caution is necessary as its expanding nature can lead to messy overflow if not applied carefully.
Acrylic Adhesive: Clear and Strong
Acrylic adhesive offers both strength and clarity, making it an excellent choice for craft projects or DIY applications where aesthetics matter. Its transparent nature makes it great for creating invisible bonds between sand particles. However, it may not hold up well under extreme temperatures or heavy loads, so it’s important to consider these factors when deciding on its use.
Silicone Adhesive: Flexibility and Resistance
Silicone adhesive boasts flexibility and resistance to temperature changes, making it an ideal choice for bonding sand in areas prone to movement or expansion, such as outdoor sculptures or installations. However, it may not provide as strong a bond as other options and may require longer curing times. Its versatility must be weighed against the desired strength of the bond.
Specialized Adhesives: Tailored for Sand Bonding
Specialized adhesives designed specifically for bonding sand or granular materials offer enhanced bonding properties. These adhesives often contain additives that improve adhesion to sand particles, ensuring a stronger bond.
However, they may be more difficult to source and come at a higher cost compared to more commonly available alternatives. Their tailored nature makes them ideal for specific applications where a strong bond is paramount.
Conclusion
In conclusion, making sand stick requires a few key techniques.
First, you need to ensure that the sand is damp, as dry sand will not adhere well. Next, you can add a binding agent such as water or glue to help the grains stick together.
Additionally, compacting the sand by applying pressure or using molds can also improve its ability to stick. Finally, allowing the sand to dry and harden will further enhance its sticking power.
By following these steps and experimenting with different methods, you can achieve sand that sticks together firmly.