Looking for a way to break free from the confines of traditional art? Get ready to embark on an artistic journey like no other. Picture the enchanting texture and irresistible allure of sand art, now brought to life on the delicate canvas of paper. That’s right, today we’re diving headfirst into the mesmerizing technique of creating sand effects on paper.
Making sand effects on paper is a thrilling process that lets your imagination soar. What makes this technique so exhilarating is its simplicity; with just a handful of materials and a dash of patience, you can create captivating artworks that leave an indelible mark.
Materials Needed:
Contents
- 1 What You Need to Make a Sand Effect on Paper
- 2 Using Actual Sand for a Textured Look
- 3 Adding Depth and Dimension with Art Mediums
- 4 Enhancing the Sand Effect with Highlights
- 5 Experimenting with Different Colors of Sand
- 6 Mixing in Acrylic Paint for Vibrant Color
- 7 Drawing or Sketching the Desired Design
- 8 Blending Different Shades of Brown for Realism
- 9 Conclusion
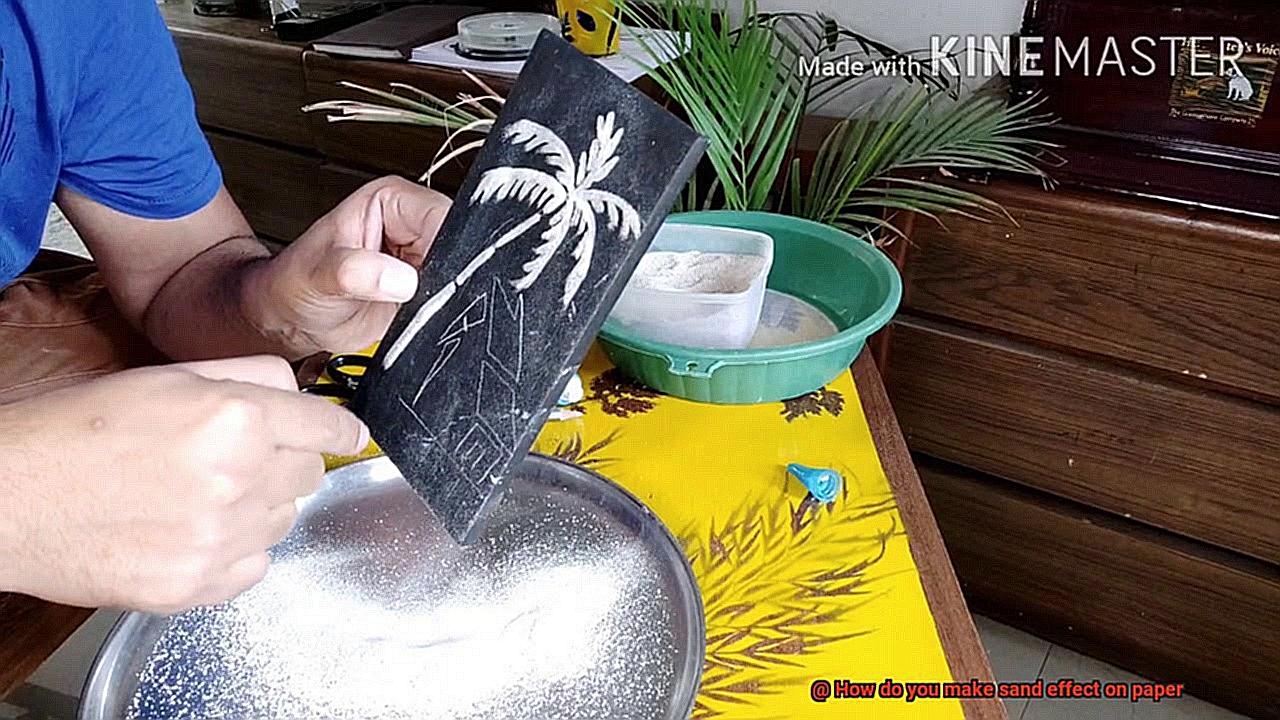
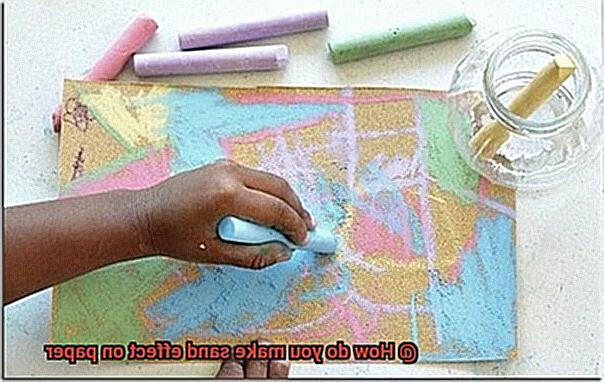
To start your sand art adventure, gather some fine-grained sand in various colors or opt for natural hues if you prefer a more subdued palette. Acrylic or water-based glue will be your trusty adhesive, expertly binding the sand to the paper. Choose heavyweight paper for added durability, as those tiny grains can weigh down lighter materials.
Process:
Let’s get started. Begin by sketching your desired image or design onto the paper using a pencil. Once your outline is complete, grab a paintbrush or sponge brush and apply a thin layer of glue within the designated area. Sprinkle the sand over the glue with gentle precision, ensuring an even distribution. Any excess sand can be easily tapped off the paper and reused later. Repeat this process until your entire design is coated in your preferred color(s) of sand. Remember to let the glue dry completely before handling your masterpiece.
Potential Outcomes:
The possibilities with sand art on paper are virtually limitless. You can create breathtaking landscapes, abstract patterns, or even accentuate specific areas within mixed-media artworks. The subtle texture added by the sand not only enhances visual appeal but also invites touch, engaging multiple senses simultaneously.
Don’t be afraid to experiment. Layer different colors of sand to add depth or sprinkle sparingly for an ethereal effect. You can also play around with various types of grains, like shimmering metallic sand or coarse rock fragments, to infuse your artwork with a touch of diversity.
What You Need to Make a Sand Effect on Paper
Creating a sand effect on paper can be a unique and visually appealing technique that adds depth and interest to your creations. Whether you want to create a realistic sandy beach scene or add a touch of texture to a greeting card, this guide will provide you with all the necessary materials and steps to achieve a stunning sand effect on paper.
Materials Needed:
- Sand: Fine-grained sand is ideal for this technique. You can purchase it from craft stores or collect it from outdoor locations like beaches.
- Glue: Regular white glue or craft glue works well as an adhesive between the paper and the sand.
- Paper: Thicker papers such as cardstock or watercolor paper are recommended for their durability.
- Optional: Paint, brushes, and sealant to enhance and protect the sand effect.
Step-by-Step Instructions:
- Prepare your materials: Gather sand, glue, and the desired paper size for your project.
- Apply the glue: Spread a layer of glue evenly across the area you want to cover with sand using a brush or spatula.
- Sprinkle sand: Sprinkle sand over the glued area, ensuring even coverage.
- Press down gently: Press down on the sand to ensure proper adhesion to the glue.
- Remove excess sand: Shake off any excess sand and tap the back of the paper to remove loose particles.
- Let it dry: Allow the project to dry completely before proceeding further.
- Optional: Add additional details or embellishments using paints or other art supplies.
- Seal the project: Consider applying a clear acrylic spray or varnish as a protective layer.
Using Actual Sand for a Textured Look

If so, using actual sand can be a game-changer. Creating a sand effect on paper not only adds visual appeal but also provides a unique texture that will captivate the viewer. In this blog post, we will explore how to use sand to achieve a textured look, providing step-by-step instructions and expert tips for success.
Materials Needed:
- Fine sand (preferably of different colors)
- Clean surface (paper, canvas, wooden panel, etc.)
- Clear-drying glue (white glue or Mod Podge)
- Paintbrush or sponge brush
- Soft brush or hands for removing excess sand
- Clear protective spray or varnish
Step 1: Gather Your Materials
To begin, gather all the necessary materials for your project. Look for fine sand in various colors to add interest and variation to your design. You can find colored sand in craft stores or collect natural sand from outdoor locations like beaches.
Step 2: Prepare the Surface
Before applying the sand, ensure that the surface is clean and free from any dust or dirt. This will allow for proper adhesion of the sand.
Step 3: Apply the Glue
Using a paintbrush or sponge brush, apply a thin and even layer of adhesive onto the surface. Opt for a clear-drying glue, such as white glue or Mod Podge, to ensure that it doesn’t affect the color of the sand. Make sure to cover the entire area where you want the sand effect to appear.
Step 4: Sprinkle the Sand
Take handfuls of colored sand and gently sprinkle it onto the glued surface. You can start with one color at a time or mix different colors together for a more vibrant look. Distribute the sand evenly, ensuring that all glued areas are covered.
Step 5: Press and Pat Down the Sand
To ensure proper adhesion, press down the sand gently with your hands or use a clean sponge to lightly pat it down. This will help the sand stick firmly to the glue, creating a textured look.
Step 6: Let It Dry
Allow the sand to dry completely. The drying time may vary based on the type and amount of glue used. Avoid touching or disturbing the surface while it dries to prevent any shifting or displacement of the sand.
Step 7: Remove Excess Sand
Once the sand is fully dry, gently shake off any excess sand that did not adhere to the glue. Use a soft brush or your hands to remove any loose grains, taking care not to rub too hard and disturb the textured effect.
Adding Depth and Dimension with Art Mediums
Incorporating sand into your art is a simple yet powerful technique that can bring depth and dimension to your pieces, captivating viewers with its unique visual appeal. In this article, we will explore how to harness the potential of sand as an art medium, providing step-by-step instructions on creating stunning sand effects on paper.
So, let’s embark on this artistic journey and unleash our creativity.
Materials Needed:
- Heavyweight paper or watercolor paper
- Sand (art supply store or collected from a beach/playground)
- Clear-drying glue or adhesive spray
- Protective surface (newspaper or protective mat)
Step-by-Step Process:
Prepare Your Workspace:
To ensure easy cleanup and prevent any stray sand mishaps, lay down a protective surface such as newspaper or a protective mat.
Apply Glue:
Using clear-drying glue, delicately apply a thin layer onto the desired area of the paper where you want to create the sand effect. Working in small sections is advised to prevent premature drying of the glue.
Sprinkle the Sand:
With precision and speed, sprinkle the sand over the glued area before it dries. Gently spread and press the sand into the glue using your fingers or a spoon, ensuring its firm adherence to the paper. Shake off any excess sand onto your protective surface.
Experiment with Techniques:
Unleash your artistic prowess by exploring various techniques to add more depth and dimension. Before applying the sand, create intricate patterns or designs with the glue, or mix different colors of sand for a vibrant effect. Take it a step further by layering different depths of sand through multiple layers of glue and sand, unveiling captivating visual contrasts.
Allow it to Dry:
Patience is key; let your artwork dry completely. The drying time may vary depending on the adhesive used, ranging from a few hours to overnight.
Remove Loose Sand:
Gently tap or shake off any loose sand from the paper. For added protection and longevity, seal the sand by applying another layer of glue or a clear varnish over the top.
Endless Possibilities:
The sand effect on paper opens up a world of boundless opportunities in art projects. Combine sand with other mediums such as paint, collage elements, or even embroidery to create awe-inspiring mixed media pieces. The texture and dimension brought forth by the sand will infuse your artwork with an intriguing and tactile quality, drawing viewers into its mesmerizing depths.
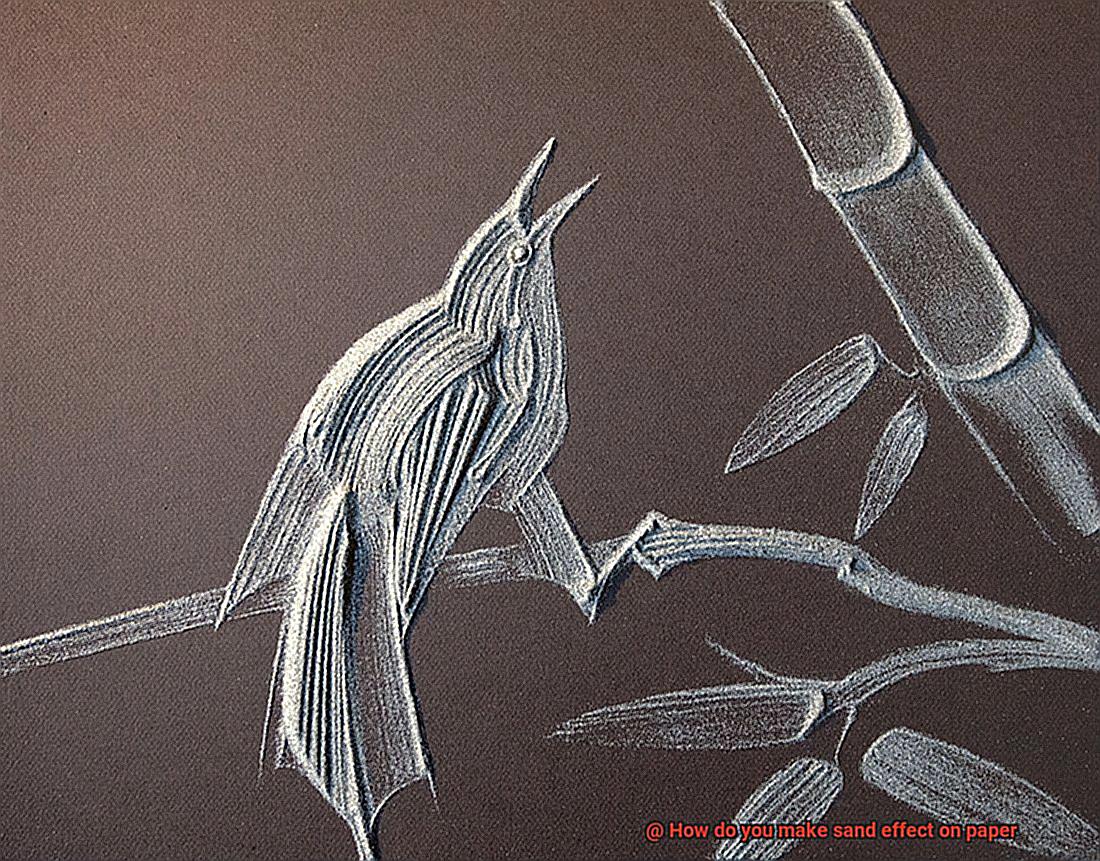
Enhancing the Sand Effect with Highlights
Fear not, for there is a secret to breathing life into your sand effect – the power of highlights. By adding highlights to your artwork, you can infuse it with depth and realism that will captivate the eyes of beholders. In this post, we will embark on an exploration of various techniques and materials that can be employed to enhance the sand effect with highlights, transforming your work from ordinary to extraordinary.
Firstly, let us consider the use of white gel pens or acrylic paint. These versatile tools allow you to create small dots or lines of white upon the sandy areas of your composition. By doing so, you simulate the play of light upon individual grains, bestowing a touch of brilliance that brings your artwork to life.
Next, let us delve into the realm of dry brushes and lighter shades. Dip a dry brush into a lighter hue of tan or beige paint, then remove most of the pigment upon a paper towel. With a gentle hand, stroke the brush lightly over the raised portions of the sand. In this manner, you shall create subtle highlights that bestow dimension upon your masterpiece.
A third avenue to explore is that of white colored pencils. Employing a gentle pressure and a deft hand, layer delicate strokes of white colored pencil across the sand, focusing on those regions that would naturally catch the light. The soft and waxy texture of colored pencils affords you precise control and blending capabilities.
For those who seek a more striking effect, consider incorporating metallic paints or pastels in gold or silver. These shimmering mediums can be applied sparingly to specific areas of the sand, imbuing them with an elegant radiance that dazzles the senses.
Remember, as you embark upon this creative journey, to blend your highlights seamlessly with the rest of the sand. Utilize a soft brush or the gentle touch of your fingertips to create a harmonious transition between the areas that are highlighted and those that are not. And do not be afraid to experiment with various techniques and materials, for it is through exploration that true artistic mastery is attained.
To further elevate your work, consider the addition of shadows. By employing darker shades of brown or gray, you can infuse your sand effect with a sense of depth and dimension. Apply these shadows to areas where the sand would naturally cast its embrace, such as crevices or beneath objects.
Experimenting with Different Colors of Sand
Experimenting with an array of vibrant colors of sand can be a thrilling and imaginative way to infuse texture and depth into your artwork. Whether you’re a seasoned artist or just beginning to explore your creative side, mastering the technique of creating a sand effect on paper will undoubtedly elevate your artistic repertoire.
To commence this mesmerizing endeavor, you must gather your materials. Colored sand can be easily acquired from craft stores or online retailers. However, for those with an adventurous spirit, crafting your own colored sand is entirely possible by blending regular sand with powdered tempera paint. The choice is yours; select the hues that beckon to your soul and prepare to unleash a torrent of creativity.
Now, let us delve into the realm of adhesive. Opt for white glue or craft glue as the ideal medium for adhering the sand onto the paper. Not only does it dry transparently, but it also offers an unwavering bond. Alternatively, you may opt for Mod Podge or any other decoupage medium to achieve the desired effect.
Once your materials are at hand, it is time to embark upon your sandy adventure. Begin by applying a thin layer of glue onto the designated area of the paper where your sand effect shall come to life. It is crucial to ensure even distribution and complete coverage.
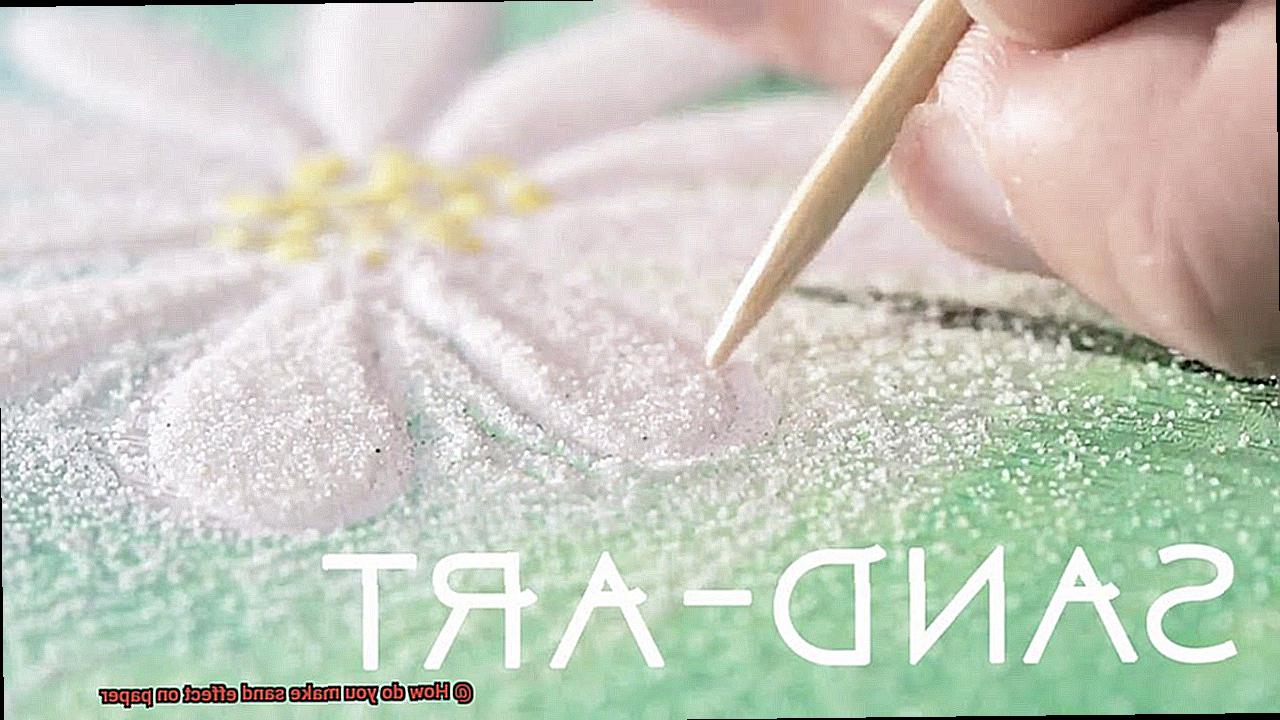
Now comes the exhilarating part – the sprinkling of sand. Take a small spoonful of colored sand and gently scatter it over the glued area. Use either your nimble fingers or a delicate brush to carefully spread the sand, ensuring its comprehensive coverage and formation of an impeccably uniform layer.
This process can be repeated with different colors of sand, whereby fresh areas of the paper are adorned with glue and corresponding shades are gracefully sprinkled upon them. Allow your creativity to soar as you experiment with captivating patterns, intricate designs, and even tantalizing gradients achieved by artfully blending various hues.
Once you stand in awe of your masterpiece, exercise patience and grant the glue ample time to dry completely. Typically, this process takes approximately twenty-four hours, but it may vary according to the quantity of glue used and the humidity of your environment.
Upon the glue’s transformation into a solid state, gently tap or shake off any excess sand from the paper. For an extra touch of finesse, employ a soft brush to eradicate any lingering grains that have not yet found their rightful place. And lo and behold. Your sand effect on paper stands resplendent in all its glory.
Now that you have mastered the basics, let your imagination run wild, for limitless possibilities await your artistic prowess. Employ this captivating technique to create breathtaking greeting cards, imbue your scrapbook pages with texture and character, or even craft framed artworks that will leave your friends and family in awe.
Mixing in Acrylic Paint for Vibrant Color
Mixing acrylic paint is the secret behind creating vibrant and realistic sand effects in your artwork. Acrylic paints are incredibly versatile, allowing you to achieve a wide range of effects. And when it comes to sand, we want those colors to pop and come alive on the canvas.
To begin, gather your materials: acrylic paints in various colors, a palette or mixing surface, brushes, and water. Once you have everything ready, it’s time to unleash your creativity and dive into the world of vibrant colors.
The first step is selecting the base color for your sand effect. Think shades of beige, tan, or light brown – those will work wonders in capturing the essence of sand. Place a small amount of this base color on your palette and let the magic begin.
But we’re not done yet. To add depth and texture to your sand effect, consider adding other colors. A touch of yellow or orange can bring warmth and brightness to your sandy landscape. On the other hand, a hint of gray or blue can create cooler tones that mimic shadows or wet sand.
Now comes the exciting part – mixing. Begin by adding small amounts of your additional colors to the base color on your palette. Grab a brush or palette knife and mix them together until you achieve the desired shade. Remember, acrylic paints dry darker than they appear when wet, so aim for a slightly lighter mix.
Don’t be afraid to experiment with different ratios and combinations of colors. That’s how you’ll find the perfect mix for your sand effect. Add more yellow for a golden tone or increase the blue or gray for a cooler vibe.
But wait, we’re not done yet. We want our sand effect to be as realistic as possible, right? So let’s talk texture. Sand isn’t completely smooth – it has tiny bumps and grains that give it character. To achieve this, you can mix in fine particles like sand itself or try special additives available at art supply stores.
To incorporate sand particles into your acrylic paint mixture, sprinkle a small amount of sand onto your palette. Gradually add the base color and other desired colors to the sand, mixing them together until well combined. Test the texture on a scrap piece of paper to ensure it’s exactly what you’re looking for.
Keep in mind that acrylic paints dry quickly, so work efficiently when mixing and applying the paint to your canvas. If you need more time, consider using a slow-drying medium or tackle smaller sections at a time.
Drawing or Sketching the Desired Design
When it comes to creating a sand effect in your drawings or sketches, one of the first steps is to sketch or draw the desired design. This could be anything from a serene beach scene to a vast desert landscape. As you embark on this artistic journey, it’s crucial to consider the perspective and composition of your overall masterpiece. Visualize how the sand will fit into the picture and how it will interact with other elements like water or objects on the beach.
But before you dive into the intricate details, take a moment to study reference images of sand. Observe its magnificent variations in texture and color, and notice how the light dances upon its surface. These observations will serve as your guide as you strive to capture the essence of sand in your sketch.
To truly bring your sandy creation to life, experiment with different types of pencils or charcoal. A softer pencil can produce darker and more pronounced lines, while a harder pencil can create lighter and finer strokes. By playing around with different pencil grades, you have the power to achieve the specific effect that you desire.
Now, let’s delve into the realm of shading. This technique is truly magical when it comes to adding depth to your sand. Begin by lightly shading areas where shadows would naturally occur – beneath objects or within crevices. Gradually build up the shading, allowing your sand to take on a three-dimensional appearance. Remember, shadows are your allies in the pursuit of realism.
But don’t be afraid to let your creativity shine through. Sand has a rough texture, so don’t hesitate to incorporate some irregularities and unevenness into your sketch. Bold and expressive lines will give your drawing an authentic touch. You can even venture into different drawing techniques like cross-hatching or stippling to further enhance the texture of your masterpiece.
As with any skill, practice makes perfect. Drawing and sketching the sand effect is a creative process that requires experimentation and perseverance. Don’t be discouraged if you don’t achieve your desired result immediately – keep trying, keep practicing, and most importantly, have fun with it.
Blending Different Shades of Brown for Realism
Creating a realistic sand effect on paper requires more than just a single shade of brown. Sand is a complex mixture of tones and textures, and capturing its depth and character is essential for achieving realism. In this comprehensive guide, we will explore the techniques and tools needed to blend different shades of brown seamlessly and create a lifelike sand effect using various art supplies.
Gather Your Supplies:
To start, gather an assortment of brown-colored art supplies, such as colored pencils, pastels, or watercolor paints. Having a range of shades available will allow you to create a more nuanced and realistic effect. Experiment with mixing different shades together to achieve your desired color palette.
Understand Lighting and Texture:
Consider the lighting conditions and texture of the sand you want to depict. For a sunny beach scene, incorporate lighter shades to represent areas that are more illuminated. To create a shaded or shadowy effect, use darker shades to add depth and contrast to your artwork.
Sketch the Outline:
Begin by lightly sketching the outline or shape of the sand on your paper. Add irregularities and bumps to make it look more authentic. Remember, sand is not perfectly smooth or flat.
Layer and Blend:
Start with a lighter shade as your base layer, representing the overall color of the sand. Gradually add darker shades in areas with more shadows or compacted sand. Use short, gentle strokes or dots to layer the colors, creating depth and dimension. Blend the colors together using a blending stump or cotton swab for a seamless transition between shades.
Add Texture:
To mimic the coarseness of sand, lightly dab a sponge or stippling brush onto the paper after applying the colors. This technique creates the illusion of small grains of sand, enhancing the realism of your artwork.
Step Back and Assess:
Take breaks to step back and observe your progress. Assess whether the colors are blending well and if any adjustments are needed. Remember, practice makes perfect, so don’t be afraid to experiment and try different techniques until you achieve the desired sand effect.
ODxtSAsXiV0″ >
Conclusion
Creating a sand effect on paper is a fun and creative way to add texture and depth to your artwork or craft projects. By following a few simple steps, you can achieve a realistic sand-like appearance that will make your piece stand out.
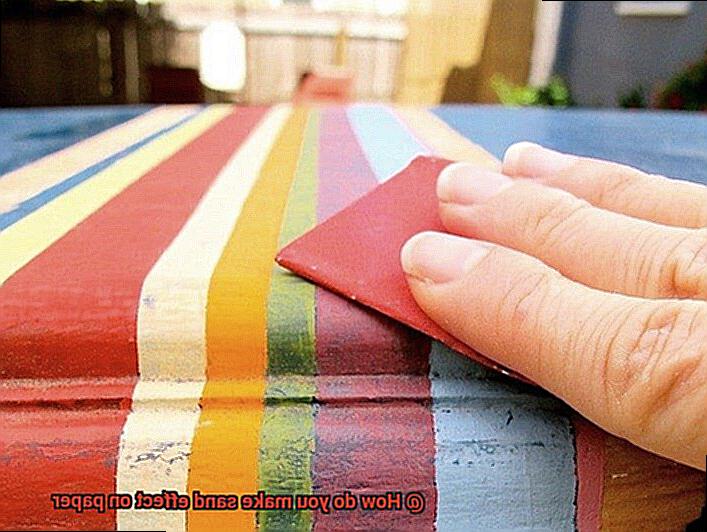
First, gather the necessary materials: fine-grit sandpaper, white glue, a paintbrush, and colored pencils or paints in shades of beige and brown. These items will help you create the desired sandy texture and color.
Next, prepare your paper by applying a thin layer of white glue using the paintbrush. Make sure to cover the entire surface evenly, as this will act as the adhesive for the sand.
Once the glue is applied, it’s time to add the sand. Sprinkle the fine-grit sandpaper over the glued area, making sure to cover it completely. Gently press down on the sand with your fingers or a clean cloth to ensure it adheres well to the paper.
After allowing some time for the glue to dry completely, gently shake off any excess sand from your paper. You can also lightly tap on the back of the paper to remove loose particles. This step will reveal your beautifully textured sandy surface.
To enhance the realism of your sand effect, use colored pencils or paints in shades of beige and brown to add depth and shadows. Apply these colors sparingly in areas where shadows would naturally appear on sand dunes or grains.
Remember to vary your stroke direction when applying colors – this will mimic the natural patterns found in real sand. Use short strokes for finer details and longer strokes for broader areas.
Finally, let your creation dry completely before handling or framing it. This will ensure that all elements are securely set in place.
In conclusion, creating a sand effect on paper is an enjoyable process that adds visual interest and tactile appeal to your artwork or crafts. By following these steps and using your creativity, you can achieve stunning results that transport viewers into a sandy oasis.