Rocks, rocks, rocks. They’re a staple in any outdoor design, bringing a natural and textured element to your space. But there’s one problem that gardeners and homeowners face: how to keep those pesky rocks in place once you’ve arranged them. Nothing ruins your carefully crafted rock garden or path like displaced or shifted stones. But fear not, my friend. There are several effective ways to keep those rocks right where you want them.
From cement and adhesives to clever landscaping techniques, we’ll explore all the different methods for making rocks stay put in this blog post. We’ll take an in-depth look at each technique, weighing the pros and cons of each so that you can make an informed decision that best suits your needs. Whether you’re creating a rock garden or retaining wall or just trying to keep decorative stones from rolling away, we’ve got you covered.
So if you’re tired of constantly having to readjust your rocks and want to know how to make them stay put for good, then keep reading. You’ll learn some fascinating tips and tricks that will not only help keep your rocks in place but also elevate your landscape design game. So let’s jump right into it.
What is the Challenge of Making Rocks Stay in Place?
Contents
- 1 What is the Challenge of Making Rocks Stay in Place?
- 2 What Adhesives Can Be Used to Secure Rocks?
- 3 How to Use Epoxy for Securing Rocks
- 4 How to Use Construction Adhesive for Securing Rocks
- 5 How to Use Silicone for Securing Rocks
- 6 Tips and Tricks for Using Adhesives on Rocks
- 7 Alternatives to Using Adhesives on Rocks
- 8 Conclusion
Crafting a captivating rock feature in your garden or landscape can bestow beauty and allure. Nevertheless, the unyielding challenge of making rocks stay in place plagues even the most seasoned landscapers and homeowners. In this article, we will delve into the primary hurdles of rock stability and present expert strategies and innovative solutions to help you conquer them.
The Untamed Nature of Shifting Rocks:
Rocks possess an innate propensity to shift or migrate over time due to the relentless forces of weather conditions, erosion, and external influences. This poses an immense obstacle when aiming to create a steadfast and enduring rock feature. Recognizing this inherent characteristic lays the foundation for finding effective solutions.
Selecting the Perfect Adhesive:
One prevalent method for securing rocks in place involves the utilization of adhesives or glues. Among the commonly used options are epoxy, construction adhesive, and silicone. Epoxy offers unparalleled strength and durability, making it ideal for bonding rocks together. Construction adhesive excels on porous surfaces like concrete or stone, while silicone boasts flexibility and waterproof properties.
Meticulous Application of Adhesive:
To ensure a triumphant bond, meticulous adherence to the manufacturer’s instructions is paramount. Thoroughly cleanse the surface of the rocks before applying the adhesive, removing any encumbering dirt or debris that might impede adhesion. Allow ample time for the adhesive to cure before any movement or disturbance occurs.
Precision in Positioning and Alignment:
Achieving precise positioning and alignment of rocks is pivotal in thwarting instability and subsequent movement over time. Devote sufficient time to meticulously plan and visualize your rock feature before embarking on the installation process. Pay scrupulous attention to detail, ensuring each rock is steadfastly nestled in its intended location.
Exploring Alternative Methods:
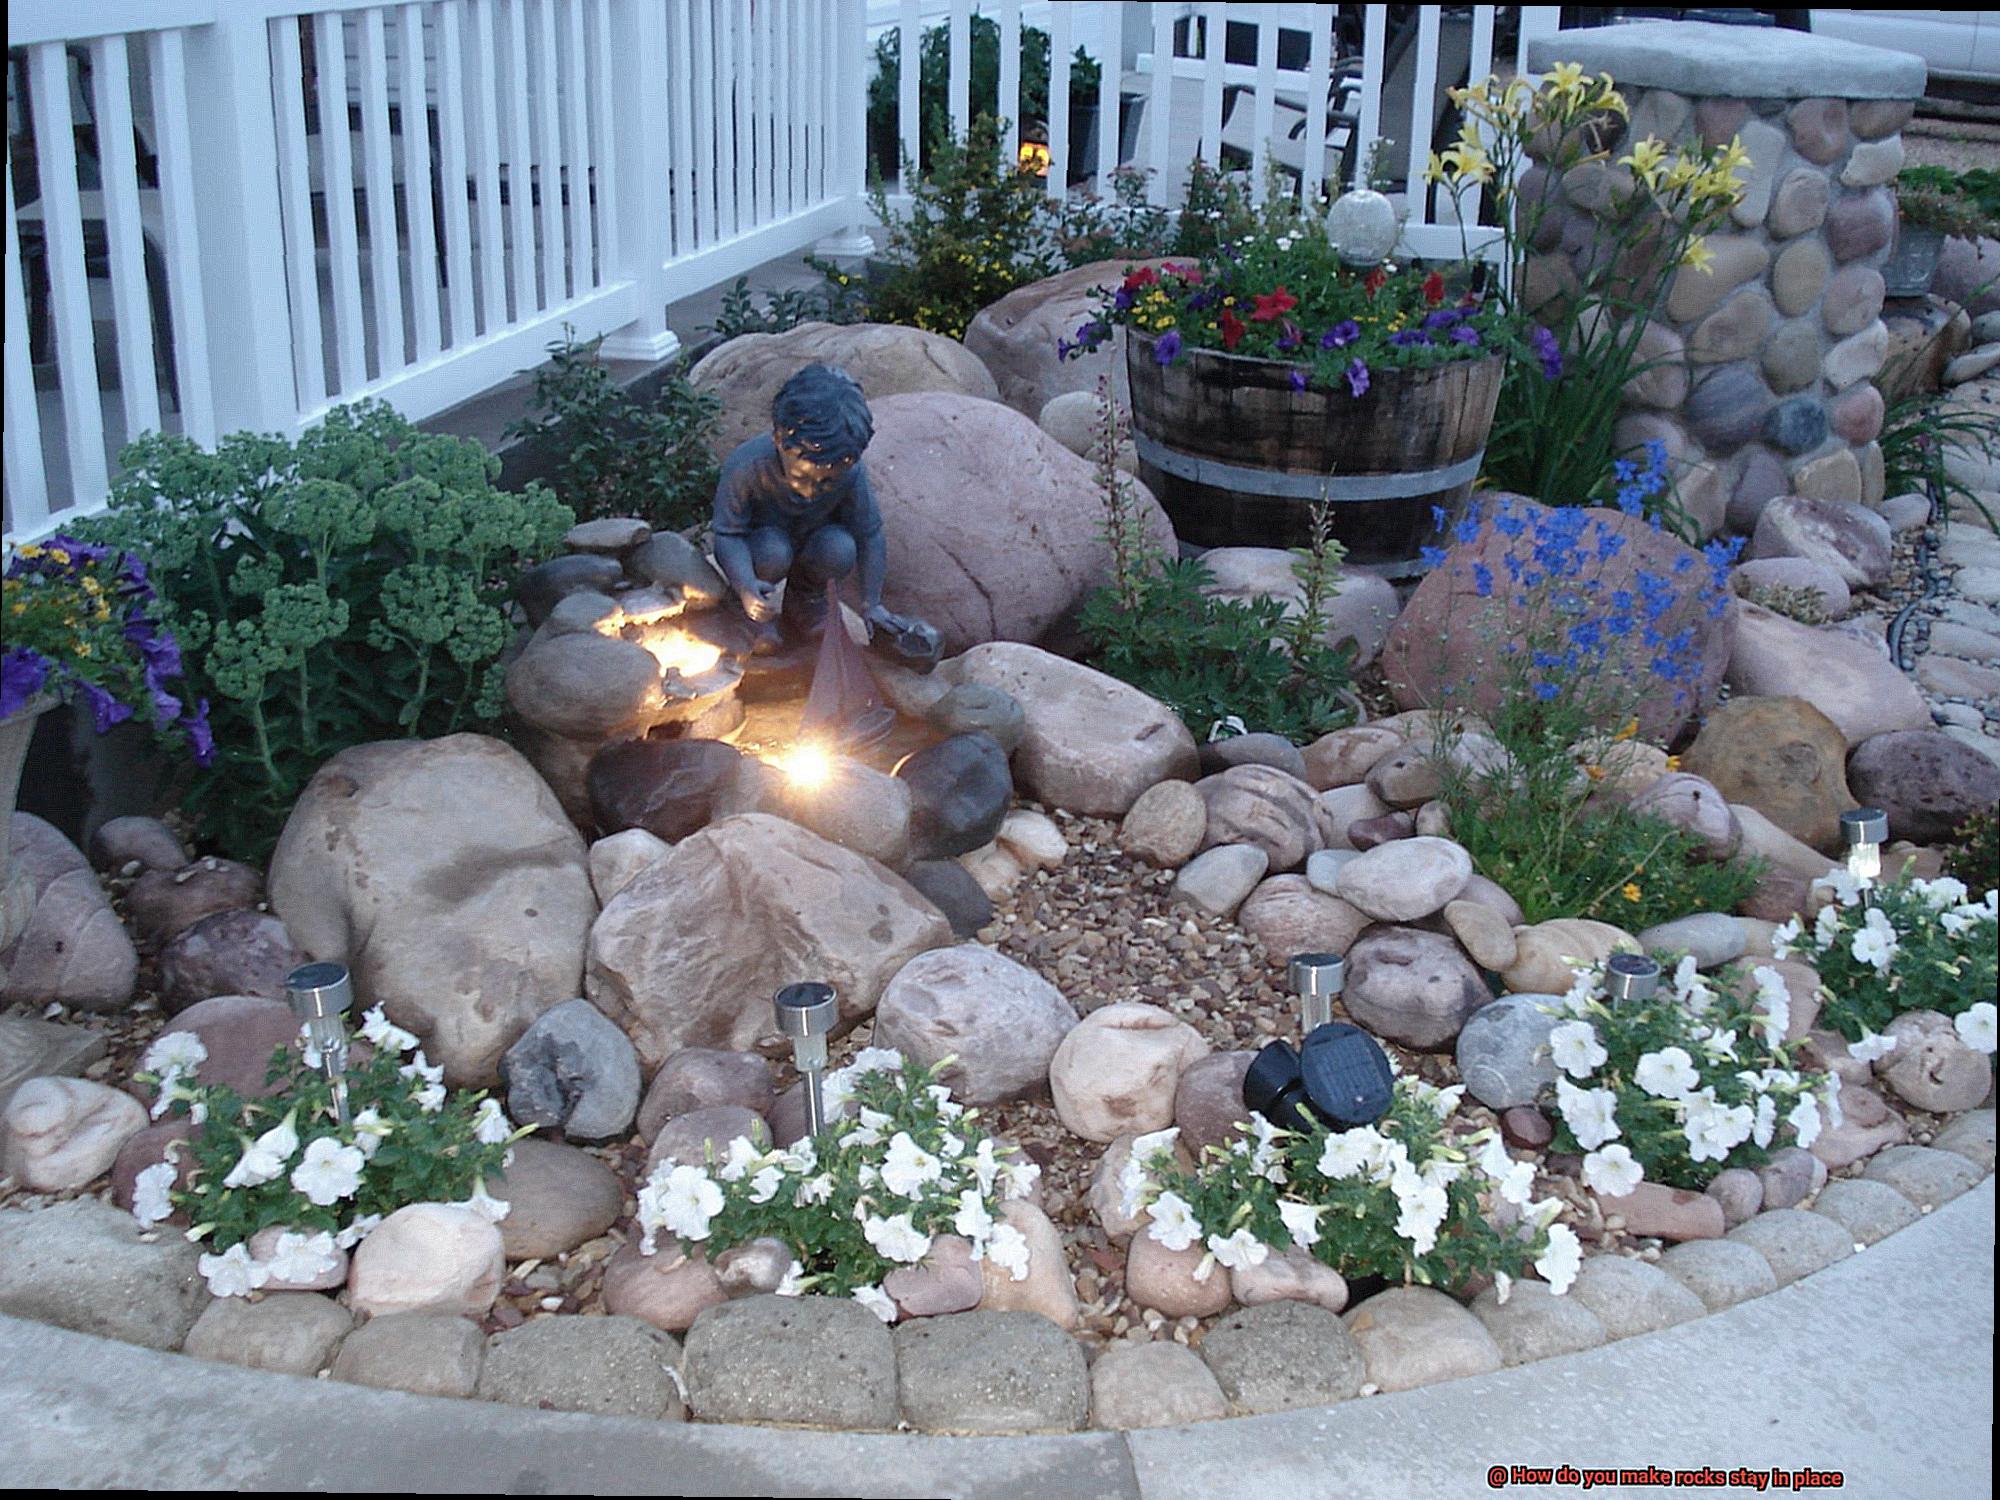
Beyond adhesive solutions, a plethora of alternative methods exist to fortify the immobility of rocks. Partially burying rocks in the ground can provide substantial stability, particularly for larger or weightier specimens. Constructing a rock wall or retaining wall can serve as an anchor to keep rocks firmly in place. Additionally, utilizing wire or mesh to interweave and secure rocks proves effective, especially for irregularly shaped formations.
What Adhesives Can Be Used to Secure Rocks?
Rocks possess an undeniable allure, but keeping them securely in place can be a challenge. Fear not, for with the right adhesive, you can bring out the hidden potential of these magnificent natural wonders. In this comprehensive guide, we will explore a variety of adhesives that can be utilized to secure rocks, empowering you to create enduring masterpieces that withstand the tests of time and nature.
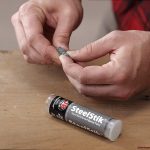
Epoxy: The Indomitable Bond Builder
Epoxy stands as an unrivaled heavyweight in the realm of rock securing adhesives. Its versatility is showcased through various forms, including liquid epoxy, epoxy putty, and epoxy glue. Large rocks find their perfect match with liquid epoxy, forming a seamless connection. Filling gaps or cracks between rocks is effortlessly achieved with epoxy putty, ensuring a solid and flawless finish. For projects demanding precision or involving smaller rocks, epoxy glue emerges as the adhesive of choice.
Construction Adhesive: The Fortress of Strength
When faced with heavy-duty applications, construction adhesive emerges as the ultimate savior. Designed to withstand the harshest conditions, this adhesive offers an unyielding bond for your rocks. Weathering and moisture become mere trifles in the face of construction adhesive’s robust strength. By wielding a caulking gun and applying this powerful adhesive, your rocks will remain steadfast against any adversity that comes their way.
Outdoor Adhesive: Weather-Resistant Marvels
For ventures into the great outdoors, outdoor adhesives take center stage. Tailored specifically to endure sunlight, moisture, and temperature changes, these adhesives are crafted to brave the elements. Waterproof and resistant to harmful UV rays, outdoor adhesives promise an unbreakable bond between rocks that withstands the relentless forces of nature.
Flexible Adhesive: Embracing Movement with Grace
In certain scenarios, flexibility becomes a crucial attribute for adhesive selection, particularly when working with rocks subjected to movement or vibrations. Flexible adhesives answer this call, accommodating slight shifts without compromising the integrity of the bond. Vertical surfaces and high-traffic areas find solace in the reliability of these adhesives, ensuring a steadfast connection that transcends time, foot traffic, and even seismic rumbles.
How to Use Epoxy for Securing Rocks
Ready to embark on an exciting rock project? Whether you’re building a majestic rock wall, crafting a captivating garden feature, or simply securing rocks together, epoxy is here to save the day.
Epoxy is a magical adhesive that forms an unbreakable bond between rocks, ensuring they stay in place for years to come. In this comprehensive guide, we will walk you through the step-by-step process of using epoxy to secure rocks. So, put on your creative hat and let’s dive into the world of epoxy.
Preparing the Rocks
Before diving into the world of epoxy, it’s crucial to properly prepare your rocks. Begin by giving them a thorough scrub with warm soapy water, banishing any dirt or debris that may hinder the epoxy’s adhesion. Once dry, gently roughen the rocks using sandpaper or a wire brush. This step adds texture and tiny grooves to the surface, providing an ideal grip for the epoxy.
Mixing the Epoxy
Now that your rocks are primed and ready, let’s tackle mixing the epoxy. Typically available in two parts—a resin and a hardener—epoxy must be mixed in the correct ratio to activate its adhesive properties. Follow the manufacturer’s instructions diligently to ensure you achieve the perfect balance. Remember, timing is paramount as epoxy has a limited working time before it begins to solidify.
Applying the Epoxy
With your mixed epoxy at the ready, equip yourself with a trusty paintbrush or small spatula. Apply the epoxy generously onto one of the surfaces that will be bonded together, ensuring complete coverage. As you work, revel in the stickiness that will soon unite your rocks with unwavering strength.
Pressing and Holding
Get ready for the exciting part. Firmly press the rocks together, aligning them with precision. Apply steady and unwavering pressure for a few minutes, allowing the epoxy to work its magic. For an extra secure bond, consider using clamps or other tools to hold the rocks in place while the epoxy cures. But remember, during this crucial time, avoid disturbing or moving the rocks.
Curing Time
Patience is the ultimate virtue. Depending on the type of epoxy used, it may take several hours or even days to achieve full curing. Follow the manufacturer’s instructions meticulously, noting the recommended curing time and any additional steps that may be necessary. Resist the urge to test the bond prematurely—let the epoxy work its undisturbed magic.
How to Use Construction Adhesive for Securing Rocks
Are you ready to take your rock projects to the next level? Well, get ready to rock and roll with construction adhesive. This powerful adhesive is the secret weapon for securing rocks in place, ensuring that your creations withstand the test of time. In this guide, we’ll walk you through the steps of using construction adhesive to create stunning rock projects that will leave everyone in awe.
Clean the Rocks:
Before diving into the adhesive action, let’s start with a clean slate. Give those rocks a thorough cleaning by wiping away any dirt, debris, or oils. Imagine it as a spa day for your rocks, making sure they’re fresh and ready for a strong bond. Grab a brush or a damp cloth and gently remove any loose particles. This step lays the foundation for a rock-solid connection.
Apply the Adhesive:
Now it’s time to unleash the adhesive power. Squeeze out a generous amount of construction adhesive onto the back of one rock. Don’t hold back; be lavish with your adhesive application. Think of it as spreading love between the rocks. Make sure to cover every nook and cranny of the rock’s surface with an even layer of adhesive. This ensures a powerful grip that won’t let go.
Press and Hold:
It’s time to bring those rocks together in perfect harmony. Firmly press the rock onto the desired surface, joining them like puzzle pieces fitting into place. Feel the adhesive spread evenly between them, creating an unbreakable bond. Hold them in place for a few minutes, applying gentle pressure like two hands clasped in unity. This allows the adhesive to set and solidify their connection.
Allow Time to Cure:
Patience is a virtue when it comes to construction adhesive. While you might be eager to show off your masterpiece, give it some time to fully cure and reach its maximum strength. Let the rocks bask in the adhesive’s embrace for at least 24 hours before subjecting them to any stress or movement. It’s like giving them a chance to solidify their relationship, ensuring a lifelong partnership.
Safety First:
As you embark on your rock-adhesive adventure, remember to prioritize safety. Don your protective gear like a superhero getting ready for action. Slip on those gloves to shield your hands and goggles to protect your eyes from any potential adhesive encounters. Additionally, make sure you’re working in a well-ventilated area, allowing fresh air to flow freely as you work your rock magic.
How to Use Silicone for Securing Rocks
Are you ready to embark on an exciting rock project but worried about how to keep those rocks in place? Look no further. In this guide, we will explore the wonders of silicone adhesive and how it can help you create a rock-solid display that will stand the test of time. Prepare yourself for an adventure that will rock your world.
Cleaning the Rocks: The First Step to Success
Before diving into the magical world of silicone, let’s start with the basics – cleaning those rocks. Picture trying to stick two pieces of tape together with dust in between – it’s a recipe for disaster. Grab a mild detergent and some water, and gently scrub away any dirt, debris, or oils from your precious rocks. A pristine surface is the key to a strong and unbreakable bond with the silicone adhesive.
Choosing the Right Silicone: The Glue That Holds It All Together
Now that your rocks are squeaky clean, it’s time to choose your trusty sidekick – silicone adhesive. Silicone comes in different forms, like caulk or sealant tubes, and can be found at most hardware stores. But don’t settle for just any silicone; opt for a superhero variety specifically designed for outdoor use. These weather-resistant champions will ensure your rocks stay securely in place, no matter what Mother Nature throws their way.
Applying Silicone: The Art of Bonding
Get ready to unleash your inner artist as you embark on the journey of applying silicone adhesive. Prepare your caulk tube by cutting the tip at a 45-degree angle – a stroke of genius that ensures smooth and controlled application. Squeeze out a thin bead of silicone along the surface where you want your rocks to find their forever home. Remember, too much silicone can lead to oozy mishaps, so exercise restraint and apply just enough to create a strong, invisible bond.
Pressing and Holding: Building a Strong Foundation
Now it’s time to bring your rocks and silicone adhesive together in a harmonious union. Press those rocks firmly into the silicone, like puzzle pieces finding their perfect fit. Hold them in place for just a few minutes, allowing the adhesive to work its magic and set. This step is crucial – it’s like laying the foundation for a majestic rock castle that will withstand the tests of time and gravity.
The Waiting Game: Patience Pays Off
As the saying goes, good things come to those who wait. Take a deep breath and embrace the art of patience as you allow the silicone adhesive to work its wonders. Give it the time it needs to fully cure, following the manufacturer’s instructions like a devoted disciple. This waiting period, typically around 24 hours, is when the silicone transforms into an unbreakable bond – a fortress of strength that will keep your rocks securely in place, rain or shine.
Tips and Tricks for Using Adhesives on Rocks
Do you have a passion for creating awe-inspiring rock formations or breathtaking landscaping projects? Adhesives are the secret ingredient that can make your visions come to life. In this article, we will delve into the tips and tricks for using adhesives on rocks, unlocking their full potential and ensuring that your rock masterpieces withstand the test of time.
The Right Adhesive: Selecting Your Super Glue
Not all adhesives are created equal, and choosing the right one is crucial for a strong bond. Consider the type of rock you are working with – is it porous or non-porous? Porous rocks like sandstone or limestone may require a different adhesive than non-porous rocks like granite or marble. Research or consult professionals to determine the most suitable adhesive for your specific rock type, ensuring a match made in adhesive heaven.
Rock Preparation: Cleaning and Roughening Up
Before embarking on your adhesive adventure, prepare the rock surface properly. Give them a thorough cleaning using a brush or cloth to banish any dirt or debris. If necessary, roughen up the surface slightly with sandpaper or a file.
This secret step creates a texture that enhances adhesion, providing a stronghold for your adhesive superhero.
Adhesive Application: The Art of Bonding
Now it’s time to unleash the adhesive’s power. Follow the manufacturer’s instructions meticulously based on the adhesive type you have chosen. Apply a thin layer of adhesive to both surfaces you wish to bond together, ensuring even coverage. Then comes the moment of truth – press those rocks together firmly, giving them a superhero-worthy squeeze. Hold them in place for a few moments, allowing the adhesive to work its magic and solidify the bond.
The Virtue of Patience: Curing Time is Key
In a world of instant gratification, remember that patience is a virtue when working with adhesives. Allow ample curing time for the adhesive to fully set before subjecting your rocks to movement or stress. Rushing this process could undermine the bond and lead to disappointing results. Embrace your inner zen and let the adhesive work its wonders, ensuring a fortress-like union.
Safety: Shielding Your Creative Journey
As with any endeavor, safety should never be overlooked. Don your protective gloves and choose a well-ventilated workspace, shielding yourself from potential fumes. Follow the manufacturer’s instructions diligently to avoid contact with skin or eyes. By prioritizing safety, you can embark on your adhesive adventure with confidence and peace of mind.
Alternatives to Using Adhesives on Rocks
Title: Rock Solid: Exploring Captivating Alternatives to Using Adhesives on Rocks
Are you tired of relying on ordinary adhesives to keep your rock formations and landscaping projects intact? Are you longing for innovative methods that not only add a touch of creativity but also enhance the natural beauty of your designs? Well, fret not. We’ve delved into extensive research to present you with an array of alternatives that will make your rocks stay put without the need for traditional adhesives. Get ready to embark on a journey through fascinating options that will revolutionize the way you work with rocks.
Interlocking Techniques: Unleash Your Creative Puzzle Master
Picture a puzzle where each piece perfectly fits together, forming a harmonious whole – that’s the enchantment of interlocking techniques. By carefully arranging rocks with complementary shapes and sizes or shaping them with chisels and hammers, you can construct a captivating structure that defies movement. It’s like building a rock fortress, where every piece interlocks flawlessly, creating a mesmerizing visual spectacle.
Wire or Metal Mesh: Fashionable Accessories for Immovable Rocks
If you seek unwavering stability and strength, wire or metal mesh might hold the key. Wrap these resilient materials around your rocks, fashioning a protective barrier that withstands any attempt at shifting. Anchor the wire or mesh into the ground or other solid structures, ensuring your rocks remain steadfast. It’s like adorning your rocks with fashionable accessories while guaranteeing their immovability.
Harnessing the Power of Gravity: An Invisible Force of Stability
Who says gravity only keeps us grounded? It turns out, this invisible force can also be harnessed to keep rocks in place. Select rocks with flat surfaces and angles that naturally interlock, entrust them to gravity’s embrace, and watch as they stand united. This technique is widely employed in dry stone wall construction, where the weight and precise arrangement of the rocks form a resilient structure that defies the test of time.
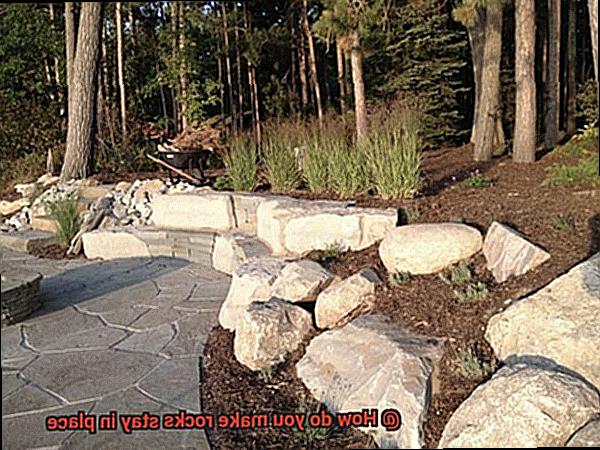
Retaining Walls: The Mighty Guardians of Rock Stability
fklP3qd9R_Y” >
Conclusion
When it comes to keeping rocks in place, there are a few key strategies to consider. First and foremost, proper placement is crucial. Ensuring that the rock is positioned securely and on a stable surface will help prevent any unwanted movement. Additionally, using supportive materials such as gravel or sand can further enhance stability.
Another important factor to consider is the use of adhesives or mortar. These substances can be applied between the rocks to create a strong bond and prevent shifting. However, it’s essential to choose the right type of adhesive or mortar based on the specific needs of your project.
Furthermore, incorporating natural elements like plants or landscaping features can also contribute to rock stability. By strategically placing vegetation around the rocks, you can create a barrier that helps hold them in place while adding aesthetic appeal.
Lastly, regular maintenance is key in ensuring long-term stability. Inspecting for any signs of movement or erosion and addressing them promptly will help maintain the integrity of your rock structures.
In conclusion, making rocks stay in place requires careful consideration of placement, the use of appropriate adhesives or mortar, incorporating natural elements, and regular maintenance.