Do you find yourself in a race against the clock to complete your DIY project or repair? Waiting for Gorilla epoxy to cure can feel like an eternity, especially when time is of the essence. But fear not. We’ve got some tips and tricks up our sleeve to help speed up the curing process.
In this blog post, we’ll explore how to make Gorilla epoxy cure faster so that you can get back to your project without delay. From using heat and increasing air circulation to adding accelerators, we’ll cover all the bases on how to expedite the curing process. Plus, we’ll provide advice on using Gorilla epoxy correctly in different temperatures and humidity levels for optimal strength and durability.
By personalizing these techniques to suit your needs, you’ll be able to avoid common mistakes that can slow down the curing process. So why wait? Let’s dive into this post and discover how you can achieve speedy results with Gorilla epoxy.
What is Gorilla Epoxy?
Contents
- 1 What is Gorilla Epoxy?
- 2 Why Would You Want to Make Gorilla Epoxy Cure Faster?
- 3 Heat Up the Surfaces
- 4 Thoroughly Mix the Epoxy
- 5 Use a Thinner Layer of Gorilla Epoxy
- 6 Place the Object in a Warm, Dry Environment
- 7 Tips for Applying Gorilla Epoxy
- 8 Troubleshooting Common Problems with Gorilla Epoxy
- 9 Conclusion
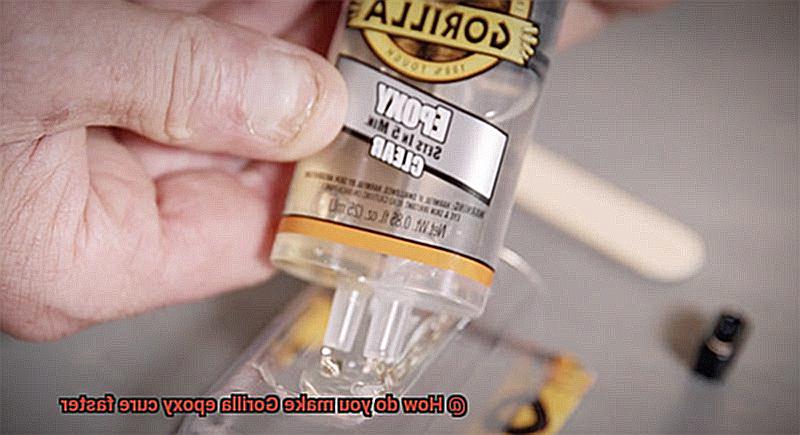
One of the unique features of Gorilla Epoxy is its versatility. This adhesive can bond to different surfaces, making it perfect for various projects, from fixing a broken vase to repairing a leaky pipe. Additionally, it is water-resistant and can withstand exposure to extreme temperatures. So, whether you’re working on an indoor or outdoor project, Gorilla Epoxy has got you covered.
Gorilla Epoxy comes in two parts – the resin and the hardener. When mixed together in equal parts, they create a chemical reaction that causes the epoxy to harden and cure. With a curing time of 24 hours at room temperature, this adhesive requires patience but delivers rock-solid results.
But what if you need your project completed faster? Here are some tips to speed up the curing process:
- Warm up the surfaces before applying the epoxy. Heat increases the rate of chemical reactions, which means that warming up the surfaces will help the epoxy cure more quickly.
- Mix the epoxy thoroughly before applying it. Proper mixing ensures that both parts will react as expected.
- Use a thinner layer of Gorilla Epoxy to help it cure faster. A thicker layer will take longer to cure because there is more material that needs to harden.
- Place the object you are bonding in a warm, dry place. A warm environment will help speed up the chemical reaction and promote faster curing.
Gorilla Epoxy comes in different sizes and packaging options, from small tubes to larger syringes. It also comes in different colors, including clear and white, making it suitable for various applications where appearance matters.
Why Would You Want to Make Gorilla Epoxy Cure Faster?
We all know that Gorilla Epoxy is a reliable adhesive that can bond almost anything. However, waiting for it to cure fully can be time-consuming and stressful. So, why would you want to make Gorilla Epoxy cure faster? Let’s explore some of the reasons.
Firstly, let’s talk about the convenience factor. We all have deadlines to meet, and sometimes we need to get things done as quickly as possible. Whether you’re fixing a broken vase or working on a bigger project that needs to be completed ASAP, speeding up the curing process of Gorilla Epoxy can save you precious time and reduce stress levels.
Secondly, if you’ve ever accidentally damaged or moved a project during the curing process, then you know how frustrating it can be. By making Gorilla Epoxy cure faster, you can reduce the risk of accidentally damaging or moving your project before it has fully hardened. This means you can rest easy knowing that your adhesive is less likely to crack or break.
Now that we’ve discussed why you would want to make Gorilla Epoxy cure faster, let’s move on to how you can actually achieve this. Here are some tips:
- Warm up the surfaces: Before applying Gorilla Epoxy, warm up the surfaces with a heat gun or hairdryer. This will make the surfaces more receptive to the adhesive and help speed up the curing process.
- Mix it thoroughly: Ensure that you mix the two components of Gorilla Epoxy thoroughly and evenly. This will help ensure that the adhesive cures evenly and quickly.
- Use a thinner layer: Applying a thinner layer of Gorilla Epoxy can help speed up the curing process. This is because a thinner layer will cure faster than a thicker one.
- Place it in a warm, dry place: If possible, place your project in a warm, dry place while the Gorilla Epoxy cures. This will help speed up the curing process and ensure a stronger bond.
Heat Up the Surfaces
One simple solution is to heat up the surfaces that require bonding. As an expert in this field, I can guide you through the process of safely heating surfaces to achieve a strong bond.
Firstly, it’s crucial to clean and dry the surfaces before heating them. Any debris or moisture on the surface can affect the bonding strength. Once the surfaces are clean and dry, you can proceed with heating them up.
One option is using a heat gun or hair dryer. It’s important to apply heat evenly and not too close to the surface as too much heat can cause damage or warping. Also, closely monitor the temperature of the surface regularly to ensure that it doesn’t overheat and cause the epoxy to melt or bubble, resulting in a weaker bond.
Alternatively, larger items can be placed in a warm environment, such as a heated room or near a heating vent. This method is ideal for when you don’t have access to a heat gun or hair dryer.
While heating up surfaces helps speed up curing time, excessive heat can weaken bonding strength. Therefore, it’s essential to follow the manufacturer’s instructions carefully regarding curing time and temperature. Additionally, test a small area before applying heat to the entire surface.
In conclusion, heating up surfaces is an effective way to hasten the curing process of Gorilla epoxy. Always ensure that surfaces are clean and dry before heating them, monitor temperature regularly, and follow manufacturer’s instructions diligently. With these tips in mind, you’ll complete your project faster without compromising bonding strength.
Thoroughly Mix the Epoxy
If so, it’s essential to know how to thoroughly mix the epoxy for a strong bond and faster curing time. As an expert in this field, I have compiled some research notes that will guide you through the process of mixing Gorilla epoxy like a pro.
First and foremost, you need to prepare your work surface. Ensure that all the tools and materials you need are within reach, including a mixing container, a stir stick, and a timer. Once everything is set up, measure equal parts of the resin and hardener, following the instructions on the packaging.
Now it’s time to mix the epoxy. Pour both parts into the mixing container and use the stir stick to combine them thoroughly. Remember to scrape the sides and bottom of the container as you mix to ensure that all parts of the epoxy are well-combined.
While mixing Gorilla epoxy, it’s crucial to avoid introducing air bubbles into the mixture. Therefore, it’s best to stir slowly and avoid vigorous mixing. Once you’ve mixed the epoxy for the recommended amount of time, set a timer for the curing time specified on the packaging.
If you’re new to working with Gorilla epoxy or any other type of adhesive, it’s important to note that thorough mixing is key. Failure to do so may result in weak bonds or a longer curing time.
In summary, here are some key takeaways for thoroughly mixing Gorilla epoxy:
- Prepare your work surface and gather all necessary tools and materials
- Measure equal parts of resin and hardener according to the instructions
- Use a stir stick to combine both parts thoroughly while avoiding air bubbles
- Set a timer for curing time specified on packaging
Use a Thinner Layer of Gorilla Epoxy
Well, we have an expert tip for you – use a thinner layer of Gorilla epoxy. Not only is it easy to do, but it will also give you a faster curing time, a stronger bond, and save you money in the long run.
When applying Gorilla epoxy in a thick layer, it generates more heat during the curing process. This excess heat can cause the epoxy to become brittle and weaken its bond. But by using a thinner layer of Gorilla epoxy, you can reduce the amount of heat generated during the curing process, allowing it to cure faster and form a stronger bond. So, remember to apply a layer no thicker than 1/16 inch to ensure an even and mess-free bond.
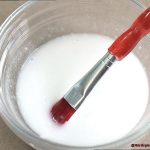
To apply evenly and avoid wasting excess adhesive, use a small brush or toothpick. It’s essential to ensure that the surfaces you are bonding are clean and dry before applying the Gorilla epoxy. By doing so, you’ll also reduce the chances of dripping or sagging.
By using a thinner layer of Gorilla epoxy, you’ll achieve professional results every time without compromising on strength or quality. Whether you’re bonding wood, metal, ceramics, or plastics, this tip will work wonders for your projects.
Place the Object in a Warm, Dry Environment
Heat is the key to making Gorilla epoxy cure faster as it speeds up the chemical reaction that causes the epoxy to harden. To create a warm and dry environment, there are a few tips and tricks you can try.
Firstly, you can use a heat lamp or space heater to create a cozy environment for your epoxy. However, be cautious when using these devices as they can be hazardous if not used properly. Keep them away from flammable materials and follow all safety instructions.
Alternatively, if it’s a sunny day outside, placing the object in a sunny spot or near a window where it can receive natural light and warmth is another option. However, this method may not work as well in colder climates or during winter months when the sun isn’t as strong.
It’s important to monitor the temperature closely when curing your epoxy. While heat speeds up the curing process, too much heat can cause the epoxy to cure too quickly, resulting in cracking or other issues. Therefore, it’s essential to avoid exposing the object to extreme heat and keep an eye on the temperature.
Remember that creating a warm, dry environment is just one part of the curing process. To ensure a strong and durable bond, follow our previous section content above, which includes applying a thin layer of epoxy using a small brush or toothpick.
Tips for Applying Gorilla Epoxy
Gorilla Epoxy is a popular choice for DIY projects, but it’s important to apply it correctly to ensure a strong and durable bond. Here are some tips and tricks to keep in mind:
Prepare the Surface
Before applying Gorilla Epoxy, make sure the surface is clean and dry. Any dirt or debris can prevent the epoxy from adhering properly. If the surface is too smooth, use sandpaper to roughen it up for better adhesion.
Mix Correctly: Gorilla Epoxy comes with two separate components
resin and hardener
Apply Thin Layers
Avoid applying Gorilla Epoxy in too thick of a layer. It’s best to apply multiple thin layers if necessary, as thicker layers will take longer to cure and may not result in a strong bond.
Speed up Curing Process
To speed up the curing process, try warming up the area where the epoxy will be applied using a heat gun or hair dryer on low heat. You can also place the epoxy mixture in a warm water bath before applying it. Be careful not to overheat the area or epoxy.
Use Catalyst or Accelerator
Another option is to add a catalyst or accelerator to the epoxy mixture. These products are designed to speed up the curing process and can be found at most hardware or home improvement stores.
Troubleshooting Common Problems with Gorilla Epoxy
Gorilla Epoxy is a powerful adhesive that can bond almost anything together, but it’s not uncommon to run into some common problems when using it. Luckily, troubleshooting these issues and achieving faster curing times is possible with a few simple tips and tricks.
First and foremost, room temperature is key when working with Gorilla Epoxy. It’s important to store the product at room temperature for at least 12 hours before using it. If the epoxy is too cold, it will take longer to cure. So, ensure that your workspace is also at room temperature before starting your project.
If you’re looking to speed up the curing process even further, consider using a heat source. You can place your project in direct sunlight or use a hairdryer on low heat to warm up the surface. However, be cautious not to overheat the epoxy as it can damage the adhesive and weaken its bond strength.
Another factor that affects curing time is the amount of hardener used. Adding more hardener than recommended will not make the epoxy cure faster and can actually result in weaker bond strength. Stick to the packaging instructions carefully and use only the recommended amount of hardener for optimal results.
Lastly, proper surface preparation is crucial for Gorilla Epoxy to cure effectively and efficiently. Ensure that the surfaces to be bonded are clean and free from any grease, oil, or dirt. Sanding or roughening up smooth surfaces can also improve bonding and help reduce curing time.
Conclusion
To sum up, Gorilla Epoxy is a jack-of-all-trades adhesive that can fix and bond almost anything. Nevertheless, waiting for it to cure can be a real drag, especially when time is of the essence. Luckily, there are several methods you can use to accelerate the curing process of Gorilla Epoxy.
From preheating the surfaces before application and mixing the components thoroughly to using a thinner layer of epoxy or finding a warm and dry spot for your project to sit, these techniques can help expedite curing without compromising bonding strength.
It’s important to keep in mind that proper surface preparation is crucial for Gorilla Epoxy to do its job effectively and efficiently. Moreover, following manufacturer instructions regarding curing time and temperature is essential for optimal results.
By personalizing these tips to fit your specific needs, you’ll be able to avoid common mistakes that can slow down the curing process and achieve speedy outcomes with Gorilla Epoxy.