Are you a craft enthusiast who’s always on the lookout for new and exciting DIY projects? Do you enjoy creating things from scratch? Well, have you ever considered making your own glue sealer?
Using glue sealer is an essential step in many craft projects. It not only protects the surface of the item but also provides a smooth, finished look. And guess what? Making your own glue sealer can be a budget-friendly and eco-friendly alternative to buying it from a store.
But how do you make glue sealer? It’s actually quite simple. The key ingredient is basic white school glue like Elmer’s Glue. All you need are some household items like water and a container to store your homemade glue sealer.
In this post, we’ll break down the steps to make your very own glue sealer. We’ll also discuss the benefits of doing so and provide tips and tricks to help you achieve the perfect consistency. So, gather up your crafting supplies, put on your creative hat, and let’s get started on making your very own glue sealer.
Materials Needed to Make Glue Sealer
Contents
Making your own glue sealer is a simple process that requires just a few basic materials.
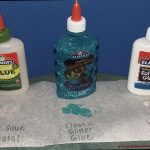
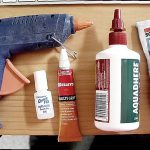
The primary material you’ll need is white glue. This water-based adhesive creates a strong bond and dries clear, making it perfect for sealing projects. You can find white glue at any craft store, or even in your local supermarket.
To create the right consistency for your glue sealer, you’ll also need water. You can use tap water or distilled water depending on your preference. The ratio of glue to water will depend on the thickness of the application and humidity levels.
Mixing these ingredients together is easy and can be done in any container. A plastic cup or bowl will work just fine. Use a stirring utensil like a plastic spoon or Popsicle stick to mix the two ingredients thoroughly. If there are any bubbles in the solution, let it sit for a few minutes so they can rise to the surface and pop.
Once you have made your glue sealer, you can customize it to suit your needs. For instance, if you need a thicker consistency for a certain project, adjust the ratio of water and glue accordingly. If you’re feeling creative, add optional additives such as glitter or food coloring.
When it comes to applying the glue sealer, you’ll need a paintbrush or sponge to achieve the desired results. A foam brush or soft bristle brush will work best. Apply the solution to your project and allow it to dry completely. Keep in mind that drying time may vary depending on how thickly you apply the solution and humidity levels.
Preparing the Solution
Take control of your DIY projects with a homemade solution that’s cost-effective and customizable. But before you get started, let’s dive into the crucial step of preparing the solution.
Gathering the necessary materials is the first step to making glue sealer. You’ll need white glue, water, and a container to mix everything in. The ratio of glue to water will vary depending on your project, but for most needs, a 50/50 mix will suffice.
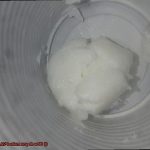
Pour the glue into the container and follow it up with an equal amount of water. Use a stirrer or spoon to mix everything together thoroughly. Be sure to keep an eye out for lumps or clumps in the mixture as they can impact the quality of the final product.
After mixing, it’s time to test the glue sealer. Apply a small amount to a scrap piece of paper or cardboard and let it dry completely. Check for any discoloration or wrinkling and make adjustments to the ratio if needed. Don’t worry if it has a cloudy appearance when wet – it will dry clear.
It’s worth noting that different types of glue may require varying ratios of water. Play around with the ratios until you achieve the desired consistency.
In summary, preparing the solution for glue sealer requires minimal materials and careful mixing. Follow these steps for reliable and cost-effective results every time:
- Gather white glue, water, and a container
- Mix in a 50/50 ratio (adjust as needed)
- Test on scrap paper/cardboard
- Adjust ratio if necessary
Applying the Glue Sealer
You’ve created your very own glue sealer, and now it’s time to apply it to your prized possession. But before you get started, let’s go over the crucial steps to ensure that the process is done correctly and effectively.
First and foremost, make sure that the surface you’re looking to protect is spick and span. Any dirt or debris left on the surface can cause the glue sealer to not adhere properly, which can lead to an ineffective seal. So take the time to ensure that your surface is clean and dry before moving on.
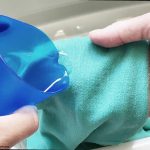
Now it’s time to apply the glue sealer. You can use either a brush or roller for this step, but whichever tool you choose, make sure it is clean and free from any previous paint residue. Apply a thin layer of glue sealer onto the surface, ensuring that all areas are covered evenly. Be mindful not to apply too much glue sealer as this can result in a thick and difficult-to-work-with texture.
Once you have applied your first layer of glue sealer, allow it to dry entirely before applying a second coat. Depending on the surface you’re working with, you may need to apply multiple coats of glue sealer for maximum protection. Always refer to the manufacturer’s instructions for specific guidelines on how many coats to apply.
Once you have applied your final coat of glue sealer, be patient and let it dry completely before using or touching the surface. This may take several hours or even overnight, depending on the type of glue sealer you’re using and the drying conditions.
Drying Time of Glue Sealer
As an expert on the drying time of glue sealer, I’m here to help you understand the factors that affect this crucial aspect of your crafting process.
Firstly, let’s talk about the type of glue used. PVA glue is a popular choice for making sealer due to its ease of use and clear drying properties. However, the amount of water added to the mixture can greatly impact the drying time. For a thicker sealer, add less water, and for a thinner sealer, add more water. As a rule of thumb, PVA glue sealer takes approximately 30 minutes to dry completely.
But what about other types of glue? Mod Podge and decoupage glue are also fantastic options for making sealer, but they have different drying times and require different ratios of water. It’s essential to follow recommended ratios and adjust them according to your desired consistency and drying time.
Temperature and humidity also play a significant role in the drying time of glue sealer. If it’s too cold or too humid, the glue might take longer to dry. Therefore, it’s essential to work in a well-ventilated area with moderate temperatures for optimal results.
It’s vital to remember that the consistency of your glue sealer affects its drying time as well. A thicker sealer will take longer to dry than a thinner one. However, thicker sealers provide better protection against moisture and other external factors.
Benefits of Making Your Own Glue Sealer
Well, it’s time to take control and make your own glue sealer. As an expert in this field, I can tell you that the benefits of making your own glue sealer are endless.
Firstly, it’s a cost-effective solution. The ingredients required to make glue sealer are readily available and come at a fraction of the cost of commercial products. This makes it ideal for those on a tight budget or looking to save money on crafting supplies.
Secondly, making your own glue sealer allows you to have complete control over the quality of the product. You can choose the type of glue and other ingredients to use, ensuring that you get the desired consistency and texture. This level of control is particularly useful for those who have specific requirements for their projects.
Thirdly, making your own glue sealer is an environmentally friendly option. Most commercial glue sealers contain harmful chemicals that can be detrimental to the environment and human health. By making your own glue sealer, you can avoid exposing yourself and the environment to these harmful substances.
Furthermore, making your own glue sealer can be a fun and rewarding activity. It provides an opportunity for creativity and experimentation, allowing you to come up with unique formulas that suit your needs. The sense of satisfaction that comes from making something yourself cannot be overstated.
To make your own glue sealer, all you need are some basic ingredients like water, white glue, and varnish. You can experiment with different ratios until you find the perfect mix for your project. With a little bit of practice, you’ll be able to create your perfect glue sealer in no time.
Adjusting the Consistency of Glue Sealer
Adjusting the consistency of your glue sealer is easier than you think. Achieving the perfect consistency for your project requires just a few simple steps, but it can make all the difference in achieving a flawless finish.
The first thing to keep in mind is that the type of glue sealer you are using determines how you adjust its consistency. For PVA glue sealers, adding water is key. Start by adding a small amount of water and mix it thoroughly. Adding too much water can cause the glue sealer to lose its adhesive properties, so be careful not to overdo it.
For oil-based glue sealers, a thinner like mineral spirits or turpentine is necessary to adjust their consistency. Again, start with a small amount and mix well until you achieve the desired thickness.
It’s important to note that adjusting the consistency of your glue sealer can have an impact on its drying time and bonding strength. If you thin out your glue sealer too much, it may dry faster but also weaken its bonding strength. Conversely, making it thicker may slow down the drying time. Always test your mixture on a small area before applying it to your entire project to avoid any mishaps.
In summary, adjusting the consistency of glue sealer is crucial in achieving a perfect finish for your project. Here are some key takeaways to keep in mind:
- The type of glue sealer you are using determines how you adjust its consistency.
- Adding water works for PVA glue sealers, while oil-based glue sealers call for a thinner such as mineral spirits or turpentine.
- Be cautious when adding water or a thinner and don’t overdo it.
- Test your mixture before applying it to your entire project to ensure that it dries well and doesn’t weaken its bonding strength.
Common Uses for Glue Sealer
As an expert in the field, I can attest that glue sealer is a game-changer in any crafter’s toolbox. This water-based adhesive dries clear and creates a strong, flexible bond, making it ideal for various projects.
Crafters, get ready to elevate your crafting game. Glue sealer is a go-to for crafting projects, particularly those involving paper or other porous materials. This versatile adhesive can seal edges, create a glossy finish, or add texture to any DIY project.
Woodworkers can also benefit from using glue sealer. It seals wood surfaces before applying paint or stain, preventing blotches or uneven finishes. It can also fill gaps or cracks in wood, ensuring a smooth surface for any woodworking project.
Home repairs are made more manageable with glue sealer. Small cracks or holes in walls or other surfaces can be quickly filled and sealed with this adhesive. Plus, it can be used to seal around windows and doors to prevent drafts and save you money on energy bills.
Jewelry makers understand the importance of waterproof seals on beads or other embellishments, and glue sealer delivers just that – a sturdy, waterproof bond.
Bookbinders rely on glue sealer to reinforce spines and create durable bindings. Fabric enthusiasts use it to attach fabric to other surfaces or create a waterproof seal on fabric.
Tips for Working with Glue Sealer
Working with glue sealer can be a messy and frustrating experience, but with the right tips and techniques, you can achieve professional-quality results every time. Here are five sub-sections that will help you work with glue sealer like a pro.
Choose the Right Type of Glue Sealer
The first step in achieving great results with glue sealer is selecting the right type for your project. There are many different types available, including spray-on, brush-on, and dip-style sealers, each with their own unique properties and applications. Make sure to select the type of glue sealer that is best suited for your specific project to avoid any potential problems.
Prepare Your Materials Properly
Before applying the glue sealer, it’s important to prepare your materials properly. This may involve sanding or cleaning the surface to ensure that it is smooth and free of any debris or contaminants that could interfere with the bonding process. Taking the time to properly prepare your materials before applying the glue sealer will give you the best results.
Follow the Manufacturer’s Instructions
To get the most out of your glue sealer, it’s important to follow the manufacturer’s instructions carefully. Pay close attention to factors such as temperature and humidity levels, and apply the sealer in thin, even coats. If you apply too much sealer, use a clean cloth to blot away any excess before it dries. Applying too much can lead to an uneven or messy finished product.
Use Precise Application Tools
If you’re working on an intricate or delicate project, using a small brush or applicator tool can help you apply the glue sealer precisely where it’s needed. This technique can help you avoid over-applying the sealer or getting it on areas where it’s not needed, which could result in a suboptimal finished product.
Allow Plenty of Drying Time
Once your project is complete and the glue sealer has been applied, it’s important to allow plenty of time for it to dry completely.
Depending on the type of sealer you’re using and the humidity and temperature of your workspace, this may take anywhere from a few hours to overnight. Be patient and allow the glue sealer plenty of time to dry before handling or using the item.
_o8k31i5nNw” >
Also Read: Can you use Elmer’s glue as a sealant?
Conclusion
In conclusion, creating your own glue sealer is not only a cost-effective option but also an eco-friendly one. With just a few basic materials like white glue and water, you can concoct a solution that not only protects your craft project’s surface but also gives it a polished finish.
Achieving the perfect consistency for your glue sealer is crucial in getting the desired results. You can easily adjust it by adding water or thinner depending on the type of glue sealer you’re using.
Glue sealer has various uses such as sealing edges, creating glossy finishes, filling gaps or cracks in wood, reinforcing spines in bookbinding, and waterproofing seals on jewelry or fabric.
However, working with glue sealer can be tricky if you don’t follow some tips and techniques.
Choosing the right type of glue sealer for your project, preparing your materials correctly before applying the sealer, following manufacturer’s instructions carefully, using precise application tools for intricate or delicate projects, and allowing ample drying time before handling or using the item are all crucial steps to ensure success.
By making your own glue sealer at home while keeping these simple steps and tips in mind, you can take charge of your DIY projects while enjoying customized results every time.