Picture this: you’re smack dab in the middle of a project, time is ticking away, and all you need is for that darn glue to dry faster. Well, fear not my friends. Our expert team has gone deep into the science of glue drying and put together a list of tried and true methods to help you speed up that process like nobody’s business. From nifty tricks to heat hacks, we’ve got your back.
So let’s jump right in and explore these awesome techniques while channeling our inner MacGyver.
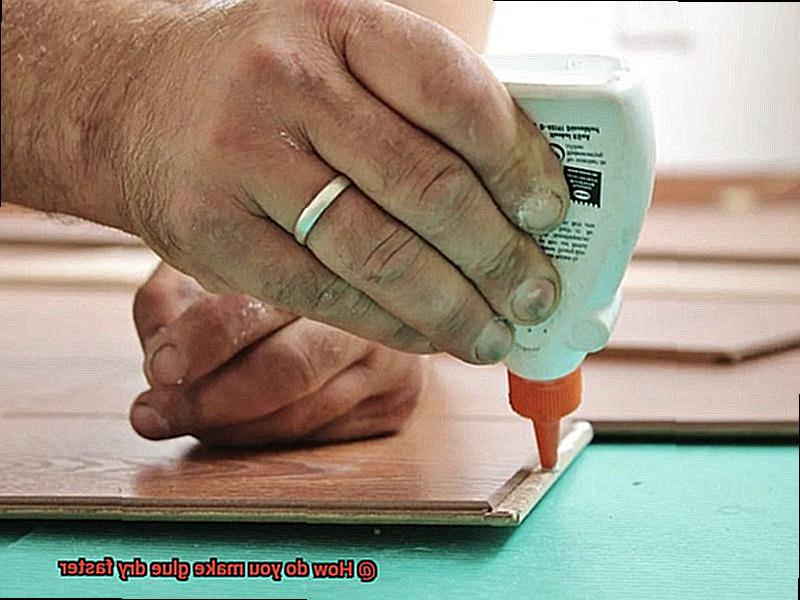
How do you make glue dry faster?
Contents
Method 1: Air Circulation
Alright, here’s an easy-peasy way to get that glue drying at warp speed – give it some air. Just plop a fan near your project and watch the magic happen. The fan will whisk away all that pesky moisture in the glue, making it evaporate quicker than you can say “sticky situation.” If you’re working on something small like paper or lightweight crafts, grab a handheld fan. For larger projects, go for a stand or ceiling fan to spread the air love evenly. This trick works wonders with different types of glues – white glue, wood glue, even super glue.
Method 2: Heat Application
Now we’re talking about turning up the heat – literally. But hold your horses before you go heating up any old glue. Some adhesives don’t play well with high temperatures – they might lose their stickiness or release toxic fumes (yikes.). Hot glue guns are the cool kids when it comes to heat though. Whip out a heat gun or hairdryer and point it at your glued area – boom. You’ll see that bond form faster than you can say “hot stuff.” Just remember safety first – wear protective gear and be cautious when using this method.
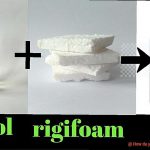
Method 3: Thin Layers
When it comes to glue, less is more, my friends. Applying thin layers not only gives you a stronger bond but also speeds up the drying process. See, when you slap on a thick layer of glue, it takes forever to dry because there’s less surface area exposed to the air. So be mindful and use just enough glue, especially if you’re working on woodworking or model-making where multiple joints need gluing at once.
Increasing the Temperature
In this article, we will explore the fascinating world of increasing the temperature to speed up glue drying. We’ll provide easy-to-follow tips and techniques that will have your glue dried in no time. So, let’s dive in.
Use Heat to Your Advantage:
Increasing the temperature is a highly effective method to accelerate glue drying. When exposed to higher temperatures, the molecules in the glue become more active, leading to faster evaporation of the solvent and quicker drying. You can achieve this by using a heat gun or a hairdryer. But remember, caution is key to prevent overheating or damaging the glue and materials being bonded.
Get a Little Help from Your Environment:
Placing the glued object in a warm environment can also expedite drying. Utilize a heating pad, position it near a radiator, or even employ an oven on a low temperature setting. However, be cautious not to make it too hot, as excessive heat can cause bubbling or brittleness in the glue.
Let There Be Light (and Heat):
A heat lamp or a desk lamp with an incandescent bulb can raise the temperature around the glued area, accelerating drying time. The emitted heat from these sources can be beneficial in speeding up the process.
Consider Humidity Levels:
Don’t overlook the influence of humidity on drying time. Higher humidity can impede evaporation and slow down the process. To make your glue dry faster, work in a well-ventilated area with low humidity whenever possible.
Thin is In:
Applying thinner layers of glue allows for faster moisture evaporation and subsequently expedites drying. Thick layers take longer to dry as there is more moisture that needs to evaporate.
Follow Manufacturer’s Guidelines:
Different glues may have specific instructions or additives that aid in faster drying. Read and follow the manufacturer’s guidelines for optimal results. Some glues may suggest adding accelerants or catalysts to speed up the process.
Using a Fan or Providing Good Ventilation
We have a solution that will not only speed up the drying process but also create a healthier working environment – using a fan or providing good ventilation. Let’s explore the benefits of incorporating airflow when it comes to drying glue.
First and foremost, exposing glue to moving air facilitates the evaporation of moisture content. This means faster drying times, allowing you to swiftly progress with your project. And how do we generate this enchanting breeze? By employing a fan.
Positioning a fan near the glued object and directing the airflow towards it creates a delightful circulation in the room. This circulation aids in the evaporation process, ensuring even and efficient drying of the glue. However, caution is necessary. Avoid blowing the fan directly onto the glued area to prevent uneven drying or unsightly air bubbles. We don’t want those.
But why stop there? Elevate your drying game by opening windows or doors to welcome fresh air into the room. This not only accelerates drying but also eliminates excess moisture from the surroundings. Good ventilation is paramount, guaranteeing faster and more effective glue drying.
Wait, there’s more. Adequate airflow can also prevent fume buildup from certain types of glues. By providing proper ventilation, you create a healthier working environment when dealing with adhesives.
It’s crucial to note that using a fan or providing good ventilation may not be suitable for all types of glues. Specific glues may require special drying conditions, so always consult the manufacturer’s instructions for optimal results.
Reducing Humidity
The secret lies in reducing humidity. In this comprehensive guide, we’ll explore the world of glue drying and reveal the techniques that will speed up the process. So grab your adhesive and get ready to say goodbye to long drying times.
The Role of Humidity:
Humidity refers to the moisture content in the air. High humidity levels create a barrier around glue, slowing down evaporation and prolonging drying time. By reducing humidity, you can promote faster drying and achieve quicker results.
Embrace Ventilation:
Proper ventilation is key to reducing humidity and expediting the drying process. Open windows wide or turn on a fan to circulate air and whisk away excess moisture. This simple step can make a world of difference in your glue drying experience.
Harness the Power of Dehumidifiers:
Working in an extremely humid environment? Consider using a dehumidifier. These nifty devices effectively lower humidity levels, creating an optimal drying atmosphere for your glue. Say goodbye to long waits.
Control Temperature:
Did you know temperature affects humidity levels? Warmer air can hold more moisture than cold air, so adjust the thermostat to a slightly higher temperature. This simple tweak helps reduce humidity and speeds up glue drying.
Choose the Right Glue:
Not all glues are created equal when it comes to drying time. Opt for quick-drying or instant adhesives designed to bond rapidly, even in humid conditions. Selecting a glue known for its fast-drying properties will make your life easier.
Prepare Clean Surfaces:
Moisture and contaminants on surfaces hinder drying and weaken bonds. Ensure surfaces are clean and dry before applying adhesive for optimal conditions that promote faster drying.
Patience Pays Off:
Reducing humidity expedites drying, but it’s crucial to follow manufacturer instructions for drying time. Rushing the process can lead to adhesive failure or weakened bonds. Allow sufficient time for glue to dry properly.
Applying Thinner Layers of Glue
We’ve all been there – eagerly working on a project, only to be held back by the seemingly endless drying time of our adhesive. But fear not. In this section, we’re about to unveil a hidden secret that can revolutionize your glue game: applying thinner layers of glue.
Now, you may ask yourself, how does this sorcery work? Let me break it down for you. When you slather on a thick layer of glue, it takes ages for the moisture to evaporate, resulting in an eternity of waiting. But when you opt for a thinner layer, the surface area of the glue exposed to the air skyrockets. And what does that mean? Faster evaporation and quicker drying.
So, how do you achieve this thin layer nirvana? Here’s the lowdown. Equip yourself with a brush or applicator boasting fine bristles. This nifty tool grants you superior control and precision when applying the glue, enabling you to spread it thinly and uniformly. Remember, using excessive amounts of glue will only condemn you to prolonged drying times. So tread lightly and use just enough to get the job done.
Another tip on your journey to glue enlightenment is spreading the adhesive evenly and smoothly. Avoid haphazard application, as it may lead to thicker areas that take eons to dry. Grab a spatula or a straight edge and ensure that you’re spreading the glue in a thin and even layer – no clumps or ridges allowed. Embrace the fluidity and grace of a thin layer.
Now, here’s a golden rule: let each layer of glue dry completely before adding another one. This ensures proper adhesion and prevents pesky bubbles or wrinkles from forming. If you rush this step and apply multiple layers while the previous ones are still wet, you’ll end up with an overall thicker layer and an extended drying time. Patience, my friend, is the key to success.
If you’re in a desperate hurry, there’s another ace up your sleeve: glue accelerators or activators. These magical concoctions are specially crafted to speed up the curing process of certain glues. Just spritz or brush them onto the glue, and presto. Reduced drying time. But remember, heed the instructions and conduct a small-scale test before unleashing it on your masterpiece.
And last but not least, always consider the type of glue you’re wielding. Different glues possess distinct drying times and properties. Some dry faster naturally, while others demand more time to set. Thus, consult the sacred scrolls provided by the manufacturer for specific guidelines on drying time and application techniques. Knowledge is power in the realm of glue.
Following Manufacturer’s Instructions for Additives
When it comes to making glue dry faster, following the manufacturer’s instructions for additives is essential. These instructions are not just arbitrary suggestions; they are carefully crafted guidelines that can make a significant difference in the performance of your glue.
Manufacturers invest a great deal of time and resources into researching and testing their products. They have in-depth knowledge of their glue formulas and have developed specific additives to speed up the drying process. By using these additives according to their instructions, you are maximizing their effectiveness and ensuring optimal results.
Ignoring the manufacturer’s instructions and going rogue can lead to problems. Using the wrong additive or not following the recommended dosage can impact the glue’s performance. It may take longer to dry or even fail altogether. And let’s be honest, nobody wants a project that falls apart.
On the flip side, following the instructions can bring some amazing benefits. Additives like accelerators can be sprayed or brushed onto the glue to significantly speed up drying time. This means less waiting around and more time for your creativity to flow. Drying agents, such as talc or cornstarch, absorb moisture and promote faster drying, acting as magical shortcuts to getting your glue nice and solid in record time.
Safety is also a crucial factor to consider when using additives. Some may have specific precautions that need to be followed. By reading and adhering to the manufacturer’s guidelines, you can ensure that you are using these additives safely and responsibly.
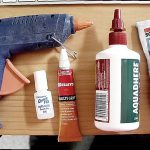
Choosing the Right Type of Glue
When it comes to glue, selecting the right type is crucial for a successful project. Not only does it ensure a strong bond, but it also affects the drying time. No one wants to waste precious time waiting for glue to dry, so let’s explore the factors to consider when choosing the right type of glue and discover some tips for making it dry faster.
- Base Material: Different glues have different drying times. Water-based glues are known to dry faster than solvent-based ones because water evaporates more quickly. Consider the base material of the glue and choose accordingly.
- Adhesive Properties: Glues are designed with specific purposes in mind. Some are formulated for quick bonding and fast drying, while others are meant for stronger and longer-lasting bonds that may take longer to dry. Read the label or product description to understand the drying time.
- Temperature and Humidity: The environment in which you work can significantly influence drying time. Higher temperatures and lower humidity levels promote faster drying. Ensure good ventilation or use a fan to increase air circulation.
- Follow Instructions: Rushing the drying process can compromise the bond’s quality. To achieve optimal results, follow the manufacturer’s instructions and recommended drying times.
- Accelerators: If you’re in a hurry, consider using accelerator products designed to speed up certain types of glue drying times. These products can be applied before or after applying the glue and significantly reduce drying time.
- Hot Glue Gun: For those who frequently work with glue and need fast results, investing in a hot glue gun is a game-changer. The melted adhesive cools and solidifies quickly upon contact with surfaces, allowing for almost instant bonding.
Tips for Quicker Drying Times
Waiting for glue to dry can be a frustrating experience, especially when you’re eager to complete a project. Fortunately, there are several techniques and products that can help speed up the drying time of glue. In this guide, we’ll explore five key tips that will have your glue drying faster than ever. From applying thin layers to utilizing drying accelerators, these strategies will ensure that you never have to wait around for glue to dry again.
Apply Thin Layers:
When it comes to glue, less is more. Applying a thin layer of glue is essential for quicker drying times. Thick layers of glue take longer to dry because they contain more moisture that needs to evaporate. By spreading the glue thinly and evenly across the surface, you allow for faster evaporation and expedite the drying process. This technique is particularly effective when working with wood glue or adhesive sprays.
Increase Air Circulation:
Improving air circulation in your workspace can significantly reduce drying time. Ensure proper ventilation by opening windows, using fans, or placing your glued item near a ventilated area. Airflow helps carry away the moisture from the glue, allowing it to dry more quickly. Not only does this technique expedite the drying process, but it also adds a refreshing breeze to your work area.
Utilize Heat:
Heat is an excellent ally in speeding up the drying time of glue. You can use a hairdryer on low heat to gently blow warm air onto the glued area. It’s crucial to maintain a reasonable distance to avoid damaging or warping the materials being glued together. Alternatively, you can use a heat lamp or heat gun with caution as they generate higher temperatures. The application of heat accelerates the evaporation of solvents in the glue, resulting in faster drying times.
Choose Fast-Drying Glue:
Not all glues are created equal when it comes to drying times. Look for glues labeled as “fast-drying” or “quick-set.” These types of glues contain solvents that evaporate quickly, allowing the adhesive to set and dry in less time. Whether you’re working on a craft project or doing home repairs, investing in fast-drying glue will save you valuable time and frustration.
Optimize the Environment:
The temperature and humidity of your workspace can significantly impact glue drying times. Aim for a moderate temperature of around 70°F (21°C) and a humidity level of approximately 50%. Extreme conditions, whether too hot or too humid, can slow down the drying process. Creating an ideal environment for your glue to dry quickly will ensure efficient project completion.
3oQMFWFbOw8″ >
Conclusion
In conclusion, there are multiple effective methods to expedite the drying process of glue. One way is to crank up the heat with tools like a heat gun or hairdryer, boosting the evaporation of solvents in the glue and accelerating drying. However, it’s crucial to exercise caution and adhere to safety guidelines when employing heat.
Another technique involves harnessing the power of air circulation by strategically placing a fan near the glued object. This helps whisk away moisture from the glue, promoting rapid evaporation and drying. Additionally, opening windows or utilizing a dehumidifier can diminish humidity levels that can hinder drying time.
Applying thinner layers of glue also plays a vital role in expediting drying. Thick layers take longer to dry because they contain more moisture that needs to evaporate. By spreading the adhesive thinly and evenly, you increase the surface area exposed to air and turbocharge the drying process.
Moreover, following manufacturer’s instructions for additives can significantly speed up drying time. These manufacturers often provide specific additives or accelerators explicitly designed to enhance drying performance. To achieve optimal results, these additives should be used according to instructions.
Lastly, selecting the right type of glue is pivotal for swift drying times. Certain glues are specially formulated for quick bonding and fast drying, while others may necessitate more time to set properly. When choosing your glue, consider factors such as base material, adhesive properties, temperature, and humidity to ensure it aligns with your specific needs.
By implementing these techniques and tips into your glue-drying arsenal, you’ll be able to complete your projects promptly without wasting precious hours waiting for your glue to dry.