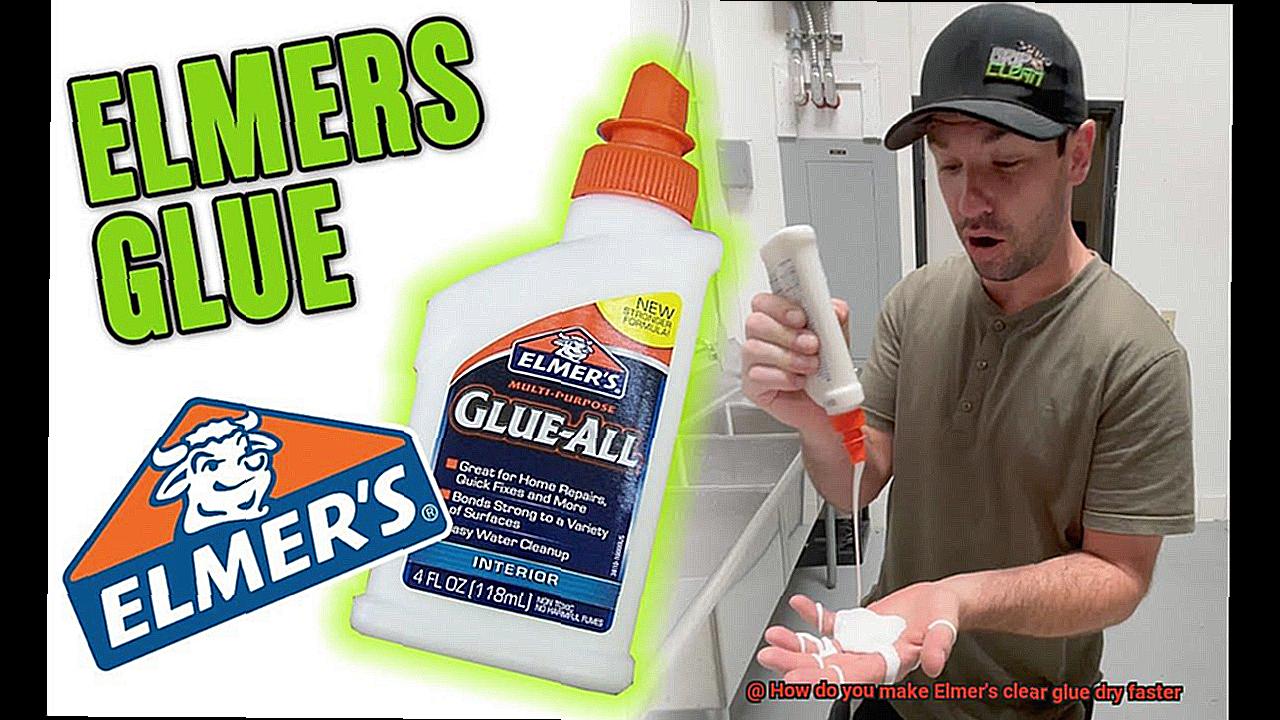
Are you a passionate artist or DIY enthusiast? We’ve all been there, eagerly waiting for glue to dry while our creative ideas bubble inside us. But fear not, fellow crafters. Today, we’re about to spill the beans on some time-saving tricks to make Elmer’s clear glue dry faster, so you can dive straight into your next masterpiece.
Whether you’re working on an intricate scrapbooking project or building a jaw-dropping model, these nifty techniques will revolutionize your crafting experience. Get ready to explore a world of fast-drying glue where creativity knows no bounds.
In our quest to speed up the drying process, we’ll uncover simple and effective methods that have proven successful in reducing glue drying time. From controlling environmental factors to utilizing everyday household items, we’re about to unveil some captivating secrets that will make your glue dry in a flash.
So if you’re tired of twiddling your thumbs while waiting for glue to set and itching to embark on your next creative endeavor, keep reading. With these tried-and-true techniques for speeding up Elmer’s clear glue drying time, you’ll be able to unleash your inner artist without the frustration of endless waiting. Let’s dive in and discover how to make your glue dry faster.
Factors Affecting Elmer’s Glue Drying Time
Contents
Elmer’s glue is a beloved adhesive used in various crafts and DIY projects. To ensure the best outcomes, it’s essential to understand the factors that affect Elmer’s glue drying time.
In this article, we will explore how temperature, humidity, thickness of glue application, air circulation, and surface type impact the drying process. Let’s dive in.
Temperature:
The environment’s temperature plays a vital role in Elmer’s glue drying time. Higher temperatures accelerate drying, while lower temperatures slow it down. Heat increases evaporation, allowing water in the glue to evaporate more quickly.
To speed up drying, work in a warmer room or gently warm the glued area with a hairdryer on low heat.
Humidity:
Humidity significantly affects Elmer’s glue drying time. High humidity slows down evaporation and prolongs drying. Work in a well-ventilated area with low humidity or use a dehumidifier to reduce moisture in the air and expedite drying.
Thickness of Glue Application:
The thickness of the glue layer impacts drying time. Thin layers dry faster because water trapped within the glue needs less time to evaporate. Spread Elmer’s glue thinly and evenly for faster results.
For larger or heavier objects, consider using a stronger adhesive designed for such purposes.
Air Circulation:
Proper air circulation is crucial for faster drying. Good airflow carries away evaporated water molecules, expediting drying. Work in a well-ventilated area with fans or open windows to facilitate air circulation. Be cautious, as excessive airflow can cause the glue to dry too quickly and result in a weaker bond.
Surface Type:
The surface onto which Elmer’s glue is applied affects drying time. Porous surfaces like wood or fabric absorb moisture from the glue, slowing drying. Non-porous surfaces like glass or metal allow for faster drying. To speed up drying on porous materials, apply a thin layer and allow it to partially dry before adding a second layer.
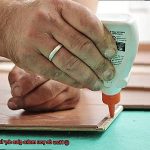
Applying a Thin Layer of Glue
Tired of waiting for your glue to dry? Want that perfect bond in no time? Look no further. We have the secret recipe for applying a thin layer of glue that will make your crafting dreams come true.
In this blog post, we’ll guide you through the steps to ensure a quick and even drying process. So, grab your glue, put on your crafting hat, and let’s get started.
Step 1: Choose the Right Tool
To achieve an even application, use the right tool. A brush or spreader will help you apply a thin layer of glue, saving time and ensuring faster drying.
Step 2: Ventilate for Speed
Good ventilation is key. Work in a well-ventilated area to allow for proper air circulation. This helps moisture in the glue evaporate faster, resulting in quicker drying times.
Step 3: Less is More
Avoid applying too much glue. Remember, a thin layer is all you need. Excess glue can prolong drying, so be conservative with your application.
Step 4: Clean and Dry Surfaces
Before applying glue, ensure surfaces are clean and dry. Dirt or moisture can interfere with drying. Lightly sand non-porous materials for better adhesion and faster drying.
Step 5: Patience is Key
Once you’ve applied the glue, resist the temptation to touch or move the glued object. Movement disrupts drying and leads to uneven drying or detachment. Exercise patience and let it dry undisturbed.
Step 6: Warm It Up (But Not Too Much)
In a hurry? A warm environment speeds up drying. But beware excessive heat that can cause bubbling or warping of materials. Use warmth wisely.
Increasing Air Circulation
Indoor air quality is a critical aspect of maintaining a healthy and comfortable living environment. Poor air circulation can lead to the accumulation of pollutants, allergens, and odors, which can negatively impact our health and well-being.
In this article, we will explore the benefits of increasing air circulation and how it can significantly improve indoor air quality.
Removal of Stagnant Air:
Stagnant air tends to trap pollutants and allergens, making the indoor environment feel stuffy and unpleasant. By increasing air circulation, we can effectively remove stagnant air and replace it with fresh, clean air from outside or other well-ventilated areas. This constant exchange of air helps reduce the concentration of airborne contaminants, creating a healthier living space.
Dilution of Indoor Pollutants:
Indoor pollutants such as volatile organic compounds (VOCs), formaldehyde, and household chemicals can have detrimental effects on our health. Increasing air circulation allows these pollutants to disperse and dilute in the larger volume of fresh air, minimizing their concentration levels.
This dilution effect helps reduce the potential health risks associated with prolonged exposure to indoor pollutants.
Prevention of Mold and Mildew Growth:
Mold and mildew thrive in damp environments with poor air circulation. By increasing airflow, we can effectively reduce moisture levels, making it more challenging for mold and mildew to grow. Proper ventilation helps keep surfaces dry, preventing the growth of these harmful microorganisms and reducing the risk of respiratory issues and allergies.
Odor Elimination:
Unpleasant odors can make our living spaces uncomfortable and unwelcoming. Increasing air circulation helps remove stagnant air where odors tend to linger. Fresh air circulation aids in carrying away odorous particles and replacing them with clean air, resulting in a fresher-smelling indoor environment.
Improved Thermal Comfort:
Proper air circulation helps maintain a comfortable temperature indoors. By increasing airflow, we can distribute cool or warm air more evenly throughout the space, reducing temperature variations and ensuring consistent thermal comfort. This not only enhances our comfort but also reduces the need for excessive heating or cooling, leading to energy savings.
Using Heat to Dry the Glue Quickly
When it comes to fixing broken items or unleashing your inner DIY guru, glue is a lifesaver. However, waiting for glue to dry can be a real buzzkill. But fear not. The answer lies in the magic of heat. In this blog post, we will explore the art of using heat to quickly dry Elmer’s clear glue, so you can get back to your creative endeavors in no time.
The Science behind Heat and Glue Drying:
- Heat is the secret ingredient that speeds up glue drying by increasing molecular movement and moisture evaporation.
- It’s like giving glue a turbo boost, making it dry faster than a speeding bullet.
Hairdryer Heroics:
- Set your hairdryer to low or medium heat for a gentle touch.
- Hold it a few inches away from the glued area.
- Gently move the dryer back and forth across the glue, ensuring even heating.
- Your glue should be dry within minutes, like a magician’s trick.
Heat Gun Heroism:
- Caution is key here. Heat guns produce intense heat.
- Keep a safe distance from the glue and constantly move the gun around to prevent damage.
- This method is fantastic for quick-drying larger areas or tackling tough gluing tasks.
- It’s like having a superhero with laser-like precision on your side.
Oven Overachiever:
- Preheat your oven to a low temperature (around 150°F/65°C) for a gentle baking session.
- Pop your glued item inside for 10-15 minutes, like a cozy retreat for your project.
- Keep an eye on it to avoid any overheating mishaps. Safety first.
- Remember, never leave the oven unattended – it’s not a place for surprises.
Heat with Care:
- Excessive heat can weaken glue bonds, so find the sweet spot.
- Always follow manufacturer’s instructions and exercise caution, like a tightrope walker.
- Test a small area first, especially if you’re working with sensitive glues or materials, to avoid any unexpected consequences.
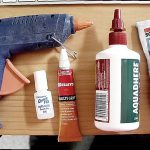
Other Adhesives for Faster Drying Times
I’m here to spill the beans on some other adhesives that offer faster drying times, allowing you to craft at lightning speed.
First up on our list is the superhero of adhesives – cyanoacrylate adhesive, better known as super glue. This stuff is a lifesaver when you need a quick fix. In just seconds to minutes, it forms a bond that is strong and secure. It’s perfect for those urgent projects where time is of the essence. Just be cautious not to glue your fingers together – trust me, it’s not a fun experience.
Next on our lineup is the mighty epoxy adhesive. This powerful adhesive consists of two components that you mix together before application. Once combined, it starts to cure and harden within a few hours. While it may not be as fast as super glue, it still offers a quicker drying time compared to traditional glues. So if you’re looking for a strong and durable bond that sets relatively quickly, epoxy is your go-to choice.
And let’s not forget about the ever-reliable hot glue. This versatile adhesive is a staple in the crafting world. When applied, hot glue quickly cools and solidifies within seconds, allowing for immediate bonding. It’s like magic. However, exercise caution when using hot glue on delicate materials, as its high heat can sometimes cause damage.
While these alternative adhesives offer faster drying times, it’s important to note that they may not provide the same versatility and flexibility as good old Elmer’s clear glue. Elmer’s is renowned for its ability to bond various materials and remain flexible even after drying. So if flexibility is crucial for your project, Elmer’s might still be your go-to choice.
Remember to always follow the manufacturer’s instructions when using these adhesives and take necessary safety precautions. Some adhesives may emit fumes or require proper ventilation during application and drying.
Experimentation and Testing
Experimentation and testing are crucial aspects of finding ways to make Elmer’s clear glue dry faster. By exploring various methods and techniques, crafters can discover practical and hands-on approaches to accelerate the drying time of this popular adhesive.
One effective method to speed up the drying process is by increasing the temperature in the surrounding environment. Heat helps to evaporate the water content in the glue at a faster rate, leading to quicker drying. Crafters can experiment by placing the glued object in a warm room or using a hairdryer on a low heat setting to gently blow air onto the glued area. Observing how different temperature levels affect drying time can provide valuable insights.
Another approach is to utilize air power. Moving air helps to remove moisture from the glue, facilitating faster drying. Crafters can experiment with placing a fan near the glued object or ensuring there is sufficient airflow in the room where the glue is drying. By observing the difference in drying time with and without air circulation, crafters can determine the impact of airflow on the process.
If high humidity is slowing down drying time, crafters can consider using a dehumidifier or silica gel packets. These tools help to reduce moisture in the environment, allowing the glue to dry more quickly. Placing a dehumidifier in the room or strategically positioning silica gel packets near the glued area can optimize results. Experimentation with different humidity levels can reveal the effectiveness of these methods.
In addition to environmental factors, technique plays a crucial role in drying time. Applying thinner layers of Elmer’s clear glue can significantly speed up the process. Thicker layers take longer to dry as it takes more time for the water content within the glue to evaporate completely. By applying thin layers, each layer will dry faster, resulting in quicker overall drying time. Crafters can experiment with different layer thicknesses and record their observations.
The water-to-glue ratio also affects drying time. Adding less water than recommended can result in a thicker consistency, which may take longer to dry. On the other hand, adding more water can make the glue thinner and reduce its drying time. Crafters can experiment with adjusting the water-to-glue ratio and observe how it affects drying time for each mixture. Recording the results will help crafters find the ideal ratio for their specific needs.
Furthermore, the material and texture of the surface being glued can impact drying time. Experimentation with different surfaces can reveal how certain materials or textures influence the drying time of Elmer’s clear glue. For example, a non-porous surface like glass may allow for faster drying compared to a porous material like fabric. Crafters can test different surfaces and document their findings to determine the best options for their projects.
Patience is Key
Today, we embark on a journey into the enchanting world of Elmer’s clear glue and unravel the secrets to faster drying. In this article, we will explore why patience is the key ingredient for achieving flawless results with this versatile adhesive. Get ready to dive deep into the realm of creativity and discover how patience can unlock the true potential of Elmer’s clear glue.
Understanding Elmer’s Clear Glue:
Elmer’s clear glue possesses a unique quality – it dries at its own pace to ensure a robust and long-lasting bond. The key here is to trust in the process and allow the glue to work its magic naturally. Rushing the drying process can compromise its effectiveness and result in weaker adhesion. So, take a deep breath and let patience guide you towards success.
Debunking Quick-Fix Myths:
In our quest for instant gratification, we often come across quick-fix myths that promise faster drying times but fail to deliver. Let’s debunk some of these myths:
- Excessive heat: Applying excessive heat, such as using hairdryers or heat guns, may seem like a shortcut, but it can cause the glue to bubble, crack, or even change color. Patience is key here – let the glue air dry for optimal results.
- Thin layers: It is commonly believed that applying thin layers of glue speeds up drying time. While there is some truth to this, excessively thin layers may compromise the strength of the bond. Find the right balance between thickness and drying time for the best results.
Optimal Environmental Factors:
To assist Elmer’s clear glue in its drying process, consider these environmental factors:
- Temperature: Higher temperatures accelerate drying, but be cautious not to exceed recommended limits. Aim for a moderate room temperature (around 70°F) to strike the perfect balance.
- Airflow: Gentle air circulation aids in drying, but avoid direct airflow as it may disturb your project or cause uneven drying. A subtle breeze can be your ally, but patience is the true guiding force.
- Humidity: Low humidity levels facilitate faster drying. If possible, choose a well-ventilated area or use a dehumidifier to create an optimal environment for your glue to work its magic.
Water-to-Glue Ratio:
Maintaining the proper water-to-glue ratio is crucial for faster drying. Follow the instructions on the glue bottle to ensure the correct consistency. Remember, patience is key when it comes to achieving the right balance of ingredients.
Thickness Matters:
The thickness of the applied glue directly influences drying time. Thinner applications dry faster, while thicker layers require additional time to cure properly. Find the sweet spot that suits your project and exercise patience as you witness the transformation unfold.
Conclusion
In conclusion, if you’re tired of twiddling your thumbs while waiting for Elmer’s clear glue to dry and itching to dive headfirst into your next artistic endeavor, fear not. There are a plethora of techniques at your disposal that can expedite the drying process.
Understanding the key factors that influence drying time – think temperature, humidity, glue thickness, air circulation, and surface type – is absolutely crucial.
To kick things off, applying a thin layer of glue with the appropriate tool and working in a well-ventilated space that boasts excellent airflow can work wonders in slashing drying time.
Cranking up the heat in your surroundings via methods like employing a hairdryer on low heat or gently warming the glued area in an oven can also give those pesky droplets of glue a nudge towards rapid drying.
However, it’s important to exercise caution and avoid excessive heat that could potentially wreak havoc on delicate materials or compromise the bond.
Moreover, don’t be afraid to dabble with alternative adhesives like super glue or epoxy if time is truly of the essence. These alternatives offer faster drying times and might just save your artistic bacon when deadlines loom large.
Nevertheless, bear in mind that these substitutes may not possess the same versatility and flexibility as our beloved Elmer’s clear glue.
When all is said and done, patience reigns supreme when dealing with Elmer’s clear glue. Trusting in the natural drying process and allowing ample time for the glue to set will guarantee a robust and enduring bond.