Are you tired of rummaging through your drawers, desperately searching for a tube of glue every time a craft project beckons? Say goodbye to the frustration of relying on store-bought adhesives that never quite meet your needs. Get ready to revolutionize your DIY game with the ultimate secret weapon: easy homemade glue.
Imagine never running out of adhesive again, having the freedom to create your very own glue concoctions, and saving some extra cash in the process. In this blog post, we’re about to unveil the captivating art of making homemade glue that is not only versatile but also incredibly simple. Prepare to tap into your inner artist and embrace the spirit of DIY like never before.
But wait, I can almost hear your thoughts racing. Homemade glue…sounds complicated, right? Wrong. Brace yourself for a delightful surprise because making homemade glue is easier than you could ever imagine. Whether you’re an experienced crafter or just dipping your toes into the world of DIY, this guide will be your trusty companion along this exciting journey.
Get ready to explore a treasure trove of homemade glue recipes using ordinary household ingredients that are probably hiding in plain sight. From classic flour-based paste to natural alternatives like milk or cornstarch – we’ve got it all covered. Each recipe comes with foolproof instructions, so you can effortlessly whip up these magical potions at your leisure.
So if you’re itching to break free from the shackles of store-bought glue and unlock a world brimming with endless possibilities, look no further. Prepare to dazzle your friends, family, and even yourself with newfound craftiness. Let’s dive headfirst into the enchanting realm of homemade glue and watch as your creativity soars higher than ever before.
What is Homemade Glue?
Contents
Are you tired of harmful chemicals in store-bought glues? Look no further. In this fascinating exploration, we’ll delve into the world of homemade glue and how it can revolutionize your crafting experiences. Get ready to embark on a journey of creativity as you discover the joy of making your very own adhesive concoctions.
Flour and Water Glue:
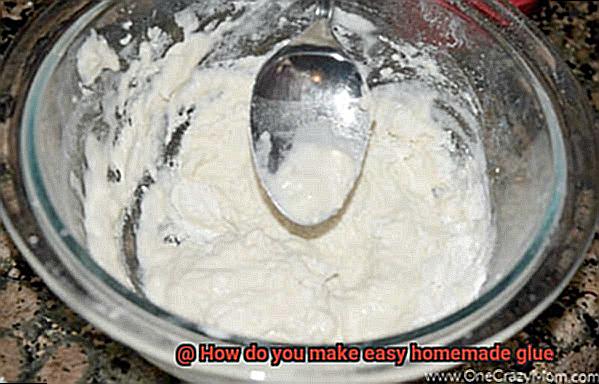
Let’s start with the simplest and most versatile homemade glue recipe – flour and water. With just two ingredients, you can create a smooth paste perfect for various craft projects. Mix equal parts flour and water in a bowl, stirring until it becomes a magical adhesive. Adjust the consistency by adding more water if needed.
Cornstarch “Goop” Glue:
Looking for an adhesive with a unique texture? Enter cornstarch glue, also known as “goop.” Combine 1/4 cup of cornstarch with 1/4 cup of cold water in a saucepan. As you heat the mixture over medium heat, watch in awe as it thickens and turns translucent. Once cooled, this glue is ready to be used for lighter craft projects that need that extra touch of magic.
Milk and Vinegar Glue:
For those seeking an unconventional adhesive option, milk and vinegar glue is here to surprise you. Begin by heating 1 cup of milk in a saucepan until it simmers, then slowly add 4 tablespoons of white vinegar while continuously stirring. Witness the transformation as the mixture curdles. Strain the resulting curds through cheesecloth or a fine mesh strainer to remove excess liquid. The remaining curds will astonish you with their sticky adhesiveness, perfect for captivating paper crafts.
Advantages of Homemade Glue:
- Control over ingredients: Homemade glues empower you to choose natural or non-toxic options, ensuring a safer and more environmentally friendly adhesive.
- Cost-effective: Unleash your creativity without breaking the bank. Making your own glue saves money, especially for avid crafters and DIY enthusiasts.
- Customizability: With homemade glue, the only limit is your imagination. Experiment with different ingredients and proportions to create an adhesive tailored to your specific needs.
- Engaging and fun: Making homemade glue becomes an exciting activity for individuals or families, promoting resourcefulness and self-sufficiency while igniting a sense of wonder.
Benefits of Making Your Own Glue
Are you tired of being limited by store-bought glues? Want to have control over the safety, cost, and customization of your adhesive? Look no further. In this captivating article, we’ll explore the enchanting world of homemade glue and uncover the numerous benefits it offers.
From cost-effectiveness to educational value, making your own glue is a fun-filled creative journey that will leave you captivated.
So, grab your apron and let’s dive into the mesmerizing realm of homemade glue.
Cost-effective:
Crafting can be an expensive hobby, especially when you’re constantly buying glue. But fear not. Making your own glue can be a wallet-friendly alternative. Most homemade glue recipes use simple household ingredients that are readily available and inexpensive. By conjuring up your own magical potions, you’ll save money on expensive adhesive products and have more to spend on other creative endeavors. Imagine the possibilities.
Environmentally friendly:
If you’re passionate about reducing your carbon footprint, homemade glue is the way to go. Unlike commercial glues that often contain harmful chemicals, homemade glue is often made from natural and non-toxic ingredients. By choosing to make your own glue, you’re taking a bold step towards a cleaner and greener environment. So go ahead, stick it to those harmful chemicals and embrace eco-friendly crafting. Mother Nature will thank you.
Customization:
One size does not fit all when it comes to adhesives. Different projects have different requirements – some need more stickiness, while others demand faster drying time. The beauty of making your own glue lies in its versatility and customizability. You have the power to adjust the recipe according to your specific needs, ensuring optimal results for all your projects. It’s like having a personalized adhesive genie at your fingertips, ready to grant all your creative wishes.
Non-toxic and safe for children:
If you’re a parent or work with children, safety is always a top priority. Homemade glue recipes often use non-toxic ingredients, making them safe for little hands and curious minds. Unlike some commercial glues that may contain harmful chemicals, homemade glue offers a safer alternative for arts and crafts activities. So let the kids unleash their creativity without worrying about exposure to toxic substances. It’s a win-win situation.
How to Make Flour and Water Glue
Are you tired of constantly running out of glue in the middle of your crafting projects? Look no further. In this blog post, we’ll teach you how to make your very own flour and water glue. It’s the perfect solution for all your crafting needs. Get ready to unleash your creativity with this cost-effective and easy-to-make adhesive.
Gathering the Ingredients: Simplicity at Its Finest
Before diving into the world of homemade glue, gather your ingredients. All you need is 1/4 cup of flour and 1/4 cup of water. Adjust the quantities depending on how much glue you require. With these simple household staples, you’re well on your way to creating a versatile adhesive.
Mixing Magic: From Lumps to Smoothness
Once your ingredients are ready, pour the flour into a mixing bowl. Now, gradually add the water while stirring continuously. Feel free to use a whisk or a fork to ensure a smooth consistency without any lumps. The goal is to achieve a texture that’s just right – not too thick and not too runny.
Optional Step: Heating It Up for Extra Adhesion
For those seeking glue with super-strength, here’s a bonus step. Heat the mixture on low heat while stirring constantly. Watch as the magic unfolds and the glue thickens to your desired consistency. Remember, though, to tread lightly and avoid overheating or burning the mixture.
The Moment of Truth: Your Homemade Glue Awaits.
After all the mixing and heating, it’s time to behold your creation – flour and water glue. Transfer it to an airtight container to prevent it from drying out. Labeling the container is a helpful reminder for future crafting endeavors.
Unleash Your Creativity: Crafting Galore.
Now that you have your very own homemade glue, let your creativity take flight. This versatile adhesive is perfect for a myriad of crafts. From building paper mache sculptures to creating stunning collages or even repairing beloved toys, the possibilities are endless. Let your imagination soar.
A Word of Caution: Know Your Glue’s Limits
While flour and water glue is a fantastic option for many projects, keep in mind its limitations. This adhesive is not waterproof, so it’s best suited for indoor projects or those shielded from moisture. If you require a stronger bond or a glue that can withstand water, exploring alternative homemade glue recipes may be beneficial.
How to Make Cornstarch Glue
Are you ready to dive into the world of crafting and DIY projects? Look no further than homemade cornstarch glue. This simple and cost-effective adhesive is perfect for all your creative endeavors. In this blog post, we will guide you through the easy steps to make cornstarch glue, including the essential ingredients and helpful tips. So, roll up your sleeves and let’s get crafting.
Ingredients:
To create cornstarch glue, you’ll need just a few pantry staples. Gather the following items:
<
Step 1: Mixing the Ingredients
Begin by combining equal parts of cornstarch and water in a saucepan. For example, if you use 1 cup of cornstarch, add 1 cup of water. Stir the mixture vigorously until it transforms into a smooth and consistent texture, devoid of any lumps.
Step 2: Heating and Thickening
Place the saucepan on the stove over medium heat. With unwavering attention, continuously stir the concoction as it warms up. Observe with delight as it thickens before your eyes, taking on a gel-like form. The rhythmic motion prevents any unwelcome lumps from forming, ensuring a smooth adhesive.
Step 3: Simmering and Cooling
Once the mixture reaches a bubbling boil, reduce the heat to low and allow it to simmer gently for approximately 5 minutes. This brief simmering period ensures that the cornstarch is fully cooked and your glue achieves the desired consistency. After simmering, remove the saucepan from heat and grant your glue ample time to cool down completely. As it gradually cools, it will continue to thicken, setting the stage for sticky success.
Step 4: Adjusting the Consistency (Optional)
Should you find your glue a touch too viscous for your liking, consider adding a small amount of vinegar to the mixture. Vinegar not only lends a helping hand in thinning out the glue but also extends its shelf life and wards off any mold growth. Introduce the vinegar gradually, stirring diligently after each addition until you achieve your preferred consistency.
Step 5: Get Crafty.
You’ve successfully concocted your very own cornstarch glue. Now, it’s time to let your creativity soar. Apply this homemade adhesive to various materials such as paper, cardboard, or fabric. With a steady hand, apply a thin layer of glue to one surface, firmly press the surfaces together, and allow the glue to dry completely. Patience is key here, as drying typically takes around 24 hours.
How to Make Milk and Vinegar Glue
Are you ready to embark on a sticky adventure that will unleash your creativity? Today, we’re going to explore the world of milk and vinegar glue, a simple and eco-friendly adhesive that you can easily create in your own kitchen. This homemade glue is not only safe and non-toxic but also perfect for a wide range of craft projects, from paper mache masterpieces to stunning collages. So, let’s dive in and get those creative juices flowing.
Gathering the Ingredients:
Before we embark on our sticky adventure, let’s gather all the ingredients we’ll need for our milk and vinegar glue. Don’t worry, you won’t need any rare or hard-to-find items. Just grab some milk, white vinegar, a stove or microwave, a mixing bowl, a strainer or cheesecloth, and a container for storing your glorious glue. These are all everyday items found in most kitchens, making it super convenient to get started on your adhesive journey.
Heating the Milk:
Now that we have our ingredients ready, it’s time to heat up the milk. You have two options here – either using a stove or a microwave. If you choose the stove method, gently heat the milk over low heat until it becomes warm and inviting but not boiling. If you prefer the microwave route, place the milk in a microwave-safe bowl and give it about 30 seconds of cozy warmth.
Curdling the Milk:
Once your milk is at the perfect temperature, it’s time to introduce it to its tangy partner – white vinegar. Add an equal amount of white vinegar to the milk. For example, if you used one cup of milk, add one cup of white vinegar.
Now comes the fun part – gently stir this lovely mixture for approximately 5 minutes. As you stir, feel the anticipation build up because here’s where the real magic happens. The milk will start to curdle and separate into curds and whey, creating the perfect base for our glorious glue.
Straining and Squeezing:
After the stirring and the magical transformation, let the mixture sit undisturbed for around 10 minutes. This brief moment allows the curds to fully separate from the whey, enhancing the adhesive power of your glue.
Now, grab a trusty strainer or cheesecloth and place it over a mixing bowl. Carefully pour the curdled mixture into the strainer or cheesecloth, allowing the whey to strain out. Watch as the liquid separates, leaving behind beautiful, sticky curds. To ensure we have a robust and adhesive masterpiece, gently squeeze the curds in the strainer or cheesecloth, removing any excess liquid. This step guarantees a solid and sticky glue-like consistency.
Tips for Using Homemade Glue
Creating your own adhesive concoctions can be an eco-friendly and cost-effective way to bring your craft projects to life. However, to ensure successful results, it’s crucial to follow specific techniques and tips. In this article, we will delve into the importance of using homemade glue properly and share valuable insights to help you achieve crafty success. Let’s dive in.
Safety First:
As with any crafting activity, safety should be a top priority when using homemade glue. While homemade glue is generally safe for use, it’s important to exercise caution, especially when heating or handling hot liquids.
Adult supervision is advised, and it’s crucial to follow the recipe carefully to ensure safe and effective results. Remember, homemade glue is not meant for ingestion.
Recipe Reliability:

Homemade glue can be created using various ingredients, such as flour, water, cornstarch, or milk. The key to achieving consistent results lies in following a reliable recipe and understanding its specific instructions. Each recipe has its unique properties, so choose the one that best suits your project’s requirements.
Consistency Matters:
Unlike store-bought glue, homemade glue tends to have a thicker consistency. If you find your glue too thick to spread easily, consider diluting it with a small amount of water until you achieve a smoother consistency. This will make application easier and minimize any excess glue that may interfere with your project.
Proper Storage:
To maximize the shelf life of your homemade glue, store it in an airtight container in a cool and dry place. This will prevent the glue from drying out or spoiling prematurely. Don’t forget to label the container with the date of preparation for future reference. Keep in mind that homemade glue may not last as long as commercial options, so it’s best to make smaller batches as needed.
Thin and Even Application:
To ensure optimal adhesion, apply homemade glue thinly and evenly onto the surfaces you wish to bond. Using a brush or sponge applicator can help achieve a smooth and consistent application. Take your time during this process to avoid applying excessive glue, which can lead to unsightly wrinkling or warping of materials.
Allow Ample Drying Time:
Homemade glue typically requires longer drying times compared to store-bought alternatives due to its higher water content. Patience is key. Allow ample drying time before moving or using glued items. Rushing this step can compromise the strength of the bond and result in project mishaps. Give your creation the time it needs to set and dry fully.
Different Uses for Homemade Glue
In our previous section, we uncovered the secrets of homemade glue. Now, let’s embark on an exciting journey through the diverse uses of this versatile adhesive. From unleashing your creativity in arts and crafts to solving everyday problems, homemade glue is here to revolutionize your DIY game.
Arts and Crafts Marvels:
Homemade glue is a true superstar in the world of arts and crafts. It effortlessly breathes life into paper mache wonders and transforms collages into vibrant masterpieces. What makes it even more remarkable is its child-friendly nature – non-toxic and gentle on little hands.
Woodworking Wizardry:
Step into the realm of woodworking with homemade glue as your trusty sidekick. It fills gaps flawlessly and bonds pieces of wood together seamlessly. With a blend of flour and water, homemade glue becomes a cost-effective alternative to store-bought wood glue, serving as the ultimate savior for small repairs or projects.
DIY Home Improvement Bliss:
Bid farewell to loose tiles and cracked plaster – homemade glue is here to save the day. It works wonders in securing those pesky loose tiles, mending damaged plaster, and even creating captivating textures on walls or furniture. Its cost-effective nature and readily available ingredients make it an indispensable tool for all your home improvement needs.
Gardening Glee:
Your garden deserves some tender loving care, and homemade glue is here to provide just that. Harness its magical powers to create homemade traps for bothersome pests like ants or fruit flies. By applying sticky homemade glue, you can effectively trap these critters and safeguard your precious plants. Additionally, this adhesive gem can mend broken plant stems or secure plant labels with ease.
Beauty Beyond Belief:
Prepare to be amazed by the unexpected beauty uses of homemade glue. Crafty DIY enthusiasts have uncovered its potential as an alternative to commercial pore strips. Applying a layer of homemade gelatin glue, allowing it to dry, and delicately peeling it off can rid your skin of blackheads and impurities. Embrace this unique, natural approach to pamper and revitalize your skin.
Advantages of Homemade Glue Over Store-Bought Options
Get ready to embark on an adhesive adventure as we delve into the world of homemade glue and uncover its incredible advantages over store-bought options. From saving money to protecting your health and the environment, homemade glue is the superhero of adhesives. So grab your aprons, it’s time to unleash the power of homemade glue.
Cost-effective:
Say goodbye to breaking the bank with store-bought glues that can burn a hole in your pocket. Homemade glue comes to the rescue with its cost-effectiveness. By using simple and inexpensive ingredients like flour, water, and vinegar, you can whip up a batch that works just as well as those pricey alternatives. Prepare to save money and craft to your heart’s content.
Non-toxic:
Safety first, my friends. Many store-bought glues contain harmful chemicals that aren’t exactly friendly to your health. But fear not, homemade glue is here to save the day. Made with non-toxic ingredients like flour and water, it’s a perfect option for crafts involving children who tend to explore with their hands and taste buds. Keep those little ones safe while unleashing their creative genius.
Environmentally friendly:
Let’s show Mother Earth some love. Store-bought glues often come packaged in plastic containers that contribute to our planet’s pollution woes. But homemade glue allows you to reduce waste by using reusable glass jars or bottles for storage. And when it’s time to dispose of it, rest easy knowing that your natural adhesive won’t harm the environment. It’s a small step towards sustainability that makes a big difference.
Customizability:
Homemade glue is like a chameleon, ready to adapt to your specific needs. Unlike store-bought options with limited varieties, homemade glue offers the flexibility of customization. Need a stronger adhesive? Simply adjust the proportions or add more flour to the mix. This level of control ensures that your glue is tailor-made for your project, giving you the results you desire every time.
B2RxoF3uzzQ” >
Conclusion
Making your own homemade glue is not only a cost-effective solution but also a fun and creative project. With just a few simple ingredients, you can create a strong adhesive that will come in handy for various DIY crafts and repairs. Say goodbye to store-bought glue and hello to the satisfaction of creating your own sticky concoction.
To start, gather together some white flour, water, sugar, and vinegar. These common household items will be the key players in your homemade glue recipe. Mix equal parts flour and water in a bowl until you achieve a smooth, paste-like consistency. This forms the base of your adhesive.
Next, add a teaspoon of sugar to the mixture. The sugar acts as a preservative, ensuring that your glue doesn’t spoil quickly. Additionally, it helps to enhance the stickiness of the final product.
To give your homemade glue some extra strength, incorporate a tablespoon of vinegar into the mix. Vinegar acts as a natural binding agent and improves the adhesive properties of your glue.
Now that you have all the ingredients combined, it’s time to heat things up. Place your mixture on low heat in a saucepan and stir continuously until it thickens. Be careful not to let it boil or burn – you want a smooth consistency without any lumps.
Once your homemade glue has reached the desired thickness, remove it from heat and allow it to cool completely before using it. Transfer it into an airtight container for storage so that you can enjoy its adhesive powers whenever needed.
With this easy homemade glue recipe in hand, you’ll never have to worry about running out of sticky solutions again. Whether you’re working on arts and crafts projects or fixing broken items around the house, this DIY adhesive will be there to save the day – all made by you.