Whether you’re a DIY enthusiast or leaving it to the pros, sealant is your go-to for repairs and improvements.
But how do you know when it’s dry and safe to move forward? No worries, we’ve got your back.
In this blog post, we’ll show you the signs that say ‘yep, it’s dry.’ From what your eyes can see to what your fingers can feel, we’ve got expert advice and practical tips to keep you in the know.
So let’s jump in and discover how to spot that perfect dryness in your sealant.”
Factors to Consider for Drying Sealant
Contents
- 1 Factors to Consider for Drying Sealant
- 2 Visual Cues of Drying Sealant
- 3 Tactile Cues of Drying Sealant
- 4 Manufacturer’s Instructions for Drying Time
- 5 Temperature, Humidity, and Ventilation Impact on Drying Time
- 6 The Importance of Patience with Sealant
- 7 Applying Pressure Before the Sealant is Dry
- 8 Conclusion
Drying sealant may appear to be a simple task, but it requires careful consideration of various factors that can influence the drying process. To achieve a strong and long-lasting bond, it is crucial to understand these factors and follow the manufacturer’s guidelines. In this blog post, we will explore the key factors that affect sealant drying time and provide useful tips to ensure optimal results.
Type of Sealant:
Different sealants have different compositions and chemical properties, leading to varying drying times. Silicone-based sealants generally take longer to dry compared to acrylic-based ones. It is essential to choose the right type of sealant for your specific application and take into account its drying characteristics.
Environmental Conditions:
The environment in which the sealant is applied plays a significant role in the drying process. Higher temperatures and lower humidity levels speed up drying, while cooler temperatures and higher humidity levels can slow it down. Adequate airflow is also crucial for moisture removal and faster drying.
Thickness of Application:
The thickness or depth of the sealant layer applied affects its drying time. Thicker layers take longer to dry compared to thinner ones. Following the manufacturer’s recommendations regarding application thickness is essential for proper drying and achieving desired results.
Ventilation:
Proper ventilation is crucial for efficient drying of sealants. Good airflow aids in moisture evaporation, speeding up the drying process. Insufficient ventilation can lead to prolonged drying times and incomplete curing.
Curing Time:
Sealants have a recommended curing time provided by the manufacturer. It is vital to allow sufficient curing time before subjecting the sealed area to stress or moisture. Rushing this process may compromise the sealant’s effectiveness.
Application Surface:
The material or surface on which the sealant is applied can affect its drying time. Porous surfaces such as wood or concrete tend to absorb more moisture, leading to slower drying. Non-porous surfaces like glass or metal allow for quicker drying.

Additives or Accelerators:
Some sealants offer the option of additives or accelerators to speed up drying. However, it is crucial to carefully follow the manufacturer’s instructions when using such substances to avoid compromising the sealant’s performance.
By considering these factors, you can ensure that the sealant dries properly and achieves its desired performance. It is important to note that rushing the drying process by applying external heat sources or excessive airflow may negatively impact the quality and effectiveness of the sealant. Following the manufacturer’s guidelines and allowing sufficient drying and curing time will help ensure a successful sealant application.
Visual Cues of Drying Sealant
The visual cues of drying sealant can vary depending on the type of sealant being used. Whether it dries to a clear or translucent finish or has a specific color, there are several key indicators you can look out for.
One unmistakable sign that your sealant is on its way to dry-town is a change in texture or appearance. That wet and glossy look will start to transform into a matte or dull finish, almost like witnessing a magic trick unfold before your eyes. It’s a satisfying sight that lets you know progress is being made.
Another visual cue to watch for is the formation of a thin layer or film on the surface of the sealant. This might feel slightly tacky or sticky to the touch. It’s a signal that the sealant is almost there but might need a bit more time to fully cure. Think of it as a protective shield forming, preparing your sealant for the challenges ahead.
But don’t be alarmed if you notice any cracking or shrinking of the sealant – it’s actually a positive development. These little cracks are like nature’s way of telling you it’s almost party time. They indicate that your sealant is drying and inching closer to being fully dry. Particularly with silicone-based sealants, those cracks are a reassuring sign of progress.
However, it’s crucial to consult the manufacturer’s instructions for specific visual cues. They may have some sneaky hints on what changes in color, texture, or appearance indicate that your sealant is completely dry. After all, who knows their product better than the people who made it?
It’s important to remember that visual cues alone may not always be accurate in determining if a sealant is completely dry. Factors such as temperature, humidity, and application thickness can affect drying time. So exercise patience and give your sealant the time it needs to fully cure before subjecting it to any stress or use.
Tactile Cues of Drying Sealant
If so, then understanding the tactile cues of drying sealant can be incredibly valuable. In this article, we will delve into the world of glue and explore how your sense of touch can help determine when a sealant is dry.
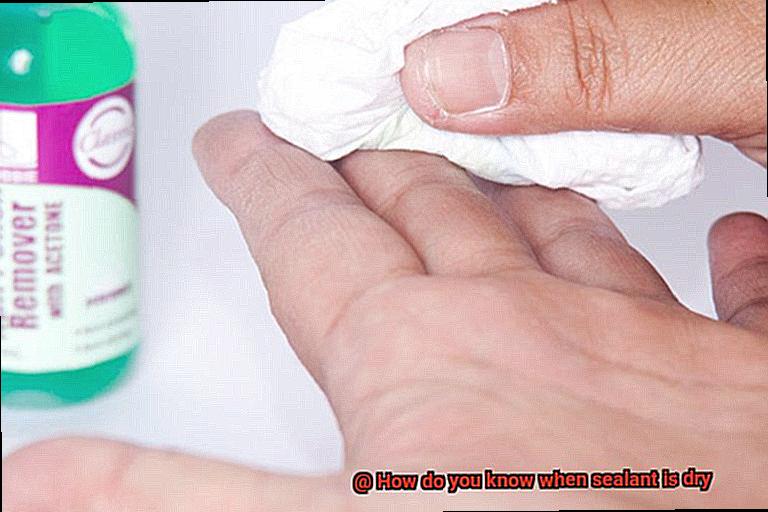
First and foremost, let’s talk about stickiness. When you first apply a sealant, it’s bound to be sticky. It’s like a clingy friend who doesn’t want to let go. But fear not, as time passes, the stickiness will gradually dissipate, and the sealant will become smoother to the touch. So, if you find that your fingers aren’t sticking to the surface anymore, it’s a good indication that the sealant is drying or nearing completion.
Texture is another tactile cue that can provide insight into the dryness of a sealant. When wet, the sealant may feel gooey and resemble a thick liquid. However, as it dries, it undergoes a transformation. The texture becomes more solid and firm, with the surface hardening and offering slight resistance when touched. So, if you notice that the sealant has hardened and feels less gooey, it’s a sign that it’s on its way to being fully dry.
Temperature can also be an excellent indicator of drying progress. As the sealant undergoes chemical reactions during the drying process, it generates heat. By touching the surface of the sealant, you can gauge its warmth. If it still feels warm to the touch, it means that it’s still in the process of drying. Conversely, if it feels cool, it’s likely that the sealant is dry or close to being fully dry.
Let’s not forget about time. Different types of sealants have varying drying times. Some may take only minutes to dry, while others require hours or even days. It’s important to consult the manufacturer’s instructions or seek advice from professionals to get an idea of the expected drying time for a specific type of sealant. If the recommended drying time has passed without any noticeable changes in stickiness, texture, or temperature, it’s safe to assume that the sealant is fully dry.
While relying on tactile cues is helpful in determining the dryness of sealant, it’s worth noting that other factors such as humidity, temperature, and the thickness of the sealant layer can influence the drying process. In some cases, additional methods or tools may be necessary for a more accurate assessment. To ensure precise information, it’s always advisable to consult experts or refer to the manufacturer’s guidelines.
Manufacturer’s Instructions for Drying Time
Glue, the unsung hero that binds our world together. From fixing leaky pipes to assembling delicate models, choosing the right sealant and allowing it to dry properly is vital for success. In this article, we will explore why following the manufacturer’s instructions for drying time is crucial when using sealants. After all, no one wants to find themselves in a sticky situation.
The Science Behind Drying Time:
Timing is everything when it comes to sealants. Each type of sealant has its own unique chemical composition and intended usage, resulting in different drying times. The manufacturer’s instructions hold the key to understanding how long you should wait before considering the sealant completely dry. By adhering to these instructions, you ensure that the sealant reaches its maximum strength and effectiveness.
Protecting the Integrity of the Seal:
Imagine spending hours meticulously sealing a joint or fixing a leak, only to have it fail because you didn’t give the sealant enough time to dry. Premature exposure to moisture or other elements can compromise the integrity of the seal, leading to leaks, cracks, or complete failure. Following the recommended drying time guarantees that your seal will withstand the test of time.
Climate Factors:
Manufacturer’s instructions often provide valuable information about specific conditions that can affect drying time, such as temperature and humidity levels. Sealing in high humidity or extreme temperatures significantly impacts the drying process. By paying attention to these guidelines, you can optimize drying conditions and ensure a reliable bond.
Coats for Success:
In some cases, achieving the desired result requires applying multiple coats of sealant. The manufacturer’s instructions will typically specify the waiting time between each coat to allow proper adhesion and curing. Rushing through this process compromises the overall effectiveness of the sealant and may result in subpar results.
Patience is a Virtue:
Although the sealant may feel dry to the touch within a certain timeframe, it may still require additional time to fully cure and achieve optimal performance. By exercising patience and adhering to the recommended drying time, you guarantee that your sealant reaches its full potential.
Temperature, Humidity, and Ventilation Impact on Drying Time
The secret to speeding up the process lies in understanding the magical trio of temperature, humidity, and ventilation. These factors are not only crucial in determining drying time but also impact the strength of the bond. Let’s dive into the captivating science behind why these factors matter.
Temperature: The Catalyst for Speed
Temperature is the ultimate game-changer when it comes to drying time. Think of it as the turbo boost that accelerates or decelerates the drying process. Higher temperatures create a cozy environment for solvents to evaporate rapidly, resulting in lightning-fast drying times. Meanwhile, lower temperatures can put the brakes on drying, leaving you impatiently waiting for that perfect bond.
Humidity: The Moisture Conundrum
Humidity is like an uninvited guest who overstays their welcome. In high humidity conditions, there is already an abundance of moisture in the air, making it harder for sealants to dry properly. The excess moisture slows down evaporation and can leave your sealant feeling tacky or soft for what feels like an eternity. On the other hand, low humidity levels create a dry environment where solvents can escape efficiently, accelerating the drying process.
Ventilation: Letting Your Sealant Breathe
Proper ventilation is a breath of fresh air for your drying sealant. Adequate airflow allows solvents to evaporate freely, ensuring a speedy drying process. Without good ventilation, solvents may struggle to escape efficiently, leading to prolonged drying times and potentially compromising the strength of the bond. Moreover, poor ventilation can result in lingering fumes or odors that are both unpleasant and detrimental to your health.
Optimizing Drying Time: The Winning Combination
To unlock the full potential of your sealants and ensure they dry properly, it’s vital to consider the trifecta of temperature, humidity, and ventilation. Follow the manufacturer’s instructions to determine the optimal temperature range for drying. Moderate humidity levels strike the perfect balance, neither too moist nor too dry. And don’t forget about ventilation. Open windows, turn on fans, and let that air circulate to help solvents evaporate efficiently.
The Importance of Patience with Sealant
In this enlightening journey, we will explore the often underestimated importance of patience when using sealant. So, grab a cup of coffee and prepare to immerse yourself in the secrets of achieving perfection with your sealant applications.
The Intricacies of Drying Time:
Did you know that sealant drying time is a delicate dance influenced by temperature, humidity, and ventilation? Prepare to embark on an intriguing scientific expedition as we unravel the intricate interplay between these factors and discover how they shape the drying process.
The Spellbinding Power of Proper Drying:
Sealants possess a mystical ability to shield against moisture, air, and other malevolent forces. Rushing the drying process is like tampering with a sacred ritual, jeopardizing the bond’s integrity and inviting mediocrity and potential damage. Join us as we unveil the mesmerizing consequences of impatience in sealant projects.
The Sacred Scrolls: Reading and Following Instructions:
In this era of impetuous DIY enthusiasts, heeding instructions is often overlooked. However, with sealants, deciphering the sacred scrolls – the manufacturer’s guidelines on drying time – holds the key to success. Prepare to be enlightened about the ancient wisdom encoded within these instructions.
Taming Giants: Larger Areas and Multiple Layers:
Conquering larger areas or applying multiple layers of sealant demands unwavering patience. Each layer yearns for solitude, requiring ample time to dry before embracing its successor. We shall bestow upon you the wisdom needed to tame these formidable tasks without compromising your project’s sanctity.
The Price of Impatience:
Indulging in shortcuts and neglecting the sanctuary of sufficient drying time may tempt you momentarily. But beware, for this transgression can lead to costly redemption in the form of repairs. Witness the illumination of how a little patience can shield you from future tribulations.

Unleashing the Winds of Time: Tricks to Speed Up Drying:
While the art of patience reigns supreme, we acknowledge that certain projects demand expedited drying. Fear not, for we shall share with you enchanting incantations to quicken the process, ensuring quality remains unscathed.
Applying Pressure Before the Sealant is Dry
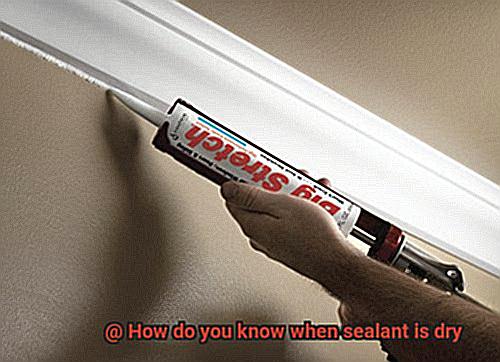
Today, we will delve into the captivating world of sealant drying time and unlock the power of patience. Understanding the importance of waiting until the sealant is fully dry before applying pressure can save you from future headaches. So, let’s uncover the mysteries and unleash the potential of a strong seal.
The Compromised Seal:
Imagine painstakingly applying sealant, only to discover leaks, gaps, or a weak bond later on. Applying pressure before the sealant is dry can disrupt its curing process, compromising its ability to adhere effectively. This results in subpar performance and costly repairs. To avoid such mishaps, respecting the drying time of the sealant is essential.
Know Your Drying Time:
Sealants come in various types, each with its specific drying time. Consulting the manufacturer’s instructions is crucial to determine the recommended drying time for your chosen sealant. Most sealants require at least 24 hours to fully dry and cure. However, external factors like temperature and humidity influence drying times. So, consider these variables when planning your project.
The Touch Test:
A simple touch test can gauge if the sealant is dry enough for pressure application. Gently touch the surface with your fingertip – if it feels tacky or sticky, it is not yet dry and should not bear pressure. Conversely, if it feels dry and leaves no residue, applying pressure is likely safe.
The Indentation Check:
Assessing sealant dryness using a flat-edged tool reveals its readiness for pressure application. Press a plastic scraper or credit card edge against the sealant and observe any indentation or mark left behind. No visible marks indicate sufficient drying for pressure tolerance.
Beware of Internal Curing:
Remember, even if the sealant appears dry on the surface, it may still be curing internally. Rushing this process by applying excessive pressure too soon compromises effectiveness. For safety, allow extra time for complete drying.
When Time Is of the Essence:
In certain situations, waiting for the recommended drying time may not be feasible. If you need to apply pressure before the sealant is fully dry, exercise caution and gradually apply gentle pressure. This minimizes the risk of damage or compromised effectiveness.
yPsSAOFZMz8″ >
Conclusion
Knowing when sealant is dry is absolutely crucial for the success and effectiveness of your projects. It’s like the finishing touch that ensures everything holds together perfectly. But how do you determine when that magical moment has arrived? Well, it’s all about paying attention to the little details and using your senses to their fullest potential.
Firstly, let’s talk about visual cues. Keep an eye out for any changes in texture or appearance. Is there a thin layer or film forming on the surface? Or maybe you notice some cracking or shrinking? These are all signs that your sealant is drying up and getting ready to do its job. Just remember to consult the manufacturer’s instructions as different types of sealants may have specific visual cues.
Now, let’s get tactile. Stickiness, texture, and temperature can provide valuable insights into the dryness of a sealant. If your fingers are no longer sticking to the surface and the once gooey sealant feels less warm and more solid, it’s a sure sign that it’s drying or almost there.
Following those oh-so-important manufacturer’s instructions regarding drying time is an absolute must. This will ensure that your sealant reaches its maximum strength and effectiveness. Take into account factors like temperature, humidity, ventilation, and if you’re applying multiple coats – because all these things can affect drying time.
Patience truly is a virtue when it comes to sealants. Rushing the drying process might seem tempting but trust me, it’s not worth it. You’ll only end up compromising bond integrity and facing leaks or cracks down the line. So take a deep breath and give your sealant the time it needs to work its magic.
Oh, one more thing – don’t apply pressure before the sealant is fully dry. Doing so could disrupt its curing process and leave you with weak bonds or dreaded leaks. To avoid this nightmare scenario, make sure you know the recommended drying time and perform touch tests or indentation checks to ensure it’s safe to apply pressure.
In conclusion, becoming a sealant-drying expert requires attention to detail, following manufacturer’s instructions, patience, and keen observation of visual and tactile cues. Master these skills, and you’ll be able to confidently move forward with your projects knowing that your sealant is dry and ready for action.

