Gluing boards together may seem like a breeze, but any woodworking enthusiast or professional carpenter knows the struggle of maintaining flatness during the process. Whether you’re working on a woodworking project or restoring a piece of furniture, achieving a perfectly aligned and uniform surface can make all the difference in the final result.
Picture this: you’ve poured your heart and soul into crafting a stunning dining table, only to be met with unsightly gaps and uneven surfaces once the glue has dried. Talk about a disappointment. To avoid such letdowns, it’s crucial to master the art of keeping your boards flat when gluing.
In this blog post, we’ll dive deep into the secrets of maintaining board flatness for professional-quality results every time. But before we reveal these valuable tips and techniques, let’s take a moment to understand why board flatness is so vital in woodworking projects.
The stability and longevity of any woodworking masterpiece depend on the structural integrity of the glued boards. Warped, uneven, or buckling surfaces not only ruin the aesthetics but also compromise the overall strength and durability of your finished piece. Luckily, with a few essential practices up your sleeve, you can ensure a flawlessly flat gluing process.
Get ready to uncover proven methods for mitigating warping, managing board movement, and achieving impeccable flatness. We’ll cover everything from joint preparation and clamping techniques to moisture control and other preventive measures.
So buckle up as we embark on this journey into the world of woodworking finesse. By learning how to keep your boards flat when gluing, you’ll set yourself up for success in all your future woodworking projects. Trust us – they’ll thank you for it.
Selecting Properly Prepared Boards
Contents
In the realm of woodworking, the quest for perfectly flat boards during the gluing process is a sacred mission. In this captivating article, we will delve into the secrets of selecting properly prepared boards and explore a plethora of techniques that guarantee impeccable results.
The Pursuit of Perfection: Straight and Defect-Free Boards
Embark on your journey towards flatness by handpicking boards that boast a straight and flawless physique. Beware of the sneaky culprits known as bowing, cupping, and twisting – these villains are notorious for creating gaps and uneven surfaces when glued together.
Moisture Content Matters: The Battle Against Warping
Wood, with its mercurial nature, has an affinity for absorbing and releasing moisture, a dangerous dance that can lead to unsightly warps. To triumph over this relentless foe, opt for boards that have been diligently dried and acclimated to their future habitat. Arm yourself with a trusty moisture meter to ensure the wood’s moisture content falls within an acceptable range.
Harmonious Grain Orientation: A Symphony of Stability
In your symphony of flatness, pay heed to the harmonious orientation of the wood’s grain. Strive for parallelism between the grain and the edges of your boards. This virtuoso move ensures that any potential movement is gracefully distributed across the width, minimizing the risk of warping. Reject those unruly boards with irregular grain patterns or discordant grain directions between adjacent pieces.
Thicker is Stronger: The Thick-Skinned Guardians Against Warping
In this battle against the forces of warping, thicker boards emerge as valiant protectors of stability. They stand tall, unbending against the tides of distortion, offering superior resistance compared to their thinner counterparts. If possible, recruit these mighty guardians to fortify your project’s defenses.
The Kiln-Dried Crusaders: Champions of Stability
Let us not forget the noble champions known as kiln-dried lumber. For glue-ups, these seasoned veterans are the epitome of reliability. Having undergone meticulous drying processes, they emerge with stabilized moisture content, steadfastly defying the siren call of warping and shrinking.
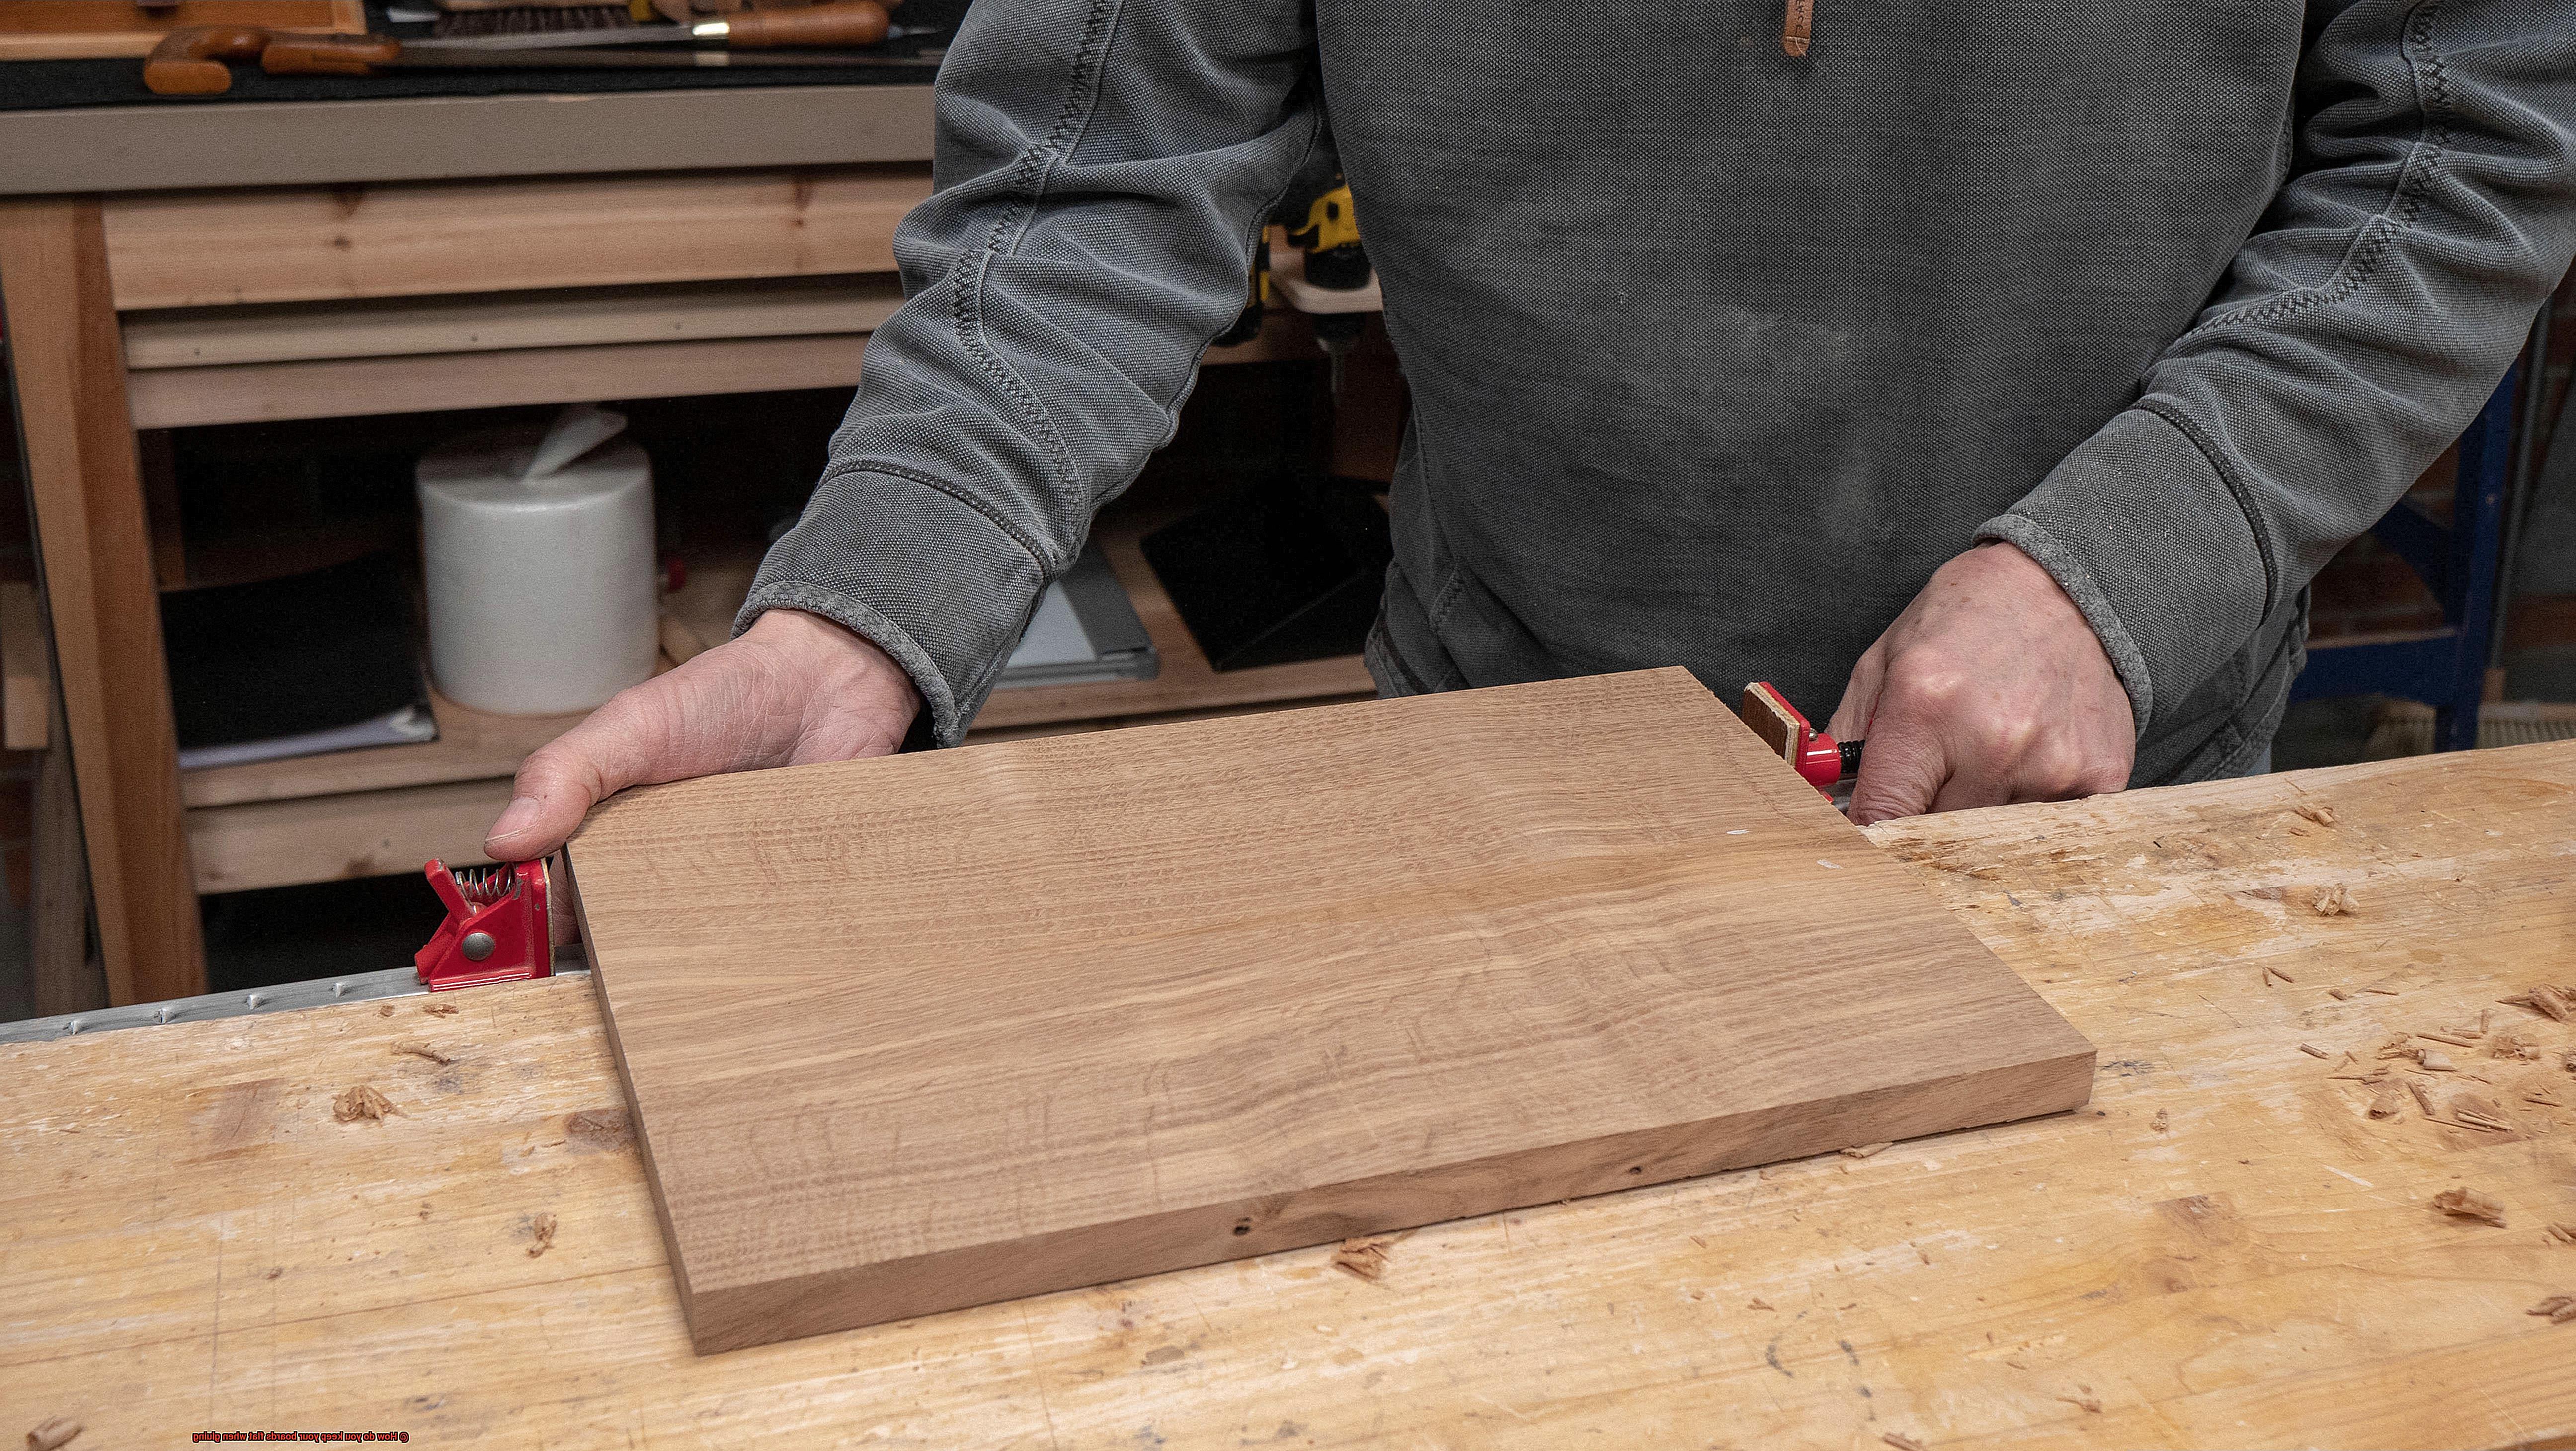
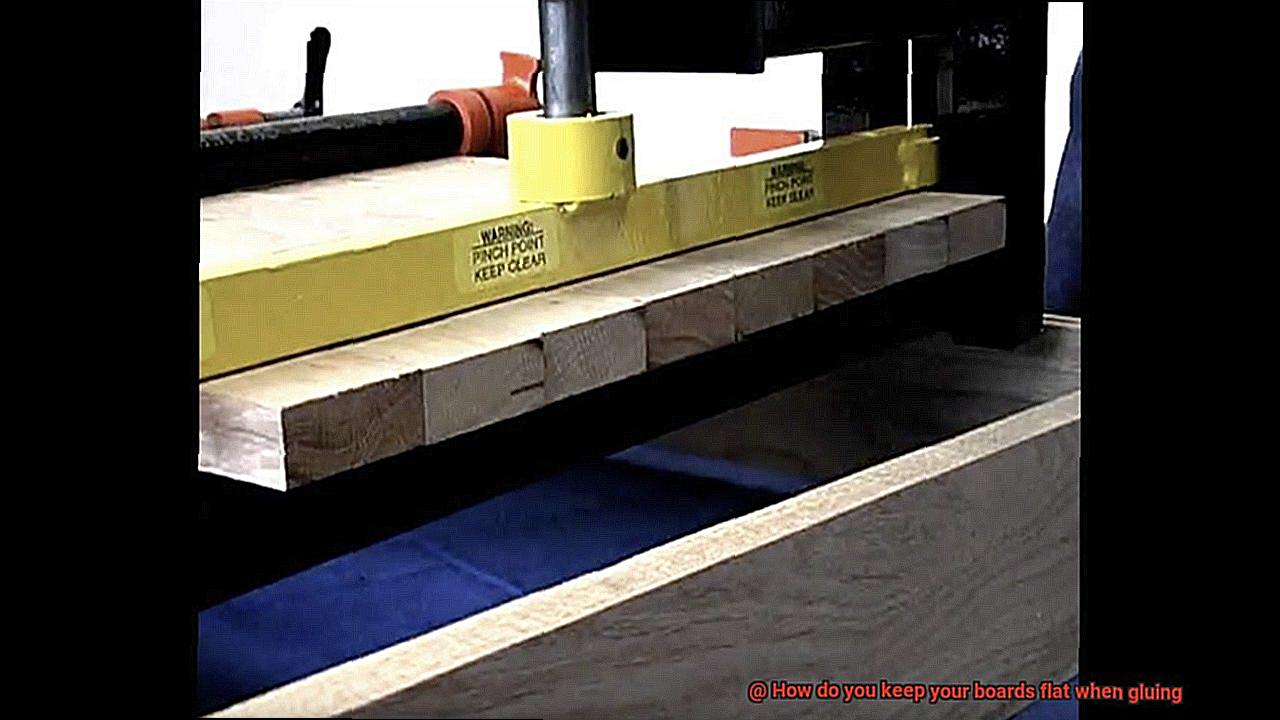
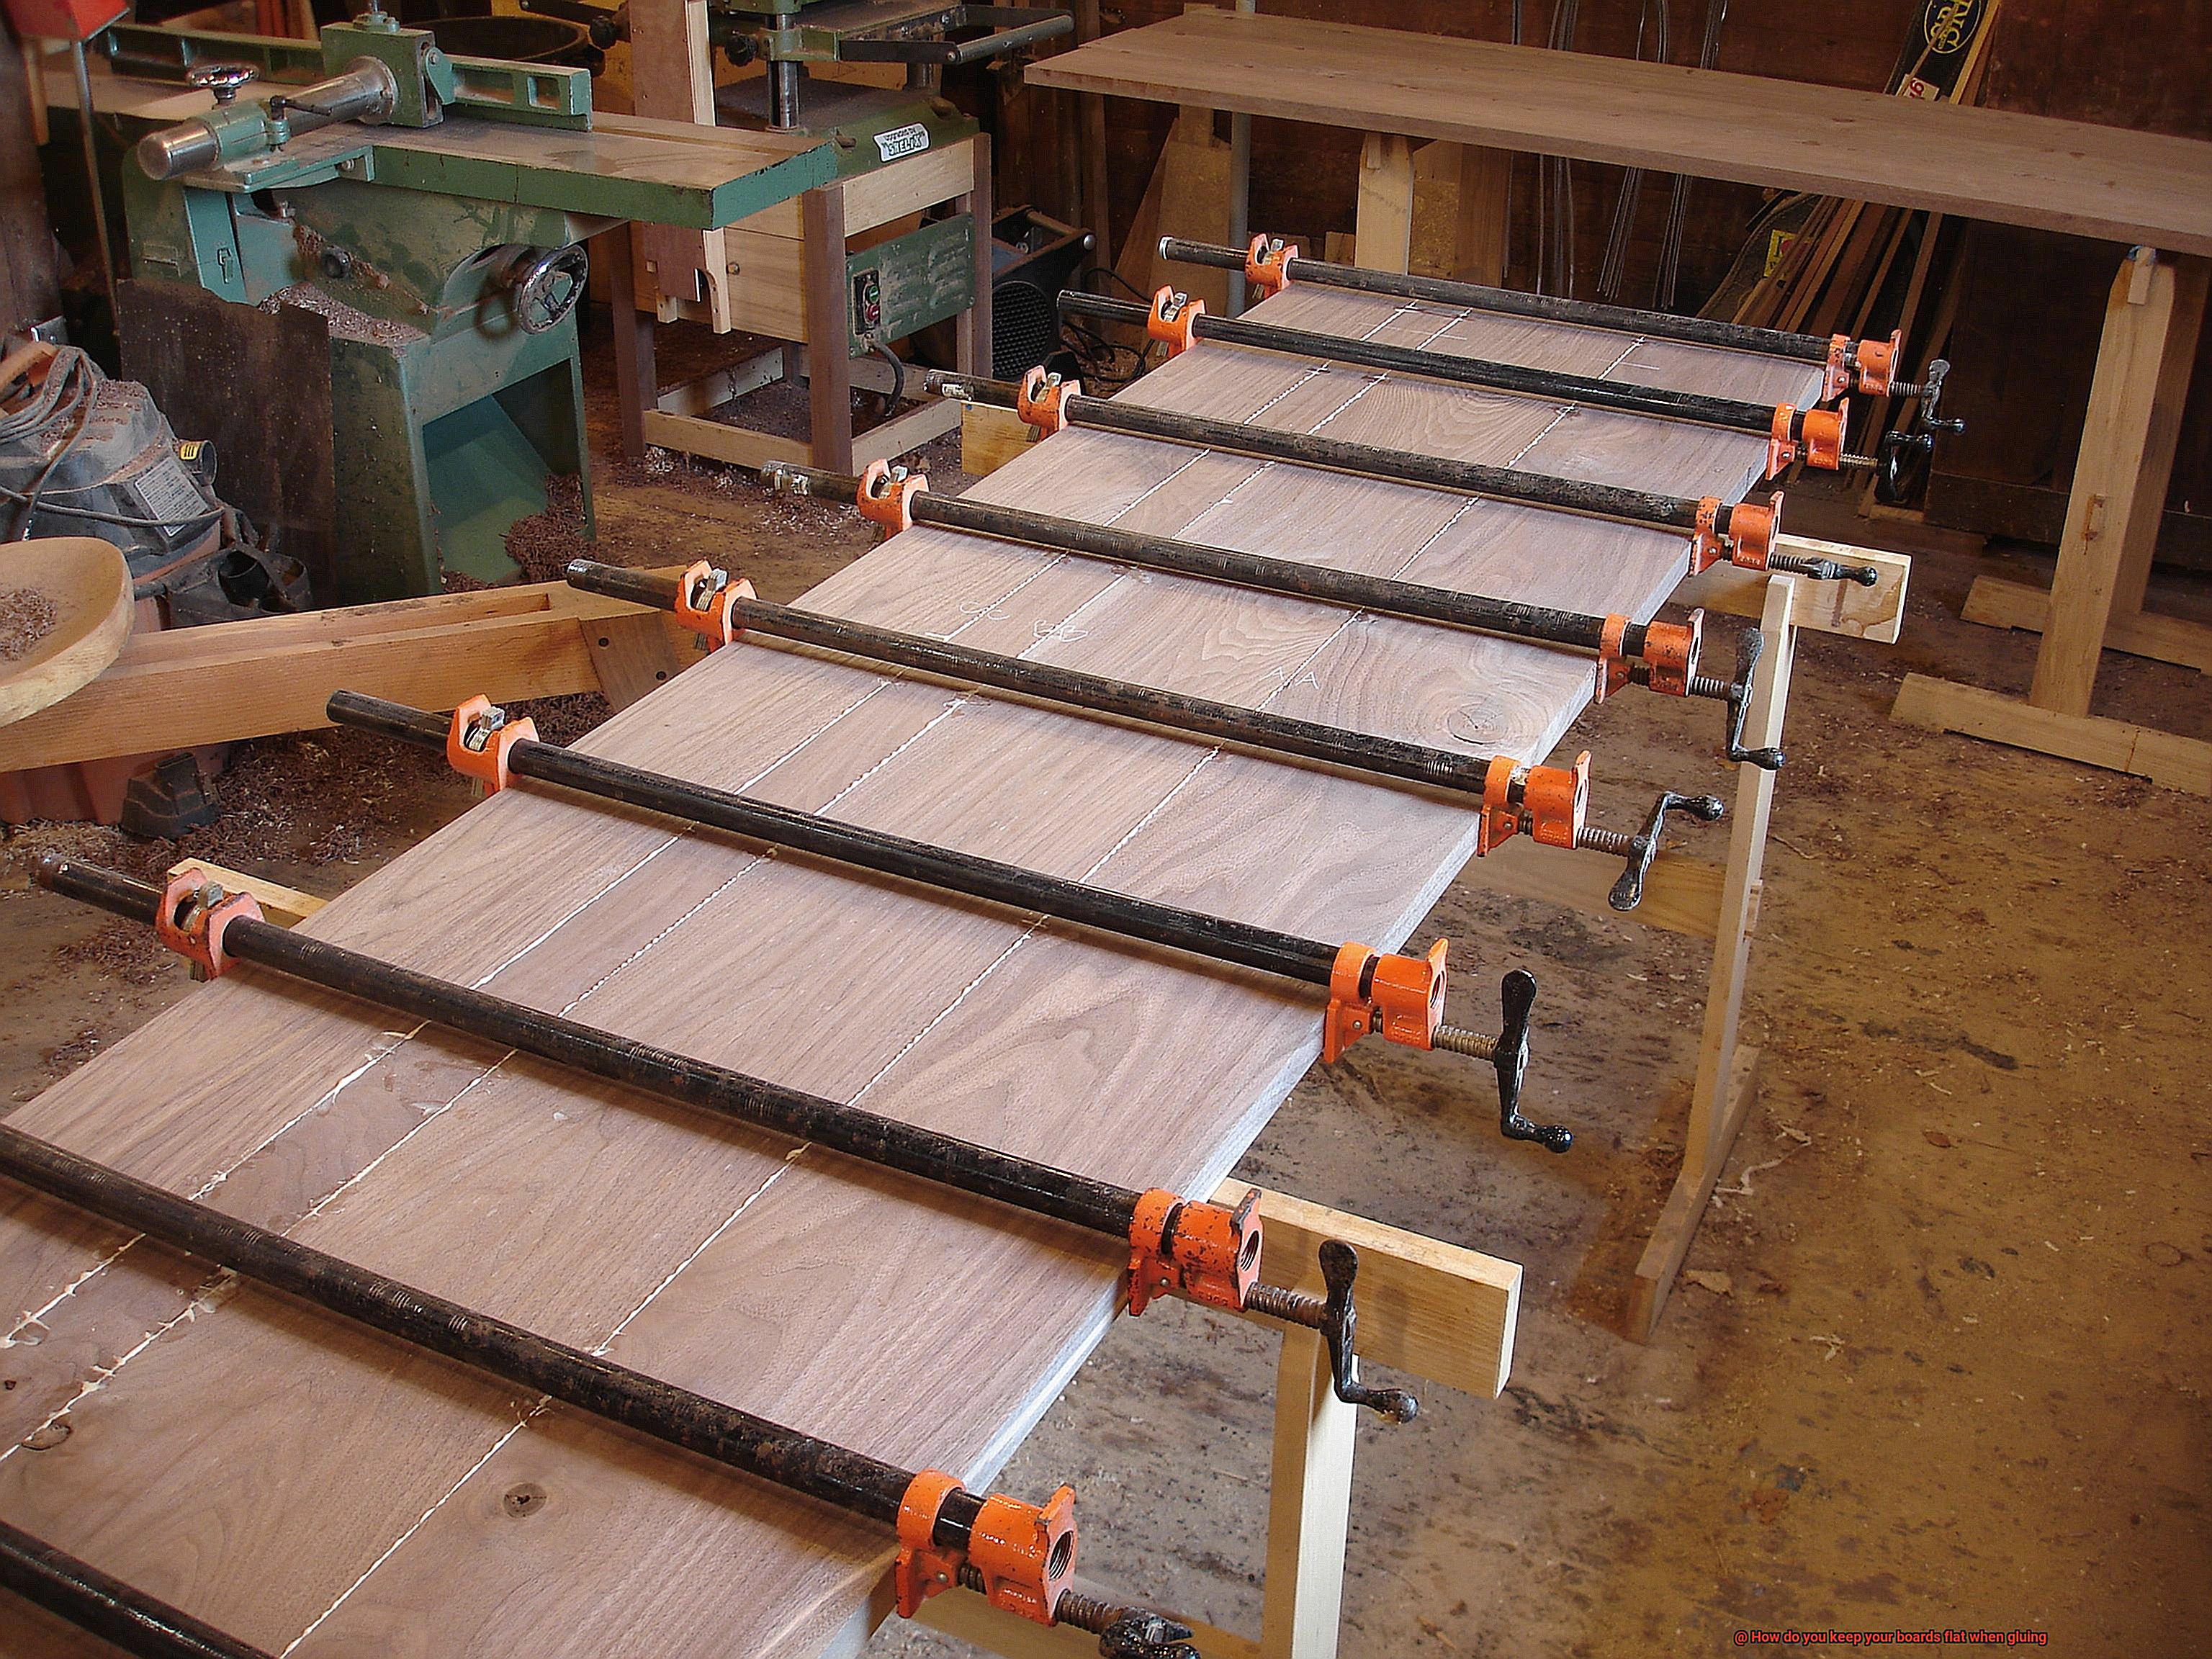
Using Clamps or Weights
As we embark on our journey to achieve flawless gluing, we find ourselves at the epicenter of a heated debate – clamps or weights? Join me as we unravel the strengths and weaknesses of these gluing warriors, and ultimately crown a champion in the quest for flat boards.
Clamps: The Versatile Champions
Clamps, the Swiss Army knives of the woodworking world, bring a multitude of benefits to the gluing arena. Let’s explore why they are considered champions in their field:
- Precision Pressure Placement: Strategically positioning clamps along the length of the boards ensures an even distribution of pressure, banishing any possibility of unsightly gaps or unevenness during the gluing process.
- Size Matters: With an array of options such as bar clamps, pipe clamps, and C-clamps, you can handpick the perfect clamp size for your project. Remember, choosing the right tool is paramount to success.
- The Art of Finesse: Mastering the perfect amount of pressure is key. Tighten them just enough to exert adequate force without causing harm to the wood. Finding that delicate balance guarantees a flawlessly bonded creation.
Weights: The Relentless Underdogs
When clamps are absent or unsuitable for your project, weights step up to the challenge. They may lack adjustability, but don’t underestimate their power. Let’s uncover their hidden strengths:
- Direct Pressure Prowess: Placing weights directly on top of glued boards provides substantial pressure, ensuring flatness during the gluing process.
- Inventive Solutions: Books, bricks, and sand-filled bags become your allies as they transform into impromptu weights. Embrace your creativity and utilize what you have on hand.
- Gentle Giants: While not as mighty as clamps, weights offer a reliable alternative for smaller projects or situations where clamps prove impractical. Keep in mind their limitations.
Clash of the Titans: Strengths and Weaknesses
As with any fierce battle, both clamps and weights possess their own set of pros and cons. Let’s weigh them up and determine who truly deserves the title of gluing greatness:
Utilizing Cauls or Straight Edges
Step into the world of woodworking mastery as we explore the legendary duo of caul boards and straight edges. These formidable tools are the secret weapons for keeping your boards perfectly flat during the gluing process. Get ready to harness their gluing greatness and achieve flawless results in your woodworking projects.
Caul Boards – The Flatness Enforcer
Caul boards, the unsung heroes of gluing, hold the key to flatness. With their ability to evenly distribute pressure, they prevent any warping or bending. Let’s dive into their effective utilization:
Select Straight and Defect-Free Boards:
Set the stage for success by carefully choosing straight boards that are free from any defects. This crucial first step ensures a solid foundation for your gluing project.
Align and Secure:
Lay out your selected boards on a flat surface, ensuring their edges are perfectly aligned. Now, place the mighty caul board on top, making sure it covers every inch of the surface area. To lock everything in place, secure the caul board with clamps or weights.
Clamp It Down:
Unleash the power of clamps, the essential tool for this technique. Strategically position them along the length of the boards, evenly spaced out. Gradually tighten the clamps, starting from one end and working your way to the other. This meticulous process guarantees a seamless bond between the boards.
Straight Edges – Guiding Your Path to Flatness
Straight edges act as steadfast guides in your quest for flatness during gluing. Let’s uncover their secrets for effective utilization:
Prepare Your Boards:
Just like with caul boards, begin by selecting impeccable boards that are straight and free from defects. Quality materials pave the way for flawless glue-ups.
Align and Secure:
Lay out your boards on a flat surface, aligning their edges with precision. Now, place the trusty straight edges on either side of the boards, running parallel to each other and covering the entire length. To ensure their unwavering support, secure them firmly with clamps or weights.
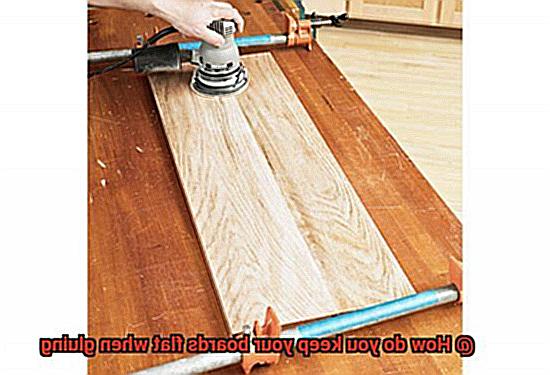
Creating a Flat Work Surface
One key factor in achieving flawless results is creating a flat work surface when gluing boards together. In this section, we will dive into various methods that will guarantee your projects turn out nothing short of amazing.
Let’s start with the mighty table saw. To create a flat work surface, it is crucial to begin by ensuring the table saw’s top surface is perfectly level. Grab a trusty leveling tool or a straightedge and meticulously inspect for any dips or unevenness. If you encounter any discrepancies, fear not. Simply adjust the table saw’s feet or use shims until it sits proudly level.
Now, let’s explore another powerful option – the indomitable jointer. This woodworking tool is purpose-built to flatten and square boards, making it an ideal choice for creating a flat work surface. Armed with an adjustable fence and a rotating cutterhead, the jointer fearlessly eradicates any imperfections from your boards. Pass them through this formidable machine, and behold. You have yourself a flawlessly flat work surface.
But what if you don’t have access to a jointer or a table saw? Do not despair. You can still achieve a flat work surface using trusty hand tools like hand planes or sandpaper. Begin by identifying any haughty high spots on the board’s surface. Armed with determination and your hand plane or sandpaper, gradually eradicate those pesky high spots until the entire surface becomes resplendently flat. It may require perseverance and elbow grease, but the end result will be worth every ounce of effort.
Throughout the gluing process, it is vital to regularly inspect the flatness of your work surface. Grab an unwavering straightedge or level and delicately lay it across the boards. Keep a vigilant eye out for any gaps or unevenness that may emerge. By promptly addressing any issues that arise, you can ensure a steadfast bond between your boards.
Speaking of bonds, let’s discuss the invaluable role of clamps and weights. When gluing boards together, it is essential to apply unwavering pressure along the entire length of the boards. This practice diligently thwarts any potential warping or bending. Harness the power of clamps or weights to seamlessly distribute pressure and secure an unyielding bond between your boards.
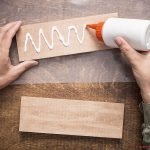
Considering the Type of Glue Used
We’ve explored the importance of a flat work surface and the role of clamps in securing strong bonds. But there’s one secret ingredient we haven’t discussed yet – the type of glue used. Today, let’s embark on a journey through the world of glues and discover how choosing the right one, along with proper application techniques, can unlock the true potential of your woodworking projects. So grab your favorite woodworking beverage and let’s dive in.
Wood Glue – The Carpenter’s Best Friend:
PVA Glue – A Versatile Option:
Epoxy Glue – A Bond That Withstands Nature’s Fury:
If you dare to venture into outdoor projects or work with materials exposed to moisture and temperature fluctuations, look no further than epoxy glue. This dynamic adhesive consists of resin and hardener that must be mixed before use. It forms an unyielding bond capable of withstanding nature’s harshest elements. When tackling projects that brave the great outdoors, make epoxy glue your ally to ensure flatness and durability.
Taking Your Time and Being Patient
In our previous section, we uncovered the secrets behind achieving flawlessly flat boards through the magic of glue. Today, we are going to explore a vital but often underestimated aspect of the gluing process – taking your time and embracing the art of patience. This is not a step you can afford to rush through if you want impeccable results. So, grab your woodworking beverage of choice and let’s embark on a journey into the world of precision and perseverance.
The Key to Flawless Boards – Even Pressure
When it comes to gluing boards, the secret lies in applying even pressure. Picture this, my friends – uneven pressure can lead to dreaded gaps and unsightly unevenness between your beloved boards. To avoid this catastrophe, arm yourself with clamps or weights that will firmly hold your boards together. But remember, it’s not just about slapping them on haphazardly. Instead, distribute the pressure evenly across every inch of the joint’s surface area. This meticulous approach will ensure a tight bond that keeps your boards perfectly flat and harmoniously aligned.
The Virtue of Waiting – Allowing Glue to Cure
Ah, patience truly becomes a virtue in the realm of woodworking. Different types of glue possess their own unique drying times. Thus, it is imperative that you follow the manufacturer’s instructions religiously. Fight off the temptation to leap ahead – waiting for the glue to cure completely is an absolute must. Prematurely removing those precious clamps can result in flimsy bonds and heartbreaking separation between your cherished boards. So sit back, relax, and let that glue perform its enchanting dance.
Precision at Its Finest – Aligning Clamps or Weights
Attention to detail is paramount, my friends. The proper alignment of your clamps or weights is the secret ingredient to maintaining flatness and thwarting the dreaded warping. Take a moment to delicately position them along the length and width of your glued joint. This meticulous act ensures equal pressure distribution and a seamless bond between your treasured boards.
Other Techniques to Consider
In the realm of woodworking, achieving perfectly flat boards during the gluing process is a true art form. We’ve already discussed the importance of even pressure, proper curing, and meticulous clamping. However, there are additional techniques to consider that can take your woodworking skills to new heights. Let’s delve into these alternative methods, each offering its own unique benefits.
Weighted Pressure: Thinking Outside the Clamp Box
Clamping isn’t always the most practical option for maintaining flatness, but fear not. Enter weighted pressure. By strategically placing heavy objects like sandbags or books on top of your boards, you can ensure even pressure distribution. Just remember to distribute the weight evenly to prevent unwanted warping or bending.
Cauls and Caul Clamps: The Secret to Flawless Alignment
Cauls, those unsung heroes of woodworking, can provide the answer to achieving perfect alignment. These wooden blocks or boards are positioned on both sides of the joint, and when paired with caulk clamps designed specifically for this purpose, they distribute pressure evenly. Say goodbye to bowed and warped boards during glue-up, especially for larger or wider projects where clamping alone may fall short.
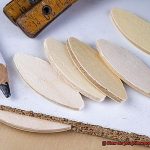
Biscuit Joinery: Small Oval-Shaped Miracles
When it comes to cabinetmaking or furniture construction, biscuit joinery is a game-changer. This technique involves cutting slots into board edges and inserting small wooden biscuits coated with glue. These unassuming ovals provide an extra dose of strength, alignment, and flatness during gluing.
Dowel Joinery: Drilling for Stability
For thicker boards or joining end grain surfaces, dowel joinery is a reliable choice. By drilling holes into the boards and inserting wooden dowels coated with glue, you create a bond that ensures stability and alignment. No more worries about warped or bent boards – this technique takes flatness to a whole new level.
Veneering: Thin But Mighty
Thin or delicate boards that have a tendency to warp easily require special attention. Enter veneering, the tried-and-true technique that adds strength and stability during gluing. By applying a thin layer of wood, known as veneer, using glue, you can keep those delicate boards flat and fabulous. This technique is commonly employed in cabinetry, furniture making, and decorative woodworking.
Benefits of Keeping Boards Flat When Gluing
In our previous section, we explored various techniques for achieving perfectly flat boards during the gluing process. Now, let’s embark on an exciting journey to discover the multitude of benefits that come with keeping those boards flat when gluing. So grab your tools, unleash your creativity, and let’s dive right in.
Strength and Durability:
Picture this: you’ve meticulously crafted a stunning piece of furniture, only to have it crumble under the weight of weak joints. By keeping your boards flat during gluing, you ensure a bond that is not only strong but also enduring. Say goodbye to gaps and uneven surfaces that compromise the joint’s strength. With flat boards, your woodworking projects are destined for greatness and will stand the test of time.
Smooth and Seamless Finish:
Who doesn’t yearn for a flawlessly finished masterpiece? When boards aren’t flat, they introduce a world of imperfections like slight unevenness and misalignment. These flaws become even more apparent when you plan on staining or painting the finished project. But fret not. By taking the time to flatten your boards before gluing, you can achieve a professional-looking finish that is visually captivating and silky-smooth to the touch. Prepare to wow everyone with your impeccable craftsmanship.
Warping and Twisting Prevention:
Wood has a mind of its own, prone to expanding and contracting with changes in humidity and temperature. However, if your boards aren’t flat when glued together, this natural movement can lead to unsightly warping or twisting over time. To ensure a stable and visually pleasing final product, start with flat boards and employ secure gluing techniques. Your woodworking creations will defy the forces of nature and shine with unwavering elegance.
Effortless Assembly and Alignment:
Let’s face it; woodworking can sometimes feel like solving a complex puzzle, especially when dealing with intricate projects that demand multiple joints. But fear not. Keeping your boards flat during gluing transforms assembly into a joyous dance. Flush surfaces provide the perfect foundation for snug fits, eliminating any gaps or misalignments. Bid farewell to frustration and revel in the satisfaction of a well-fitted and visually harmonious construction.
KdeUBuCOBBQ” >
Conclusion
Keeping your boards flat when gluing is crucial for achieving high-quality woodworking results. To ensure that your boards stay perfectly level during the gluing process, here are some effective techniques to consider.
- Proper board preparation: Before applying glue, make sure your boards are properly prepared. This includes planing and jointing the surfaces to be glued together, ensuring they are smooth and free from any imperfections.
- Use cauls: Cauls are long, straight pieces of wood that help distribute pressure evenly across the surface of the boards during clamping. Place cauls on top and bottom of the glued joints, using clamps to hold them firmly in place. This technique helps prevent warping or bowing of the boards.
- Apply even pressure: When clamping your glued boards together, it’s important to apply even pressure across the entire surface area. Uneven pressure can cause distortion or misalignment of the boards. Use enough clamps spaced evenly along the length of the joint to ensure a consistent and uniform distribution of pressure.
- Check for flatness: While clamped, periodically check for flatness by running a straightedge or level across the surface of your boards. If you notice any areas that are not flush or have gaps, adjust your clamps accordingly until you achieve a perfectly flat result.
- Allow sufficient drying time: After gluing, allow ample time for the adhesive to fully cure before removing the clamps. Rushing this step can lead to premature movement or warping of the boards.