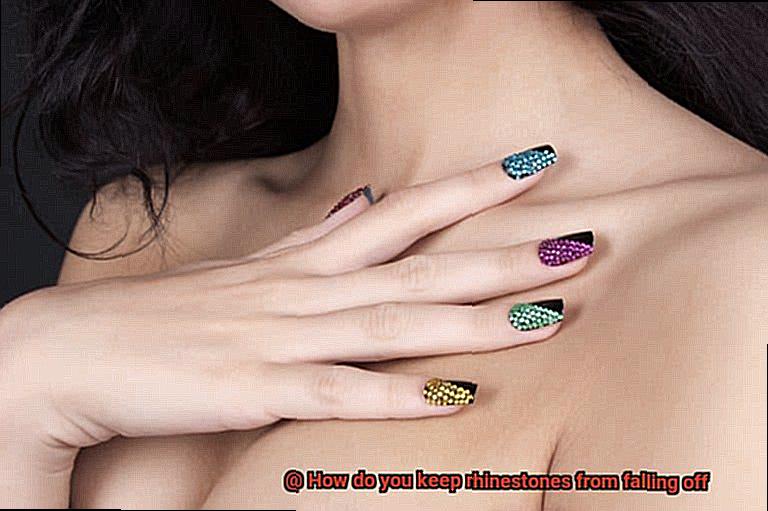
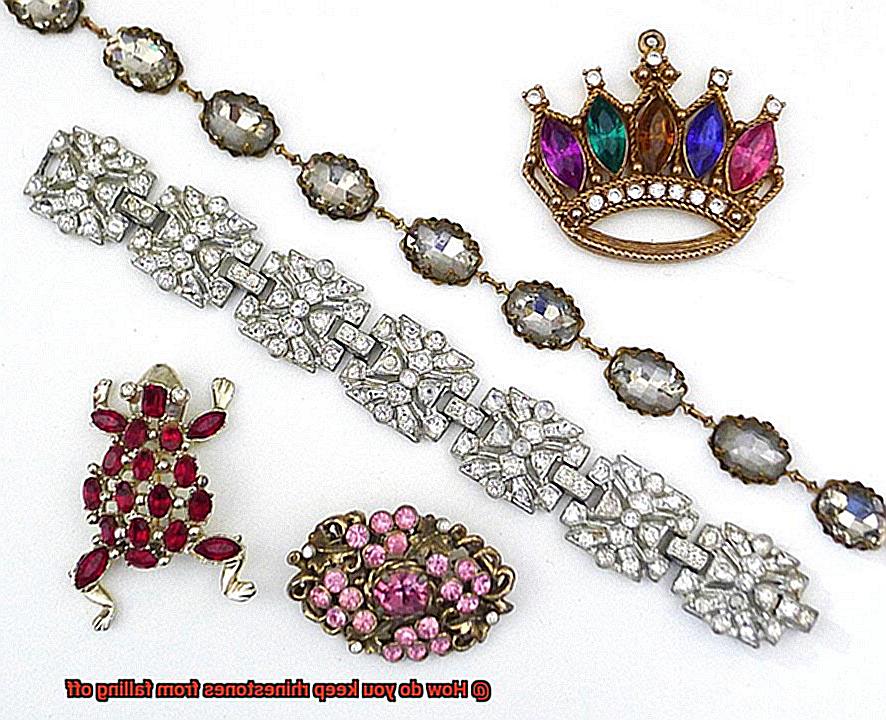
Love the dazzling allure of rhinestones on your favorite accessories or DIY projects? We can’t resist their mesmerizing brilliance either. But let’s face it, the heartbreak of losing those precious gems is downright devastating.
Whether it’s a jaw-dropping gown or a painstakingly crafted pair of earrings, keeping rhinestones securely in place can be quite the challenge. But fear not. In this blog post, we’re spilling all the secrets to ensure your rhinestones stay put, so you can shine with confidence.
With a few simple yet powerful techniques up your sleeve, bidding farewell to those frustrating moments when rhinestones go missing will be a breeze. From choosing the perfect adhesive to adding protective layers, we’ve got you covered.
So stick around as we dive into all the essential tips and tricks for preserving your rhinestones’ spectacular sparkle. Get ready to embark on a journey towards enduring brilliance that will leave you feeling like a true gem – no matter the occasion. Let’s get started, shall we?
Different Types of Glue for Rhinestones
Contents
- 1 Different Types of Glue for Rhinestones
- 2 Cleaning the Surface Before Applying Adhesive
- 3 Precisely Applying the Glue
- 4 Attaching the Rhinestone to the Desired Surface
- 5 Allowing Adequate Time to Dry
- 6 Tips and Tricks to Enhance Longevity
- 7 Protecting Rhinestones from Excessive Heat
- 8 Regularly Inspecting for Loosening or Detachment
- 9 Conclusion
Rhinestones are the epitome of glamour and can add a touch of sparkle to any project. Whether you’re creating a dazzling costume, customizing accessories, or embellishing crafts, finding the right glue is essential to ensure your rhinestones stay securely in place. In this comprehensive guide, we will delve into the different types of glue for rhinestones, providing you with valuable insights and tips to achieve long-lasting results that will make your creations shine.
E6000: The Superstar Adhesive
E6000 is the superstar adhesive favored by many rhinestone enthusiasts. Its strength, versatility, and clear drying properties make it an ideal choice for a wide range of surfaces, including fabric, metal, glass, and plastic. Whether you’re bedazzling a costume or embellishing a piece of jewelry, E6000 will bond securely, ensuring your rhinestones remain luminous.
Gem-Tac: Flexibility at Its Finest
For projects involving fabrics or flexible surfaces, Gem-Tac is the glue of choice. This adhesive not only dries clear but also retains flexibility even after drying. It allows your rhinestones to withstand movement without popping off, making it perfect for dance costumes or stretchy garments that require durability and adaptability.
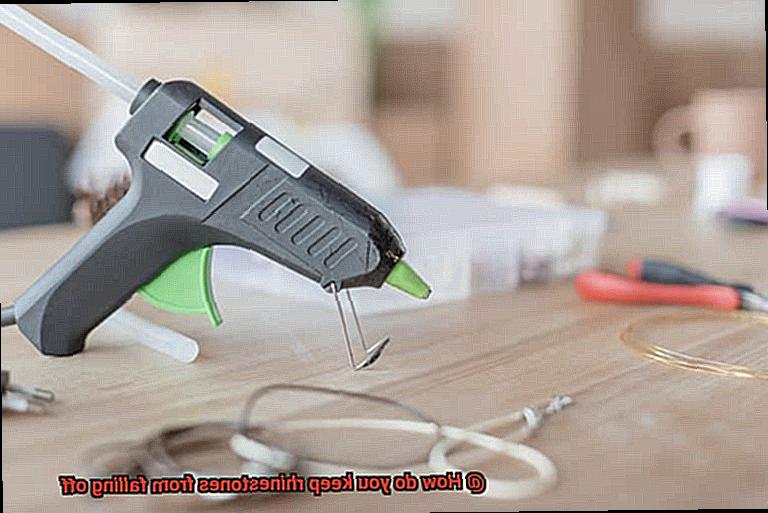
Hot Glue: Quick and Mighty
No crafting arsenal is complete without a hot glue gun, and it can also be used to attach rhinestones. Hot glue provides a quick-drying, strong bond that is ideal for projects requiring immediate results. However, exercise caution when using hot glue on delicate fabrics as the heat can potentially cause damage.
Jewelry Glue: A Touch of Elegance
If you’re creating jewelry pieces with rhinestones, jewelry glue is your best bet. Specially formulated for metal surfaces, this adhesive can withstand wear and tear while providing a secure bond. Your sparkly earrings, necklaces, and bracelets will stay intact and retain their dazzling allure.
Fabric Glue: Perfect for Textiles
When attaching rhinestones to fabric, fabric glue is a fantastic option. Specifically designed to adhere to fabric fibers, it provides a flexible bond that ensures your rhinestones stay put even in high-movement areas. From garments to home decor projects, fabric glue will keep your rhinestones firmly in place.
Selecting the right glue for your rhinestones is crucial for achieving stunning and long-lasting results. Consider the material you’re working with, the desired durability, and any specific requirements such as flexibility or transparency.
Testing the glue on a small area beforehand is always a smart move. With the right adhesive and proper application techniques, your rhinestones will sparkle and shine on any surface, adding that extra touch of glamour to your creations.
Cleaning the Surface Before Applying Adhesive
Cleaning the surface before applying adhesive is a crucial step that can make all the difference in the world when it comes to the longevity and effectiveness of your adhesive bond. So, listen up, my fellow crafters and DIY enthusiasts, because I’m about to spill the beans on this game-changing secret.
Why is cleaning the surface so important, you ask? Well, let me break it down for you. When you clean the surface before applying adhesive, you ensure that the adhesive can bond effectively, creating a strong and long-lasting hold for your precious rhinestones or any other embellishments.
Not only that, but it also prevents any dirt, oils, or debris from interfering with the adhesion process. And let’s be honest, who wants their bling falling off after all that hard work?
Now, let’s dive into the nitty-gritty of how to clean that surface like a pro. First things first, remove any existing rhinestones or embellishments that might be hanging around. Grab yourself a trusty pair of tweezers or a toothpick and gently lift them off the surface. We don’t want any stragglers ruining our masterpiece.
Once you’ve cleared the stage, it’s time to bring out the big guns – mild detergent or soap and water solution. Mix up a little concoction and grab a soft cloth or sponge. Dampen it with the solution and gently wipe the entire area where the rhinestones will be applied. Make sure you cover every nook and cranny – we want everything spotless.
But we’re not done just yet. Rinse away any residue by using another clean cloth or simply rinsing it under running water. The key here is to ensure all soap or detergent is completely removed. We want everything pristine and ready for action.
Now, here’s a little tidbit for you – different surfaces may require different cleaning techniques. If you’re working with glass or metal, consider using rubbing alcohol or acetone for maximum adhesion. However, always remember to test these products on a small, inconspicuous area first to avoid any unwanted surprises.
Once the surface is clean and dry, it’s time to take it up a notch. Give it a light sanding with fine-grit sandpaper. This step creates a slightly roughened surface, giving the adhesive something extra to hold onto. But be gentle while sanding and make sure to wipe away any dust or debris afterward – we want everything smooth and clean.
Precisely Applying the Glue
Precisely applying the glue is the key to achieving a strong and long-lasting bond between rhinestones and the desired surface. By following a few essential tips and techniques, you can take your bling game to the next level and create dazzling masterpieces that will leave everyone in awe.
- Finding the right balance: The amount of glue you apply is crucial for a secure adhesive bond. Too little glue will result in weak adhesion, causing your rhinestones to pop off at the slightest touch. On the other hand, applying too much glue can create a messy appearance and potentially damage both the rhinestones and the surface they’re being attached to. Ensure you find that sweet spot where just enough glue is used to create a strong bond without any excess.
- Preparing the surface: Before reaching for that glue bottle, take the time to properly prepare the surface. Dust, dirt, and oils can interfere with the adhesive bond, compromising its strength. Use a mild soap or an alcohol-based cleaner to thoroughly clean the surface and remove any residue. Allow it to dry completely before proceeding with the glue application.
- Choosing the right adhesive: Not all glues are created equal when it comes to attaching rhinestones. Epoxy adhesives are known for their strength but can be challenging to work with due to their quick drying time. On the other hand, jewelry glue is specifically designed for rhinestones and strikes a balance between strength and ease of use. Consider the materials you’re working with and pick a glue that is compatible with both your gems and the surface.
- Precision tools for precise application: To apply the glue precisely, arm yourself with toothpicks or fine-tipped brushes. These tools allow you to have complete control over where the glue is placed, ensuring it stays exactly where you want it without any unwanted spreading. They also help prevent excess glue from squeezing out from under the rhinestones, saving you from a sticky situation.
- Patience is key: Take your time when positioning your rhinestones. Once the glue is applied, gently press them onto the surface and resist the urge to fiddle with them while they dry. Rushing or constantly touching them can compromise the adhesive bond. Follow the recommended drying time specified by the glue manufacturer, as impatience will only lead to rhinestone disasters.
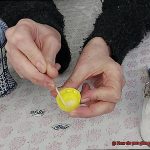
Attaching the Rhinestone to the Desired Surface
With the right materials and techniques, you can create stunning, eye-catching designs that will make heads turn. In this article, we will guide you through the process step-by-step, using adhesive glue as our primary method. Get ready to add a touch of sparkle to your world.
Step 1: Prepare the Surface
Cleanliness is key. Before attaching the rhinestones, ensure that the surface is pristine. Use a mild soap and water solution or rubbing alcohol to remove any dust, oils, or debris that could hinder adhesion. Allow the surface to dry completely before proceeding.
Step 2: Plan Your Design
Let your creativity shine. Decide on the placement of your rhinestones. Whether you opt for a pre-determined design or prefer random placement, consider creating a sketch or template to follow if you have a specific design in mind. This will help you achieve the desired look with precision.
Step 3: Apply the Adhesive Glue
Time for some adhesive magic. Squeeze a small amount of adhesive glue onto a non-porous surface like plastic or wax paper. Using a toothpick or small brush, pick up a tiny dab of glue and apply it to the back of each rhinestone. Ensure complete coverage without excess glue oozing out when pressed onto the desired surface.
Step 4: Place and Press
Bring your design to life. Carefully position each rhinestone on the desired location, gently but firmly pressing it down. Hold it in place for a few seconds to allow the glue to set. Repeat this process for each rhinestone until your design is complete.
Step 5: Extra Reinforcement (If Needed)
For larger rhinestones or surfaces requiring additional strength, consider using hot-fix rhinestones or a two-part epoxy adhesive. Hot-fix rhinestones have heat-activated glue on the back and can be applied with a hot-fix applicator or iron. Two-part epoxy adhesives require mixing equal parts of resin and hardener, providing a strong and durable bond. These methods ensure your rhinestones stay securely in place.
Step 6: Allow Time to Dry and Cure
Patience is a virtue, but the wait is worth it. Regardless of the adhesive method used, allow the rhinestones to fully dry and cure before handling or wearing the item. Follow the manufacturer’s instructions for drying and curing times to ensure optimal adhesion.
Allowing Adequate Time to Dry
Today, we are delving into a crucial yet often overlooked step in the rhinestone application process – allowing adequate time for the adhesive to dry. This step is the secret ingredient to ensuring your rhinestones stay firmly in place, refusing to budge even in the face of wild dance moves or unexpected gusts of wind.
Let’s dive right into why this drying time is of utmost importance. Firstly, it’s vital to note that different adhesives have varying drying times. To avoid any mishaps, always consult the instructions provided by the manufacturer. Some adhesives may dry within a matter of minutes, while others might require a few hours or even an overnight curing process. Following these guidelines will guarantee that your rhinestones adhere properly, standing strong against the tests of time.
But wait just a moment – before you start tapping your foot impatiently, let’s not forget about the impact of temperature and humidity on drying time. Picture this: you’re getting ready for a dazzling performance in a warm and humid venue. In such conditions, the drying process may be slowed down considerably. So, my friend, summon your inner zen master and exercise a little extra patience, giving the adhesive some additional time to work its magic.
Now, here’s an invaluable pro tip for you – applying pressure during the drying process can work wonders for creating an unbreakable bond between your rhinestones and their chosen surface. Picture yourself gently pressing down on each rhinestone after gluing them, like a skilled artist finessing their masterpiece. This technique helps eliminate any pesky air bubbles and ensures that your rhinestones stick like glue (pun intended).
So remember, dear rhinestone aficionados, allowing adequate time for the adhesive to dry is absolutely essential if you want your stones to stay put and continue their mesmerizing display. Nobody wants to deal with rhinestones falling off like fugitives, do they? Take your time, follow the manufacturer’s instructions diligently, consider environmental factors like temperature and humidity, and apply some gentle pressure – your patience will be rewarded with long-lasting and sparkling results.
Tips and Tricks to Enhance Longevity
We’ve got you covered with some fantastic tips and tricks to enhance the longevity of your rhinestones and keep them securely in place. From choosing the right adhesive to avoiding excessive heat and moisture, these tips will ensure that your rhinestones continue to sparkle and shine for a long time.
Glue it Right:
To keep your rhinestones secure, use a strong adhesive specifically designed for rhinestone applications. These adhesives provide a durable and long-lasting bond. Apply a small amount of adhesive to the back of each rhinestone for a secure hold. Remember, less is more.
Clean and Prep:
Before attaching your rhinestones, thoroughly clean the surface. Dust, oils, and residue can weaken the adhesive bond. Use alcohol wipes or mild detergent to clean the surface, ensuring it’s dry before applying the adhesive. A clean surface is the foundation for a strong bond.
Adhesive Application 101:
Follow the manufacturer’s instructions when applying the adhesive. Apply a small amount to the back of each rhinestone and press firmly onto the surface. Avoid using too much adhesive, as it can create a messy look. Allow the adhesive to dry completely before handling or wearing your item.
Seal with a Top Coat:
Protect your rhinestones from moisture, dirt, and other external factors by sealing them with a top coat. Look for top coats specifically designed for rhinestones in the market. Apply a thin layer over the rhinestones and let it dry completely. This extra layer of protection will keep your rhinestones dazzling for longer.
Handle with Care:
Rhinestones are beautiful but delicate. Avoid pulling or tugging at them, as it can loosen and dislodge them. When storing or transporting items with rhinestones, use protective cases or wrap them in tissue paper to prevent any accidental damage.
Protecting Rhinestones from Excessive Heat
I’ve got the inside scoop on keeping your rhinestones safe and sound.
First things first, let’s talk about placement. Keep your rhinestone-studded creations away from those sizzling hot spots. Heating vents and direct sunlight are a big no-no.
These fiery areas can weaken the adhesive holding your rhinestones in place, leaving you with a sad, sparkly-less project. So, keep them cool and away from the heat.
When it comes to washing your blinged-out garments or accessories, take a gentle approach. Opt for a delicate cycle and steer clear of hot water or high heat settings in the dryer. Heat is not your rhinestones’ BFF, so let them air dry or use a low heat setting if needed.
Now, let’s tackle ironing. If you absolutely must press your rhinestone-adorned fabric, here’s a nifty trick – place a thin cloth or towel between the iron and the rhinestone area. This genius move creates a barrier that prevents direct heat contact and keeps your precious gems intact.
But wait, there’s more. Check the label or consult the manufacturer’s instructions for heat exposure guidelines if you’re using adhesive to attach your rhinestones. Some adhesives may not be heat-resistant, so it’s better to be safe than sorry.
Attention hot glue gun enthusiasts. Make sure to use a heat-resistant adhesive specifically designed for rhinestones. Trust me, it’ll save you from heartache (and missing rhinestones).
Lastly, if you want to go the extra mile in protecting your bling, consider applying a clear protective coating over the rhinestones. This superhero move gives them an extra layer of defense against heat and other potential damage.
Regularly Inspecting for Loosening or Detachment
Regularly inspecting for loosening or detachment is of utmost importance when it comes to preserving the dazzling allure of your rhinestones. Whether they bedeck your favorite jeans, add a touch of glamour to your accessories, or enhance the beauty of your home decor, taking the time to carefully examine each stone is a crucial step in ensuring their longevity.
To begin, conduct a thorough inspection of your rhinestones, paying close attention to any indications of movement or gaps between the stone and its surface. Arm yourself with a magnifying glass if necessary, for even the tiniest shift can lead to a catastrophic loss of sparkle.
Make it a habit to scrutinize your rhinestones both before and after each use, especially if you frequently wear or handle the adorned item. This proactive approach allows you to swiftly address any loose stones before they have a chance to detach completely.
When reattaching wayward stones, exercise caution in selecting the appropriate adhesive for the job. Depending on the type of adhesive initially used, it may be necessary to meticulously remove any residual glue from both the stone and its surface before applying a fresh layer. Respectfully adhere to the instructions provided by the adhesive manufacturer, as they hold the key to proper application and drying time.
Should you find that your stones persistently detach despite your diligent inspections and reattachments, it may be prudent to explore alternative methods of attachment. Consider employing sewing techniques or utilizing prong settings to fortify their security, should glue alone prove insufficient.
In addition to regular inspections, it is paramount that you treat your rhinestones with utmost care. Avoid subjecting them to excessive rough handling and protect them from water, heat, and corrosive chemicals that can gradually degrade the adhesive over time.
Lastly, do not overlook the condition of the adhesive itself. As with all things in life, adhesives deteriorate with the passage of time. They lose their efficacy, becoming brittle and prone to failure. Should you detect any signs of deterioration, it is imperative that you promptly remove and replace the adhesive to safeguard the splendor of your rhinestones.
CrpcOk4HLrA” >
Conclusion
Are you tired of seeing your rhinestones fall off your favorite garments or accessories? Don’t worry, I’ve got you covered. Keeping those dazzling gems in place is easier than you think. With a few simple techniques and some handy tips, you can ensure that your rhinestones stay put and sparkle for days on end. Say goodbye to the frustration of losing those precious embellishments and hello to a world of glimmering perfection. Let’s dive into the secrets of keeping rhinestones firmly attached, so you can enjoy their beauty without any worries.
One surefire way to prevent rhinestones from falling off is by using a high-quality adhesive. Not all glues are created equal when it comes to securing these delicate gems. Opt for an adhesive specifically designed for rhinestone application, such as E6000 or Gem-Tac. These adhesives provide excellent bonding power and flexibility, ensuring that your rhinestones stay firmly in place even with regular wear and tear.
Another crucial factor in maintaining the longevity of your rhinestone embellishments is proper surface preparation. Before applying any adhesive, make sure the surface is clean and free from any dust, oils, or residue. Use a gentle cleanser or rubbing alcohol to remove any impurities that might hinder the adhesive’s effectiveness. A clean surface provides a solid foundation for the glue to adhere to, increasing its durability.
When it comes to applying the adhesive, less is more. Apply a small amount directly onto the back of each rhinestone using a toothpick or a precision applicator. Remember not to overload with glue as excess adhesive can seep out around the edges and ruin the overall look. A thin layer is sufficient for creating a strong bond while keeping the appearance neat and tidy.
Once you’ve applied the adhesive, gently press each rhinestone into place using tweezers or a small tool like a toothpick. Ensure that each gem is firmly pressed down, allowing the adhesive to spread evenly and create a secure attachment. Take your time and work methodically, paying attention to each rhinestone’s placement for a flawless result.
After securing all the rhinestones, allow ample drying time before handling or wearing your adorned item. Depending on the adhesive used, this can range from a few hours to overnight. Rushing this step may compromise the bond between the rhinestones and the surface, leading to premature detachment.