You’re in the middle of a project, and suddenly your adhesive dries up on you. Ugh, so frustrating.
But fear not, my friend. Whether you’re a crafting enthusiast, an industrial pro, or just someone who likes to fix things around the house, I’ve got some awesome tips for you on how to keep your adhesive from drying out.
No more wasting precious supplies. So stick around (pun intended) and let’s dive into these strategies that will make your adhesive last longer than ever before.
Let’s get started.

Storing Adhesive Properly
Contents
Adhesive is a versatile and essential tool for various DIY projects, crafts, and repairs. However, nothing is more frustrating than reaching for your glue only to find it dry and unusable. Proper storage is the key to preserving the freshness and effectiveness of adhesive. In this blog post, we will explore the best practices for storing adhesive to prevent it from drying out, ensuring that your glue is always ready when you need it.
Temperature Matters:
To maintain optimal glue consistency, store adhesive in a cool and dry place. Extreme temperatures can spell doom for your adhesive, causing it to deteriorate and lose its effectiveness. Avoid storing adhesive near heat sources like radiators or heaters. Aim for a temperature range of 50-75 degrees Fahrenheit.
Humidity Control:
Moderate humidity is essential for adhesive storage. High humidity can cause stickiness or clumping, while low humidity can accelerate drying. Strike a balance by storing your glue in an area with controlled humidity levels. Avoid storing adhesive in damp areas like basements or bathrooms.
Airtight Containers:
The container you choose plays a vital role in preserving adhesive freshness. Opt for airtight containers that prevent air from entering and drying out the glue. Mason jars with screw-top lids or squeeze bottles with secure caps are excellent options. After each use, make sure to seal the lid or cap tightly to minimize air contact.
Mind the Manufacturer’s Instructions:
Different adhesives may have specific storage requirements. Some may need to be stored upright to prevent drying out, while others may benefit from being stored upside down to create an airlock within the container. Always refer to the manufacturer’s instructions for guidance on proper storage techniques.
Labeling and Organization:
Keep your adhesive collection organized by labeling each container properly. This will help you locate the glue you need quickly and ensure that each adhesive is stored correctly according to its specific requirements. Use waterproof labels or marker pens to prevent smudging.
Avoid Chemical Interactions:
Storing adhesive near chemicals or solvents can potentially react with the glue and alter its properties. To maintain its effectiveness, keep your adhesive away from any substances that could compromise its quality. Store adhesives separately from paints, cleaning agents, or other potentially reactive materials.
Check the Expiration Date:
Before purchasing or using adhesive, always check the expiration date. Using expired glue may result in decreased effectiveness and a higher likelihood of it being partially dried out already. It’s better to invest in fresh adhesive to ensure optimal performance.
Keeping the Container Sealed
Adhesives are the unsung heroes of various industries and everyday life. Whether you’re a DIY enthusiast or a professional contractor, you understand the importance of keeping your adhesives fresh and ready for use. The secret to achieving this lies in properly sealing the container. In this article, we will explore the significance of proper storage and maintenance in keeping adhesive containers tightly sealed. By following these expert tips, you can extend the shelf life of your adhesives and ensure they don’t dry out prematurely.
Tightly Closed Lid or Cap:
The first step in maintaining a sealed container is to tightly close the lid or cap after each use. This simple action prevents air from infiltrating the container and damaging the adhesive. An airtight seal is crucial for preserving the adhesive’s integrity and preventing it from drying out quickly.
Clean the Rim:
Before sealing the container, thoroughly clean the rim. Any adhesive residue or debris on the rim can obstruct a tight seal and allow air to seep in. Use a clean cloth or tissue to wipe off excess adhesive and ensure that the rim is clear of any obstructions.
Remove Seals Properly:
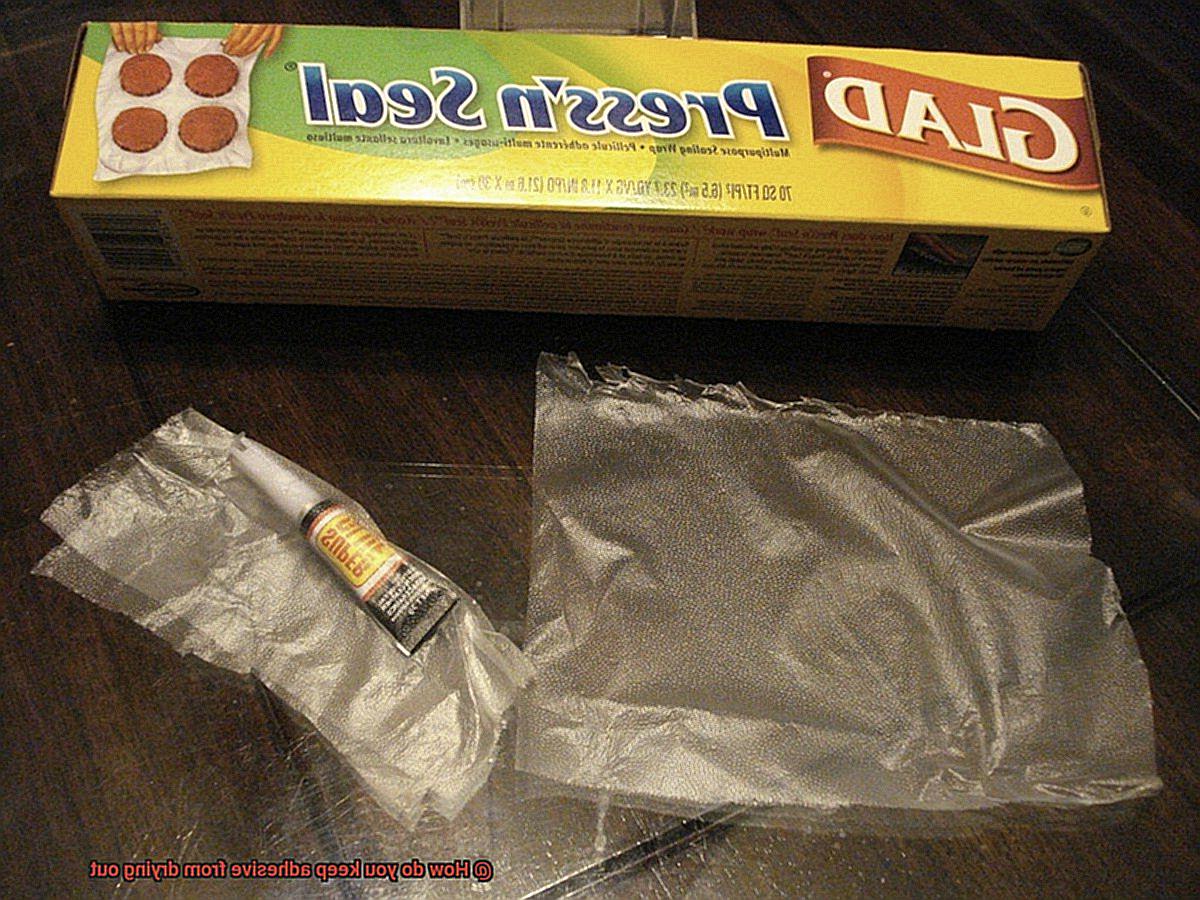
Certain adhesives come with special seals or foil liners that guard against air exposure. It is essential to carefully follow the manufacturer’s instructions for removing these seals. Once removed, reseal the container tightly to maintain freshness.
Transfer Adhesive if Needed:
If you discover that the original seal or liner is damaged or missing, it is advisable to transfer the adhesive into a new container with a proper seal. This step safeguards the adhesive’s integrity and prevents premature drying.
Store Upright:
Storing adhesives upright is vital for preventing leaks and preserving the seal. By maintaining an upright position, the adhesive remains contained, minimizing air exposure and maintaining its freshness.
Optimal Storage Conditions:
To maximize the shelf life of your adhesives, store them in a cool and dry place. Extreme temperatures and high humidity accelerate the drying process, leading to adhesive failure. Avoid storing adhesives in areas prone to these conditions.
Check Expiration Dates:
Adhesives have a limited shelf life, so it is crucial to check their expiration dates. Using expired adhesives can result in reduced effectiveness or even failure to bond properly. Discard any expired adhesives and replace them with fresh ones.
Storing Adhesive Upside Down
Adhesives are the unsung heroes of our projects, helping us stick things together and create masterpieces. However, there’s nothing worse than reaching for your favorite adhesive only to find it dried out and unusable. Fear not. In this blog post, we’ll explore the benefits of storing adhesive upside down and how it can help you keep your glue fresh and ready for action.
Preventing Drying Out:
Liquid adhesives, such as glue, are more susceptible to drying out when exposed to air. Storing adhesive upside down is an effective method to prevent this from happening. By keeping the adhesive in constant contact with the cap or nozzle, air exposure is minimized, ensuring that your adhesive remains fresh and usable for a longer period of time.
Simple Technique:
Storing adhesive upside down is a simple technique that anyone can do. Just turn the container or bottle upside down and secure it in place. You can use specialized adhesive storage racks or simply place the container in an inverted position on a stable surface. Remember to tightly close the cap or nozzle to prevent any leakage or spills.
Consider Viscosity:
It’s important to consider the viscosity of the adhesive when using this method. Thicker adhesives may not flow easily when stored upside down. Before using the adhesive, check its consistency. If needed, gently agitate or shake the container to ensure that the adhesive is evenly mixed and ready for use.
Extending Shelf Life:
One major benefit of storing adhesive upside down is that it helps extend the shelf life of the product. By minimizing air exposure, your adhesive remains fresh and usable for a longer period of time, reducing waste and saving you money.
Manufacturer’s Guidelines:
While storing adhesive upside down works well for most liquid adhesives, it’s essential to read and follow any specific storage instructions provided by the manufacturer. Different types of adhesives may have unique requirements, so make sure to consider these guidelines for optimal performance and longevity.
Additional Tips:
In addition to storing adhesive upside down, there are other tips and techniques to prevent drying out. Keep the container tightly sealed when not in use, store the adhesive in a cool and dry place away from direct sunlight, and avoid exposing it to extreme temperatures.
Minimizing Air Exposure During Use
Glue is a powerful tool that allows us to bond materials together, but nothing is more frustrating than discovering a dried-out adhesive when you need it most. To prevent this, it is crucial to minimize air exposure during use. In this article, we will explore expert tips and techniques to keep your glue fresh and ready for action. Let’s dive in and uncover the secrets of minimizing air exposure like a pro.
Seal It with Precision:
The first step to preventing air exposure is properly sealing the adhesive container after each use. Ensure that the lid or cap is tightly closed, leaving no room for air to sneak in. If the original packaging is too large, consider transferring the adhesive into a smaller container with a secure seal.
Thin Layers, Swift Application:
When applying the adhesive, aim for thin and even layers. Thick applications create more surface area for air exposure, increasing the chances of drying out. To minimize air exposure, work efficiently and quickly. Plan ahead and prepare all necessary materials beforehand to reduce the time between application and container sealing.
Tools and Techniques:
Opt for tools like brushes or spatulas instead of using your fingers directly. This prevents direct contact between the adhesive and the air on your skin, reducing the risk of premature drying. Additionally, choose squeeze bottles or applicators with small openings to control the flow of adhesive and minimize air exposure.
Proper Storage:
Correctly storing your adhesive when not in use is crucial for preventing drying out. Find a cool, dry place away from direct sunlight and extreme temperatures. Heat and humidity can accelerate the drying process, so choose an optimal storage location for your glue.
Adding Solvents or Thinners to Adhesive
Glue is a remarkable tool that brings materials together, but its quick-drying nature can sometimes hinder our creative endeavors. Fear not. The secret lies in adding solvents or thinners to adhesive. By understanding the process and considering crucial factors, we can unlock the ability to extend the working time of our adhesive, ensuring flawless bonding. Get ready to dive into the art of adding solvents or thinners to adhesive.
Choosing the Perfect Solvent or Thinner:
Not all adhesives are created equal, and they require specific solvents or thinners to achieve the desired consistency and drying time. As glue enthusiasts, it is crucial to select the appropriate solvent or thinner recommended by the manufacturer. Using the wrong one can compromise adhesive performance and bonding strength.
Gradual Addition for Optimal Results:
Patience is key when it comes to adding solvents or thinners to adhesive. Avoid over-dilution by adding them gradually and in small amounts. Start with a minuscule quantity, mixing thoroughly before assessing consistency and drying time. Based on your observations, continue adding more solvent or thinner until you achieve your desired results.
Manufacturer’s Guidelines:
The manufacturer knows best. Always refer to their instructions when adding solvents or thinners to adhesives. These guidelines provide specific directions on suitable amounts, precautions, and limitations. Following them ensures optimal performance and prevents any unwanted surprises.
Periodic Maintenance:
Like any masterpiece, adhesive requires upkeep. Solvents and thinners can evaporate over time, potentially altering the adhesive’s consistency. Keep your adhesive at its prime by periodically adding small amounts of solvent or thinner as needed.
Test Before Committing:

Adhesive mishaps on a larger scale can be heart-wrenching. To avoid such tragedy, test the adhesive on a small area first. This allows you to assess its performance and ensure it meets your requirements before committing to larger projects. Safety first, glue enthusiasts.
Regular Maintenance of Containers
Today, we’re diving into the importance of regular maintenance for adhesive containers. Trust me, it’s the secret to adhesive success.
Cleanliness is Key:
Before and after each use, give your adhesive containers a quick wipe down. No residue means flawless bonding every time.
Seal the Deal:
Tightly seal the lids of your adhesive containers after each use. Prolonged exposure to air can dry out the glue, leaving you with a useless mess. Check those lids regularly for cracks and damage – give your glue a protective hug.
Store it Right:
Adhesive containers are delicate flowers – they need cool, dry places. Extreme temperatures and humidity speed up drying, turning sticky glue into a sad excuse. Keep containers away from sunlight and high humidity for maximum effectiveness.
Handle with Care:
Your adhesive doesn’t appreciate foreign substances. Use clean tools when dispensing glue and keep the container’s opening squeaky clean. Maintain that pristine adhesive environment.
Expiration Dates Matter:
Expired adhesives lead to lackluster performance and weak adhesion – not ideal for your projects. Stay on top of expiration dates and replace old adhesives. Your glue will thank you.
Adhesive Specifics:
Different adhesives may require specific maintenance procedures. Some need a good stir or shake before use for consistency, while others may require thinning with specific solvents. Refer to the manufacturer’s instructions for that extra adhesive TLC.
Benefits of Proper Storage and Use of Adhesives
We’ve all experienced that frustrating moment when our trusty adhesive fails us mid-project, turning into a gloopy mess. But what if we told you that this sticky situation can be avoided with proper storage and use? That’s right, taking care of your adhesives is the key to unlocking their full potential. In this blog post, we’ll explore the benefits of storing and using adhesives correctly – from preventing drying out to ensuring safety and cost savings. So let’s dive in.

Prevent Drying Out:
To keep your adhesives in tip-top shape, store them in airtight containers or seal them tightly after each use. Avoid exposing them to extreme temperatures or direct sunlight. By doing so, you prevent evaporation and maintain the adhesive in a liquid or semi-liquid state.
Maintain Bonding Strength:
Control the environment by storing adhesives at stable temperature and humidity levels. This preserves their original strength, ensuring reliable bonding performance. Say goodbye to weak bonds.
Minimize Contamination Risks:
Store your adhesives in clean and dry conditions, far away from potential sources of contamination. Don’t let foreign particles compromise the effectiveness of your adhesive. Keep it pure and powerful.
Ensure Safety:
Take precautions during storage and use, especially for adhesives containing hazardous chemicals or VOCs. Store them in designated areas away from heat sources or open flames. Safety first, always.
Achieve Cost Savings:
Following proper storage guidelines extends the shelf life of your adhesives. No more wasted products or frequent replacements. Efficient use of adhesives minimizes waste and optimizes usage, leading to long-term cost savings.
Conclusion:
Proper storage and use of adhesives are about more than just avoiding dried-out glue; it’s about unlocking their full potential. By investing a little time and effort into storing your adhesives correctly, you ensure they remain effective, reliable, and safe to use.
Not only will this save you the frustration of dried-out glue, but it will also lead to cost savings in the long run. So, next time you reach for that adhesive, remember that a little TLC can go a long way in achieving sticky success.
QOWxLIfeFYs” >
Conclusion
In conclusion, the key to preventing adhesive from drying out is proper storage and maintenance. By following these strategies, you can keep your glue fresh and ready to go, saving time, money, and frustration.
Storing adhesive correctly involves considering important factors like temperature control, humidity levels, airtight containers, following manufacturer’s instructions, labeling and organizing, avoiding chemical mishaps, and checking expiration dates. These practices will help preserve the freshness and effectiveness of your adhesive.
Don’t forget the crucial step of tightly sealing the container. Make sure to close that lid or cap with gusto after each use. Give the rim a good cleaning too, removing any pesky residue or debris that might interfere with a tight seal. If applicable, remove seals properly and consider transferring adhesive to a new container if necessary. Storing adhesives upright is also a smart move to prevent any unwanted leaks. And always choose optimal storage conditions for your sticky stuff.
If you really want to get fancy in preventing drying out, try storing adhesive upside down. This nifty technique keeps your glue in constant contact with the cap or nozzle, minimizing exposure to air.
During use, it’s all about minimizing air exposure like a pro. Seal that container with precision after each use and apply thin layers of adhesive quickly to reduce drying time. Get creative with tools and techniques that keep direct contact between the adhesive and air at bay (think brushes or spatulas). And when not in use? Store that adhesive in a cool and dry place like it deserves.
Now let’s talk solvents and thinners – they’re like magic potions for extending working time. Adjust consistency and drying time by adding them to your adhesive mix. Just remember to choose those recommended by the manufacturer and follow their guidelines for optimal results.
Regular maintenance is key too. Keep those adhesive containers squeaky clean before and after each use. Tighten those lids like there’s no tomorrow to prevent any air exposure. And store them in suitable conditions, far away from extreme temperatures and humidity levels that can speed up the drying process. Oh, and handle with care using clean tools to avoid any contamination risks.
The benefits of proper storage and use are immense. You’ll prevent drying out, maintain bonding strength, minimize contamination risks, ensure safety, and save some serious cash by extending the shelf life of your adhesives. It’s a win-win.
So there you have it – implement these strategies and take good care of your adhesive.

