Renovating your kitchen means joining two worktops together for that sleek and cohesive look. But let’s face it, getting that flawless connection can feel intimidating. Don’t sweat it. In this guide, we’ll walk you through the step-by-step process of joining two kitchen worktops like a pro. From planning and measuring to those final finishing touches, we’ve got you covered. Whether you’re a seasoned DIY guru or just starting out, this comprehensive guide will give you all the knowledge and tips you need to make your kitchen transformation remarkable. So let’s dive in and make those worktops join seamlessly.
Step 1: Plan and Measure
Contents
- 0.1 Step 1: Plan and Measure
- 0.2 Step 2: Cut and Shape
- 0.3 Step 3: Route It Out
- 0.4 Step 4: Bolt It Up
- 0.5 Step 5: Stick It Together
- 0.6 Step 6: Clamp It Down
- 0.7 Step 7: Finishing Touches
- 1 Types of Worktop Materials
- 2 Preparing the Worktops for Joining
- 3 Choosing the Right Adhesive
- 4 Applying the Adhesive
- 5 Aligning and Securing the Worktops
- 6 Drying Time Requirements
- 7 Removing Excess Glue
- 8 Mechanical Methods for Joining Worktops
- 9 Conclusion
Before diving into the physical stuff, take time to plan and measure the worktops for a precise fit. Decide on the type of joint you want – butt or mitered – and mark accordingly.

Step 2: Cut and Shape
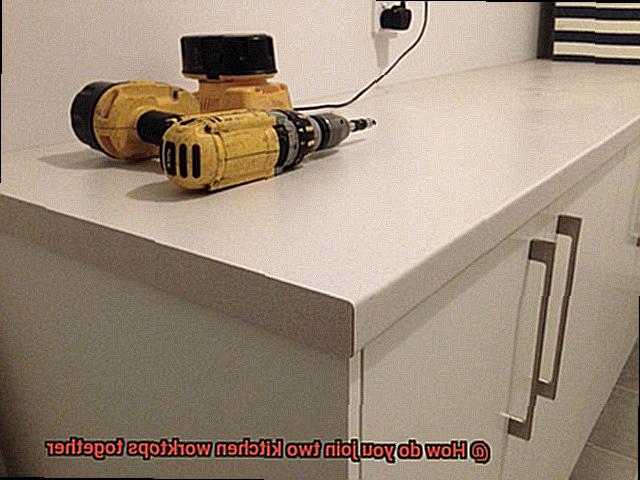
Grab your circular saw or jigsaw and cut along those marked lines on both worktops. Take it slow and steady, making sure to keep things accurate. Safety first, so don’t forget your gear.
Step 3: Route It Out
Once your worktops are cut, use a router with a straight-cut bit to create grooves in both joining edges. These grooves are key to a strong and seamless connection.
Step 4: Bolt It Up
To reinforce the joint, install connector bolts into those grooves you just made. These bolts will keep everything stable, preventing any unwanted movement between the worktops. Space them evenly for even weight distribution.
Step 5: Stick It Together
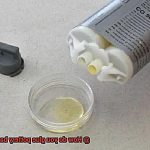
Apply some top-notch adhesive on the mating surfaces of the worktops. Spread it evenly without going overboard; too much squeeze-out is not what we’re aiming for here. This adhesive will give you a solid bond.
Step 6: Clamp It Down
Grab a bar clamp or sash clamp and use it to hold those worktops tightly together. This step is crucial for a secure and even joint. Follow the adhesive manufacturer’s instructions for how long to leave the clamps in place, so you get the best results.
Step 7: Finishing Touches
Once the adhesive has fully dried and hardened, remove those clamps and use a sharp chisel to clean up any excess adhesive. Lightly sand the joint for that smooth finish we’re aiming
Types of Worktop Materials
When it comes to joining two kitchen worktops together, selecting the right material and adhesive is crucial for creating a strong and seamless joint. In this comprehensive guide, we will explore the various types of worktop materials available and provide tips on how to join them effectively using appropriate adhesives.
Laminate: Affordability and Versatility
Laminate worktops are a popular choice due to their affordability, wide range of colors and patterns, and ease of maintenance. To join laminate worktops, use a contact adhesive or PVA glue specifically designed for laminate surfaces. Apply a thin layer of adhesive on both edges, align the worktops accurately, and firmly press them together. Use clamps or weights to ensure a tight bond.
Solid Surface: Seamlessness and Durability
Solid surface worktops, such as acrylic or polyester, offer a seamless appearance with their non-porous construction. They are resistant to stains, scratches, and heat, making them ideal for busy kitchens. For joining solid surface worktops, use an adhesive recommended for this material. Apply the adhesive evenly on the edges, align the worktops precisely, and apply even pressure to create a strong bond. In case of any damage over time, solid surface worktop joints can be easily repaired.
Granite: Elegance and Longevity
Granite worktops are known for their natural beauty, heat resistance, and durability. To join granite worktops together seamlessly, use an epoxy-based adhesive specifically designed for stone surfaces. Apply the adhesive evenly on both edges, align the worktops accurately, and apply even pressure to ensure a secure joint. Periodic sealing may be necessary to maintain their appearance.
Quartz: Strength and Beauty
Quartz worktops offer the look of natural stone with added strength and durability. To join quartz worktops, use an adhesive suitable for this material. Apply the adhesive evenly on both edges, align the worktops accurately, and apply even pressure to achieve a strong bond. Quartz worktops require minimal maintenance and are resistant to stains and scratches.
Wood: Warmth and Natural Appeal
Wooden worktops provide a warm and natural aesthetic to the kitchen. Joining wooden worktops requires a waterproof wood glue to ensure a secure bond. Apply the glue evenly on both edges, align the worktops precisely, and apply even pressure for a tight joint. Regular oiling or sealing is necessary to protect the wood from moisture damage.
Conclusion:
Joining kitchen worktops requires careful consideration of the material and adhesive used. Laminate, solid surface, granite, quartz, and wood are all popular options with their own unique characteristics.
Preparing the Worktops for Joining
Creating a dream kitchen involves careful attention to detail, and joining two worktops together is a skill that can truly elevate the overall look and feel of your space. However, before you embark on this exciting project, it is crucial to properly prepare the worktops. In this article, we will delve into the essential steps you need to take before joining your worktops, with a specific focus on the use of glue as the connecting material.
Step 1: Measure and Mark for Accuracy:
To start off on the right foot, accurately measure and mark the area where the worktops will be joined. This preliminary step ensures precision during the joining process, resulting in a seamless final product.
Step 2: Cleanse for Optimal Adhesion:
Properly cleaning the surfaces of both worktops is vital for achieving a strong bond. Using a mild detergent and water, remove any dirt, dust, or grease that may hinder adhesion. A clean and smooth surface serves as an ideal foundation for the adhesive to grip onto, ensuring a durable connection.
Step 3: Smooth Out Imperfections:
Address any rough or uneven areas on the worktops by employing sandpaper or an electric sander. By skillfully smoothing out these imperfections, you create a flawless canvas for joining the worktops together seamlessly.
Step 4: Selecting the Perfect Adhesive:
Choosing the right adhesive is key to ensuring a successful joint. Wood glue, epoxy resin, or contact adhesive are popular choices, depending on the material of your worktops and personal preference. Follow the manufacturer’s instructions carefully when applying the adhesive, ensuring an even coverage on both surfaces.
Step 5: Align and Join with Precision:
With your chosen adhesive in place, it’s time to align and join the worktops together. Exercise extra care in ensuring accurate alignment before making contact with the adhesive. Once the bond is made, adjustments become trickier, so take your time to achieve a flawless match.
Step 6: Secure for Stability:
To guarantee a strong bond while the adhesive cures, consider using clamps or weights to hold the worktops in place. This additional step will provide the necessary stability for a secure and long-lasting connection.
Step 7: Patience Pays Off:
Allow the adhesive to cure fully before putting your newly joined worktops to use. Curing times can vary depending on the type of adhesive used, so be sure to follow the manufacturer’s instructions for optimal results. Patience is key in achieving a seamless kitchen transformation.
Choosing the Right Adhesive
Today, we are diving into the exciting world of adhesives. Now, I know what you’re thinking – adhesive isn’t exactly the most glamorous topic. But trust me, when it comes to joining two kitchen worktops together, the right adhesive is your secret ingredient for a strong and stylish kitchen. So, let’s roll up our sleeves and explore the factors to consider when selecting the perfect adhesive for your worktops.
Material Matters:
First things first, consider the type of material your worktops are made of. Are they laminate, solid surface, or perhaps a beautiful granite or quartz? Different adhesives are designed to work best with specific materials, so understanding your worktops’ composition is key.
Moisture Exposure:

Kitchens can be hotspots for moisture, whether it’s from spills, steam, or the occasional splash. Therefore, choosing an adhesive with excellent moisture resistance is crucial to ensure the longevity of your bond. Nobody wants their worktops coming apart in the middle of cooking up a storm.
Strength is Everything:
Next on our list is determining the desired strength of your bond. If you’re dealing with heavy-duty worktops or planning to place a lot of weight on them (hello, enthusiastic home cooks.), opt for adhesives known for their high strength and durability. We want that bond to be rock-solid.
Epoxy Resins: The Heavy-Duty Heroes:
When it comes to joining worktops together, two-part epoxy resins steal the show. These powerhouses are renowned for their incredible strength, durability, and resistance to moisture, heat, and chemicals. Perfect for kitchens that experience a lot of action.
Polyurethane Adhesives: The Flexible Friends:
For those who want a strong bond with a little flexibility, polyurethane-based adhesives are the way to go. They offer excellent resistance to moisture and can accommodate some movement between worktops as they expand and contract with temperature changes.
Solid Surfaces: Silicone to the Rescue:
If your worktops are made of solid surface materials like granite or quartz, silicone adhesives come to the rescue. They provide a robust bond while allowing for a bit of flexibility. Plus, they boast resistance to moisture, heat, and chemicals – perfect for bustling kitchens.
Preparation is Key:
Before applying any adhesive, ensure your worktop surfaces are clean, dry, and free from grease or debris. A quick sanding to roughen the surface can also enhance the bond by providing more area for adhesion.
Applying the Adhesive
In this blog post, we will dive into the process of joining two kitchen worktops together using adhesive. Whether you’re a DIY enthusiast or a professional tradesperson, this guide will equip you with the knowledge and techniques to create a bond that stands the test of time.
Choose the Right Adhesive:
To ensure a successful bond, it’s essential to choose the right adhesive for your specific worktop material. Consider the following options:
- Heavy-duty epoxy resins: Exceptional durability and resistance, perfect for worktops exposed to moisture.
- Flexible polyurethane adhesives: Accommodate movement between worktops, ideal for long-term durability.
- Silicone adhesives: Perfect for solid surfaces like granite or quartz, providing a strong and seamless connection.
Prepare the Worktops:
Before applying adhesive, ensure that both worktops are clean and free from dirt, dust, or grease. Thoroughly clean the surfaces using a mild detergent and warm water, then dry them completely with a clean cloth.
Prepare the Adhesive:
Follow the manufacturer’s instructions to prepare the adhesive for application. Some adhesives may require mixing with water or activating with a catalyst. Take care to follow instructions carefully to ensure proper application.
Apply the Adhesive:
Using a notched trowel or a suitable applicator, apply a thin layer of adhesive evenly on one of the worktops. The notches on the trowel create ridges that increase the surface area for bonding and improve overall strength. Spread the adhesive evenly to avoid any gaps or unevenness.
Joining the Worktops:
Carefully align the second worktop over the first one, ensuring a perfect fit. Having another person assist you during this step can ensure accuracy. Apply gentle pressure and adjust as necessary to achieve a precise fit.
Bonding and Curing:
Firmly press the worktops together to allow the adhesive to bond properly. Use clamps or heavy objects to apply even pressure along the entire joint. Avoid exerting excessive pressure that may damage the worktops. Allow sufficient time for the adhesive to cure according to the manufacturer’s instructions.
Finishing Touches:
Inspect the joint to ensure a strong and seamless connection. Remove any excess adhesive using a scraper or suitable solvent, following the manufacturer’s guidelines.
Aligning and Securing the Worktops

In this guide, we will explore the various methods available, with a particular focus on using adhesive or glue. So, let’s dive in and discover the secret recipe for aligning and securing worktops that will transform your kitchen into a masterpiece.
Alignment:
To start, place the worktops next to each other in the desired position. Use a tape measure to ensure perfect alignment in terms of length and width. Double-check the alignment before proceeding to secure the worktops together.
Using Adhesive:
Adhesive or glue is a popular choice for joining solid surface or laminate worktops. Apply a thin layer of adhesive to the edges of both worktops, ensuring even coverage. Carefully bring the worktops together, aligning them perfectly. Apply pressure evenly along the joint to ensure a strong bond. Clean up any excess adhesive that may squeeze out from the joint using a damp cloth.
Clamps for Added Stability:
To prevent any movement or shifting during the drying process, use clamps to hold the worktops in place while the adhesive cures. Remove the clamps once the adhesive has fully cured.
Reinforcement with Wooden Dowels:
For added stability and strength, insert wooden dowels into pre-drilled holes along the joint. This ensures a durable and long-lasting connection between the worktops.
Finishing Touches:
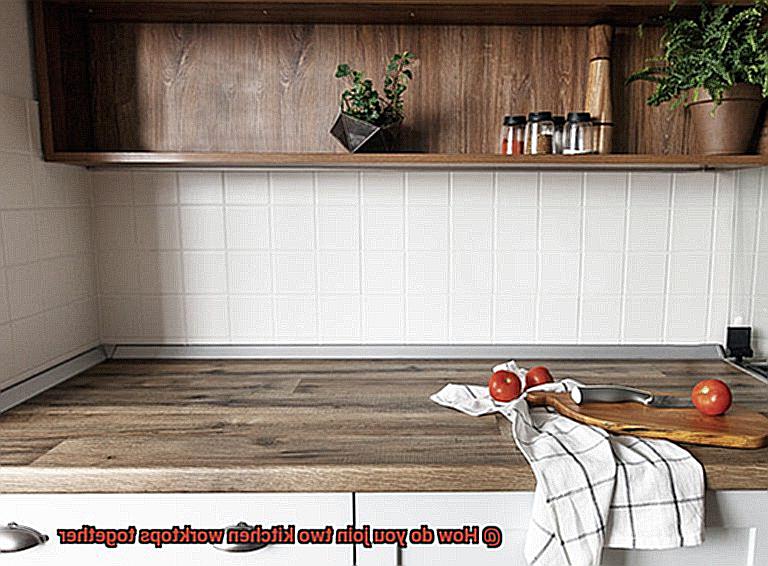
Allow sufficient time for the adhesive or glue to fully cure before applying any weight or stress on the joined worktops. Finish the joint with a matching filler or sealant for a seamless appearance and to prevent moisture or dirt from penetrating the joint.
Drying Time Requirements
Achieving a seamless and professional look for your kitchen worktops requires more than just slapping some glue on and calling it a day. To ensure a strong and long-lasting joint, it’s crucial to understand and follow the drying time requirements of the adhesive used. Let’s delve into this topic further to discover the key factors and considerations involved.
First and foremost, selecting the right adhesive is paramount. Investing in a high-quality adhesive specifically designed for bonding kitchen worktops is essential. These adhesives are formulated to provide strong bonds and have shorter drying times compared to standard adhesives. So, don’t skimp on the glue – it’s worth the investment.
Now let’s dive into the heart of the matter – drying time. The recommended drying time for kitchen worktop adhesives can vary based on several factors. These factors include the type of adhesive, ambient temperature, humidity levels, and the materials being joined. It is crucial to carefully read the manufacturer’s instructions for the specific adhesive you’re using, as they will provide detailed information on how long you need to wait before moving forward.
In general, most kitchen worktop adhesives require a minimum drying time of 24 hours. This means that once you’ve applied the adhesive and joined the two worktops together, you must leave them undisturbed for at least 24 hours before applying any weight or pressure to the joint. This critical period allows the adhesive to fully set and create a robust bond that will stand the test of time.
However, here’s a little secret – allowing for a longer drying period can actually enhance the strength and durability of your joint even further. Some high-quality adhesives may require extended drying times ranging from 48 hours to several days. If you’re aiming for a rock-solid joint that will withstand daily use and heavy loads, consider giving it a little extra time to dry.
Keep in mind that environmental factors can significantly impact drying time. Temperature and humidity play a vital role in how quickly your adhesive will dry. Higher temperatures can expedite the process, while lower temperatures can slow it down. Similarly, high humidity levels can prolong the drying time, while low humidity levels can accelerate it. To create the optimal drying conditions for your adhesive, take these factors into account and make any necessary adjustments.
Removing Excess Glue
Joining kitchen worktops together with glue is a popular method to create a strong and durable bond. However, excess glue can be an eyesore, detracting from the seamless finish you desire. In this comprehensive guide, we will explore a variety of expert techniques to effectively remove excess glue from joined kitchen worktops, ensuring a flawless result.
Method 1: Scraping
Scraping is a tried and tested method for removing excess glue. Once the glue has dried, gently scrape away the hardened residue using a putty knife or scraper. Employing a sharp blade or scraper will yield superior results. Remember to exercise caution to avoid any damage to the worktops.
Method 2: Heat Application
Heat can be a valuable ally in the battle against excess glue. Utilize a hairdryer or heat gun to apply heat directly to the glued area. As the glue softens under the warmth, carefully scrape it off using a putty knife or scraper. It is crucial not to overheat, as excessive heat can cause damage to the worktops.
Method 3: Solvents
Harness the power of solvents such as acetone, rubbing alcohol, or nail polish remover to dissolve and remove excess glue. Apply the solvent directly onto the glue and allow it to soak for a few minutes. Then, wipe away the softened glue using a clean cloth or sponge. Prioritize testing the solvent on an inconspicuous area first to ensure it does not cause any damage or discoloration.
Method 4: Sanding
For stubborn or dried-on glue stains, sanding may be necessary. Employ fine-grit sandpaper or an electric sander to gently sand away the excess glue until it is no longer visible. Gradually progress from low grit sandpaper to higher grit to avoid any scratching or damage to the worktops. After sanding, thoroughly wipe away any residue with a clean cloth or sponge.

Mechanical Methods for Joining Worktops
From trusty screws to mighty bolts, from sturdy connectors to secret weapon biscuit joints, we have a variety of techniques to ensure a strong and reliable bond between your worktops.
Let’s start with the simple yet effective screw method. Drill pilot holes into your worktops, insert screws, and tighten them up with a screwdriver or drill. This method provides a tight and secure connection that even the strongest glue would envy.
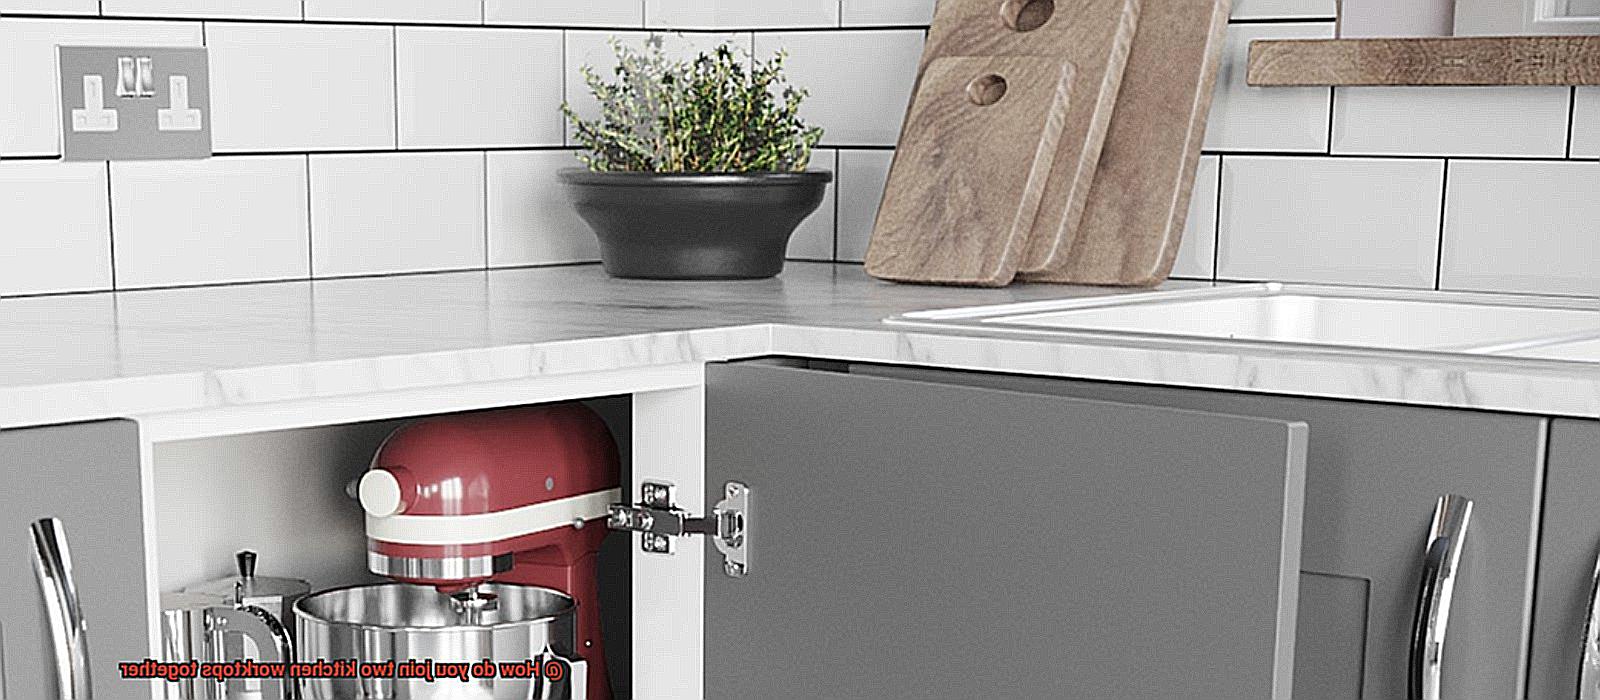
For heavy-duty applications, bolts are your best friends. Drill pilot holes, insert bolts through the holes, and secure them with nuts and washers on the underside of the worktops. This method requires more effort but offers exceptional stability.
Now, let’s delve into the world of connectors. These mighty heroes come in various shapes and sizes, such as L-shaped brackets or straight connectors. Made of metal, they ensure a strong and stable connection between your worktops. Attach them to the underside of your worktops using screws or bolts (depending on their design), and you’re good to go. The best part? Connectors make disassembly a breeze if needed in the future.
Last but not least, we have the secret weapon of worktop joining: biscuit joints. This technique involves cutting grooves (biscuit slots) into the edges of your worktops and inserting small oval-shaped wooden pieces (biscuits) along with adhesive. When you press your worktops together, these biscuits expand, creating an unbreakable bond that even Houdini would be proud of.
itXlmMD68Aw” >
Conclusion
Joining two kitchen worktops together can be a simple and effective way to create more counter space in your kitchen.
There are several methods you can use, depending on the type of worktop material you have and your personal preferences. One common method is using adhesive and clamps to secure the worktops together.
This involves applying a strong adhesive to the edges of the worktops, then using clamps to hold them tightly in place while the adhesive sets. Another option is using dowels or biscuits to join the worktops together.
This involves drilling holes into the edges of the worktops and inserting dowels or biscuits that will align and hold them together. Whichever method you choose, it’s important to ensure that the surfaces are clean and properly aligned before joining them.
Additionally, it’s a good idea to reinforce the joint with screws or brackets for added stability.