Ever wondered how those sleek, transparent acrylic sheets seamlessly blend into one solid masterpiece? Whether you’re a DIY enthusiast or a pro in the field, joining two acrylic sheets is an essential skill that unlocks endless possibilities.
Imagine this: you have two acrylic sheets yearning to be transformed into a stunning display case or an awe-inspiring aquarium. The secret lies in understanding the techniques, tools, and adhesives that effortlessly bring these sheets together. Brace yourself for the captivating world of acrylic bonding.
Hook:
There’s nothing quite like the satisfaction of creating an invisible bond between two acrylic sheets. Picture showcasing your prized collectibles without any pesky seams or glue marks. It’s pure magic.
Main Points:
- Thermal Bonding: Harnessing controlled heat to soften the surface of acrylic, this technique creates a virtually seamless connection. Discover the precision-based process and precautions that make it happen.
- Solvent Cementing: A tried and true method in acrylic fabrication, solvent cementing dissolves the surface of both sheets using chemical solvents, resulting in a strong and cohesive bond. Learn about different solvents and expert tips for flawless results.
- Mechanical Fasteners: Sometimes, mechanical connections are needed to reinforce acrylic sheet bonds. Explore options like screws, nuts, and bolts while learning how to effectively utilize them with acrylic.
- UV Bonding: Seeking an invisible joint with no trace of bonding? Enter UV bonding. Discover how ultraviolet light can magically cure adhesive and create bonds that defy physics.
Joining two acrylic sheets goes beyond a simple DIY project; it’s an art form merging aesthetics with functionality to bring your wildest ideas to life. From mastering thermal bonding and solvent cementing basics to exploring mechanical fasteners and UV bonding possibilities, these techniques empower you to create breathtaking acrylic designs that leave an unforgettable impression.
So, are you ready to embark on your acrylic bonding journey? Get ready for a world of boundless creativity.
What is Acrylic and its Uses?
Contents
- 1 What is Acrylic and its Uses?
- 2 Joining Acrylic Sheets with Adhesive
- 3 Preparing the Acrylic Surfaces for Bonding
- 4 Applying the Adhesive and Aligning the Sheets
- 5 Curing Time for the Joint
- 6 Joining Acrylic Sheets with Mechanical Fasteners
- 7 Drilling Holes in the Acrylic Sheets
- 8 Inserting Fasteners and Securing Them
- 9 Solvent Welding for a Seamless Look
- 10 Conclusion
Acrylic, also known as polymethyl methacrylate (PMMA), is a synthetic polymer that has taken the world by storm with its versatility and wide range of applications. From its exceptional transparency to its outstanding weather resistance, acrylic has become the go-to material for a variety of uses.
One of the standout features of acrylic is its remarkable optical clarity. Acrylic sheets are renowned for their ability to provide crystal-clear views, making them perfect for applications where visual aesthetics are paramount. Unlike glass, acrylic is lightweight and shatter-resistant, ensuring safety in any situation.
But it doesn’t stop there. Acrylic’s weather resistance is second to none. It refuses to yellow or degrade when exposed to sunlight, making it an excellent choice for outdoor applications such as signage, windows, and protective barriers. Furthermore, acrylic boasts incredible resistance to chemicals and UV radiation, enhancing its durability and longevity.
What truly sets acrylic apart is its adaptability. With ease, it can be molded into any shape or size, making it a favorite in industries like architecture, interior design, automotive manufacturing, and electronics. Through processes like extrusion, injection molding, thermoforming, and casting, acrylic can be transformed to meet the most intricate design requirements.
But it’s not just about appearances. Acrylic offers functionality benefits as well. Its ability to insulate both heat and electricity makes it perfect for electrical enclosures and thermal insulation applications. Additionally, acrylic sheets can be manufactured with scratch resistance or anti-glare coatings to suit the specific needs of different applications.
The uses of acrylic are limitless and diverse. In the world of architecture and interior design, acrylic finds its place in windows, skylights, partitions, furniture, and decorative elements. Its transparency allows natural light to flood through while adding a sleek modern touch to any space. In the automotive industry, acrylic is the material of choice for headlights, taillights, mirrors, and instrument panels, thanks to its unmatched clarity and impact resistance.
The display and signage industry relies heavily on acrylic’s capabilities. Lightboxes, point-of-purchase displays, trade show exhibits, and retail store fixtures all benefit from acrylic’s lightweight nature and impeccable optical clarity. Whether it’s transporting or installing, acrylic gets the job done with ease and ensures high visibility of the displayed content.
Joining Acrylic Sheets with Adhesive
As an expert in the realm of all things acrylic, I am here to guide you on this thrilling journey and share some valuable insights. Put on your safety goggles and prepare to be amazed.
When it comes to bonding acrylic sheets, the possibilities are endless with various types of adhesive at your disposal. Whether you opt for the specialized strength of acrylic adhesives, the magic of cyanoacrylate adhesives (super glue), or the resilience of epoxy adhesives, the choice is yours. Each offers its own unique benefits, so select the one that aligns perfectly with your project’s needs.
Before embarking on this adhesive adventure, it is crucial to ensure that your acrylic surfaces are squeaky clean. We must banish any trace of dirt, dust, or grease that could potentially hamper the bond’s success. Utilize a mild detergent and water for a basic cleanse or indulge in a specialized acrylic cleaner for an extra touch of brilliance.
Now, brace yourself for a crucial step – roughening those edges. Gently sanding the areas that will be united creates a rough surface that enhances the adhesive’s grip. Think of it as providing your adhesive with tiny footholds to grab onto – ensuring an unbreakable bond.
The time has finally come to unveil the main act – applying the adhesive. Take heed and carefully follow the manufacturer’s instructions as application methods may vary. Typically, a thin, delicate layer of adhesive is delicately spread onto one of the acrylic surfaces. Then, with great precision and purpose, press the two sheets together firmly. Alignment is key here, my friends – ensuring a seamless connection that astounds.
But wait. To achieve an unyielding bond that stands the test of time, consider clamping or securing the joined acrylic sheets until the adhesive reaches its full potential. This may require a touch of patience as curing times can vary depending on the adhesive type chosen. Remember, greatness comes to those who patiently wait.
Ah, an important word of caution. Some adhesives possess the ability to fog or discolor your precious acrylic sheets. We cannot allow such atrocities. To avoid any unexpected surprises, it is wise to test the adhesive on a small, inconspicuous area before covering the entire surface with its magical touch. Better safe than sorry, my fellow artisans.
Preparing the Acrylic Surfaces for Bonding
Similar to a virtuoso painter priming their canvas, the key to achieving a strong and enduring bond lies in meticulous surface preparation. So don your lab coats, wield your sandpaper with finesse, and unlock the secrets to flawless acrylic bonding.
Step 1: The Spa Treatment – Cleaning the Surfaces
Step 2: Creating Friction – Sanding the Surfaces
Now that our acrylic sheets are resplendently clean, it’s time to introduce some friction into the equation. Delicately sanding the surfaces will impart a textured finish, allowing the adhesive to work its enchantment. Exercise caution, though. We wouldn’t want to mar our precious acrylic. Employ a fine-grit sandpaper (around 220-400 grit) and lovingly sand back and forth. Once done, tenderly wipe away any lingering sanding dust with a pristine cloth.
Step 3: Seeking Assistance – Applying a Solvent (if needed)
Sometimes, our acrylic surfaces yearn for a helping hand in achieving that impeccable bond. Enter solvents like methyl ethyl ketone (MEK) or acetone. These prodigious potions can soften and slightly melt the acrylic surfaces, elevating adhesion to new heights. However, be aware that not all acrylics dance harmoniously with solvents. Conduct a preliminary test on a discreet area before proceeding. Should you choose to employ a solvent, carefully apply it with restraint, allowing it to gracefully evaporate before proceeding.
Step 4: The Finishing Flourish – Using a Primer
In our grand symphony of bonding, primers take center stage. These alchemical elixirs act as adhesion promoters, forging an unbreakable union between the acrylic surfaces and the adhesive. Prior to applying the primer, immerse yourself in the manufacturer’s instructions. Ensure that both surfaces receive an even coat, and patiently await its complete drying before embarking on the final crescendo.
Applying the Adhesive and Aligning the Sheets
In the previous section, we explored the crucial role of surface preparation in achieving a flawless bond. Now, get ready to dive into the fascinating world of applying adhesive and aligning the sheets for a strong and durable connection. It’s time to unleash your inner DIY guru and create something extraordinary.
Step 1: Cleanliness is Next to Bond-liness
Before we embark on the adhesive adventure, let’s ensure our acrylic sheets are squeaky clean. Dust, dirt, or oil residues can spoil the party when it comes to bonding. So, grab a mild detergent or acrylic cleaner and give those sheets a pampering session. Say goodbye to contaminants and hello to a sparkling clean surface.
Step 2: Choosing the Right Adhesive
Now that our sheets are pristine, it’s time to choose the perfect adhesive for our mission. Enter methyl methacrylate (MMA) and cyanoacrylate (CA) – the superheroes of acrylic bonding. These adhesives possess the power to create a strong and durable bond between our sheets. So, let’s suit up and follow the manufacturer’s instructions for application.
Step 3: The Art of Applying Adhesive
Alright, folks, it’s time to unleash your inner artist. Grab your chosen adhesive and delicately apply an even layer on both surfaces that will be united. Remember, less is more. Excess adhesive can tarnish the appearance and weaken the bond. So, apply it with finesse and avoid any adhesive mishaps that could spoil our masterpiece.
Step 4: Aligning for Perfection
Now comes the moment of truth – aligning our acrylic sheets for that seamless connection. Precision is our secret weapon here. Utilize alignment guides or clamps to firmly hold the sheets in place while the adhesive works its magic. We won’t settle for anything less than perfection. Use shims or spacers, if necessary, to ensure a snug and impeccable fit.
Step 5: Gentle Pressure for Better Adhesion
We’re almost there, my friends. After aligning the sheets, it’s time to apply some gentle pressure. This will evenly distribute the adhesive and enhance adhesion. But remember, we need to exercise caution – excessive pressure can cause the adhesive to squeeze out, tarnishing our beautiful bond. Let’s maintain a steady and controlled approach.
Curing Time for the Joint
In our previous chapter, we delved into the intricacies of joining acrylic sheets, from the art of surface cleaning to the selection of adhesive superheroes. Now, we embark on a thrilling journey into the world of curing time for your joint. So, fasten your seatbelts and prepare to uncover the secrets behind achieving the ultimate bond.
Understanding Curing Time:
Imagine this: you’ve meticulously aligned your acrylic sheets, applied the adhesive with precision, and delicately pressed them together. Now, time takes the stage. Curing time refers to the magical period during which your adhesive dries and solidifies, creating a robust and seamless connection.
Adhesive Types and Their Curing Times:
Not all adhesives are created equal, my friends. Each adhesive possesses unique chemical compositions and drying properties, resulting in distinct curing times. Let’s begin with the crowd-favorite – methyl methacrylate (MMA) adhesive. This mighty hero typically takes around 24 hours to achieve full curing. But fear not. The initial bond strength can often be attained within a mere few hours, with continuous curing and strengthening occurring over the next day.
But wait, there’s more. Enter cyanoacrylate, also known as super glue. This speedy adhesive can work its enchantment in just minutes or hours, depending on its formulation. Epoxy adhesives also have their own captivating curing times, ranging from a few minutes to several hours. Remember to consult the manufacturer’s instructions for precise details on your chosen adhesive’s curing time.
Factors Affecting Curing Time:
Just like any grand adventure, external factors can influence our journey. Temperature and humidity levels play pivotal roles in the curing process. Higher temperatures and lower humidity can accelerate curing, while lower temperatures and higher humidity can slow it down. So, keep a vigilant eye on the environment to ensure optimal conditions for your joint’s curing.
The Power of Patience:
Impatience can prove to be our greatest nemesis when striving for a robust and enduring bond. It is imperative to grant ample time for curing before subjecting the joint to any stress or load. Rushing the process can weaken the bond, compromising its long-term durability. So, take a deep breath, relax, and allow time to weave its magic.
Joining Acrylic Sheets with Mechanical Fasteners
Prepare to embark on an enthralling journey into the realm of joining acrylic sheets with mechanical fasteners. Brace yourselves for a symphony of strength and simplicity, as we unveil the secrets to achieving flawless connections. Grab your tool belt and let’s dive into this captivating craft.
The Power of Mechanical Fasteners:
Why settle for anything less than perfection? Mechanical fasteners emerge as the unrivaled choice for joining acrylic sheets, blending simplicity with unwavering strength. From screws to bolts, nuts to rivets, these trusty companions offer a steadfast solution that withstands the test of time.
Unveiling the Right Fastener:
In this delicate dance of connection, size and type reign supreme. Carefully select your fasteners based on the unique demands of your project. Remember, a secure and reliable joint is the cornerstone of enduring success.
Pre-Drilling: A Sacred Ritual:
To preserve the integrity of your precious acrylic sheets, honor the sacred ritual of pre-drilling. By creating holes in advance, you shield against unwanted cracks or splits while ensuring a seamless insertion of fasteners. Pro tip: Equip yourself with a drill bit specifically designed for acrylic to ward off any chipping or melting mischief.
Gradual and Even Tightening:
Patience is key when tightening screws or bolts. Resist the urge to rush into this final act. Instead, embrace a measured pace, gradually and evenly tightening the fasteners. By doing so, you protect your acrylic sheets from undue stress and bestow upon them longevity.
Washers: The Unsung Heroes:
In this tale of adhesion, we find solace in the humble washer. These unsung heroes bring balance to the equation. By distributing pressure evenly, they safeguard against cracks, bestowing stability upon the joint. Remember, even superheroes need their loyal sidekicks.
The Power of Multiplicity:
For grand endeavors and weighty aspirations, don’t shy away from the power of numbers. Multiple fasteners, diligently spaced along the joint, fortify your creation with unparalleled strength and unwavering stability. Embrace the mantra: united we stand, divided we fall.
Drilling Holes in the Acrylic Sheets
Prepare to embark on a fascinating journey into the world of drilling holes in acrylic sheets. Whether you’re an experienced pro or a curious beginner, this comprehensive guide will equip you with the knowledge and techniques needed to achieve flawless results. So, grab your drill bits and let’s dive in.
Selecting the Perfect Drill Bit:
The first step to drilling holes in acrylic sheets is selecting the perfect drill bit. While a standard twist drill bit can get the job done, we recommend using specialized tools like acrylic drill bits or brad point drill bits. These incredible inventions have sharper cutting edges, minimizing the risk of chipping or cracking and ensuring clean and precise holes every time.
Securing Your Acrylic Sheet:
To prevent any unwanted movement or vibrations during the drilling process, securing your acrylic sheet is crucial. You have two options: clamping the sheet between two pieces of scrap wood or using a trusty vise. Whichever method you choose, you’ll feel like a true acrylic maestro in control of your masterpiece.
Masking Tape: A Shield of Protection:
Say goodbye to unsightly splinters and chips with a simple but effective trick – masking tape. Before drilling, place a piece of this magical tape over the area where you’ll be creating a hole. This ingenious barrier acts as a shield, minimizing potential damage to the surface of your precious acrylic sheet.
Drilling Technique: Slow and Steady Wins the Race:
Now it’s time for the actual drilling process, where patience is key. Begin with a slow speed setting on your drill and gradually increase it as you go along. Remember, excessive force or high speeds can generate heat, leading to melting or cracking of your beloved acrylic sheet. Stay steady and let your precision shine through.
Lubricant: A Cool Companion:
Introducing your trusty companion – lubricant. Keep things cool and prevent overheating by applying water, a water-based coolant, or even a light oil directly onto the drill bit. This simple yet crucial step will ensure your acrylic sheet remains happy and intact throughout the drilling process.
Inserting Fasteners and Securing Them
In our previous section, we delved into the intricate world of drilling holes in acrylic sheets. Now, let’s take our skills up a notch and explore the techniques and considerations for inserting fasteners and securing them when joining two acrylic sheets together. Get ready to embark on a thrilling journey into the heart of acrylic craftsmanship.
Choosing the Right Fasteners:
When it comes to joining acrylic sheets, using the right fasteners is paramount. Opt for screws, bolts, or rivets specifically designed for use with acrylics. Regular metal fasteners can wreak havoc on your precious acrylic material. So, let’s play it safe and ensure a secure and crack-free connection.
Aligning and Positioning:
Before diving into fastener insertion, ensure your acrylic sheets are properly aligned and positioned. Clamp them together tightly or use a trusty jig to hold them in place. Misaligned joints are the last thing we want in our masterpiece.
Pre-drilling Holes:
To prevent dreaded cracks or splits during the insertion process, pre-drill holes in the acrylic sheets. The diameter of these holes should be slightly smaller than that of the fastener you’re using. A snug fit ensures a rock-solid connection without compromising your acrylic sheets.
Insertion Technique:
Now comes the moment of truth – inserting those fasteners. Gently slide screws or bolts into the pre-drilled holes, but remember: acrylic is softer than metal. Avoid over-tightening to prevent unfortunate cracking or deformation. Gentle and steady wins this race.
Enhancing Strength and Stability:
For added strength and stability, use nuts or washers on the opposite side of the sheet when securing your fasteners. These trusty companions distribute the load evenly, ensuring your joint withstands the test of time.
The Power of Adhesive:
For an extra-strong bond, adhesive can be your secret weapon. Apply a small amount around the holes before inserting the fasteners. This magical trick enhances the bond between your acrylic sheets and fasteners, providing even greater strength and stability.
Give It a Once Over:
Once all your fasteners are securely in place, take a step back and give your joint a thorough inspection. Look out for any signs of stress or instability. If needed, add more fasteners or reinforcements to ensure a secure connection.
Solvent Welding for a Seamless Look
Solvent welding is the ultimate solution for achieving a seamless look. This technique uses a powerful solvent-based adhesive that chemically melts the surfaces of the acrylic, creating an incredibly strong and invisible bond. Let’s dive into the fascinating world of solvent welding and discover why it’s the go-to method for achieving a flawless finish.
Preparing your acrylic sheets for solvent welding is crucial. A thorough cleaning is necessary to ensure a perfect bond. Wipe away any dirt, dust, or grease using a clean cloth soaked in isopropyl alcohol. Remember, solvent welding is specifically designed for acrylic sheets, as other plastics may react differently to the adhesive.
Once your sheets are spotless, it’s time to apply the adhesive. Using a brush or applicator, evenly spread the solvent adhesive on both surfaces. Watch as the adhesive penetrates the acrylic, softening it and creating an unbreakable bond between the two pieces. It’s like witnessing magic right before your eyes.
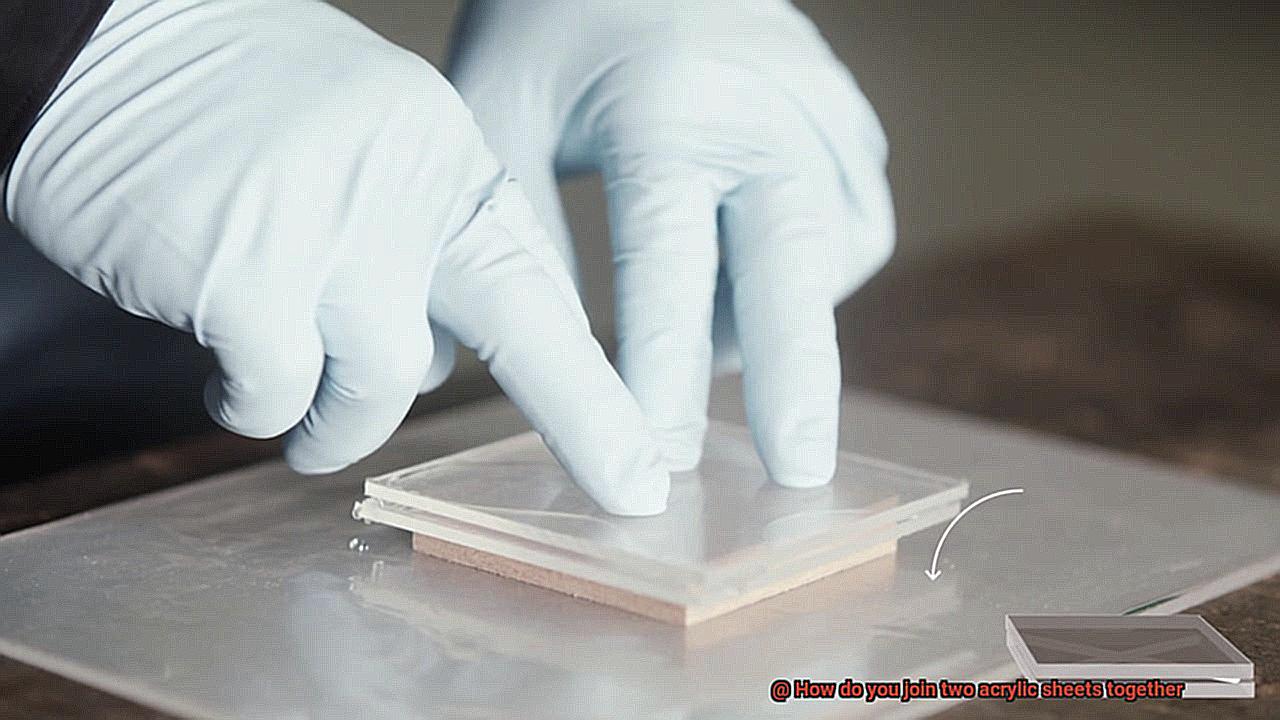
With the adhesive applied, it’s time to join the sheets together. Press them firmly and securely, ensuring a tight fit. To hold them in place during the curing process, you can use clamps or weights. Patience is key here – let the adhesive cure undisturbed for at least 24 hours. Trust us, it will be worth the wait.
The most remarkable advantage of solvent welding is its ability to create a seamless look between the acrylic sheets. Unlike other methods that leave visible joints or seams, solvent welding produces a bond that is nearly invisible. This makes it ideal for applications where aesthetics are of utmost importance, such as displays or architectural features. Say goodbye to unsightly eyesores and hello to perfection.
But it’s not just about looks – solvent welding also provides an incredibly strong and durable bond. The chemical reaction between the adhesive and the acrylic creates a fusion at the molecular level, resulting in a bond that is resistant to peeling or delamination. Your joints will remain intact and reliable for years to come.
Of course, safety should always be a priority. When working with solvent adhesives, make sure to do so in a well-ventilated area or under controlled conditions. These solvents can be harmful if inhaled or if they come into contact with your skin or eyes. Follow the manufacturer’s instructions and suit up with gloves and safety goggles for added protection.
Mx10ZN9Jigo” >
Conclusion
When it comes to joining two acrylic sheets together, there are several methods you can use.
One common technique is using a solvent adhesive specifically designed for acrylics. These adhesives work by chemically bonding the sheets together, creating a strong and seamless joint.
Another option is using an acrylic cement, which essentially melts the edges of the sheets and fuses them together. This method requires precision and careful application to ensure a secure bond.
Additionally, you can also use mechanical fasteners such as screws or bolts to hold the sheets in place. This method provides added strength and stability to the joint.
Whichever method you choose, it’s important to clean and prepare the surfaces properly before joining them together to ensure optimal adhesion.