When it comes to woodworking projects, thin plywood is like a trusty sidekick. It’s lightweight, easy to cut, and can be shaped into intricate designs with ease. Whether you’re building furniture, sprucing up your interior decor, or even dabbling in model-making, this versatile material has got your back. But here’s the catch – how do you join these delicate sheets together without compromising their strength?
With a few nifty techniques and some woodworking wizardry, you can create rock-solid connections that will stand the test of time. This comprehensive guide will walk you through the step-by-step process and provide essential tips to ensure success in your plywood joining adventures.
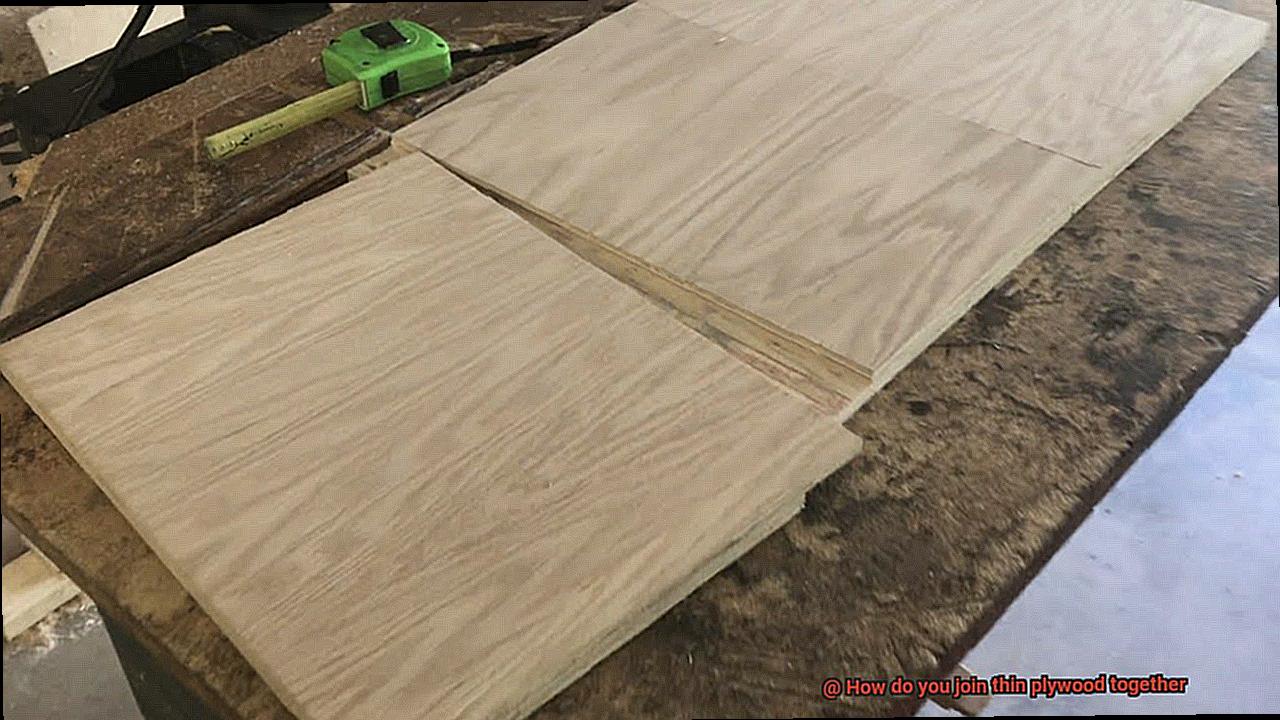
How do you join thin plywood together
Contents
- 1 How do you join thin plywood together
- 2 Different Methods for Joining Thin Plywood Together
- 3 Wood Glue
- 4 Epoxy Resin
- 5 Adhesive Tapes
- 6 Mechanical Fasteners
- 7 Choosing the Appropriate Method for Your Project
- 8 Benefits of Using Wood Glue
- 9 Benefits of Using Epoxy Resin
- 10 Benefits of Using Adhesive Tapes
- 11 Benefits of Using Mechanical Fasteners
- 12 Considerations When Joining Thin Plywood Together
- 13 Conclusion
Step 1: Choosing the Perfect Method
Before we dive into the nitty-gritty, let’s find the right joining method for your project. There are various options at your disposal – edge gluing, biscuit joinery, doweling, and pocket hole joinery. Each technique has its own perks and is suitable for specific applications. So take a moment to analyze your project’s needs and pick the method that aligns with your vision.
Step 2: Prepping those Plywood Sheets
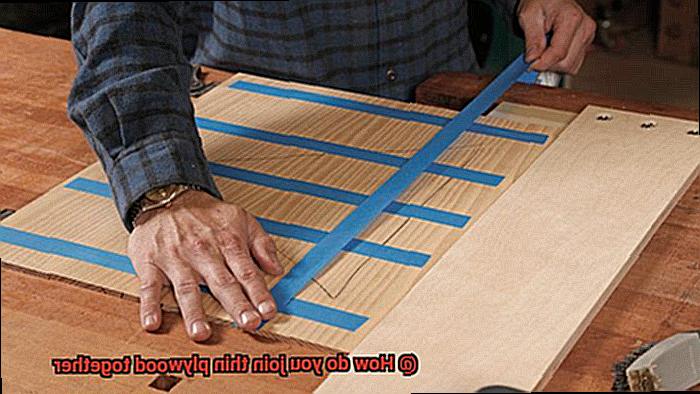
Now that we’ve got our method sorted, it’s time to get those plywood edges in tip-top shape. Grab a sharp utility knife or a straight edge and trim away any wonky edges or pesky splinters. Give those edges a light sanding too – we want them smooth as silk.
Step 3: Glue it Up.
For our beloved thin plywood, edge gluing is often the go-to choice. But remember – not all glues are created equal. Opt for high-quality woodworking glue specifically designed for plywood projects. Apply a thin layer of glue onto one edge of the plywood using a brush or roller. Spread that sticky goodness evenly, my friend.
Step 4: Clamp it Down
Now comes the moment of truth – joining those plywood sheets together. Align the edges carefully and press them firmly. To ensure a rock-solid bond, grab some trusty clamps and secure the pieces in place while the glue works its magic. Strategically position the clamps along the glued seam, applying even pressure to distribute the force evenly. Just be sure not to go overboard with tightening – we don’t want any glue squeeze-out disasters.
Different Methods for Joining Thin Plywood Together
Joining thin plywood together is a crucial step in woodworking projects, ensuring stability, strength, and a seamless finish. There are various methods available, each with its own advantages and considerations. In this guide, we will explore different methods for joining thin plywood together, focusing on glue as the primary bonding agent.
Method 1: Gluing
To create a strong bond, clean the surfaces thoroughly and apply a thin layer of wood glue, such as PVA or aliphatic resin glue, to both edges. Press the plywood sheets together and use clamps to hold them in place until the glue dries. This method is ideal for lightweight applications.
Method 2: Nailing or Screwing
For a quick and strong connection, use nails or screws. Choose an appropriate size to prevent splitting and consider pre-drilling pilot holes for nails. Use a countersink bit for screws to ensure flush heads. This method is perfect for projects that require disassembly or repositioning.
Method 3: Dowels
Dowels provide both strength and visual appeal. Drill corresponding holes in both plywood pieces and apply glue to the dowels before inserting them into one of the holes. Press the plywood sheets together, aligning them with the dowels. This method is suitable for projects that demand a seamless look.
Method 4: Biscuit Joinery
Enhance alignment and reinforcement by cutting slots into the plywood edges and inserting oval-shaped wooden biscuits. Apply glue to the biscuits, insert them into the slots, and clamp the pieces together until dry. Biscuit joinery is ideal for larger or heavier applications.
Method 5: Pocket Hole Joinery
Achieve a strong and hidden joint by drilling angled holes into one piece of plywood and joining it to another using screws. The advantage of this method is that the screws are concealed within the pocket holes, resulting in a clean and professional finish. Perfect for cabinetmaking.
Wood Glue
Wood glue, the adhesive that holds wood together, is the secret ingredient for creating strong and durable woodworking projects. It’s like the superhero of the woodworking world, providing a seamless connection that can withstand the test of time. But not all wood glues are created equal. Let’s dive in and discover the different types of wood glue available and their unique properties.
First up, we have PVA glue, also known as yellow glue or carpenter’s glue. This glue is perfect for joining thin plywood together. It dries relatively fast and creates a strong bond. However, keep in mind that PVA glue is not suitable for applications that require water resistance.
Next on the list is epoxy glue, a dynamic duo of a resin and a hardener that need to be mixed together before application. This glue offers excellent bonding strength and is water-resistant, making it ideal for outdoor projects or areas prone to moisture. Just remember to follow the instructions carefully when mixing and applying this powerful adhesive.
Last but not least, we have polyurethane glue, also known as Gorilla Glue. This superhero adhesive is known for its exceptional bonding strength and versatility. It expands as it cures, filling any gaps or voids between the plywood sheets. However, it requires moisture to cure properly, so be sure to dampen the plywood surfaces before applying this mighty glue.
Now that you know the different types of wood glue available, let’s talk about application techniques. Before applying any glue, make sure the surfaces are clean, dry, and free from dust or debris. This ensures maximum bonding strength.
Spread an even layer of glue on both surfaces to be joined. Too much can lead to excess squeeze-out and messy joints, while too little may result in weak bonds. Clamping the plywood sheets together after applying the glue is crucial for a tight and secure bond. The clamps should be positioned evenly along the joint, exerting enough pressure to squeeze out any excess glue.
After the glue has dried completely, which can take several hours or overnight, remove any excess glue using a chisel or sanding block. This final touch will give your project a smooth and seamless finish.
Epoxy Resin
When it comes to joining thin plywood, finding the perfect adhesive is crucial. Enter epoxy resin – the superhero of glues. With its exceptional bonding capabilities, durability, and waterproof properties, epoxy resin is the go-to adhesive for professionals and DIY enthusiasts alike. Get ready to dive into the world of epoxy resin and discover how it can help you create stunning plywood projects that stand the test of time.
The Superpowers of Epoxy Resin
Epoxy resin is not just any adhesive; it’s a titan in the world of bonding. Its incredible strength and durability make it a popular choice for joining thin plywood. This superhero adhesive forms a robust bond that can withstand even the toughest conditions. Plus, its waterproof and moisture-resistant properties ensure that your plywood projects remain intact, no matter what Mother Nature throws at them.
Mixing and Applying the Magic
To activate epoxy resin’s superpowers, it requires a precise mixture of its two components – the resin and the hardener. Following the manufacturer’s instructions for accurate mixing ratios is crucial to achieve optimal results. Once mixed, the adhesive should be evenly spread on both sides of the plywood, ensuring complete coverage. This even application allows the epoxy resin to work its magic and create a bond that is as strong as steel.
The Cure: From Liquid to Solid
Epoxy resin’s transformation from liquid to solid is nothing short of extraordinary. However, this metamorphosis takes time. The curing time can vary based on factors like temperature and humidity levels. To ensure success, consult the product instructions for specific curing times. During this period, it’s essential to resist the urge to disturb or move the plywood pieces so that the bond can reach its full potential.
Applications and Benefits: Unleash the Superhero
Epoxy resin’s versatility knows no bounds. It has found its place in a multitude of applications, including furniture construction, boat building, and woodworking projects. The benefits of using epoxy resin are numerous. Not only does it enhance the longevity and stability of plywood structures, but it also provides exceptional structural integrity. With epoxy resin as your sidekick, your plywood projects will be as strong as they are stunning.
Adhesive Tapes
In the world of woodworking, adhesive tapes are the unsung heroes when it comes to joining thin plywood. These versatile tapes offer a quick and reliable bonding solution without the mess and hassle of traditional glue. In this article, we will explore the different types of adhesive tapes used for joining thin plywood, their advantages, and disadvantages, so you can make an informed decision for your next woodworking project.
Double-Sided Tape:
Seamless and invisible joints are easily achieved with double-sided tape. Its adhesive properties on both sides ensure a strong bond between surfaces. No additional tools or equipment are needed, making it a hassle-free option. However, it may not be suitable for heavy-duty or long-term applications.
Masking Tape:
While masking tape is primarily used for painting, it can also serve as a temporary bonding solution for thin plywood. It offers moderate adhesive strength and is easily removable or repositionable without leaving residue. However, caution should be exercised in projects requiring long-term durability.
Construction Adhesive Tape:
For permanent and heavy-duty applications, construction adhesive tapes are the go-to choice. These tapes withstand challenging conditions like moisture, heat, and environmental factors. They provide a strong and reliable bond over time, ensuring your thin plywood remains intact. Additional tools or equipment may be required for application.
Tips for Successful Application:
- Clean surfaces before applying adhesive tape to remove dust and debris.
- Apply pressure to the joint after applying the tape to enhance the bond.
- Choose the appropriate tape based on intended use and durability requirements.
Advantages of Adhesive Tapes:

- Easy to use: No messy glues or complicated application methods.
- Quick bonding solution: Adhesive tapes offer fast and efficient joining of thin plywood.
- Versatility: Different types of adhesive tapes cater to various woodworking projects and provide flexibility in temporary or permanent bonding options.
Mechanical Fasteners
Today, we embark on a journey into the world of mechanical fasteners and their indispensable role in joining thin plywood. These unsung heroes provide a secure and reliable connection, ensuring that your plywood creations stay intact. In this blog post, we will delve into the fascinating realm of mechanical fasteners, exploring their various types and shedding light on the considerations for choosing the perfect one for your project. So, let’s roll up our sleeves and delve into the wonders of mechanical fasteners.
Screws – Versatile and Reliable:
First on our list is the ever-reliable screw. With its versatility, screws can be employed in a myriad of applications when joining plywood. However, it is crucial to select screws that are suitable for the material’s thickness. Beware of using screws that are too long, for they may cause the plywood to split, while ones that are too short won’t provide sufficient holding power. Opt for screws with a thread design specifically designed for plywood, as some threads may not hold well in this material.
Nails – Quick and Easy:
For those seeking temporary or less permanent connections, nails are the go-to option. Effortless and speedy to install, nails offer a convenient solution. However, it’s important to note that nails may not deliver as robust of a connection as screws. To ensure a sturdy joint, select nails long enough to penetrate both pieces of plywood and possess ample holding power.
Staples – A Quick Fix:
In upholstery or woodworking projects, staples come to the rescue. Offering rapid and secure connections, staples provide a quick fix. Yet, be aware that they may not possess the same strength as screws or nails. When choosing staples, consider their length and gauge in relation to the thickness of the plywood.
Considerations for Choosing the Right Fastener:
When utilizing mechanical fasteners to join thin plywood, several factors demand attention. Take into account the type of plywood, its thickness, and the specific requirements of your project. To avoid splitting or damaging the plywood, it is highly recommended to pre-drill pilot holes before installing screws or nails. Additionally, the use of clamps or holding devices ensures proper alignment before fastening the plywood pieces together.
Choosing the Appropriate Method for Your Project
Selecting the right method for your project is crucial to achieving success. Whether you are joining thin plywood, building furniture, or creating a work of art, understanding the available options and their advantages will help you make an informed decision. In this comprehensive guide, we will explore different methods and their considerations, ensuring that you choose the appropriate one for your specific needs.
Wood Glue:
Wood glue is a popular choice for joining thin plywood due to its versatility and reliability. It creates a bond stronger than the wood itself, providing excellent structural integrity. Advantages of using wood glue include:
- Strong Bond: Wood glue forms a bond that is often stronger than the wood itself, ensuring stability and durability.
- Versatility: Wood glue can be used on various types of plywood, making it suitable for a wide range of projects.
- Easy Application: Applying wood glue is simple – clean surfaces, apply a thin layer of glue, and press pieces together firmly.
Considerations:
- Drying Time: Plan your project accordingly as wood glue requires sufficient drying time. Use clamps or weights to hold pieces together until glue dries completely.
- Compatibility: Ensure the wood glue chosen is compatible with plywood. Specialized glues are designed specifically for plywood applications.
- Moisture Resistance: For projects exposed to moisture or humidity, consider using waterproof or weather-resistant wood glue for enhanced durability.
Screws or Nails:
For load-bearing applications or added strength, screws or nails can provide a secure connection between thin plywood pieces. Steps include:
Marking: Align pieces and mark where screws or nails will go using a pencil or marker.
- Pilot Holes: Drill pilot holes slightly smaller in diameter than the screws or nails to prevent splitting.
- Insert Fasteners: Drive screws or nails into pilot holes until they are flush with the plywood surface.
Clamps or Tape:
For quick and temporary joins, clamps or tape can be suitable options. Clamps apply pressure to hold pieces together until adhesive dries or another joining method is employed. Tape provides temporary hold with easy removal once bond is no longer needed.
Dowels or Biscuits:
To reinforce joints, dowels or biscuits can be used. Dowels are inserted into pre-drilled holes in both plywood pieces, adding strength and stability. Biscuits are inserted into matching slots cut into the edges of the plywood, aligning the pieces and enhancing joint strength.
Benefits of Using Wood Glue
First and foremost, wood glue boasts remarkable bonding properties. When you employ wood glue to join thin plywood, rest assured that the bond will be robust and enduring. No longer do you need to fret about your project crumbling apart.
Wood glue is not only strong but also incredibly versatile. It can be utilized on various wood types, including plywood. So whether you’re engrossed in a small craft project or a grand woodworking endeavor, wood glue has got you covered.
But wait, there’s more. Wood glue is also remarkably easy to use. With its liquid form, you can effortlessly apply and spread it evenly on the plywood surfaces. Say goodbye to uneven or messy application—wood glue ensures a hassle-free and efficient bonding process.
Time is precious, especially when it comes to completing woodworking projects. Fortunately, wood glue dries rapidly. Depending on your chosen type of wood glue, your bonding process can conclude within hours or even minutes. Bid farewell to lengthy waiting times.
One of the best aspects of wood glue is that it necessitates no special tools or equipment for application. A brush or even your fingers will suffice. This convenience caters to DIY enthusiasts or those without access to professional tools.
In addition to its ease of use, wood glue excels at filling gaps and cracks in the plywood. This results in seamless and smooth joints, enhancing both the appearance and strength of your project.
But wait, there’s more. Wood glue is non-toxic and safe to use. Most wood glues are water-based and emit no harmful fumes or odors. It proves ideal for indoor applications where ventilation may be limited.
Last but certainly not least, wood glue is affordable and readily available in most hardware stores. You won’t need to break the bank to acquire this fantastic adhesive.
Benefits of Using Epoxy Resin
Look no further. In the world of adhesives, epoxy resin stands out as the superhero glue that offers a myriad of benefits. From its unbreakable bonds to its resistance against moisture and chemicals, epoxy resin has become the go-to choice for craftsmen, DIY enthusiasts, and professionals alike. Let’s explore the superpowers of epoxy resin and discover why it is the ultimate glue for joining thin plywood.
Unbreakable Bonds:
Epoxy resin possesses an extraordinary ability to create durable and long-lasting bonds. When applied correctly, this adhesive ensures a secure and sturdy connection between plywood pieces that will withstand the test of time.
Moisture and Chemical Resistance:
Unlike other adhesives that weaken or dissolve when exposed to water or certain substances, epoxy resin remains unaffected. This makes it particularly suitable for outdoor or wet environments where plywood is prone to moisture exposure. Whether it’s a patio table or a boat deck, epoxy resin will keep your project intact.
Versatile Application:
Epoxy resin shines in its versatility, as it can be used with various types of plywood, including hardwood, softwood, and marine-grade plywood. Moreover, it can also bond plywood with other materials such as metal or plastic, making it a reliable adhesive for a wide range of projects.
Easy Application:
Mixing epoxy resin is a breeze – simply combine the resin and hardener before use. With its relatively long working time, you have ample opportunity to apply it evenly and adjust the position of the plywood pieces if needed. Say goodbye to stress-inducing bonding struggles.
Gap Filling Abilities:
Epoxy resin possesses a unique talent for filling gaps and creating a smooth surface. When joining thin plywood, it eliminates any unevenness or imperfections in the joint, significantly enhancing overall strength and stability. Your plywood project will look flawless and perform magnificently.
Aesthetically Pleasing:
Who says adhesives can’t be visually appealing? Epoxy resin can be tinted or mixed with dyes to create a wide range of colors and effects. This allows you to customize the appearance of your plywood joints, adding a touch of artistic flair to your woodworking masterpiece.
Benefits of Using Adhesive Tapes
Look no further. In this article, we will delve into the incredible benefits of using adhesive tapes as a convenient, efficient, and cost-effective solution for joining thin plywood together. Whether you’re a DIY enthusiast or a seasoned woodworker, adhesive tapes offer a range of advantages that will make your projects a breeze.
Ease of Use:
Adhesive tapes are the epitome of user-friendliness. With no need for additional tools or equipment, simply peel off the backing and apply the tape to the desired area. In just a matter of seconds, you’re ready to go. This makes adhesive tapes a quick and hassle-free solution, perfect for beginners or those who prefer a simpler approach to woodworking.
Clean and Neat Finish:
Say goodbye to messy glue residue and unsightly joins. Adhesive tapes create a seamless bond that is virtually invisible. When working with thin plywood, where every flaw stands out, this feature becomes invaluable. With adhesive tapes, you can achieve a clean and professional finish every time, elevating the overall appearance of your projects.
Versatility:
Adhesive tapes are incredibly versatile, making them a superhero tool in any woodworker’s arsenal. They can be used to join plywood of different thicknesses, widths, and lengths. Whether you’re crafting small-scale projects or tackling larger woodworking endeavors, adhesive tapes adapt effortlessly to your needs. Additionally, they come in various strengths, allowing you to choose the most suitable option for your specific project.
Durability and Longevity:
High-quality adhesive tapes are designed to withstand moisture, temperature changes, and other environmental factors. This means that the joints created with adhesive tapes will remain strong and reliable over time, providing a long-lasting solution for your plywood projects. No more worries about joints coming apart or weakening over time.
Easy Disassembly:
Unlike other joining methods that may require destructive force or damage to the wood when separating joints, adhesive tapes can be easily removed without causing any harm. This is particularly useful for projects that may require future adjustments or modifications. With adhesive tapes, you have the freedom to make changes without the fear of ruining your hard work.
Cost-Effective:
Adhesive tapes often provide a cost-effective solution compared to other joining methods. While some high-end tapes may have a higher upfront cost, their ease of use and durability often outweigh the initial investment. Moreover, adhesive tapes eliminate the need for additional materials such as screws or nails, reducing overall project costs. With adhesive tapes, you get more bang for your buck.
Benefits of Using Mechanical Fasteners
While adhesive tapes may seem like a convenient option, mechanical fasteners offer a range of advantages that make them the preferred choice for many DIY enthusiasts and professionals alike.
Strength and Durability:
One of the key benefits of using mechanical fasteners, such as screws, nails, or bolts, is their exceptional strength and durability. Unlike glue, which may degrade over time due to moisture or temperature changes, mechanical fasteners provide a secure and long-lasting bond. For instance, when constructing a cabinet out of thin plywood sheets, using screws to secure the joints ensures that the structure can withstand the weight of the contents without compromising its integrity.
Easy Disassembly:
In situations where disassembly is necessary for repairs or modifications, mechanical fasteners offer a significant advantage. Unlike glued joints that require painstaking effort to separate, removing screws or bolts is a straightforward process. This allows for easy access to the interior of furniture or other woodworking projects without causing damage.
Versatility:
Mechanical fasteners provide unparalleled versatility in joining different types of materials together. Whether you’re connecting plywood to metal brackets or reinforcing corners with angle brackets, mechanical fasteners can handle various applications. This flexibility opens up a world of design possibilities and ensures adaptability in different project scenarios.
Convenience:
Installing mechanical fasteners requires only basic tools, making them accessible to DIY enthusiasts with limited woodworking skills or equipment. With a few simple steps, you can achieve a secure joint that stands the test of time. In contrast, glue often requires specialized equipment and expertise to ensure proper application and drying time.
Stability and Reinforcement:
Thin plywood is prone to warping, shifting, or separation over time. By using mechanical fasteners strategically placed along the joints, you can provide essential stability and reinforcement. This prevents the plywood from succumbing to the stresses of daily use, ensuring a structurally sound and reliable final product.
Adjustability and Fine-Tuning:
Unlike glue, which sets quickly and restricts adjustments, mechanical fasteners offer the invaluable advantage of adjustability during assembly. You can tighten or loosen screws or bolts as needed, allowing for precise alignment and fit. This feature is especially beneficial when working with intricate designs or when minor adjustments are required to achieve the desired outcome.
Visual Indication of Strength:
In applications where safety is a concern, the presence of visible screws or nails provides visual reassurance of the joint’s strength. This added peace of mind is particularly important when building furniture or structures that will bear weight or experience significant stress.
Considerations When Joining Thin Plywood Together
When joining thin plywood together, several considerations must be taken into account to achieve a strong and durable bond. These considerations include the type of joint, adhesive selection, surface preparation, clamping, drying time, reinforcement, and finishing.
- Type of Joint: Choose the joint that best suits your needs and desired strength. Options include butt joints for simplicity, lap joints for added strength through overlapping, and tongue and groove joints for tight and secure fits.
- Adhesive Selection: Different adhesives offer varying strengths and moisture resistance. Wood glue is commonly used for its bonding strength and ease of use. However, for outdoor or high-stress applications, epoxy or polyurethane adhesive may be more suitable due to their greater strength and moisture resistance.
- Surface Preparation: Ensure that the surfaces to be bonded are clean, dry, and free from dust or debris. Lightly sanding the surfaces can improve adhesion by creating a rougher surface for the glue to grip onto.
- Clamping: Applying even pressure during the drying process is crucial for a successful bond. Position clamps strategically to distribute pressure across the joint evenly. Be careful not to overtighten them, as this can weaken the joint.
- Drying Time: Follow the manufacturer’s instructions regarding drying time to ensure optimal bond strength. Avoid disturbing or applying stress to the joint before the adhesive has fully cured.
- Reinforcement: In some cases, additional reinforcement may be necessary to strengthen the joint. Screws, nails, or dowels can be used with adhesive to provide added stability and prevent shifting or separation over time.
- Finishing: Sand rough edges or surfaces and apply a suitable finish or sealant for protection and aesthetics.
1QiTG_mSsS4″ >
Conclusion
Joining thin plywood together requires careful consideration and skillful execution. One approach is using wood glue – generously apply it to the edges of the plywood pieces, pressing them firmly for a secure bond. Eliminate any excess glue that seeps out with precision.
Alternatively, screws or nails can be utilized as an effective joining method. Prioritize pre-drilling holes in the plywood to prevent splintering before fastening them tightly with screws or nails – exercise caution not to overdo it and risk damaging the delicate material.
For enhanced strength and stability, dowels or biscuits come into play. By drilling holes into the edges of the plywood and inserting dowels or biscuits, one can achieve an inconspicuous joint when combined with gluing and clamping techniques. This method ensures a robust connection that is less visible than traditional screws or nails.
When working with larger plywood sheets, it is advisable to employ a combination of techniques for added reinforcement. Consider combining gluing and screwing or nailing the pieces together, maximizing their strength and durability. Always remember the age-old adage of measuring twice and cutting once to guarantee precise joints.