If you’ve ever wondered how to securely join different pieces of cardboard together, you’re in the right place.
Cardboard is an awesome material that can be used for all sorts of projects, big or small. But when it comes to making those connections strong and durable, it can be a bit tricky.
That’s why I’ve put together this blog post to explore various methods of joining cardboard. We’ll cover everything from simple techniques like gluing and taping to more advanced methods like stitching and bracing.
So let’s dive in and learn how to join cardboard pieces like a pro.
Factors to Consider When Choosing the Right Glue
Contents
- 1 Factors to Consider When Choosing the Right Glue
- 2 Joining Cardboard with White Craft Glue
- 3 Joining Cardboard with Hot Glue
- 4 Using Adhesive Tapes for Joining Cardboard
- 5 Using Mechanical Fasteners for Joining Cardboard
- 6 Pros and Cons of Different Bonding Methods
- 7 Tips for Working with Glues and Fasteners
- 8 Conclusion
Adhesive Type:
- Liquid glue: Strong bond, easy application.
- Glue sticks: Mess-free, dries clear.
- Hot glue: Heavy-duty, quick-drying.
- Spray adhesives: Convenient, even application.
Drying Time:
- Consider project time constraints.
- Liquid glue requires drying time.
- Hot glue sets almost immediately.
Bond Strength:
- Evaluate bonding capabilities.
- Look for strong or permanent bonding properties.
Flexibility:
- Choose glue that withstands cardboard flexibility.
- Avoid brittle or cracking glues.
Transparency:
- Consider glue visibility in aesthetic projects.
- Opt for transparent adhesives that dry clear.
Application Method:
- Choose method that suits comfort and project needs.
- Squeeze bottles for precise control.
- Brushes or sprays for different applications.
Safety:
- Choose non-toxic and safe glues, especially with children.
- Note strong fumes and provide ventilation.
Joining Cardboard with White Craft Glue
Joining cardboard with white craft glue is a straightforward process that can yield strong and reliable results for your craft and DIY projects. Here’s a step-by-step guide to help you achieve a sturdy connection between your cardboard pieces:
- Prepare the surface: Before applying the glue, ensure that the edges you plan to join are clean and free from any dust or debris. This crucial step sets the foundation for a strong bond between the pieces.
- Apply the glue: Using a brush or a small spatula, spread a thin layer of white craft glue along one edge of the cardboard that you want to join. Make sure to distribute the glue evenly for proper adhesion.
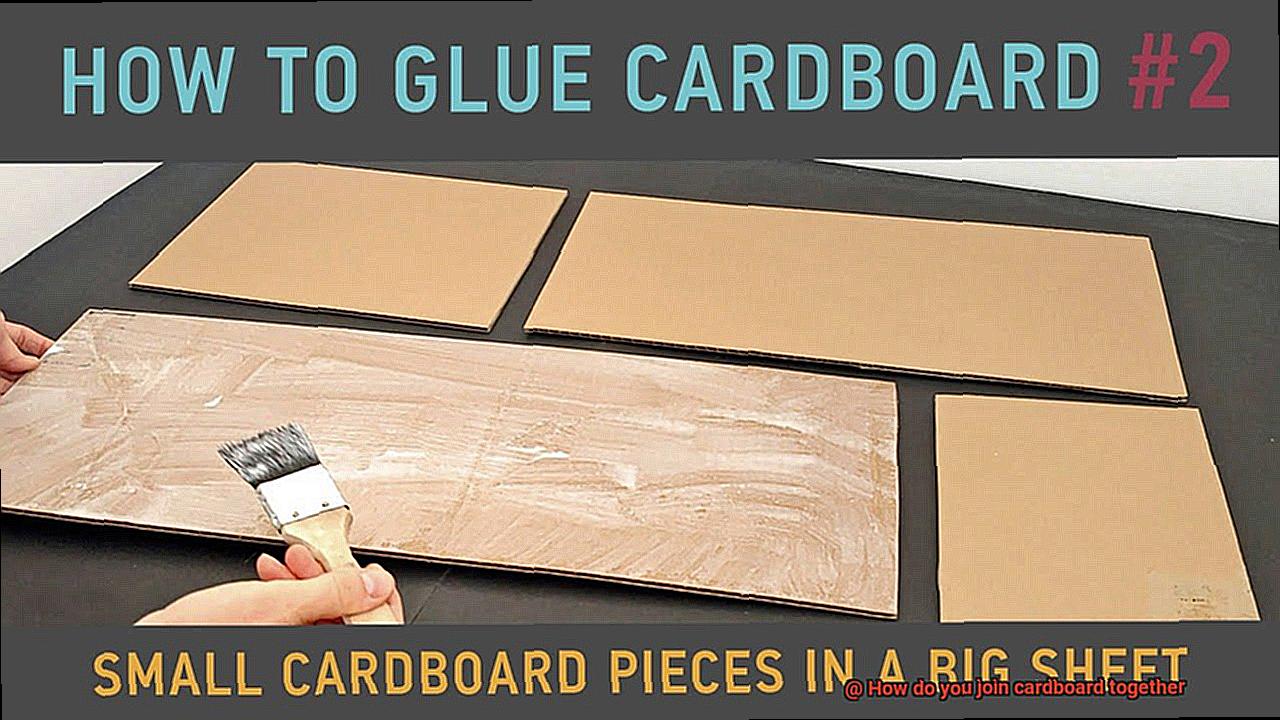
- Press and hold: Now comes the moment of truth. Firmly press the glued edge against the corresponding edge of the second piece of cardboard. Applying gentle pressure ensures that the pieces stick together securely.
- Secure the bond: To enhance the strength of the bond, employ binder clips or clamps to hold the glued edges together while the glue dries. This extra measure prevents any movement or shifting during the drying process.
- Allow to dry: Patience is key here. Let the glue dry completely before handling or moving the joined cardboard. Drying time may vary due to factors like humidity and temperature, so it’s wise to consult the manufacturer’s instructions for specific drying times.
- Check the bond: Once the glue has fully dried, put it to the test. Gently tug on the joined edges to check if they feel secure and resist separation. If they hold up well, congratulations. The glue has formed a strong bond.
While white craft glue is an excellent choice for joining cardboard, it’s important to note its limitations. For heavy-duty or structural applications, consider using stronger adhesives like hot glue or epoxy. Furthermore, keep in mind that white craft glue is not waterproof, so it’s best to avoid using it for projects exposed to moisture or damp environments.
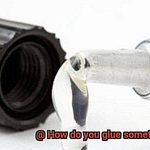
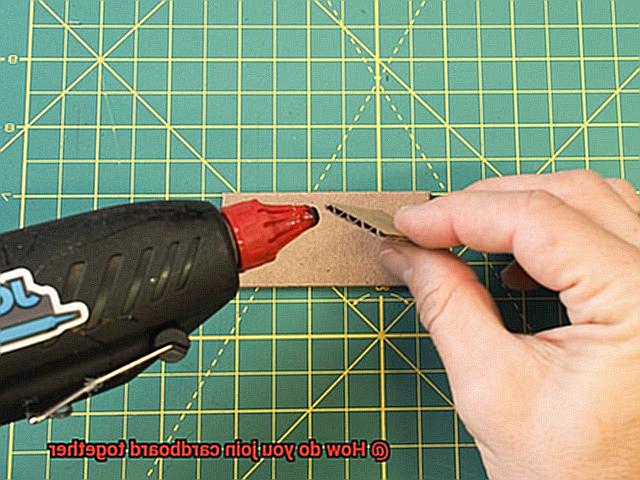
Joining Cardboard with Hot Glue
Joining cardboard with hot glue is a straightforward process that can provide a strong and durable bond. However, to achieve optimal results, it’s important to follow a step-by-step guide that includes surface preparation, glue selection, application techniques, and reinforcement options.
Firstly, preparation is key. Before applying hot glue, make sure to clean the areas of the cardboard that will be bonded together. Dust and debris can interfere with the adhesive’s effectiveness, so use a damp cloth to wipe away any unwanted particles. Additionally, lightly sand the surfaces to create a rough texture. This texture will enhance the grip of the hot glue, ensuring a stronger bond.
When selecting hot glue for joining cardboard, it’s crucial to choose the right type. High-temperature hot glue is recommended as it provides a stronger bond compared to low-temperature options. It’s also essential to use hot glue sticks specifically designed for bonding cardboard and similar materials.
Once you have your hot glue gun and sticks ready, heat up the glue gun according to the manufacturer’s instructions. Different guns may have different heating times and temperature settings, so be sure to follow the guidelines provided.
When applying the hot glue, take care not to apply too much. A thin line of hot glue along one of the edges or surfaces that need to be joined is sufficient. Applying too much can cause excess seepage or uneven bonding.
After applying the hot glue, immediately press the other piece of cardboard firmly against it. Maintain steady pressure for a few seconds to allow the adhesive to cool and solidify. This ensures a tight and secure bond. It’s important not to move or shift the pieces until the glue has completely set.
For larger or heavier pieces of cardboard or if you want extra strength and stability, consider adding support structures like wooden dowels or popsicle sticks. These can be adhered with hot glue along with the cardboard joints.
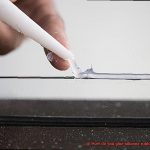
Using Adhesive Tapes for Joining Cardboard
Using adhesive tapes for joining cardboard is not only a convenient but also an effective method that provides a strong bond. There are various types of adhesive tapes available, each with its own advantages and disadvantages for this purpose. Let’s explore these options in more detail:
- Double-sided tape: This versatile option has adhesive on both sides, making it ideal for securely bonding cardboard together. It is easy to use and does not require any additional tools. The strength of the bond may vary depending on the brand and quality of the tape. Double-sided tape is particularly useful for projects that require a seamless finish.
- Packing tape: Designed specifically for packaging purposes, packing tape is durable and offers a strong hold. It is important to choose a packing tape specifically designed for cardboard to ensure proper adhesion. However, packing tape can be difficult to remove or reposition once applied. It provides a secure and long-lasting solution for joining cardboard.
- Duct tape: Known for its strength and versatility, duct tape is a heavy-duty option that provides an extra strong bond. It is made with a reinforced backing and strong adhesive, making it suitable for holding together heavy or bulky cardboard structures. However, duct tape can leave a sticky residue and may not be suitable for all applications due to its thickness.
Now let’s discuss how to properly use adhesive tapes when joining cardboard:
- Step 1: Prepare the surfaces – Before applying adhesive tape, ensure that the cardboard is clean and free from dust or debris. This will ensure optimal adhesion.
- Step 2: Choose the appropriate adhesive tape – Consider the type of cardboard project and select the adhesive tape that best suits your needs (double-sided tape, packing tape, or duct tape).
- Step 3: Apply the adhesive tape – Cut the tape to the desired length and apply it along the edges or seams where the pieces of cardboard meet. Press firmly to ensure proper bonding.
- Step 4: Reinforce weak areas (optional) – If needed, apply additional strips of adhesive tape along weak areas or corners of the cardboard structure to strengthen them.
Here are some additional tips and tricks to keep in mind:
- For added strength and stability, apply adhesive tape both on the inside and outside of the joint.
- Ensure that the adhesive tape is properly aligned with the edges of the cardboard to achieve a neat and seamless bond.
- Consider using a tape dispenser or cutter to easily handle and cut the adhesive tape.
- Test the adhesive tape on a small area of the cardboard before applying it to the entire project to ensure that it adheres properly without causing damage or leaving residue.
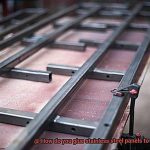
Using Mechanical Fasteners for Joining Cardboard
Using mechanical fasteners for joining cardboard offers numerous benefits, making it a popular and effective method. Here are some of the advantages:
- Strength and Security: Mechanical fasteners provide a strong and secure connection between cardboard layers, ensuring that the pieces stay firmly in place. This is especially important for projects that require stability and durability.
- Versatility: There are various types of mechanical fasteners available, each with its own advantages and suitable applications. Staples, brads, screws, nails, and specialized fasteners offer different options to meet specific project requirements.
- Ease of Use: Mechanical fasteners are generally easy to use. Staples can be driven into the cardboard using a staple gun or stapler, while brads can be inserted with a hammer or brad setter tool. Plastic snap fasteners can be easily pushed through the layers of cardboard without the need for tools.
- Quick Assembly: Using mechanical fasteners allows for quick assembly as compared to other joining methods like glue or tape. This makes them ideal for time-sensitive projects or situations where efficiency is crucial.
- Aesthetics: Brads and specialized fasteners offer decorative options for joining cardboard, enhancing the overall appearance of the project. This is particularly useful for crafts or applications where aesthetics play a significant role.
- Additional Strength: Screws and nails can be used as mechanical fasteners to provide additional strength when required. However, it is essential to consider the type of cardboard used and pre-drill holes to prevent damage or splitting.

Pros and Cons of Different Bonding Methods
In the world of cardboard craftsmanship, the choice of bonding method can make all the difference. Each method has its own virtues and vices, offering unique benefits and potential drawbacks. Let’s explore the pros and cons of various bonding methods to uncover the secrets behind creating sturdy and visually appealing cardboard creations.
Glue, a popular choice for cardboard bonding, boasts a range of advantages. Its strong bond securely holds the cardboard together, ensuring durability and longevity. With a myriad of glue options available, such as white glue, craft glue, and hot glue, users have the freedom to choose the adhesive that best suits their needs. Water-based adhesives like white glue and craft glue dry clear, providing a clean and professional finish. Moreover, these glues are non-toxic, making them safe for use in projects involving children. Hot glue, on the other hand, solidifies rapidly from a molten state, forming an unyielding bond. Its quick-drying nature makes it ideal for time-sensitive projects.
However, adhesive methods have their drawbacks as well. Hot glue can be messy, with visible strings of adhesive potentially obscuring the aesthetic appeal of the project. Additionally, gluing requires patience since adhesives may take time to fully dry and cure. This can be a disadvantage when working on projects with tight deadlines or immediate usage requirements. Furthermore, glue may not always be suitable for joining larger pieces or supporting heavy loads.
As an alternative to adhesive bonding, mechanical fasteners offer distinct advantages. They provide quick assembly and enhanced strength compared to glues. Staples or brads inserted into pre-drilled holes secure cardboard pieces together with unwavering tenacity. Staples deliver a secure hold but may leave visible puncture marks on the surface of the cardboard. Brads offer a more discreet option but may not possess the same strength as staples.
For those seeking convenience in their bonding endeavors, tape presents an alluring option. Masking tape, duct tape, and double-sided tape offer quick and easy solutions for joining cardboard pieces. Masking tape can be effortlessly torn and allows for paintability. Duct tape, renowned for its strength and durability, may leave residue when removed. Double-sided tape provides an invisible bond but may not possess the same strength as other methods.
Adhesive tapes specifically designed for cardboard bonding, such as double-sided foam tape or hook-and-loop fasteners, provide ease of use and formidable strength. However, their application may be limited compared to glue or other bonding methods when it comes to joining different shapes and sizes of cardboard.
When considering the pros and cons of various bonding methods, it is crucial to contemplate factors such as strength, ease of use, visibility of the bond, potential damage to the cardboard surface, and the specific requirements of the project at hand. By weighing these considerations against personal needs and preferences, one can determine the optimal bonding method for their cardboard masterpiece.
Tips for Working with Glues and Fasteners
When working with cardboard, it is important to choose the right type of glue for a strong and durable bond. White glue, also known as PVA glue, is a popular choice as it dries clear and bonds well with cardboard. Craft glue is another option that provides a strong hold, especially for more intricate projects. Hot glue guns are also commonly used for quick and instant bonding, but be sure to test a small area first to ensure it does not melt the cardboard.
Preparing the Surface:
Before applying glue, make sure the surfaces of the cardboard that need to be joined are clean and free from dust or debris. Wipe them down with a damp cloth or use a mild detergent solution to remove any dirt or grease. Allow the cardboard to dry completely before applying the glue to ensure a solid bond.
Applying Glue:
Apply glue evenly and sparingly to avoid excess dripping or seeping. A thin layer of glue is usually sufficient for bonding cardboard together. Use a brush, sponge, or applicator to spread the glue evenly across the surface. Be mindful not to use too much glue, as it can create messy joints and take longer to dry.
Providing Support While Glue Dries:
For large or heavy cardboard pieces, provide additional support while the glue dries to prevent warping or buckling. Use clamps or place heavy objects on top of the glued area, being careful not to apply too much pressure. This will help ensure a strong bond while allowing the glue to dry properly.
Using Fasteners:
In addition to glues, fasteners such as staples, brads, or paper clips can be used to join cardboard together. These are especially useful when you need a temporary or adjustable bond. When using fasteners, select the appropriate size and type for your project. Smaller staples or brads may be sufficient for thinner cardboard, while thicker cardboard may require larger fasteners. Position the fasteners evenly and securely to ensure a strong bond.
HRmJ7yD3ZnE” >
Conclusion
In conclusion, when it comes to joining cardboard together, you need to carefully consider the best bonding method for your project. Gluing is a popular and versatile option that can meet most needs. White craft glue is the go-to choice for creating a strong bond that holds up well in various applications.
If you’re looking for quick-drying and durable results, hot glue is your best bet. It’s perfect for those projects where time is of the essence and you don’t want to compromise on strength. On the other hand, adhesive tapes like double-sided tape, packing tape, and duct tape offer convenience and strength all in one.
For heavier or structural projects that require added strength and stability, mechanical fasteners are the way to go. Staples, brads, screws, nails, and specialized fasteners provide a secure connection between cardboard layers without breaking a sweat. They’re easy to use and ensure your project stays intact.
But remember, choosing the right adhesive or fastener is crucial. Make sure to clean the surfaces thoroughly before applying anything. When using glue, apply it evenly and sparingly to avoid any messy mishaps. And don’t forget to give it enough drying time. Providing support during this process can prevent any warping or buckling issues.
When it comes to using fasteners, select ones that match your cardboard thickness perfectly. Position them evenly and securely for a bond that won’t let you down.
Ultimately, picking the right bonding method depends on factors like how much strength you need, ease of use, visibility of the bond, potential damage to the cardboard surface, and specific project requirements.
You may also like: