Are you tired of staring at your lackluster wooden floor, yearning for a dazzling upgrade that screams sophistication and allure? Well, fret no more. Picture a jaw-dropping transformation that seamlessly blends the cozy vibes of wood with the timeless charm of ceramic tiles. Yes, you heard it right.
Today, we embark on an exciting journey into the captivating realm of installing ceramic tiles on wood planks.
How do you install ceramic tile on wood planks
Contents
- 1 How do you install ceramic tile on wood planks
- 2 What You Need to Install Ceramic Tile on Wood Planks
- 3 Preparing the Wood Surface
- 4 Applying a Waterproof Membrane
- 5 Laying Out the Tile Pattern
- 6 Applying Tile Adhesive
- 7 Installing the Ceramic Tiles
- 8 Allowing the Adhesive to Cure
- 9 Finishing Touches and Maintenance Tips
- 10 Conclusion
Unveiling the Enchantment:
Forget what you’ve been told – the union between ceramic tiles and wood planks is not just a far-fetched dream. With some nifty techniques and a sprinkle of creativity, you can breathe new life into your space and create an aesthetic masterpiece that will leave everyone speechless. The fusion of these two classic materials offers a fresh perspective that is nothing short of mesmerizing.
Achieving Perfect Harmony:
Before diving headfirst into the installation process, it’s crucial to understand the delicate balance required for a seamless and long-lasting result. We’ll delve deep into key considerations such as selecting the right type of wood, assessing its condition, and identifying ceramic tile characteristics that perfectly complement your interior design vision.
Step-by-Step Brilliance:
To ensure triumph in this endeavor, we’ll guide you through an foolproof step-by-step process armed with invaluable tips and tricks designed to elevate your installation skills. From prepping the wooden surface to spacing tiles flawlessly, choosing the ideal adhesive to grouting and sealing like a pro – every aspect will be demystified, leaving you feeling confident and empowered throughout this exciting journey.
The Grand Reveal:
As you lay down that final tile and add those finishing touches with finesse, sit back and prepare to be utterly amazed by the breathtaking transformation unfolding before your very eyes. In this blog series, we’ll also showcase mind-blowing examples of ceramic tile installations on wood planks, igniting your creativity and inspiring you to bring your unique vision to life.
So, are you ready to embark on this extraordinary voyage of elegance and ingenuity? Join us as we unlock the secrets of installing ceramic tiles on wood planks, revealing a world of possibilities for your home or business. Get ready to witness and acquire the skills needed to create a masterpiece that will have everyone gasping in admiration.
What You Need to Install Ceramic Tile on Wood Planks
Discover the secret to transforming your space with the timeless elegance of ceramic tile on wood planks. But beware, this venture requires meticulous planning and execution for a flawless and enduring installation. In this comprehensive guide, we will unveil the tools, materials, and step-by-step process needed to bring your vision to life.
Tools and Materials Needed:
- Ceramic tiles: Select high-quality ceramic tiles that harmonize with wood surfaces, considering their size, color, and design.
- Wood planks: Ensure the wood planks are in pristine condition with no signs of damage or rot. A stable and level surface is paramount for a successful installation.
- Thin-set mortar: This specialized adhesive bonds ceramic tiles to wood planks. Choose a thin-set mortar compatible with both wood and ceramic surfaces.
- Notched trowel: Employ this tool to evenly spread the thin-set mortar on the wood planks. The size of the notches should correspond to the tile dimensions.
- Tile spacers: Insert these small plastic wonders between tiles to achieve uniform spacing and alignment. Opt for spacers that match your desired grout line thickness.
- Grout: Fill the gaps between tiles with grout, carefully selecting a color that complements your chosen tiles.
- Grout float: Utilize this tool to effortlessly apply and distribute grout across the tiled surface, ensuring seamless coverage.
- Tile cutter or wet saw: Depending on your project’s requirements, you may need a tile cutter or wet saw to fashion tiles that fit snugly around edges and corners.
- Sponge or clean cloth: Keep these trusty companions nearby to swiftly remove excess grout from the tile surface during installation.
- 10. Sealer (optional): Enhance durability by applying a sealer after grouting, safeguarding the tiles and grout against stains and moisture.
Step-by-Step Installation Process:
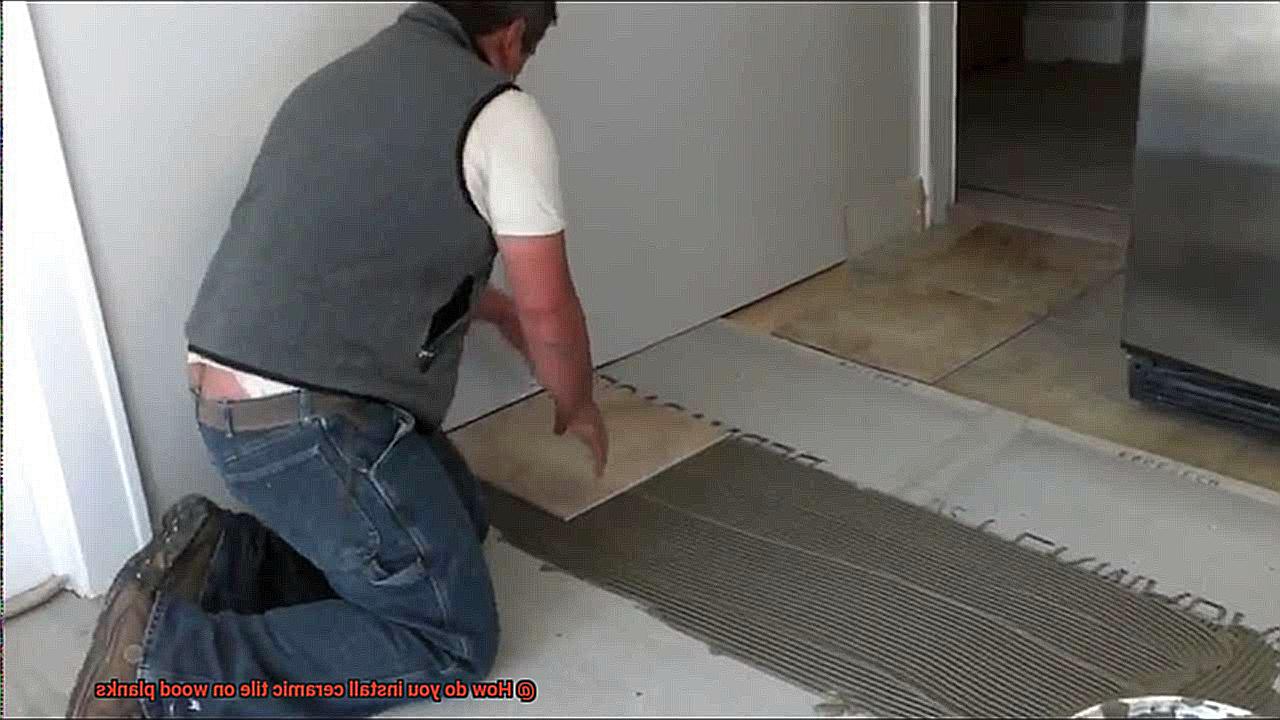
- Prepare the wood surface: Thoroughly cleanse the wood planks, meticulously repairing or replacing any uneven or damaged sections. Employ a sander to create a flawlessly level foundation for tile installation.
- Apply a waterproof membrane: Shield the wood from moisture by artfully applying a waterproof membrane as per the manufacturer’s instructions.
Preparing the Wood Surface
Preparing the Wood Surface: Creating a Flawless Foundation for Ceramic Tile Masterpieces
Are you ready to embark on the journey of transforming your wood planks into a stunning ceramic tile masterpiece? Before you dive headfirst into this exciting project, it’s crucial to properly prepare the wood surface. Don’t worry, I’ve got your back with all the essential steps to ensure a flawless and enduring installation. Let’s get started.
- Inspect and Address: Take a moment to closely examine your wood surface. Look out for loose or damaged planks, signs of moisture or rot. It’s imperative to address these issues now to avoid future headaches.
- Clear and Clean: Now that you’ve tackled any underlying problems, it’s time to give your wood surface a thorough cleaning. Grab that trusty broom or vacuum and clear away any dirt, dust, or debris. Then, wipe it down with a damp cloth or mop to create a clean and smooth canvas for the tile adhesive.
- Strip and Reveal: If there are any existing finishes on your wood surface, such as paint or varnish, bid them farewell. You can use a paint stripper or sandpaper to strip off the old finish, ensuring that the wood is bare and free of any coatings. This step is vital for a solid bond between the wood and tile adhesive.
- Sanding Perfection: Time to give your wood surface some extra love with a light sanding session. Grab that medium-grit sandpaper and delicately sand in the direction of the wood grain. This step helps roughen up the surface and creates an even better bond with the tile adhesive.
- Dust-Free Zone: After all that sanding action, don’t forget to clean up. Utilize your broom or vacuum to remove any dust created during the sanding process. Trust me, a clean surface is essential for proper adhesion of the tile.
- Fill the Gaps: Let’s not forget about those pesky gaps and cracks between the wood planks. Fill them up with a suitable wood filler, smoothing it out to create a seamless surface. Allow the filler to dry completely before moving forward.
- Level the Playing Field: Is your wood surface level and even? If not, fear not. Grab a leveling compound and follow the manufacturer’s instructions for mixing and applying it. This step ensures a solid foundation for your ceramic tiles to rest upon, free from any low spots or uneven areas.
Applying a Waterproof Membrane
Embark on a remarkable journey of transforming your wood plank flooring into a captivating masterpiece with the timeless elegance of ceramic tiles. But before you dive headfirst into this transformative project, there is one secret ingredient that must not be overlooked – the application of a robust waterproof membrane.
In this comprehensive guide, we will delve into the significance of this essential component and unravel the secrets to achieving unparalleled longevity and durability for your ceramic tile installation on wood planks.
Embracing the Vitality of Waterproof Membranes
- Shielding Moisture Menace: As a formidable barrier, the waterproof membrane springs into action, thwarting any attempts by moisture to infiltrate your wood planks. By doing so, it prevents potential damage to both your precious tiles and the underlying subfloor.
- Unyielding Durability: With moisture effectively locked out, your ceramic tiles stand resolute against the test of time. Say goodbye to unsightly cracks and loose tiles that can mar the beauty of your flooring.
- A Tapestry of Endurance: By investing in a reliable waterproof barrier, you ensure that your ceramic tile floor retains its captivating allure, serving as a testament to its longevity for years to come.
Exploring the Diverse World of Waterproof Membranes
- Liquid-Applied Membranes: Unleash your creativity with the ease of liquid-applied membranes. These versatile solutions, applied using brushes or rollers, effortlessly spread over the wood surface. As they dry, they transform into a flexible and impenetrable layer that seamlessly adheres to the wood substrate.
- Sheet Membranes: Take advantage of pre-manufactured rolls or sheets crafted from resilient materials such as rubber, PVC, or polyethylene. Simply unroll these wonders onto your wood surface, securing them in place with a suitable adhesive to achieve a watertight seal.
- Peel-and-Stick Membranes: Embrace the simplicity of installation with peel-and-stick membranes. Their self-adhesive backing simplifies the process, allowing you to effortlessly press them onto your prepared wood surface. Witness their superior adhesion capabilities creating an impenetrable shield against moisture.
Laying Out the Tile Pattern
In this guide, we will unravel the secrets of laying out the perfect tile pattern on wood planks. With careful planning and attention to detail, you’ll be able to create a symphony of colors and shapes that will leave everyone in awe. So, let’s embark on this artistic journey and discover the art of tile layout.
Plan Ahead for a Seamless Design:
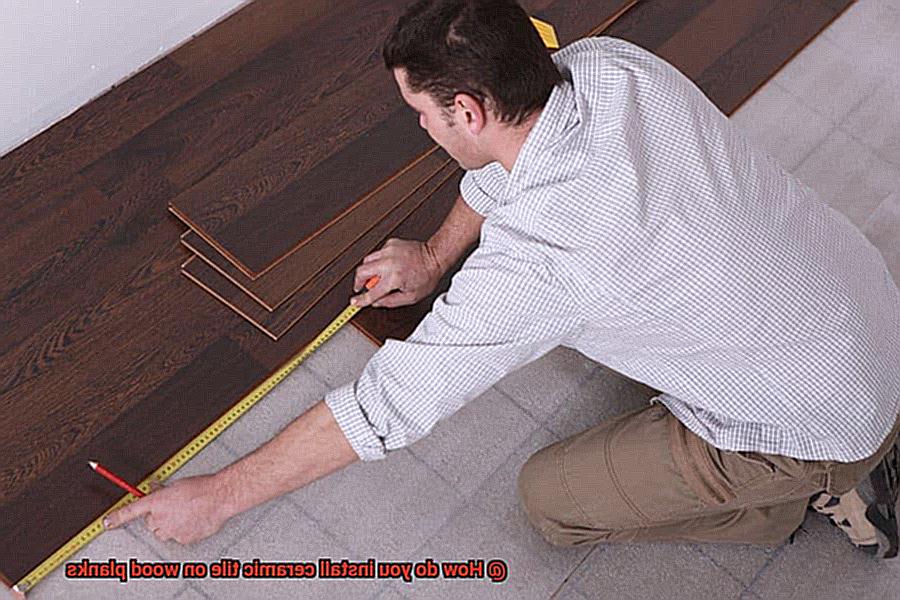
Before diving into the installation process, it’s crucial to plan ahead. Start by measuring your space, taking into account any obstructions or fixtures that may affect your layout. With these measurements in hand, sketch out a scale drawing of the area and experiment with different tile arrangements. Let your imagination run wild and envision the masterpiece that will grace your floors.
The Power of Starting from the Center:
To achieve balance and symmetry in your tile design, begin laying tiles from the center of the room. Finding the center point is as simple as marking the midpoint of each wall and connecting them with lines. This cross-shaped guide will be your compass as you navigate through your tile-laying adventure.
Building Your Foundation:
Now it’s time to bring your vision to life. Start laying tiles along one of the lines you drew in step 2, using tile spacers to ensure consistent spacing between each tile. As you work your way towards one wall, revel in the satisfaction of seeing your creation take shape.
Row by Row, Pattern by Pattern:
Moving onto the next row, adjust each tile’s placement to fit your desired pattern. Whether it’s an intricate mosaic or a simple yet elegant arrangement, let your creativity guide you. Remember to rely on those trusty tile spacers to maintain uniform spacing and create a harmonious overall look.
As you approach the edges and corners of the room, challenges may arise. Fear not, for your determination will triumph. Measure and mark any areas that require tile cuts on the backside of each tile. With precision and finesse, use a tile cutter or wet saw to bring your tiles to their perfect shape. This meticulous attention to detail will ensure a seamless transition from one wall to another.
Applying Tile Adhesive
Don’t forget the crucial step of applying tile adhesive to ensure a strong and durable bond. Get ready to dive into the art of adhesive application on wood planks, and let your tile installation skills shine. Here’s everything you need to know:
- Prepare the Surface: Like preparing a canvas for a masterpiece, prepping the wood planks is essential. Start by eliminating any dirt or debris that could hinder adhesion. Grab your trusty broom or vacuum cleaner to sweep away loose particles. Then, wipe down the surface with a damp cloth to remove any remaining residue. For an extra grip, lightly sand the wood to create a rough texture.
- Choose the Perfect Adhesive: Just as an artist selects their colors and brushes, picking the right adhesive is crucial. You want an adhesive specifically designed for bonding ceramic tiles to wood surfaces. It should also be compatible with both the type of wood and tiles you’re using. Consult your local hardware store or manufacturer for expert recommendations if you’re unsure.
- Apply with Precision: Imagine spreading sauce onto a perfectly rolled pizza dough – that’s how you want to apply your adhesive. Mix it according to the manufacturer’s instructions, then grab a trowel or notched trowel and get to work. Create an even layer that covers every inch of the wood planks, using the notched side of the trowel to leave ridges that enhance the bond.
- Work in Small Sections: Patience and precision are key here. Prevent your adhesive from drying out too quickly by working in small sections at a time. Divide your floor into manageable areas and focus on one section at a time. Apply the adhesive consistently and evenly, ensuring each area gets sufficient coverage.
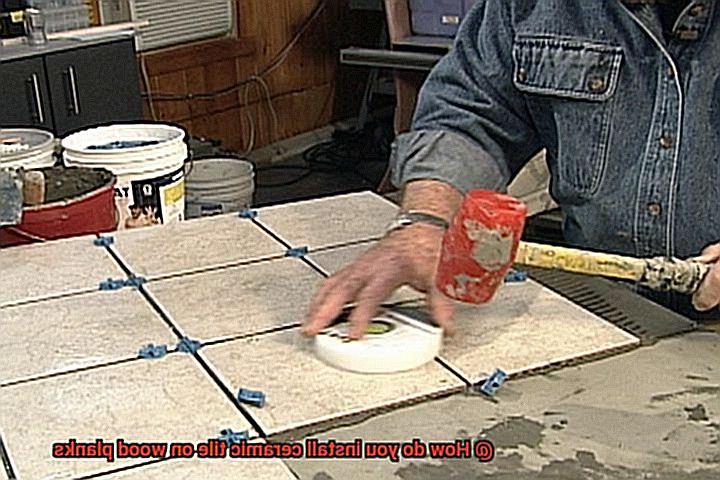
- Lay Your Tiles: Now it’s time to bring your vision to life. Firmly press each ceramic tile into the adhesive, applying slight pressure for proper contact and adhesion. Use spacers or tile wedges to maintain consistent spacing between tiles, creating a professional finish with even grout lines.
- Check for a Strong Bond: After completing the installation, it’s crucial to check for proper adhesion. Gently tap the tiles with a rubber mallet to ensure they are securely bonded to the wood planks. If any tiles feel loose, remove and reapply them with fresh adhesive.
Installing the Ceramic Tiles
If you’re ready to transform your space with a stunning and resilient flooring solution, then you’ve found the right place. In this comprehensive article, we will take you through the step-by-step process, ensuring that you have all the knowledge and tools necessary to create a masterpiece. Let’s dive in and unleash your inner artist.
Step 1: Preparing the Canvas
Just like an artist preparing their canvas, it is crucial to start with a clean and level surface. Begin by removing any existing flooring or debris from the wood planks, ensuring they are properly sanded and smoothed. This meticulous preparation will provide a solid foundation for the ceramic tiles.
Step 2: Choosing Your Tools
Much like an artist carefully selects their tools, you too should choose your tools wisely. Gather adhesive or thin-set mortar, a notched trowel, spacers, a level or straight edge, a grout float or rubber float, a damp sponge or cloth, and a sealer. With these essential tools in hand, you’ll be well-equipped to achieve professional-grade results.
Step 3: Applying the Adhesive
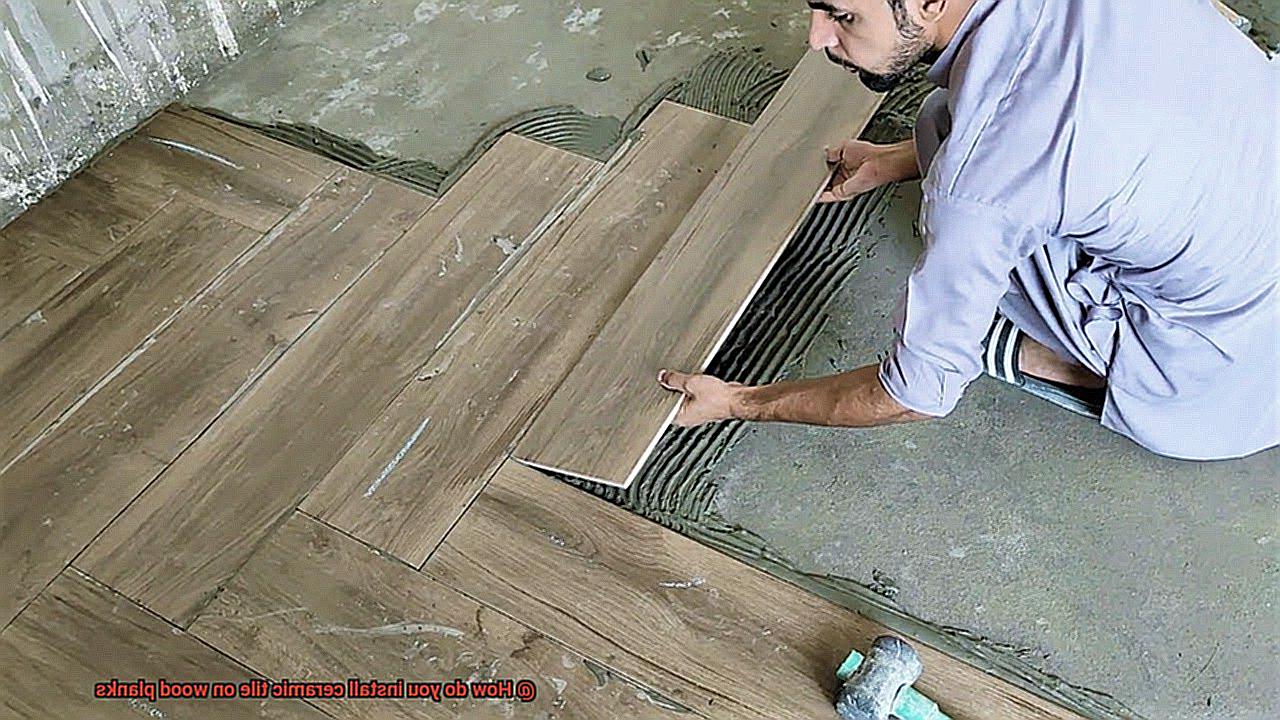
Now it’s time to bring your vision to life by applying the adhesive or thin-set mortar onto the wood planks. Using your trusty notched trowel, spread the adhesive evenly across the surface. This step is crucial for creating a strong bond between the wood and ceramic tile, ensuring long-lasting durability.
Step 4: Bringing Your Vision to Life
Just as an artist brings their vision to life stroke by stroke, you’ll lay your tiles with firm pressure. Begin in one corner of the room and work your way towards the opposite corner. Remember to use spacers between each tile for even spacing and alignment. Press each tile firmly into the adhesive, checking for levelness using a straight edge.
Step 5: Working in Sections
Similar to spreading sauce on a pizza dough, working in small sections is key. It allows you to maintain control and ensure precision. By focusing on small sections at a time, you can adjust and perfect each tile placement. Continue laying the ceramic tiles in small sections until all the wood planks are covered.
Allowing the Adhesive to Cure
In our previous guide, we explored the artistry behind installing ceramic tiles on wood planks, comparing it to a painter’s meticulous canvas preparation. Today, we dive deeper into the importance of allowing the adhesive to cure properly before taking the next steps. Think of it as giving your masterpiece time to dry before adding those final touches.
Why Curing Matters:
Just like a painting needs time to dry and set, allowing the adhesive to cure is crucial for a successful installation. The adhesive is not just a mere glue; it’s what holds your tiles in place, ensuring their durability and longevity. So, let’s break down why giving it enough time to cure is essential:
Stronger Bond:
During the curing process, the adhesive hardens and bonds securely with both the wood planks and the ceramic tiles. This ensures that your tiles stay firmly in place, even when faced with daily wear and tear. Think of it as providing a solid foundation for your artwork.
Manufacturer’s Guidance:
Different adhesives have varying curing times. To achieve optimal results, consult the manufacturer’s instructions for recommended curing times. Typically, you should allow at least 24 to 48 hours for the adhesive to cure fully. This waiting period might seem tedious, but it guarantees a strong bond that will stand the test of time.
Avoiding Disturbances:
Imagine someone accidentally stepping on your freshly painted canvas – disastrous, right? The same principle applies here. During the curing period, it’s important to avoid any foot traffic or placing heavy objects on the newly installed tiles. These actions can disrupt the curing process and weaken the bond between the tiles and wood surface.
Moisture Management:
Moisture is another enemy of proper adhesive curing. Excessive moisture or high humidity levels can interfere with the adhesive’s ability to cure effectively. To ensure a successful installation, keep the area dry and well-ventilated during the curing process. It’s like creating the perfect climate for your artwork to dry.
The Art of Checking:
Now that you’ve patiently allowed the adhesive to cure, it’s time to put your expert eye to the test. Here’s how you can ensure that the curing process has worked its magic:
Finishing Touches and Maintenance Tips
To achieve a long-lasting and visually appealing result, it is vital to pay attention to the finishing touches and follow proper maintenance tips. In this article, we will explore six key steps that will help you enhance the beauty and durability of your ceramic tile installation on wood planks.
Grouting: A Seamless and Protective Touch:
Grouting is a crucial step in any ceramic tile installation on wood planks. It not only adds a polished and cohesive look to the surface but also serves as a protective barrier against moisture damage. Selecting a grout color that complements both the ceramic tiles and wood planks will create a seamless and stylish finish, while preventing water seepage into the subfloor.
Sealant: Shielding Tiles and Grout:
To protect your tiles and grout from stains, dirt, and moisture, applying a sealant is essential. This additional layer acts as a shield, making it easier to clean and maintain your ceramic tile installation in the long run. Be sure to choose a sealant specifically designed for use on ceramic tiles installed on wood planks, and carefully follow the manufacturer’s instructions for application.
Regular Cleaning: The Key to Longevity:
Regular cleaning is crucial for preserving the beauty of your ceramic tile installation on wood planks. Use mild detergents or specially formulated tile cleaners to remove dirt, dust, and spills without causing any damage to the surface. Avoid harsh chemicals or abrasive cleaners that may scratch or dull the tiles. Promptly attending to spills will prevent staining and ensure that your tiles retain their original luster.
Protective Measures: Safeguarding Your Investment:
Consider using rugs or mats in high-traffic areas or places prone to moisture accumulation, such as entryways or near sinks. These protective measures act as a barrier, minimizing wear and tear on your ceramic tile installation and reducing the risk of water damage. Placing rugs strategically will capture dirt and moisture before they reach your beautiful tiled surface, helping to maintain its pristine condition.
Prompt Repairs and Inspections: Ensuring Longevity:
Regularly inspecting your ceramic tile installation is crucial for identifying any potential issues early on. Loose or cracked tiles, deteriorating grout, or signs of moisture penetration should be addressed promptly to prevent further damage. Prompt repairs or replacements will ensure the longevity of your installation, allowing you to enjoy its beauty for years to come.
Preventive Maintenance: Preserving Beauty and Integrity:
In addition to regular cleaning and inspections, implementing preventive measures can significantly extend the lifespan of your ceramic tile installation. Using furniture pads under heavy items prevents scratches or dents on both the tiles and wood planks, preserving their appearance and structural integrity. These small yet effective steps will help maintain the beauty and longevity of your ceramic tile installation on wood planks.
Conclusion
Installing ceramic tile on wood planks is a process that requires careful attention and precision. It involves preparing the surface, applying adhesive, and laying the tiles in a specific pattern. By following these steps, you can transform your wooden floor into a stunning tiled masterpiece.
Firstly, it’s crucial to ensure that the wood planks are clean and free from any dirt or debris. Use a broom or vacuum cleaner to remove any loose particles. Next, inspect the planks for any signs of damage or unevenness. If necessary, sand down any rough areas to create a smooth and level surface for the tiles.
Once the wood planks are prepped, it’s time to apply an appropriate adhesive. Choose a high-quality thin-set mortar or tile adhesive specifically designed for bonding ceramic tiles to wood surfaces. Using a notched trowel, spread the adhesive evenly over a small section of the wood plank area.
Now comes the exciting part – laying the ceramic tiles. Start by placing the first tile at one corner of the room, pressing it firmly into the adhesive. Use tile spacers to maintain consistent spacing between each tile for a professional finish. Continue this process until all tiles are laid out in your desired pattern.
After allowing sufficient time for the adhesive to dry (refer to manufacturer instructions), you can begin grouting. Mix grout according to package instructions and apply it using a rubber float, filling in the gaps between tiles. Wipe off any excess grout with a damp sponge before it dries completely.
Finally, let your newly installed ceramic tile floor cure for at least 24 hours before walking on it or moving furniture back into place. This will ensure that everything sets properly and avoids any potential damage.
In conclusion, installing ceramic tile on wood planks is an intricate yet rewarding task that can elevate your home’s aesthetic appeal. With proper preparation, precise application of adhesive and tiles, and careful finishing touches with grout, you can achieve a stunning and durable tiled floor that will stand the test of time.