Ever found yourself in a sticky situation, desperately seeking a quick fix? Look no further. Super glue has long been hailed as the ultimate adhesive, trusted by DIY enthusiasts, professionals, and everyday heroes alike.
But what if we told you there’s a way to take it to the next level – transforming it into an unstoppable force of super-solidity? That’s right, folks.
We’re about to unveil the secrets of hardening super glue, unlocking its full potential for unbreakable bonds.
In this blog post, we’ll delve into the captivating world of super glue hardening, sharing secret tips and tricks that will elevate your fixing game to extraordinary heights.
So buckle up and prepare for a journey into the mesmerizing science behind this incredible transformation.
What is Super Glue?
Contents
- 1 What is Super Glue?
- 1.1 The Science Behind Super Glue: Cyanoacrylate: At the heart of Super Glue lies cyanoacrylate, a monomer that possesses a remarkable ability to polymerize rapidly in the presence of moisture. Polymerization: When exposed to air or moisture, the cyanoacrylate molecules fuse together, forming long chains of polymers that create an unbreakable bond between surfaces. Versatile Applications:
- 1.2 Essential Tips for Successful Bonding:
- 1.3 Safety Precautions:
- 2 The Hardening Process of Super Glue
- 3 Techniques and Methods to Harden Super Glue
- 4 Use Accelerators
- 5 Apply Pressure
- 6 Use Heat
- 7 Use Thin Layers
- 8 Increase Humidity Levels
- 9 Conclusion
Super Glue, also known as cyanoacrylate adhesive, is a remarkable adhesive that has revolutionized the world of bonding. From fixing broken toys to assembling intricate models, Super Glue is the ultimate solution for DIY enthusiasts and professionals alike.
In this blog post, we will dive into the captivating world of Super Glue, exploring its scientific secrets, versatile applications, and essential tips for successful bonding.
The Science Behind Super Glue:
- Cyanoacrylate: At the heart of Super Glue lies cyanoacrylate, a monomer that possesses a remarkable ability to polymerize rapidly in the presence of moisture.
- Polymerization: When exposed to air or moisture, the cyanoacrylate molecules fuse together, forming long chains of polymers that create an unbreakable bond between surfaces.
Versatile Applications:
- Materials: Super Glue can securely bond various materials, including plastics, metals, ceramics, rubber, leather, and even some woods.
- Household Repairs: Fix broken toys, eyeglass frames, or kitchenware effortlessly.
- Crafting and Hobbies: Assemble models, create jewelry, or repair delicate components with precision.
- DIY Projects: Strengthen loose screws, reinforce joints, or mend cracked objects for durable results.
Essential Tips for Successful Bonding:
- Use Accelerators: Speed up the hardening process by applying accelerators before using Super Glue.
- Apply Pressure: Ensure optimal contact between surfaces by using clamps or your hands to firmly hold materials until the glue sets.
- Harness Warmth: Expedite curing by gently warming the glued area with a hairdryer or heat gun on low temperature.
- Thin Layers: Apply thin coats of Super Glue for faster and more efficient hardening.
- Consider Humidity: Boost humidity levels by placing a damp cloth nearby or working in a room with higher moisture content.
Safety Precautions:
- Handle with Care: Super Glue can bond skin together. If accidental contact occurs, soak the affected area in warm soapy water or use an acetone-based nail polish remover to gently separate the bonded skin.
- Ensure Ventilation: To avoid inhaling fumes, work in a well-ventilated area when using Super Glue.
The Hardening Process of Super Glue
Step into the enchanting world of super glue and witness its transformation from a liquid to a solid state in mere seconds. Prepare to embark on a journey as we unravel the mysteries behind the hardening process of this extraordinary adhesive, delving into its influencing factors and uncovering invaluable tips along the way.
The Power of Polymerization:
Super glue, scientifically known as cyanoacrylate adhesive, owes its hardening process to the awe-inspiring chemical reaction called polymerization. As this glue encounters air, it initiates polymerization, forging robust bonds between surfaces. But what ignites this remarkable reaction?
Moisture: The Catalyst:
Moisture reigns as a vital factor in the hardening process. Super glue reacts with moisture present in the air or on the surfaces being bonded, effectively triggering the polymerization process. Water molecules play a pivotal role in instigating a chemical reaction that metamorphoses the liquid glue into a solid state. This reaction transpires with astonishing speed, often within a matter of seconds.
Temperature Matters:
Temperature also performs a significant role in dictating the curing time of super glue. Higher temperatures hasten the hardening process, while lower temperatures decelerate it. Therefore, if time is of the essence, applying gentle heat from a hairdryer can expedite the curing time. Yet, it is crucial to exercise caution and avoid excessive heat, as it may cause bubbling or release hazardous fumes.
The Power of Pressure:
Pressure emerges as another influential factor in this intricate process. Applying pressure between bonded surfaces ensures optimal contact and fortifies the bond’s strength. Clamps, weights, or simply pressing surfaces firmly together for a few minutes can yield a superior bond.
Specialized Formulas and UV Curing:
Did you know that specialized super glue formulas exist, designed to cure under specific conditions? Some adhesives necessitate exposure to UV light for rapid and precise hardening. These UV-curing adhesives prove invaluable for intricate projects requiring swift bonding.
Techniques and Methods to Harden Super Glue
When it comes to hardening super glue, there are several techniques and methods that can be employed to achieve quick and strong bonds. These techniques have been developed to enhance the curing process of the glue, ensuring a durable result. Here are some commonly used techniques and methods to harden super glue:
- Accelerators: These handy products are designed to speed up the curing process of super glue. By applying accelerators before or after gluing, you can expect faster results. These products contain chemicals that react with the glue, causing it to cure more rapidly. Say goodbye to long waiting times.
- Warmth: Super glue thrives in warm environments. So why not give it what it wants? Applying heat to the glued area can help the adhesive harden faster. You can use a hairdryer on its low heat setting or place the glued object in a warm place, such as near a heater or under direct sunlight. Just be cautious, as excessive heat can make the glue brittle.
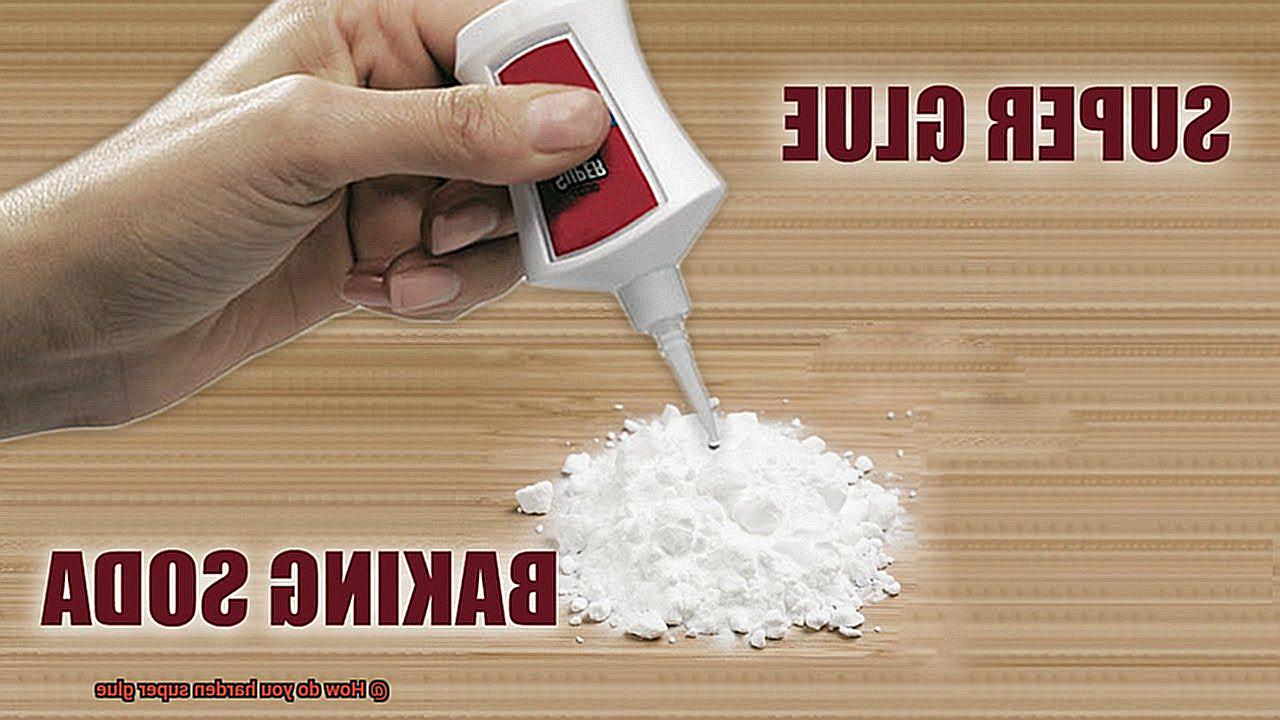
- Moisture: Did you know that super glue reacts with moisture in the air to cure? It’s true. Introducing a small amount of water or moisture can speed up the hardening process. You can lightly mist the glued surface with water or use a damp cloth to apply moisture directly to the adhesive. Watch that glue work its magic.
- Pressure: Applying pressure to the glued parts ensures a strong bond and aids in quick hardening. Grab some clamps, rubber bands, or any other tools you have on hand to hold the surfaces tightly together while the glue cures. No more worrying about weak bonds.
- Thin Layers: Instead of applying a large amount of glue all at once, opt for thin layers. Thin layers cure faster and provide better control and precision during application. Plus, you’ll avoid any excess glue seeping out.
- Primers: Some surfaces may require a little extra help to enhance the hardening process of super glue. Primers are specialized products that prepare the surface for bonding, improving adhesion and promoting faster curing. Make sure to apply them before using the glue and choose a primer specifically designed for the material you’re working with.
Remember to always follow the manufacturer’s instructions when using these techniques and methods. Different brands and types of super glue may have specific recommendations for optimal results. And don’t forget to ensure proper ventilation when using accelerators or any other chemicals.
Use Accelerators
Accelerators are the secret weapon for those sticky situations where you just can’t wait for super glue to dry. These magical substances are designed to speed up the curing process of super glue, allowing it to harden in a flash.
So, if you’re tired of waiting around for your projects to come together, let’s dive into the world of accelerators and discover their incredible power.
At its core, an accelerator works by promoting the chemical reaction between the super glue and the surface it’s applied to. This reaction is what causes the glue to harden and create a strong bond.
But what makes accelerators truly remarkable is their ability to tackle tricky materials that love to soak up moisture from the glue, slowing down the curing process. With an accelerator by your side, even the most difficult surfaces can be bonded quickly and securely.
One popular accelerator for super glue is cyanoacrylate accelerator, available in both spray and liquid form. Applying a small amount of this accelerator to one of the surfaces you want to bond before applying the super glue is all it takes.
The accelerator reacts with the glue, instantly kickstarting the curing process. No more waiting around for hours or holding pieces together until they finally dry. With an accelerator, your projects will come together in a matter of seconds.
However, before you go accelerator crazy, there are a couple of things you should know. Not all types of super glue are compatible with accelerators, so it’s important to check the manufacturer’s instructions before diving in. Additionally, accelerators can sometimes cause discoloration or blooming on certain surfaces. To avoid any mishaps, it’s always a good idea to test them on a small, inconspicuous area first.
Apply Pressure
Applying pressure when using super glue is a crucial step that can make all the difference in achieving a strong bond and quick drying time for your projects. So, let’s dive into the fascinating world of applying pressure and explore different techniques to ensure a successful glue application.
Why is applying pressure important? Well, when you apply pressure to the glued surfaces, you help distribute the adhesive evenly, ensuring that every nook and cranny is covered. This creates a firm bond that will stand the test of time. Plus, applying pressure also helps speed up the drying process, so you can move on with your masterpiece in no time.
Now, let’s talk techniques. For smaller objects or surfaces that can be easily held in place, using your fingers or a clamp is a great option. Exerting pressure on the glued area creates a tight hold and promotes an even bond. It’s like giving your project a big bear hug.
But what about larger objects or surfaces that can’t be easily held? Don’t worry, we’ve got you covered. Grab some heavy objects or weights and place them on top of the glued area. This constant pressure ensures that the glue adheres properly and gives you peace of mind knowing that your project won’t come undone.
Now, here’s a nifty trick for bonding curved or irregular surfaces – tape or rubber bands. Wrap them tightly around the glued area to create continuous pressure. This technique is like giving your project a gentle squeeze, allowing the glue to set properly and ensuring a strong bond.
But wait. Before you start Hulk-smashing everything with pressure, remember not to apply excessive force. Too much pressure can cause the glue to squeeze out from between the surfaces, leading to weakened bonds and messy results. So, find that sweet spot between applying enough pressure for a strong bond and avoiding over-pressurizing the glued area.
Use Heat
Heat can be harnessed in various ways to achieve desired outcomes. One fascinating application is using heat to harden super glue. By subjecting the glued area to heat, you can accelerate the curing process and achieve a robust bond in record time.
So, how exactly can you use heat to make that glue rock-solid? Let’s delve into the exciting world of heat techniques:
- Hairdryer or Heat Gun: Grab your trusty hairdryer or heat gun and direct that scorching air onto the glued area. The heat activates the adhesive properties of the glue, expediting the curing process. Remember to exercise caution and avoid excessive heat exposure to prevent any damage or discoloration.
- Hot Water Immersion: If you’re dealing with smaller objects or areas sensitive to direct heat, fret not. Hot water is here to save the day. Simply immerse the glued area in steaming hot water, and let that warmth work its magic. The transmitted heat accelerates the curing process, granting you a solid bond.
- Microwave Adventure: Brace yourself for an unconventional method. Yes, you can even use your microwave oven to harden super glue. Place the glued object in a microwave-safe dish and zap it for short intervals on low power. Keep a close eye on it and repeat as needed until the glue hardens. But remember, moderation is key. Avoid overheating or using high power settings to avert any mishaps.
As we embark on this heat journey, safety should always be a priority. Ensure you work in a well-ventilated area when using heat on super glue, as some products may emit fumes. If necessary, don respiratory protection for added safety measures. Moreover, always consult the manufacturer’s instructions for specific guidance on heating super glue.
Use Thin Layers
When it comes to the art of glueing, thin layers are a game-changer. If you want your glue to create strong bonds, dry faster, and avoid any messy mishaps, then utilizing thin layers is a must-have skill in your glue arsenal. Let’s dive into the fascinating world of using thin layers when hardening super glue.
So, why should you bother with thin layers? It’s quite simple, really. Thin layers of super glue have a better chance of creating strong bonds and drying faster compared to their thicker counterparts. This means less waiting time and more efficient glueing. And, let’s not forget about the aesthetics – thin layers prevent excess glue from oozing out and making your project look like a sticky mess.
To apply super glue in thin layers, make sure to use the nozzle or applicator that comes with the glue bottle. This ingenious tool allows for precise application and gives you full control over the amount of glue being dispensed. Say goodbye to those globs of glue ruining your masterpiece.
Now, let’s talk technique. Start by applying a small amount of glue to one surface. Remember, less is more in this case. Then, firmly press the two surfaces together. Be careful not to apply too much pressure though, as this can squeeze out excess glue and create a sticky situation. Find the perfect balance between firmness and gentleness.
If you’re looking for an extra-strong bond, layering is the way to go. Apply multiple thin layers of super glue, ensuring each layer dries before applying the next one. This layering technique helps build up a robust bond without compromising the integrity of the glue or the surfaces being bonded.
Increase Humidity Levels
Are you tired of waiting for your super glue to dry? Frustrated with weak bonds and messy applications? Well, we have the secret to unlock glueing mastery – increasing humidity levels. Yes, you heard it right. By harnessing the power of moisture in the air, you can achieve faster and stronger bonds with your super glue.
The Process: How Humidity Boosts Super Glue
Super glue, also known as cyanoacrylate adhesive, cures or hardens when it comes into contact with moisture in the air. By increasing the humidity levels in your workspace, you can accelerate the curing process and achieve a stronger bond in less time.
Methods to Increase Humidity Levels:
- Humidifier: These nifty devices release water vapor into the air, creating a more humid environment. Place a humidifier near the area where you’ve applied super glue, and watch the magic happen. The increased moisture will speed up the hardening process, giving you a secure bond in no time.
- Water Bath: Don’t have a humidifier at hand? No problem. Fill a container with water and place it near your glued object. As the water evaporates, it adds moisture to the air, effectively increasing humidity levels. This method works wonders, especially for smaller objects or when using super glue in enclosed spaces.
- Temperature Adjustment: Did you know that temperature also affects humidity levels? Warmer temperatures generally have higher humidity levels due to increased water vapor in the air. So, if you’re working in a chilly space, consider raising the temperature slightly to indirectly increase humidity levels and speed up the hardening process.
Strike a Balance:
A word of caution – balance is key. While increasing humidity levels can help harden super glue faster, excessive moisture can weaken the adhesive bond. So, find the sweet spot between providing enough moisture for proper curing and avoiding excessive moisture that could compromise the bond’s strength.
Also Read: How Long Does Super Glue Take to Dry?
Conclusion
In conclusion, the process of hardening super glue is nothing short of captivating. It involves delving into the intricate science behind its mesmerizing transformation from a mere liquid to a solid powerhouse. Moisture, temperature, pressure, and specialized formulas all play pivotal roles in this spellbinding metamorphosis.
Moisture acts as the catalyst that sparks the polymerization process of super glue. When exposed to the tantalizing touch of air or moisture, this adhesive marvel springs into action, forming unyielding bonds between surfaces. As for temperature, it wields its mighty influence over curing time. The higher the mercury rises, the faster this miraculous hardening process takes place. Conversely, lower temperatures gently coax the glue into a more leisurely pace.
But there’s more to this enchanting journey than meets the eye. Applying pressure becomes an indispensable ally in ensuring optimal contact between surfaces and fortifying their connection. It’s like a secret handshake between materials that seals their fate together.
Now let’s explore some techniques and methods that can expedite this captivating hardening process even further. Enter accelerators – these magical potions work hand in hand with super glue to speed up curing time by igniting a reaction within the adhesive itself. And if you’re feeling adventurous, why not add some heat to the mix? A blast from a hairdryer or a dip in warm water can send your glue on an express route to rock-hard status.
Remember: thin layers are your allies in this quest for hardened perfection. They dry faster and grant you unparalleled control during application – a true testament to craftsmanship.
But wait. There’s one final trick up our sleeves – humidity manipulation. By increasing moisture levels in your workspace through humidifiers or water baths, you’ll be ushering in an environment where hardened bonds thrive. Adjusting temperature settings adds yet another dimension to this mystical dance of elements.
Of course, caution should always stand at the forefront of your mind when working with super glue. Handle it with the utmost care to avoid any unwanted skin bonding mishaps, and ensure proper ventilation when utilizing accelerators or heat.
Now armed with these extraordinary techniques and methods for hardening super glue, you possess the power to transcend ordinary repairs. Unleash the force of hardened bonds and watch as your fix-it prowess reaches new heights – unbreakable bonds that defy time itself await.
You may also like: