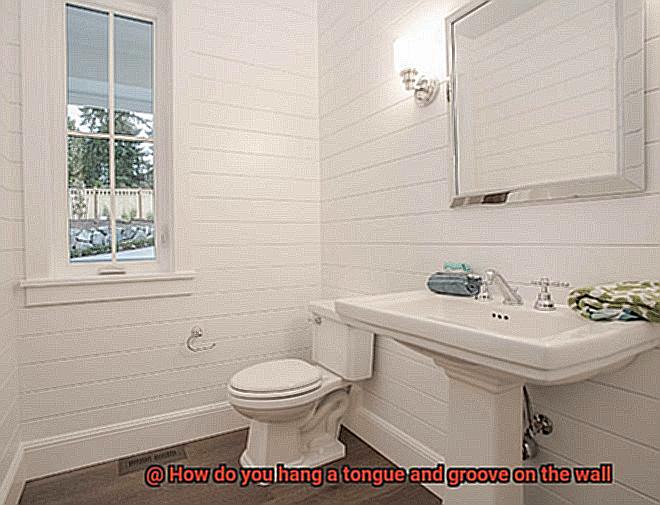
Today, we’re diving into the exciting world of hanging tongue and groove on your wall. If you want to add a touch of timeless elegance to your space, tongue and groove paneling is the way to go.
This classic technique involves fitting boards together like puzzle pieces, creating a seamless and stunning look that works in any style of home. In this post, we’ll walk you through each step of the process, from planning and prepping to adding those final finishing touches.
So, grab your tools and let’s get started on this awesome DIY project that will transform your walls.
Gather Necessary Materials
Contents
- 1 Gather Necessary Materials
- 2 Measure the Wall
- 3 Apply Construction Adhesive
- 4 Secure the First Board
- 4.1 Step 1: Gather Your Arsenal of Tools and Materials:
- 4.2 Step 2: Prepare the Canvas – Your Wall Surface:
- 4.3 Step 3: Measure, Cut, and Mark – The Paragon of Precision:
- 4.4 Step 4: Secure Your Vision – The First Board:
- 4.5 Step 5: Unleash Harmony – Install Subsequent Boards:
- 4.6 Step 6: Attain Nirvana – Check for Levelness:
- 5 Attach Remaining Boards
- 6 Trim Boards to Fit Around Fixtures
- 7 Leave a Gap for Expansion and Contraction
- 8 Clean Excess Adhesive
- 9 Conclusion
Enhancing your space with the elegance and charm of tongue and groove boards requires careful planning and preparation. Before you embark on this project, gather all the necessary materials for a smooth and efficient installation. In this article, we will guide you through the essential materials you’ll need and provide helpful tips along the way.
Tongue and groove boards:
- Measure the area where you plan to install them to determine quantity.
- Interlocking boards that create a seamless fit.
Measuring tape:
- Accurate measurements are vital for success.
- Measure length, width, and height of the wall.
Level:
- Ensures a straight and even installation.
- Choose a level that spans the width of the boards.
Stud finder:
- Locates vital supports behind the drywall.
- Crucial for secure attachment.
Nails or screws:
- Choose based on preference.
- Nails offer quick installation; screws provide added stability.
Hammer or screwdriver:
- Required to drive nails or screws into place.
- Select appropriate tool size.
Wood adhesive or construction adhesive (optional):
- Provides added strength and stability.
- Apply to the back of each board before attaching.
Measure the Wall
Today, we embark on a journey to master the first step of hanging tongue and groove boards on your wall – measuring. Just like a symphony conductor needs precision, you must wield your measuring tape with finesse to create an impeccable installation. So, let’s arm ourselves with tools and dive into the world of measurements.
Step 1: Preparing the Wall
Before commencing with measuring, ensure your wall is pristine, devoid of any obstructions or obstacles. Remove trim or baseboards that may hinder the process. Take a moment to inspect the wall for cracks, holes, or uneven surfaces. Patch up any imperfections before proceeding.
Step 2: Measuring the Height
Begin our measurement symphony by measuring the height of the wall from floor to ceiling. Place your trusty tape measure against one corner and extend it gracefully to the ceiling. Jot down this measurement on your handy piece of paper.
Step 3: Measuring the Width
Now, let’s measure the width of the wall. With elegance, place your tape measure against one side of the wall and extend it gracefully across to the opposite side. Once again, record this measurement for future reference.
Step 4: Accounting for Windows and Doors
If your wall boasts beautiful windows or elegant doors, don’t forget to measure their dimensions too. Start by measuring the height from floor to top of each window or door frame. Then measure the width from one side of the frame to the other.
Step 5: Minding the Gap
In measuring for a tongue and groove installation, it’s vital to consider gaps for expansion caused by temperature and humidity changes. Manufacturers recommend leaving a small gap between each board for expansion. Check guidelines specific to your tongue and groove material to determine the ideal gap size.
Step 6: Double-Checking for Perfection
Before you put down your measuring tape, take a moment to double-check all your measurements. Accuracy is key to ensuring a snug and even installation. It’s wise to have a second pair of eyes review your measurements as well, just to be extra sure.
Apply Construction Adhesive
When it comes to transforming your wall into a stunning work of art, applying construction adhesive is a crucial step. By following a few simple steps, you can ensure a strong and lasting installation of tongue and groove boards. Here’s how to do it:
- Prepare the Wall: Before you begin, ensure that the wall surface is clean, dry, and free from any dust or debris. Remove any loose paint or wallpaper to create a smooth surface for better adhesion.
- Load up the Adhesive: Grab your caulk gun or trowel and load it with construction adhesive. Cut the nozzle at a 45-degree angle for precise application and control of the adhesive flow.
- Bead It Like You Mean It: Starting at one end of the wall, apply a continuous bead of construction adhesive along the backside of the first tongue and groove board. Make sure the adhesive is evenly distributed and covers the entire length of the board. Avoid using too much adhesive to prevent squeezing between the boards later.
- Stick It to the Wall: Press the first board firmly against the wall, aligning it with any reference lines or marks. Use a level to check if the board is plumb vertically and level horizontally. Make any adjustments necessary before moving on to the next board.
- Repeat and Rejoice: Repeat the process for each additional board, applying construction adhesive to each one before pressing it against the wall with confidence. Take your time to ensure proper alignment and secure attachment before proceeding to the next board.
- Mind the Gap: Leave a small gap between each board for expansion and contraction caused by temperature and humidity changes. This gap will allow for a seamless installation. Fill it later with a matching wood filler or caulk for a flawless finish.
- Hold Your Horses: Once all boards are securely attached, use clamps or nails to hold them in place until the adhesive dries completely. Follow the manufacturer’s instructions for drying time, as it may vary depending on the adhesive used.
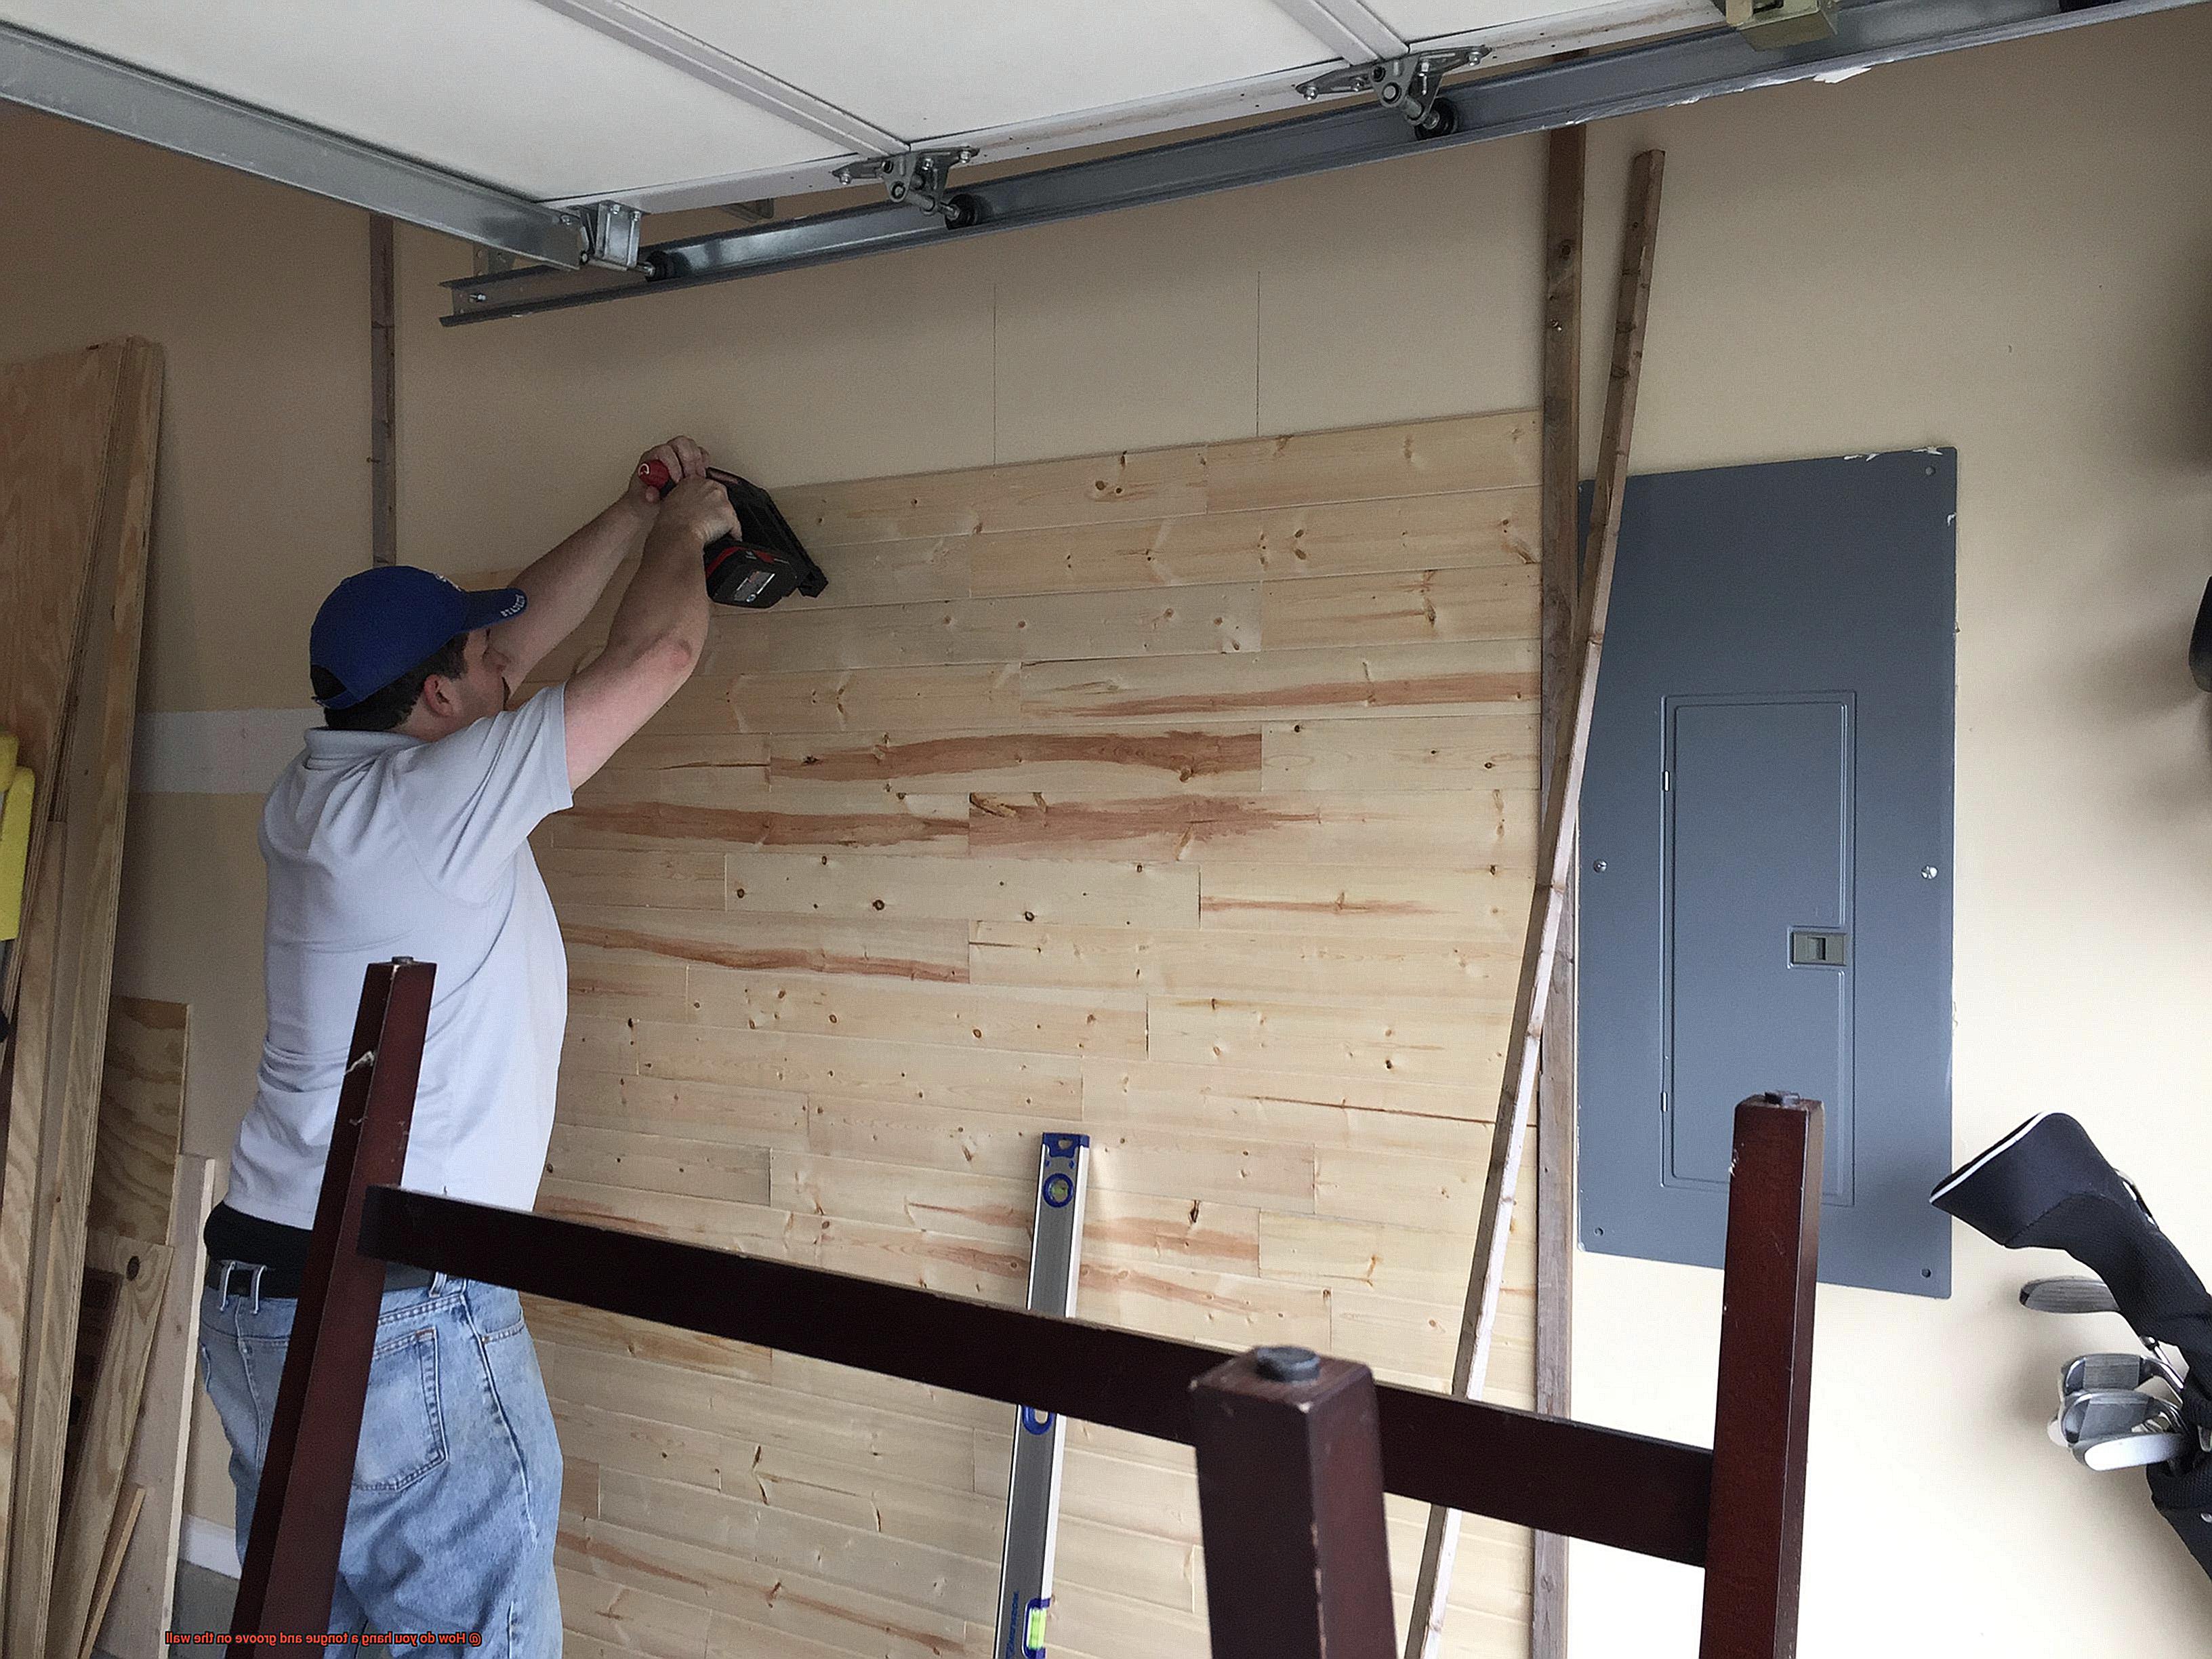
Secure the First Board
Tongue and groove boards are the secret ingredient to adding style and sophistication to any space. In this comprehensive guide, we will walk you through the essential steps of securely installing the first board of a tongue and groove wall using glue. So, grab your tools, unleash your creativity, and let’s dive in.
Step 1: Gather Your Arsenal of Tools and Materials:
Before embarking on this exciting project, ensure that you have all the necessary tools and materials at your fingertips. Equip yourself with a trusty tape measure, pencil, level, drill, screws, construction adhesive, and, of course, the magnificent tongue and groove boards themselves.
Step 2: Prepare the Canvas – Your Wall Surface:
To ensure a rock-solid bond between the boards and the wall, it is crucial to begin with a pristine surface. Bid farewell to dirt and debris by thoroughly cleaning your wall before proceeding any further.
Step 3: Measure, Cut, and Mark – The Paragon of Precision:
Measure the height of your wall meticulously and cut the first board accordingly. Leave a small gap at the bottom to accommodate any expansion. A level comes to your rescue here, ensuring that the board aligns flawlessly. As your guiding light, use a pencil to mark the top, bottom, and sides of the board with surgical precision.
Step 4: Secure Your Vision – The First Board:
To fortify your masterpiece, pre-drill holes along the marked lines using a drill bit slightly smaller than the screws’ diameter. This tactical move prevents any wood splitting or unsightly cracks from marring your creation. Now it’s time to attach the board to the wall by driving screws through the pre-drilled holes and into the sturdy wall studs.
Step 5: Unleash Harmony – Install Subsequent Boards:
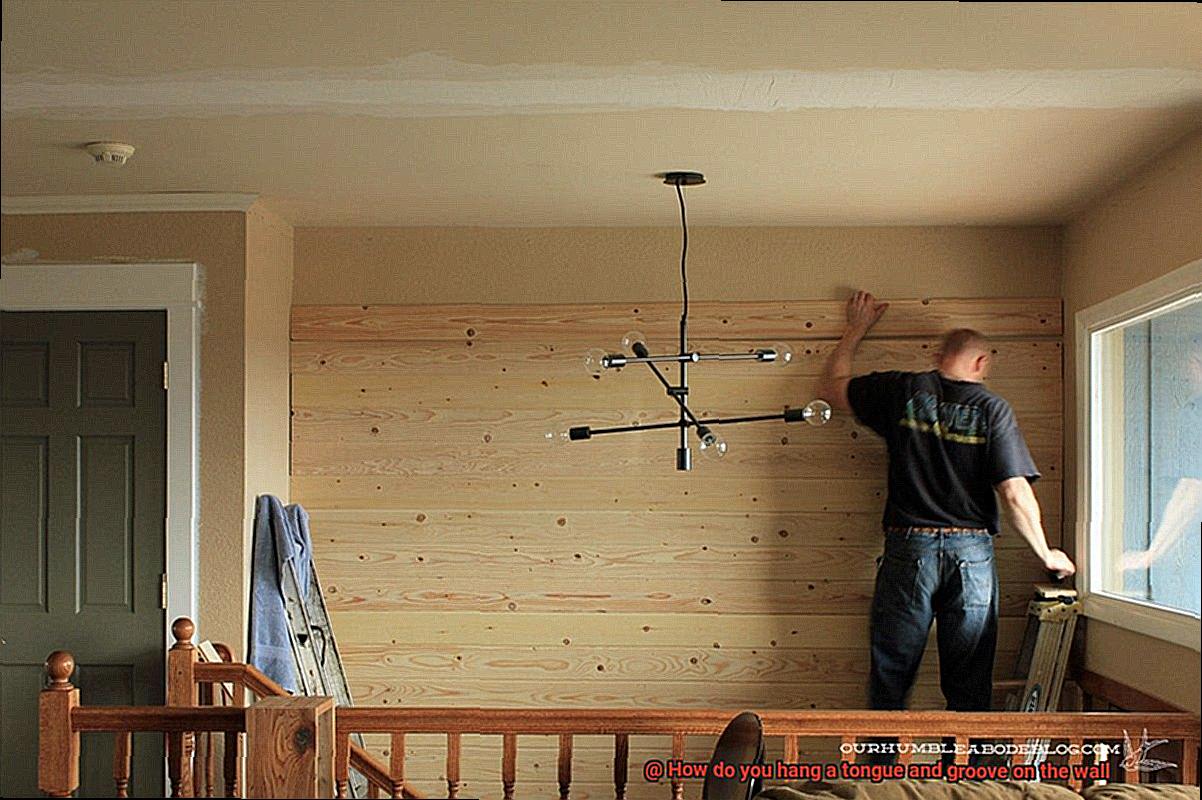
With your first board securely in place, it’s time to unlock the symphony of installation. Apply a bead of construction adhesive along the edge of each board and slide it into the welcoming groove of the previously installed board. Employ the finesse of a rubber mallet or a block of wood and hammer to delicately tap the board into its rightful place. Repeat this poetic process for each subsequent board, ensuring a snug fit that exudes elegance.
Step 6: Attain Nirvana – Check for Levelness:
Throughout this enchanting journey, it’s paramount to verify that your creation is level and aligned. Embrace your inner perfectionist and make any necessary adjustments to ensure that each tongue and groove board harmoniously intertwines, forming a seamless and professional appearance that will leave onlookers spellbound.
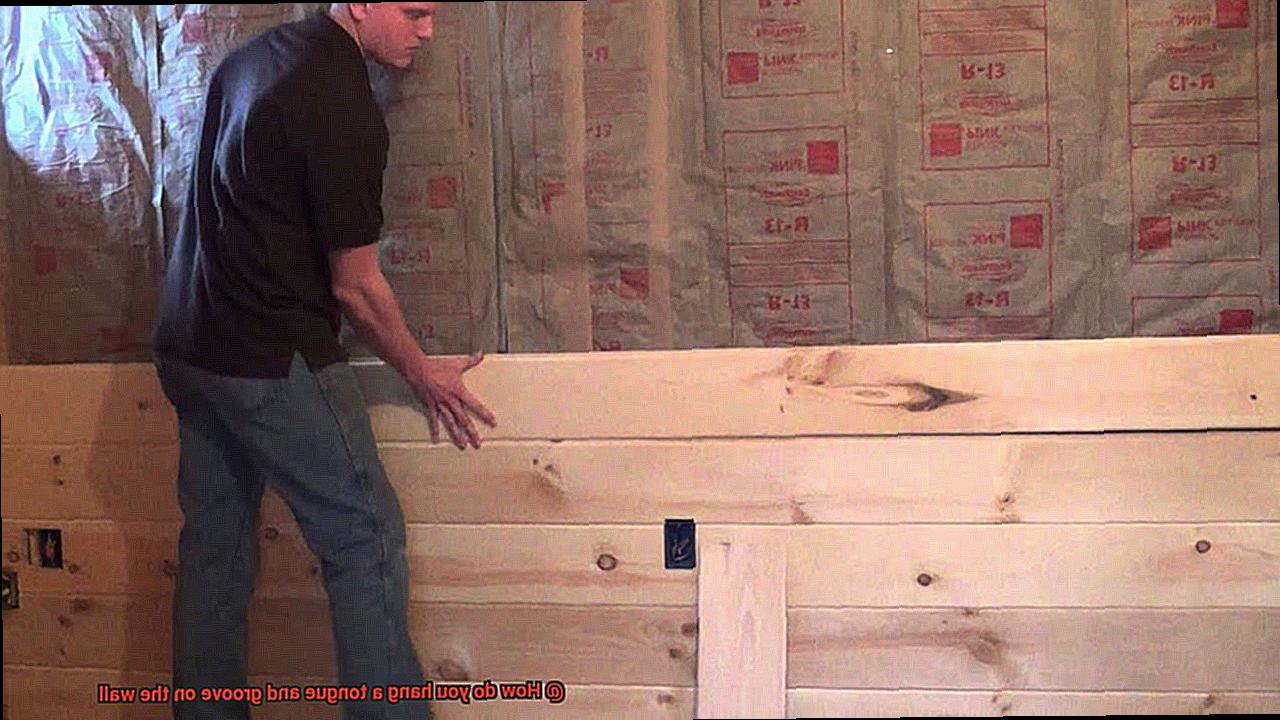
Attach Remaining Boards
Tongue and groove boards not only add elegance to any space but also provide structural stability. In this detailed guide, we will take you through each step of attaching the remaining boards using glue, ensuring a flawless installation.
Ensure Previous Boards are Secure:
Before proceeding, it is crucial to ensure that the previously installed boards are securely attached. This ensures the integrity of your installation and prevents any issues down the line.
Slide and Align with Precision:
Slide the tongue of the next board into the groove of the previous board at a slight angle. Take your time to align the boards perfectly and ensure full insertion of the tongue into the groove. Use a rubber mallet or a block of wood to gently tap the board into place, creating a seamless connection.
Enhance Adhesion with High-Quality Wood Glue:
Apply a generous amount of high-quality wood glue along the entire length of the tongue. This extra layer of adhesion enhances the strength and durability of your installation, ensuring that your boards stay firmly in place for years to come.
Nail or Screw for Unyielding Stability:
For maximum stability, use either a nail gun or finish nails to secure the board to the wall. Place the nails at an angle through the tongue, ensuring they penetrate into the wall studs. Alternatively, opt for screws instead of nails for increased strength and longevity.
Maintain Consistent Spacing:
To achieve an aesthetically pleasing result, maintain consistent spacing between each board. Utilize spacers or shims during the installation process to ensure uniformity and create a professional finish that catches the eye.
Trim with Precision:
If necessary, trim the final board to fit perfectly in its designated space. Measure and mark the required dimensions, and then use a circular saw or jigsaw to make precise cuts along the marked line. Always prioritize safety by wearing appropriate protective gear and following safety guidelines.
Check Levelness and Alignment:
Inspect the installation to ensure that all boards are level and aligned correctly. If adjustments are needed, gently tap the boards into alignment using a rubber mallet or a block of wood. This attention to detail ensures a stunning finished result.
Finishing Touches for Perfection:
To achieve a flawless look, attend to the finer details.
Fill any nail holes or gaps between boards with wood putty or caulk, creating a seamless surface. Sand down any rough edges or imperfections, ensuring a smooth and visually appealing finish.
Lastly, apply a coat of paint or stain according to your desired aesthetic.
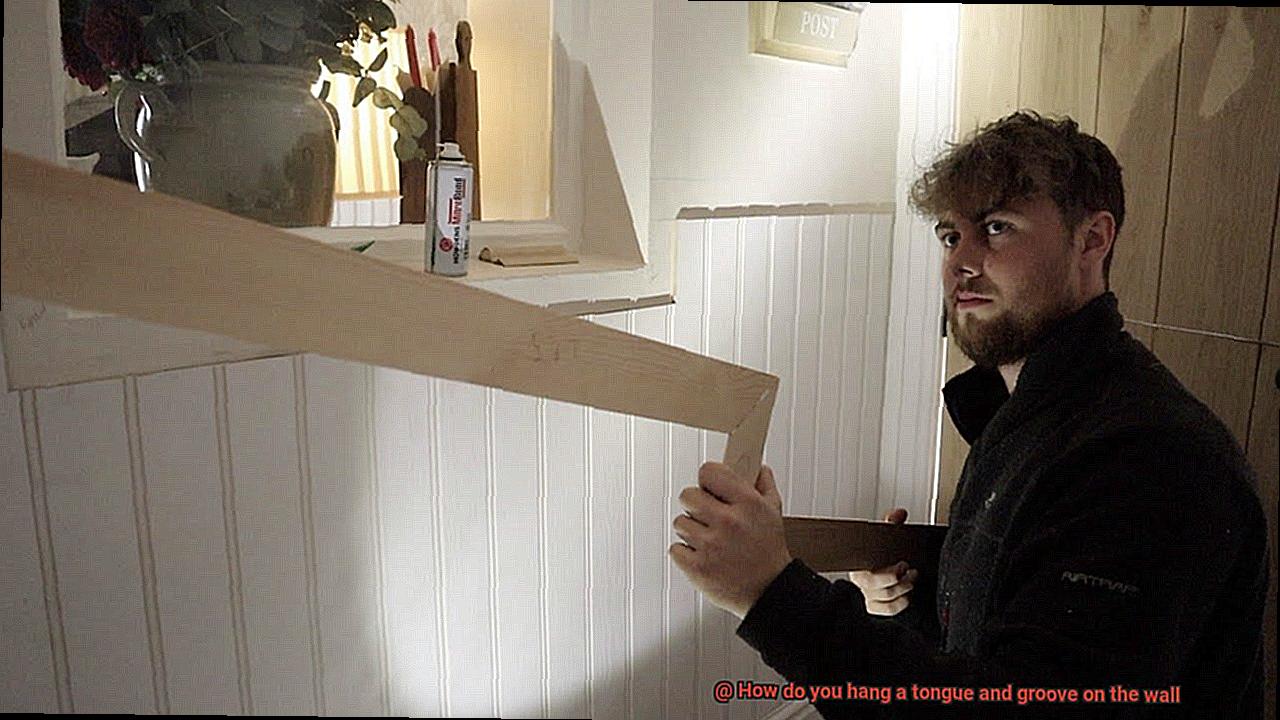
Trim Boards to Fit Around Fixtures
Enhancing the visual appeal of any room is as simple as introducing tongue and groove boards. However, when faced with fixtures like outlets, switches, and pipes that disrupt the smooth flow of the boards, it’s crucial to know how to trim them seamlessly around these obstacles.
In this comprehensive guide, we will take you through the step-by-step process of trimming boards to fit around fixtures, ensuring an impeccable tongue and groove installation.
- Measure and Mark: Begin by measuring the dimensions of the fixture and transferring them onto the tongue and groove board. Use a pencil or chalk to draw the outline of the fixture, providing a precise cutting guide.
- Jigsaw Magic: Equip yourself with a jigsaw suitable for wood cutting and adjust its speed accordingly. Starting at one end of the marked outline, carefully cut along the line, ensuring utmost precision as you navigate around the fixture. Remember, slow and steady wins the race.
- Relief Cuts for Precision: For corners or tight spots, consider making small relief cuts. Drill holes at each corner of the marked outline and connect them using the jigsaw blade. This technique guarantees clean corners and a perfect fit.
- Test-Fit for Perfection: After cutting out the desired shape, try fitting the board around the fixture. If adjustments are required, carefully make additional cuts until you achieve a snug fit.
- Remove Tongue or Groove if Needed: In some cases, removing a section of the tongue or groove on the trimmed board may be necessary for a flush fit against another board. A router or chisel can be used for this purpose.
- Secure and Align: Once all necessary boards are trimmed to fit around fixtures, secure them to the wall using nails or screws. Ensure each board is properly aligned and level with adjacent ones, maintaining consistent spacing throughout.
- Finishing Touches: Inspect the trim around fixtures for any gaps or imperfections. Fill them with wood filler or caulk, ensuring a seamless finish. Now, you’re ready to paint or stain the boards for a polished look.
Leave a Gap for Expansion and Contraction
Today, we’re going to dive deeper into the concept of leaving a gap for expansion and contraction in business operations. It may not be the most glamorous topic, but trust me, it’s crucial if you want your business to thrive and adapt to changing circumstances.
Let’s explore the reasons why leaving a gap is so important:
- Flexibility in growth: Just like wood expands and contracts with temperature and humidity changes, businesses also need room to grow and contract. By leaving a gap in your operations, you create space for expansion when opportunities arise or demand increases. On the flip side, it allows for contraction when market conditions are tough or when you need to pivot your strategy. This flexibility ensures that your business remains agile and can adapt to the ever-changing marketplace.
- Avoiding bottlenecks: When a business operates without any gaps or room for expansion, it can quickly become overwhelmed and experience bottlenecks in various areas. For example, if you don’t leave room in your production process for increased demand, you may struggle to meet customer needs and lose out on potential revenue. By leaving a gap, you give yourself breathing room to scale up operations efficiently and avoid these bottlenecks.
- Managing risk: Leaving a gap also helps manage risk in your business. It provides a cushion for unexpected events or economic downturns. Just like wood needs space to adjust to changes in its environment, businesses need room to absorb shocks and make necessary adjustments. By leaving a gap for expansion and contraction, you build resilience into your operations and mitigate the impact of unforeseen circumstances.
- Embracing innovation: Leaving a gap encourages innovation in your business. When you have room to expand, you can explore new ideas, products, or markets without feeling constrained by existing operations. This freedom allows for creativity and experimentation, leading to new opportunities for growth and differentiation in the marketplace. By embracing innovation, you stay ahead of the competition and ensure the long-term success of your business.
Clean Excess Adhesive
We’ve all experienced that sinking feeling when we finish installing a gorgeous tongue and groove wall, only to discover unsightly excess adhesive oozing out between the boards.
I’m here to share some expert tips on how to clean up this sticky situation and make your wall look flawless.
The Scraper Method:
Begin by grabbing a trusty putty knife or scraper and gently scrape off the dried adhesive. Start at one end of the board and work your way along, removing any visible adhesive as you go. This method is a breeze, and you’ll be amazed at how easily the excess adhesive peels away.
Solvent Magic:
If scraping alone doesn’t completely remove the adhesive, it’s time to call upon the power of solvents or adhesive removers. Carefully read the instructions provided and apply the solvent to a clean cloth or sponge.
Gently rub it over the excess adhesive until it starts to dissolve, then wipe away with a clean cloth. Witness the adhesive vanish before your eyes.
Suds Away:
In some cases, warm soapy water can work wonders in cleaning excess adhesive. Create a solution by mixing mild dish soap with warm water. Dip a clean cloth into the soapy mix and gently rub it over the stubborn adhesive.
Apply slight pressure if needed. The soap will break down the adhesive, making it easier to remove. Finally, wipe away any residue with a clean cloth dampened with plain water.
Remember, different adhesives may require different cleaning methods, so always check with the manufacturer or consult an expert for specific instructions tailored to your tongue and groove installation.
So there you have it – three simple yet effective ways to bid farewell to excess adhesive on your beautiful tongue and groove installation. By following these expert tips and taking care not to damage the boards or the wall, you’ll achieve a clean and visually pleasing result that will leave your friends and family in awe of your DIY skills.
sc6YLbIzgno” >
Conclusion
Hanging a tongue and groove on the wall may seem like a daunting task, but with the right tools and techniques, it can be a straightforward process. Here are some steps to help you get started.
First, gather all the necessary materials: tongue and groove boards, a measuring tape, a level, a saw, nails or screws, and a hammer or drill.
Next, measure the length of the wall where you plan to install the tongue and groove. Cut the boards accordingly, ensuring they fit snugly against each other.
Before installation, make sure the wall is clean and free from any debris. This will ensure a smooth surface for attaching the boards.
Begin by installing the first board at one corner of the wall. Use a level to ensure it is straight and plumb. Secure it in place with nails or screws.
Continue adding boards one by one, sliding the groove of each board onto the tongue of the previous board. Make sure each board is level before securing it to the wall.
To create an even look, stagger the seams between boards as you work your way across the wall. This will give your finished project a professional appearance.
When you reach an obstacle such as an outlet or window frame, measure and cut accordingly to fit around it. Take your time to ensure precise cuts for a seamless finish.
Once all boards are installed, use finishing nails or screws to secure them firmly into place. Be careful not to overdrive them as it may damage the wood.
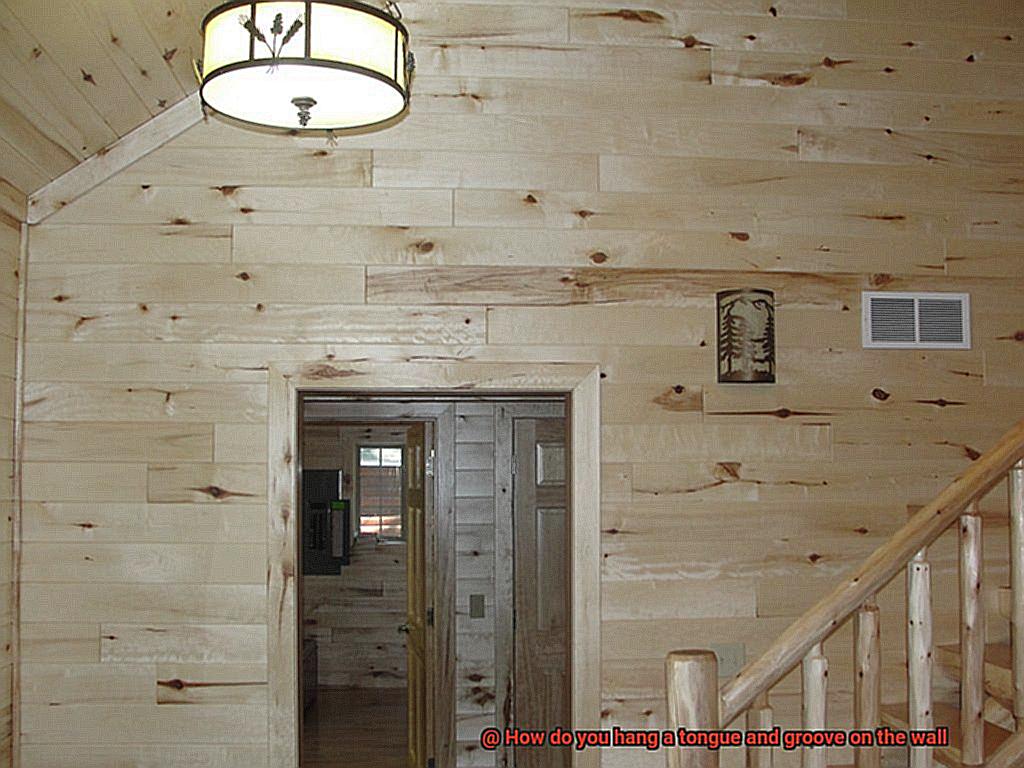
Finally, step back and admire your handiwork. A properly installed tongue and groove can transform any wall into a stunning focal point in your home.
Remember to take your time during this process and double-check measurements before making any cuts.