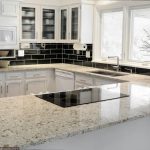
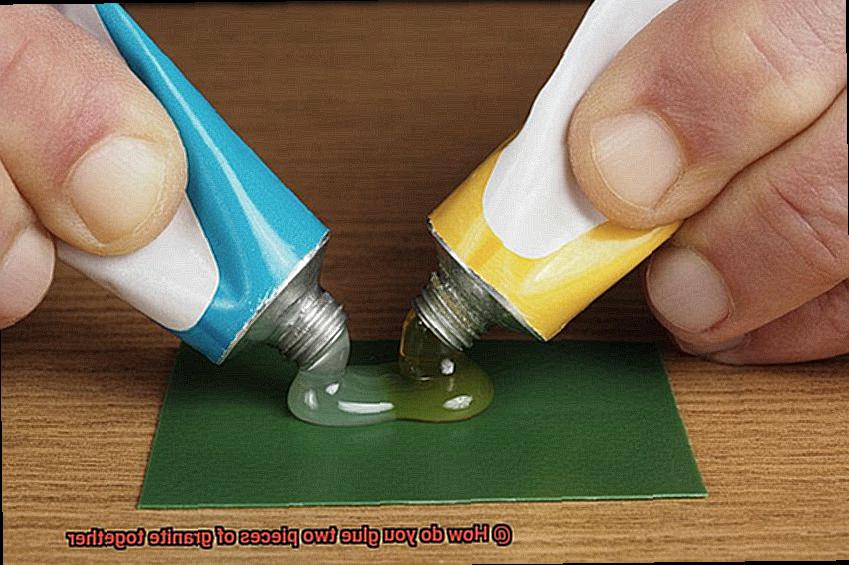
Have you ever gazed in awe at the exquisite beauty of a granite countertop, with its mesmerizing patterns flowing seamlessly across its surface? It’s not just about choosing the right stone; it’s also about the skillful joining of multiple slabs. Today, we embark on an enchanting journey into the realm of granite fabrication, uncovering the secrets behind gluing two pieces of this magnificent natural rock together.
Just imagine the endless possibilities – transforming your kitchen with a jaw-dropping oversized granite island or creating a captivating fireplace surround that exudes opulence and grandeur. These dreams can become reality when you acquire the know-how to combine multiple granite pieces into one harmonious masterpiece. But how exactly is it done?
In this article, we dive deep into the nitty-gritty details, revealing the essential steps and techniques required to achieve a flawless bond between two granite slabs. From selecting the perfect adhesive to meticulously preparing the surfaces and ensuring a rock-solid connection, we leave no stone unturned on this path to granite perfection.
Key Points:
- Choosing the Right Adhesive: Discover different types of adhesives and their compatibility with granite for achieving a strong and long-lasting bond.
- Preparing the Surface: Uncover the meticulous process of cleaning and roughening the surface of your granite slabs to ensure optimal adhesion.
- Applying Like an Artist: Explore the artistry behind applying adhesive, spreading it evenly, and joining those two magnificent pieces together with precision.
- Clamping for Success: Learn why using clamps is crucial in firmly holding your granite pieces during curing, allowing the adhesive to set completely.
- Flawless Finishing Touches: Delve into techniques for polishing and blending seams until they become virtually invisible. We’ll also share expert tips on maintaining that seamless appearance over time.
Conclusion:
Contents
- 1 What is Granite?
- 2 What Adhesive Is Needed for Gluing Granite?
- 3 Preparing the Granite for Glue Application
- 4 Applying Primer or Bonding Agent to Improve Adhesion
- 5 Mixing the Epoxy Resin
- 6 Applying the Epoxy Resin Evenly
- 7 Pressing the Two Pieces of Granite Together Firmly
- 8 Drying Time and Excess Glue Removal
By understanding the intricacies of bonding granite pieces together, you unlock a world of design possibilities. Whether you’re a homeowner dreaming of a magnificent granite feature or a professional fabricator seeking to refine your craft, this comprehensive guide will reveal the secrets to achieving flawless results. So, let’s embark on this journey and master the art of seamlessly gluing two pieces of granite—one bond at a time.
What is Granite?
Step into the world of granite, an exquisite type of igneous rock that emerges from the depths of the Earth’s crust. Renowned for its durability, aesthetic appeal, and versatility, granite has become a top choice for construction and home improvement projects. Get ready to explore the captivating characteristics, formation process, practical applications, and even the art of gluing this remarkable natural stone.
Characteristics of Granite:
Quartz, feldspar, and mica minerals form the backbone of granite. Its alluring grain structure, visible to the naked eye, gives this stone a distinctive appearance. Prepare to be mesmerized by the palette of colors that granite showcases – from serene whites and grays to vibrant pinks, reds, greens, and even blues. The array of colors stems from the diverse mineral compositions within the rock.
Formation Process:
Imagine the slow cooling and solidification of molten magma deep within the Earth’s crust over countless years. This extraordinary process gives birth to granite as the magma undergoes crystallization. The result is a material renowned for its exceptional hardness and resilience – a testament to its enduring nature.
Strength and Durability:
Strength lies at the core of granite’s appeal. Its robust composition boasts unrivaled resistance to both heat and scratches, making it ideal for high-traffic areas like bustling kitchens or luxurious bathrooms. Moreover, when properly sealed, granite defies stains with ease – a true testament to its low-maintenance nature.
Practical Applications:
Granite’s rich history as a building material spans centuries. Ancient civilizations such as the Egyptians recognized its timeless allure and employed it in constructing enduring monuments and statues that still stand today. In modern times, granite continues to grace our lives in various forms – countertops that exude elegance, flooring that captivates with its beauty, backsplashes that add a touch of sophistication, and even outdoor spaces like patios or pool decks that radiate luxury.
What Adhesive Is Needed for Gluing Granite?
Step into the enchanting realm of granite, where beauty and practicality intertwine. In our previous expedition, we marveled at the splendor and resilience of this majestic igneous rock. Now, let us delve deeper into the art of granite bonding and unlock the perfect adhesive to bring your granite projects to life.
The Mighty Epoxy Resin:
When it comes to gluing granite, one adhesive reigns supreme like an indomitable warrior – epoxy resin. This formidable adhesive forges an unbreakable bond that defies the ravages of time. Picture a bond that scoffs at water, heat, and even chemicals – that’s the power of epoxy resin.
Yet, not all epoxy resins are created equal. To achieve a triumphant bond, it is imperative to select a product purposefully crafted for stone bonding. These specialized epoxy adhesives have been meticulously formulated to deliver a robust and enduring bond on porous surfaces like granite.
Seamlessness and Invisibility:
One crucial attribute of an ideal adhesive for gluing granite lies in its ability to fill every crevice and cavity between two granite pieces. Enter high viscosity – the secret ingredient. A high-viscosity epoxy resin ensures that no gap is left unfilled, resulting in a seamless and invisible bond.
Some epoxy adhesives for granite come in an array of colors. Now, you can harmonize the adhesive hue with your precious stone, rendering the bond even more discreet. It’s like witnessing magic unfold before your eyes.
Polyurethane: The Versatile Contender:
While epoxy resin takes center stage in the grand theater of granite bonding, there exists a worthy alternative – polyurethane adhesive. This flexible adhesive possesses the remarkable ability to bond different materials together, including stone.
However, it is important to note that polyurethane may not wield the same strength of bond as epoxy resin, particularly on porous surfaces like granite. Thus, it is better suited for non-structural applications or situations that call for flexibility. Consider it the acrobat of adhesives.
Proven Strategies for Success:
To ensure a triumphant bond between granite pieces, heed these expert strategies:
Surface Preparation: Meticulously cleanse the surface, banishing every trace of dirt or debris. Additionally, gently roughen the surface with sandpaper, paving the way for improved adhesion.
Preparing the Granite for Glue Application
Are you ready to embark on a thrilling adventure into the world of granite bonding? Grab your cleaning supplies and buckle up, because we’re about to dive deep into the crucial process of preparing the granite for glue application. This step is essential to ensure a bond as strong as Hercules himself. So, let’s get started and make sure our granite is ready for this epic journey.
First and foremost, we must cleanse the granite surface of any dirt, dust, or debris. We want nothing to come between our perfect bond. To achieve this pristine cleanliness, arm yourself with a mild detergent or stone cleaner and a soft cloth or sponge. With gentle strokes, scrub away any grime and give your granite the royal treatment it deserves. But remember, not all cleaners are created equal. Choose ones specifically designed for stone surfaces to avoid any chemical mishaps.
Once your granite is sparkling clean, it’s time to dry it off completely. Using a clean, dry cloth or towel, give it a thorough pat-down. Moisture can be our enemy when it comes to adhesive bonding, so let’s ensure our granite is bone-dry before proceeding.
Now, let’s roughen up the surface to create better adhesion for the glue. This step is crucial for a strong and durable bond. You have two options: sandpaper or a diamond-grit abrasive pad. But hold on tight. Don’t go overboard with the sanding or you’ll end up with unsightly scratches or patterns on your granite surface. Work in gentle circular motions, ensuring even coverage without going too wild.
After roughening the surface, it’s time for another round of cleaning. Use a soft brush or trusty vacuum cleaner to remove any dust or debris created during the roughening process. We want our granite to be as smooth as a baby’s bottom before moving forward.
Now, here’s a little secret to enhance the natural beauty of your granite and protect it from stains – a stone sealer. Applying a stone sealer will make your granite shine like a star while providing an extra layer of protection. Follow the instructions on the sealer bottle and let it dry completely before proceeding with the glue application. Remember, patience is key.
Applying Primer or Bonding Agent to Improve Adhesion
In our quest for the perfect bond, we have explored the crucial steps to prep granite surfaces. Now, brace yourselves as we dive into the realm of applying primer or bonding agents. Prepare to harness the might of Hercules in your granite bonding adventures. So, don your cape and let’s embark on this epic journey.
Step 1: Purify and Prepare
Before we unlock the true potential of a primer or bonding agent, let us purify our granite surfaces. Armed with a mild detergent or specialized stone cleaner, banish any lurking dirt or grime that might undermine our adhesive’s Herculean strength. Rinse thoroughly, leaving no trace behind, and dry fully to create a clean canvas for our bonding mission.
Step 2: Choose Your Loyal Bonding Agent
Now comes the thrilling juncture – selecting the perfect bonding agent. Behold the array of options available, like epoxy-based or polyurethane-based adhesives, each tailored to bond mighty stone materials such as granite. Each type possesses its own unique ability–choose wisely to match your specific needs and conquer your granite challenges.
Step 3: Blend and Conquer
Once armed with your chosen bonding agent, unleash its power through careful mixing. Follow the manufacturer’s instructions diligently as ratios may vary. Embrace a clean container and stir the components together until they form an unbreakable alliance. Remember, thorough mixing ensures an even distribution of strength particles–your secret to granite bonding supremacy.
Step 4: Apply with Surgical Precision
With your blended bonding agent at hand, it’s time for the grand performance. Seize a brush, roller, or even a trusty spatula as you elegantly bestow a thin layer of adhesive upon both destined surfaces. Every stroke must exhibit unwavering precision, ensuring complete coverage in every nook and cranny. You, my friend, are a superhero of accuracy.
Step 5: Let the Magic Unfold
Now that the bonding agent is bestowed, let it weave its enchantment. Respect the manufacturer’s instructions regarding curing time, allowing the adhesive to reach its pinnacle of strength. A bond forged during this period shall withstand the test of time. Resist temptation, for this is a moment of stillness and trust – let your granite pieces bond undisturbed.
Mixing the Epoxy Resin
Prepare yourselves, fearless craftsmen, as we embark on a journey to unravel the mysteries of epoxy resin mixing. With my expertise as your guide, we shall delve into the realm of granite surface bonding. Equip yourselves with stirring sticks and don your gloves, for we are about to be enchanted by the captivating world of epoxy resin.
Preparing the Granite Surface:
Before we dive into the enchanting process of resin mixing, we must ensure our granite surfaces are pristine. Banish any dirt or debris that dares to mar our masterpiece. Employ a gentle cleansing ritual with mild detergent and water, leaving behind only a sparkling canvas for our epoxy resin sorcery.
Gathering Your Tools and Materials:
To become true alchemists in the art of epoxy resin mixing, we must equip ourselves with the necessary tools. Let disposable gloves be our armor, stirring sticks our wands, and a measuring cup our sacred vessel. And, of course, let us not forget the star of our adventure – the epoxy resin itself.
Measuring with Precision:
The realm of epoxy resin mixing demands utmost precision. With accurate measurements, we unlock the potential for flawless magic. Don your gloves and embark on a quest for balance as you carefully measure equal parts of resin and hardener in your sacred measuring cup. Remember, equilibrium is the key to our success.
The Dance of Mixing:
Behold, the exhilarating climax approaches – the moment when we blend resin and hardener together. Pour both ingredients into a clean container or mixing cup, our sacred cauldron. Take up your stirring stick, an instrument brimming with hidden powers, and let the dance begin. Stir slowly and meticulously, ensuring every drop of resin and hardener mingles harmoniously within our cauldron.
Beware the Air Bubbles:
The treacherous air bubbles, our nemeses in this epic tale. To forge a bond that defies time itself, we must remain vigilant and avoid their infiltration. Slow and deliberate, we stir, mindful not to disturb the serenity of our mixture. Only through patience and dedication shall we conquer these mischievous foes, achieving a blend of consistent color and texture throughout.
Applying the Epoxy Resin Evenly
Today, we embark on the next step of our epic quest: applying the epoxy resin evenly. Get ready to wield your mixing tools and dive into the enchanting world of epoxy resin sorcery.
First things first, cleanliness is paramount. Just like a knight preparing for battle, we must cleanse our granite surfaces of any lurking dirt, dust, or grease that could sabotage our bonding efforts. A thorough scrub with a mild detergent or stone cleaner, followed by a refreshing rinse and meticulous drying session, will create the perfect canvas for our epoxy resin masterpiece.
Now that our granite is squeaky clean, let’s roughen things up a bit – metaphorically speaking, of course. Grab some fine-grit sandpaper and give the surfaces a gentle buffing. This secret maneuver enhances the bond between the epoxy resin and the granite, ensuring an unbreakable union.
Ah, the mixing of the epoxy resin – a dance of precision and chemistry. Pay heed to the manufacturer’s instructions, for they hold the key to triumphant bonding. Respect their specified ratio of resin and hardener to unlock the full potential of this mystical adhesive sorcery.
With our magical concoction ready, it’s time to apply it onto one of the granite surfaces. Equip yourself with either a trusty putty knife or a small brush, and commence spreading the resin with finesse. Picture yourself as an artist delicately painting a masterpiece – smooth strokes, no trace of imperfections. Cover every square inch of the surface with this bewitching bonding potion.
Now comes the pivotal moment – bringing our two granite pieces together in harmonious unity. Align them with utmost precision, like puzzle pieces finding their destined fit. Apply gentle pressure to ensure seamless contact between the surfaces and bid farewell to any lingering air bubbles that dared to disrupt our resin spell.
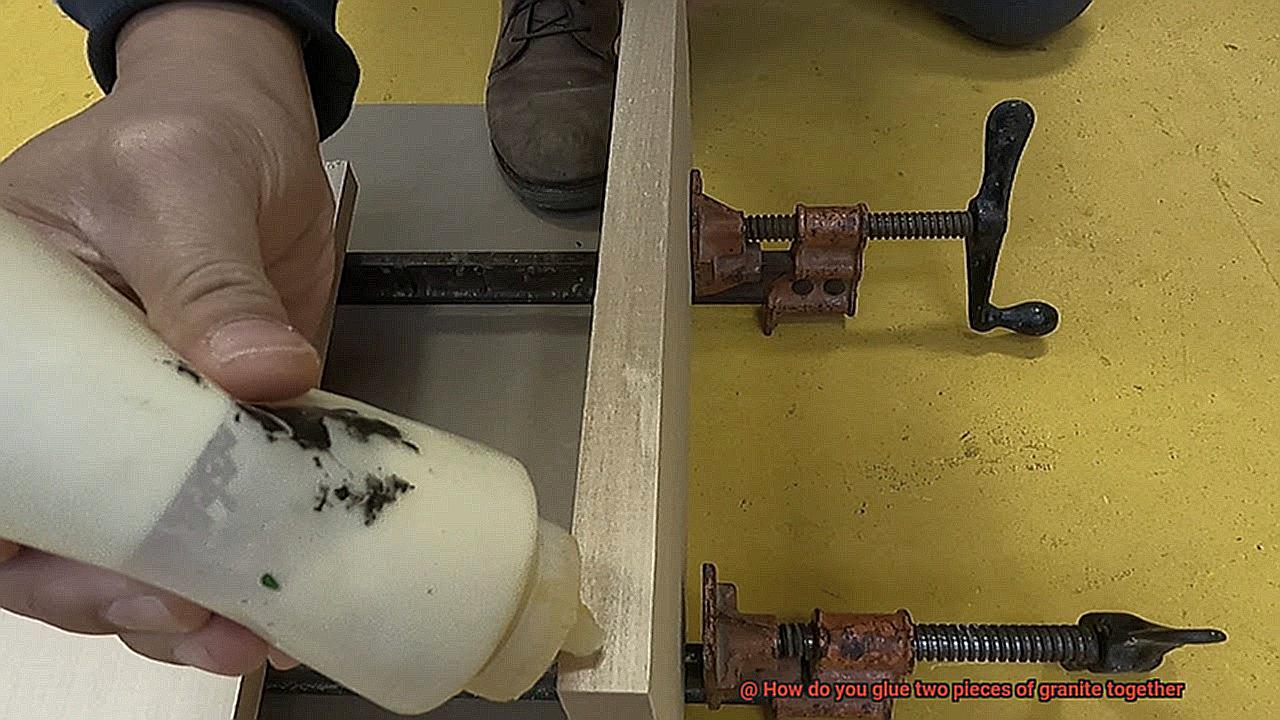
To safeguard our granite duo during the curing process, call upon clamps or heavy objects as steadfast guardians. These loyal companions will fortify the bond while the epoxy resin works its magic, which typically takes several hours or even overnight. Remember, patience is a virtue in the realm of epoxy resin sorcery.
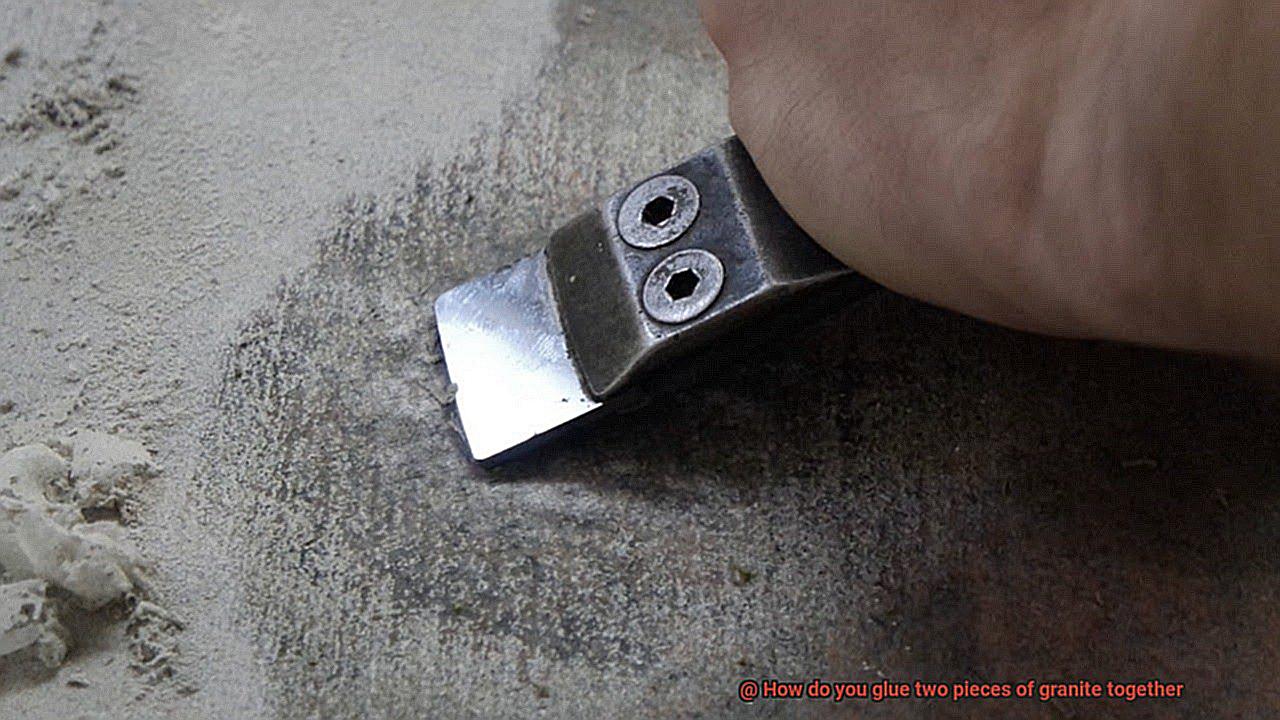
Once the time has come, it’s time to add the finishing touches to our masterpiece. Employ a razor blade or scraper to eliminate any excess epoxy resin that may have escaped from between the granite pieces. This final act bestows a polished and refined appearance upon our bonded granite creation.
Pressing the Two Pieces of Granite Together Firmly
In our previous adventures, we uncovered the importance of cleanliness, precision alignment, and the magic of adhesive application. Now, prepare to unleash the true power of pressing those magnificent granite pieces together firmly. So gather your tools and let us delve into the secrets of creating an unbreakable bond.
Cleanse and Prepare:
Before embarking on our quest for a flawless bond, we must cleanse our granite surfaces to perfection. Remember, in the world of granite, cleanliness is next to godliness. With a touch of mild detergent and water, banish all traces of dirt and grease from the surfaces. Ensure they are immaculately dry before proceeding.
Adhesive Application:
Ah, behold the moment when we tap into the true magic of adhesive. Choose a premium-grade adhesive designed exclusively for granite bonding. Follow the sacred instructions bestowed upon us by the manufacturer. Apply this elixir generously yet evenly onto both surfaces, ensuring that every crevice is embraced by its mystical power.
Align with Delicate Precision:
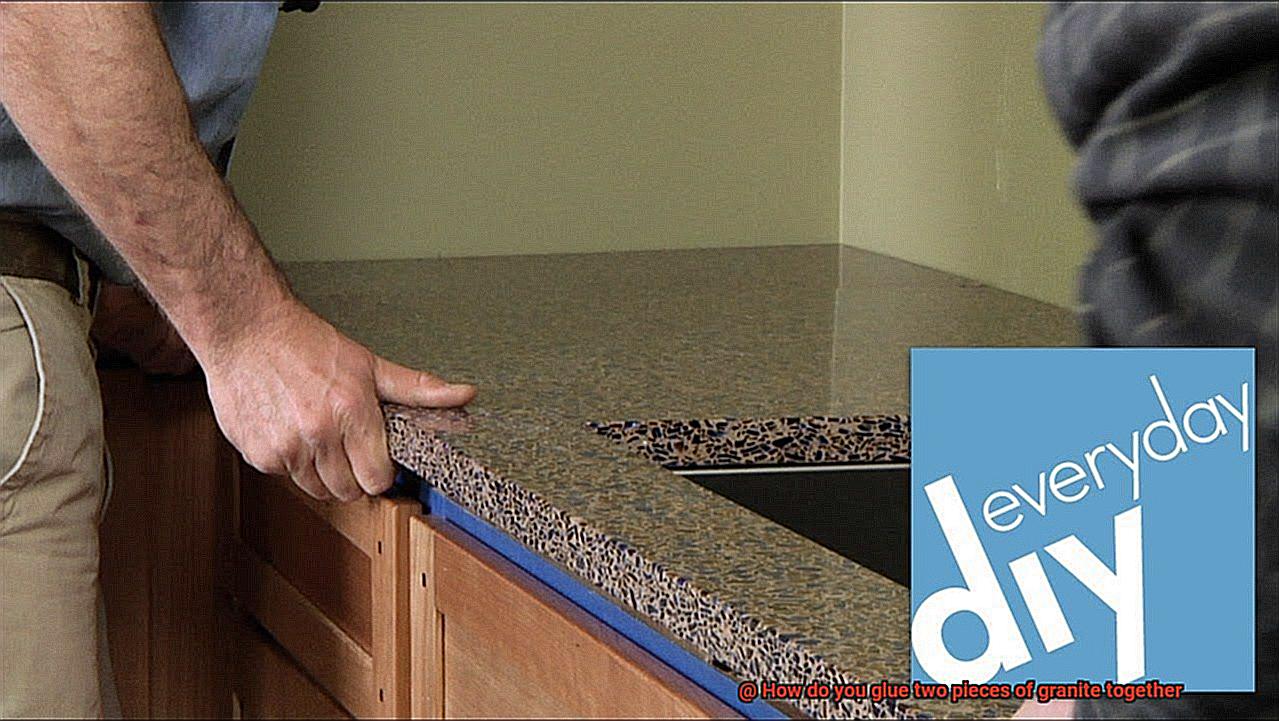
Now comes the artistry of alignment. Treat it as a dance between two souls seeking perfect harmony. Take your time to position the two granite pieces with utmost care. Adjust as needed until they fit together flawlessly, like two celestial bodies aligning in the night sky. Embrace the power of precision.
Unleash Clamps and Weights:
Behold, the guardians who shall maintain balance in our quest. To ensure even pressure graces every inch of our bond, call upon clamps or weights. These steadfast companions shall hold our granite pieces in place, as if embracing them with an iron grip. Distribute their divine presence evenly, granting just enough force to forge an unyielding connection.
Banish Excess Adhesive:
As we venture closer to perfection, beware the lurking presence of excess adhesive. This malevolent force seeks to tarnish our creation. With your trusty tool, vanquish it swiftly before it has the chance to solidify and mar the beauty of our masterpiece.
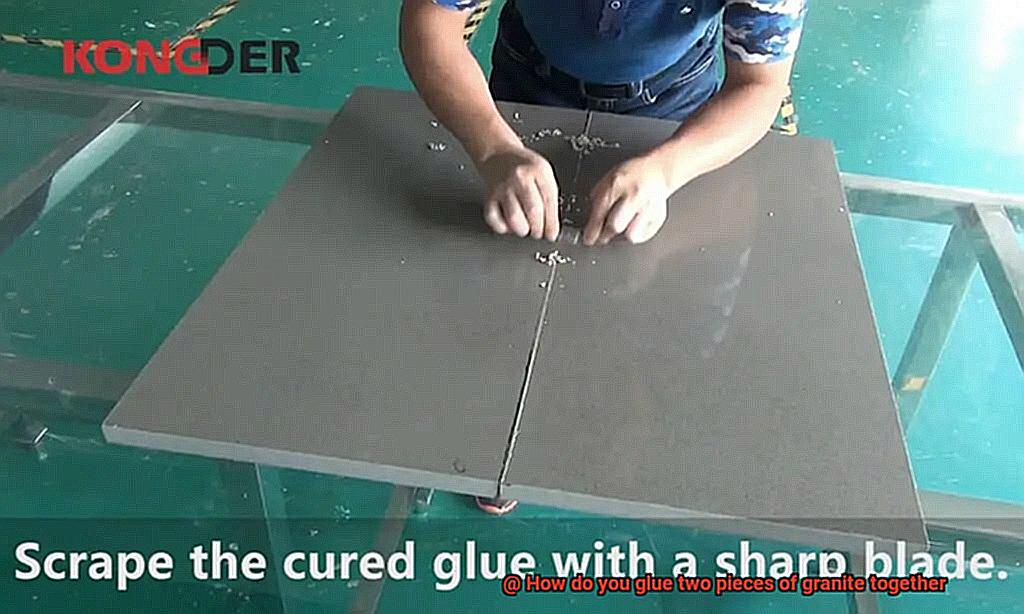
Drying Time and Excess Glue Removal
Prepare to unlock the secrets to flawlessly removing excess glue and achieving a pristine finish for your masterpiece. Grab your tools, sharpen your wit, and let’s embark on this thrilling quest.
The Drying Time Dilemma:
In the realm of gluing granite, drying time reigns supreme. Each adhesive boasts its own unique drying time, making it essential to select one that aligns with your specific requirements. Heed the manufacturer’s instructions diligently to determine the optimal drying period for your chosen adhesive. Remember, patience becomes your greatest ally here, as rushing can compromise the strength of the bond and jeopardize your masterpiece’s magnificence.
Excess Glue Removal: Unveiling Perfection:
While we cherish glue for its bonding prowess, excess glue is an unwelcome intruder in our pursuit of perfection. Swiftly removing any seepage or residue is paramount in achieving the professional finish we crave. Here’s how to accomplish this feat with finesse:
Scrape It Off:
When excess glue retains some pliability but has partially dried, arm yourself with a razor blade or a putty knife. Carefully scrape away the unwanted intruder, exercising caution to safeguard the granite surface from scratches or chips. Our aim is nothing short of flawlessness.
Confronting Dry and Hardened Glue:
Fear not when faced with hardened excess glue. Equip yourself with specially formulated solvents designed to dissolve glue residue, readily available at hardware stores. Apply these magical elixirs using a cloth or sponge, following instructions meticulously. Before proceeding, test on a small, inconspicuous area to ensure compatibility with your precious granite.
Patience and Care: The Golden Rule:
As warriors of granite, we approach excess glue removal with unwavering patience and meticulous care. Haste or excessive force can spell disaster, leading to damage or discoloration. Remember, it is the slow and steady path that leads to triumph. Take your time, gradually removing the excess glue to preserve the innate splendor of your granite masterpiece.
i3RejLpS9nw” >