Foam, the unsung hero of countless creative projects, has a knack for adding that perfect touch of comfort and style. Whether you’re an experienced DIY enthusiast or just starting out on your crafting journey, you’ve likely encountered the challenge of bonding two pieces of foam together. And let’s be honest – it’s not always as easy as it seems.
But fear not. In this blog post, we’re diving deep into the world of foam bonding to reveal the secrets behind achieving a strong and long-lasting bond. Say goodbye to those frustrating moments when your foam creations seem to fall apart at the slightest touch. We’re here to equip you with expert tips, foolproof techniques, and top-notch product recommendations.
Whether you’re working on a foam-filled cosplay masterpiece or dreaming up a custom headboard that will make your bedroom envy-worthy, our comprehensive guide has got you covered. So get ready to unlock the mysteries behind flawless foam bonding as we embark on this exciting journey together.
So, grab your adhesive of choice and let’s dive right in.
Understanding the properties of foam
Contents
- 1 Understanding the properties of foam
- 2 Choosing the right adhesive for gluing foam
- 3 Using contact cement to glue foam together
- 4 Gluing foam with hot glue
- 5 Utilizing spray adhesive for gluing foam
- 6 Considerations when gluing large or complex foam shapes
- 7 Tips for achieving a durable bond when gluing foam
- 8 Removing or repositioning glued foam pieces
- 9 Conclusion
Prepare to be captivated by the extraordinary world of foam, a versatile material that has found its way into countless industries. From its ethereal lightweight composition to its exceptional cushioning abilities and sound absorption qualities, foam possesses a multitude of awe-inspiring properties. In this article, we will embark on a journey to unravel the remarkable characteristics of foam, providing you with a comprehensive understanding of this magical substance.
Feather-Light and Airy:
Step into a world where weight is but a fleeting thought. Foam, with its lightweight nature, effortlessly defies gravity, making it the go-to choice for applications where weight plays a crucial role. Whether it’s packaging materials or creative crafting projects, the airy demeanor of foam allows for effortless manipulation and transportation without compromising on quality or performance.
Cushioning Royalty:
Behold the unrivaled prowess of foam’s cushioning capabilities. With the power to compress and absorb impact, foam provides an unparalleled shield of protection for delicate objects. From mattresses and pillows that cradle your weary body to seat cushions that embrace you in comfort, foam’s cushioning abilities ensure that safety and comfort reign supreme.
Thermal Insulation Wizardry:
Prepare to be spellbound by foam’s thermal insulation properties. Hidden within its remarkable structure lie trapped air pockets that act as formidable insulators, thwarting the transfer of heat. As a result, foam becomes the ultimate ally in insulation, whether it be in buildings that crave warmth, packaging fragile items in need of temperature control, or even in coolers and beverage holders that strive to maintain desired temperatures.
Flexibility Unleashed:
Witness the boundless flexibility of foam as it bends and molds itself to fit the contours of your desires. With ease, foam adapts to any shape or curve, making it an unrivaled choice for upholstery, mattresses, and pillows that crave comfort and adaptability. The flexibility of foam grants the power of customization, ensuring that specific design requirements are effortlessly met.
Sound Absorption Sorcery:
Prepare to be entranced by foam’s open-cell structure, a gateway to acoustic bliss. With its unique construction, foam dissipates sound waves like a skilled magician, reducing echoes and noise levels with an enchanted touch. This remarkable property makes foam an invaluable component in soundproofing applications, such as recording studios, theaters, and automotive insulation, creating an environment where crystal-clear acoustics reign supreme.
Choosing the right adhesive for gluing foam
Whether you’re embarking on a craft project or tackling heavy-duty upholstery, selecting the right adhesive is essential for creating a strong and durable bond. Let’s dive into the factors to consider when choosing the ideal glue for your foam projects.
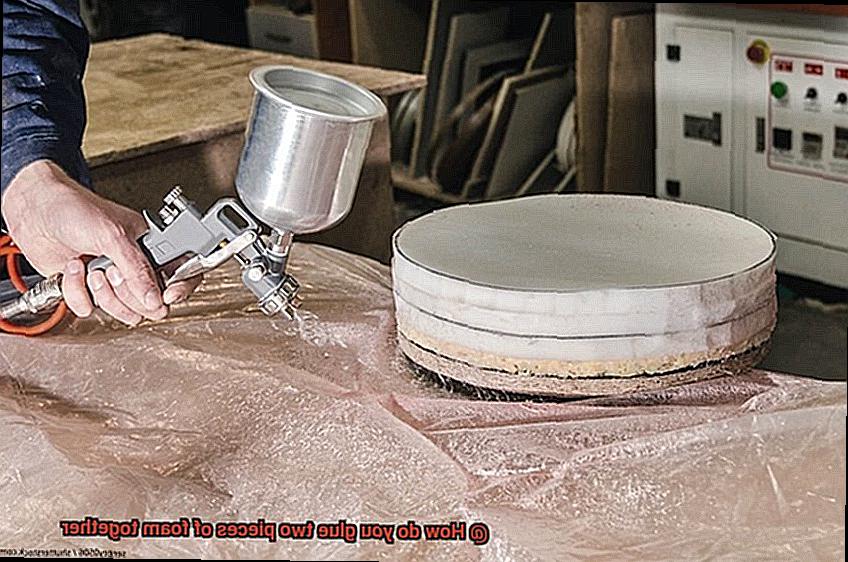
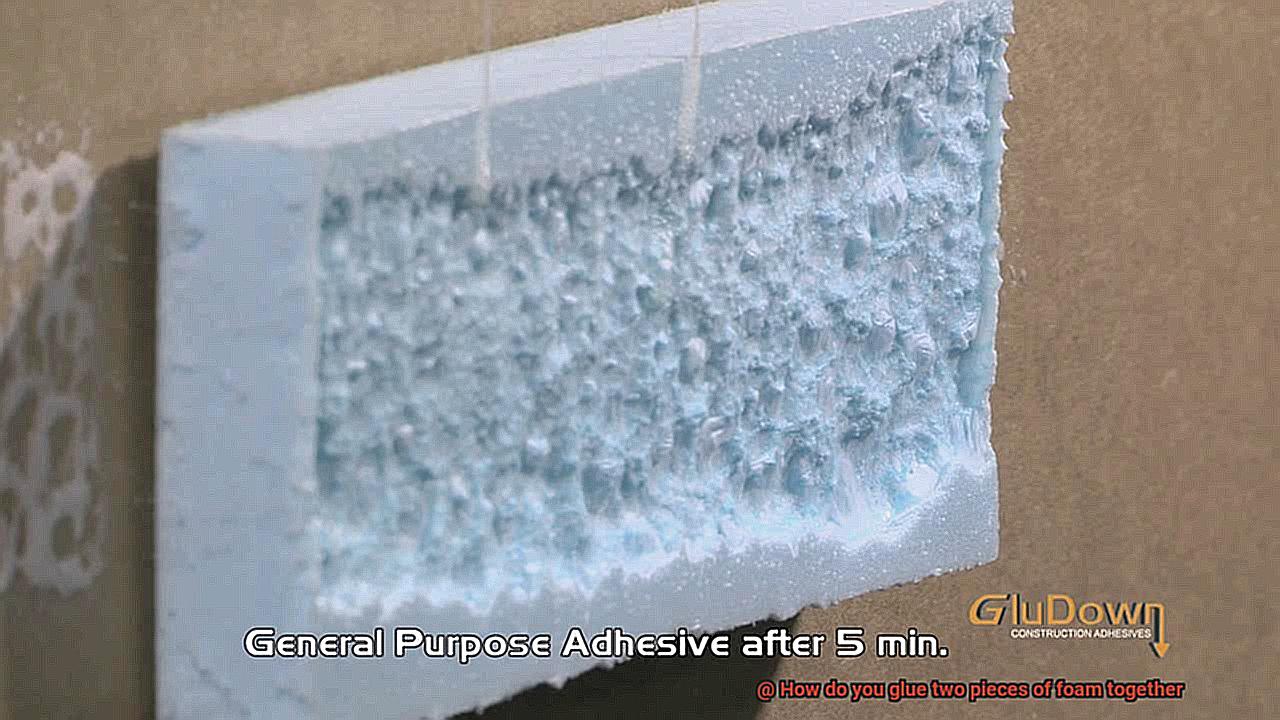
- Spray Adhesives: These handy cans provide an even coat of adhesive on the foam surface, making them incredibly easy to use. With their quick-drying formula, spray adhesives are ideal for bonding large pieces of foam together. They are the fairies of the adhesive world – quick, efficient, and oh-so-convenient.
- Hot Glue: The knight in shining armor for small craft projects and repairs, hot glue is your go-to option. With a trusty hot glue gun by your side, you can apply a controlled amount of adhesive onto the foam surface. The bond is strong and reliable, making it perfect for intricate DIY projects that require attention to detail.
- Contact Adhesives: When it comes to heavy-duty tasks like upholstery or automotive projects, contact adhesives are your best bet. Applied to both surfaces being bonded and left to dry before being pressed together, these bad boys create a bond as strong as a Viking warrior’s grip.
But hold on a second – before you rush off to make your adhesive selection, consider the type of foam you’re working with. Not all adhesives play nicely with every type of foam; some may weaken the bond or even damage the foam surface. Don’t forget to read those manufacturer’s instructions or consult an adhesive guru before diving in.
Preparation is key. Ensure your foam surfaces are clean and free from dust, debris, or oils before applying the adhesive. Think of it like giving your foam a spa day – a little TLC goes a long way.
Now, let’s address the elephant in the room – some adhesives have a strong odor or emit fumes during application. We don’t want you feeling like you’re trapped in a toxic fog, so work in a well-ventilated area or consider wearing a mask for extra protection. Safety first, my friends.
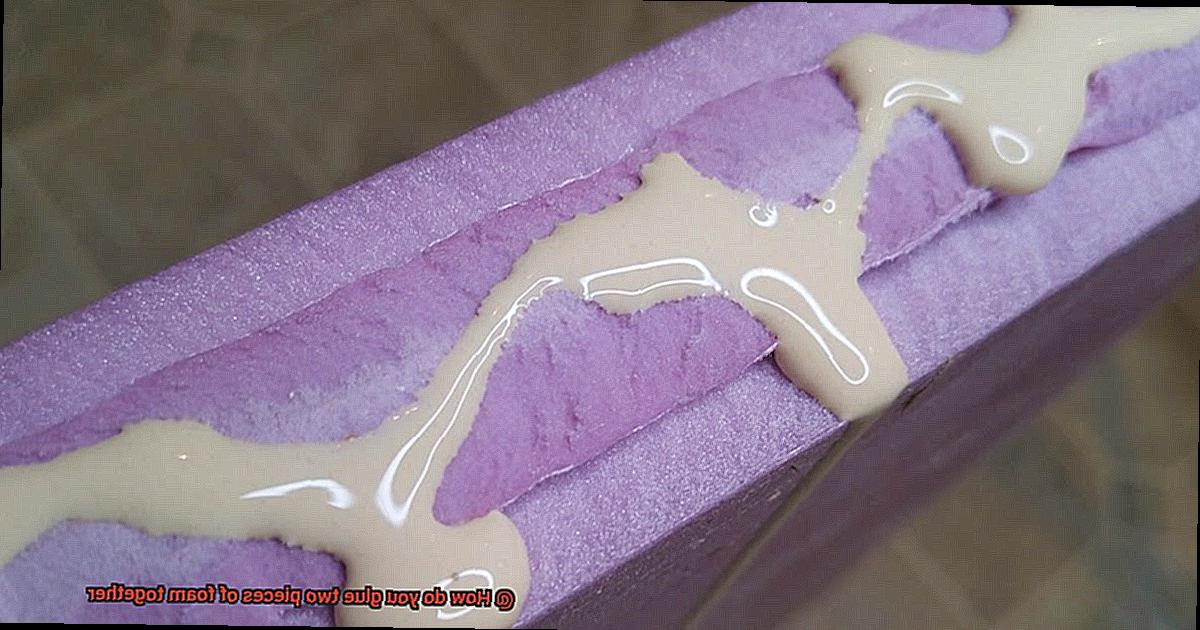
Using contact cement to glue foam together
Well, I’ve got the solution for you: contact cement. This incredible adhesive is not only strong and reliable, but it’s also versatile and easy to use. So, if you’re ready to take your foam projects to the next level, let’s dive into the world of using contact cement to glue foam together.
The first step in this magical process is to ensure that your foam surfaces are squeaky clean. We don’t want any dirt or debris getting in the way of that perfect bond, do we? Give them a good wipe or use a mild detergent solution to make sure they’re sparkling clean. Just remember to let them dry completely before moving on to the next step. Patience is key here, my friend.
Now comes the exciting part – applying the adhesive. Grab a brush or roller and spread a thin and even layer of contact cement onto both foam surfaces. This ensures a strong and uniform bond. But wait. Don’t forget to follow the manufacturer’s instructions on how much adhesive to use and how long it needs to dry. We don’t want any sticky situations, do we?
Once the adhesive is applied, it’s time to let it work its magic. Give it the time it needs to dry completely. Rushing this step could result in a weak bond, and nobody wants that. So sit back, relax, and let those foam pieces dry to perfection.
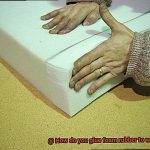
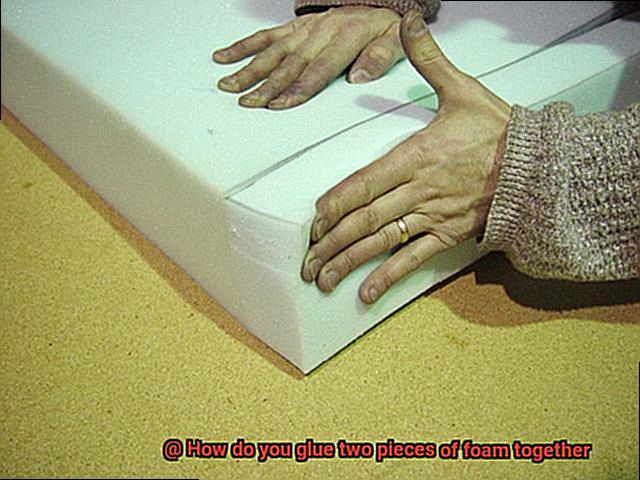
After the adhesive has dried, it’s time for the grand finale – bringing those foam pieces together. Carefully align them and press them firmly against each other. Remember, contact cement creates an instant bond upon contact, so make sure those pieces are aligned correctly. There’s no room for adjustments once they touch.
Now here’s where things get even more interesting – apply even pressure along the entire surface using your hands or a roller. This not only ensures a strong bond but also helps any pesky air bubbles escape. We want that connection to be as solid as a rock.
Gluing foam with hot glue
Its versatility and ease of use make it the go-to option for bonding various types of foam. In this step-by-step guide, we will walk you through the process of achieving a successful bond with hot glue. Additionally, we will provide important considerations and tips to ensure your foam projects are flawlessly crafted.
Step 1: Prepare the Surfaces
To begin, it is crucial to prepare the foam surfaces properly. Wipe away any dust or debris that may hinder adhesion by gently using a clean cloth or utilizing compressed air to remove loose particles. By ensuring clean surfaces, you lay the foundation for a strong bond and a neat finish.
Step 2: Preheat the Glue Gun
Follow the manufacturer’s instructions to preheat your hot glue gun. This step is essential in preventing the foam from melting or becoming damaged. Setting your glue gun to a low temperature will yield optimal results, avoiding messy outcomes and preserving your project’s integrity.
Step 3: Apply the Glue
With a steady hand, apply a thin line of hot glue along one edge of the foam piece. Exercise caution not to use an excessive amount of glue, as it can seep through the porous nature of the foam, leading to an unsightly appearance. Remember, less is more in this case.
Step 4: Press and Hold
Now comes the moment of truth. Firmly press the second piece of foam against the glued edge. Hold it in place for a few seconds, allowing the glue to cool and successfully bond the two pieces together. This step is crucial for ensuring a strong and durable connection.
Step 5: Repeat and Secure
Repeat the gluing process along the remaining edges until all the pieces of foam are securely bonded. Be mindful not to apply excessive pressure, as this can deform or compress the foam, compromising its integrity. By carefully adhering to each edge, you create a solid foundation for your foam project.
Step 6: Clean Up Excess Glue
If any excess glue seeps out from between the foam pieces, allow it to cool and harden. Once hardened, gently peel or trim away the excess glue using a craft knife or scissors. This final step will give your project a clean and professional finish, ensuring that no unsightly glue remnants detract from your creation.
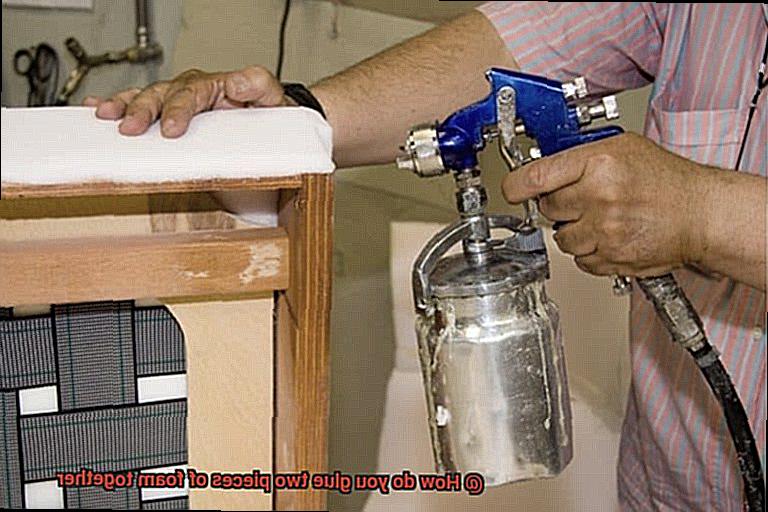
Utilizing spray adhesive for gluing foam
Say goodbye to frustration and hello to a professional-looking finish. In this guide, we will walk you through the step-by-step process of utilizing spray adhesive to achieve a seamless bond between foam pieces. Get ready to become a master of foam bonding.
Step 1: Prepare the Foam Surfaces
Don’t dive straight into adhesive application. Properly prepare the foam surfaces by ensuring they are clean and free from dust and debris. Use a gentle brush or cloth to remove any loose particles, and set the stage for a flawless bond.
Step 2: Shake It Up
Now it’s time to unleash the adhesive power. Give that can of spray adhesive a vigorous shake to ensure it’s well-mixed and ready for action. Holding the can about 6-8 inches away from the foam surface, get ready to unleash an even and consistent spray pattern.
Step 3: Apply a Thin and Even Layer
Let’s get down to business – start at one end of the foam piece and move your hand in a steady, sweeping motion across the surface. Apply a thin and even layer of adhesive, making sure every nook and cranny is covered for complete bonding coverage.
Step 4: Let It Get Tacky
Patience is key here. After spraying the adhesive, give it a few minutes to dry until it becomes tacky. This tackiness is essential for achieving a strong bond. But be careful not to let the adhesive become too dry before joining the foam surfaces together – timing is everything.
Step 5: Press and Hold
Now comes the moment of truth – carefully align the two foam pieces and press them together firmly. Apply steady pressure for a few seconds, ensuring that the bond takes hold. Remember, no excessive movement or disturbance during this critical bonding process.
Step 6: Allow Proper Curing Time
Don’t rush greatness. To achieve maximum strength, let the glued foam pieces cure for at least 24 hours. This waiting game will pay off, as it allows the adhesive to fully set and create an unbreakable bond between the foam surfaces.
Step 7: Safety First
Before you embark on this foam bonding journey, take precautions. Work in a well-ventilated area to protect yourself from the strong fumes emitted by the spray adhesive. If possible, wear a mask or respirator to ensure your safety during the application process.
Step 8: Clean Up Excess Adhesive
Once you’ve achieved the perfect bond, it’s time for a quick clean-up. Grab a cloth or sponge dampened with a suitable solvent like mineral spirits or acetone and swiftly remove any excess adhesive from the foam surfaces. Act fast before the adhesive fully cures.
Considerations when gluing large or complex foam shapes
Gluing large or complex foam shapes together may seem like a daunting task, but fear not. With careful consideration and the right techniques, you can achieve a flawless bond that will withstand the test of time. Let’s dive into the important factors to keep in mind when bonding foam pieces, ensuring your creations are not only visually stunning but also strong and durable.
First and foremost, the choice of adhesive is paramount. Foam, being a porous material, requires an adhesive specifically designed for bonding foam. These specialized adhesives penetrate the foam’s surface, creating a robust bond that resists peeling and separation. Look for adhesives labeled as “foam safe” or “foam adhesive” to ensure compatibility with your project.
Size and shape also play a significant role in the gluing process. Large or irregularly shaped foam pieces may need additional support during bonding. Consider using clamps, weights, or other methods to hold the foam pieces together while the adhesive sets. This ensures even pressure distribution, creating a strong bond across the entire surface area.
Proper surface preparation is another crucial consideration. Before applying the adhesive, it is vital to thoroughly clean the surfaces of the foam pieces. Any dirt, dust, or oils on the surface can hinder proper adhesion. Use a mild detergent or rubbing alcohol to remove contaminants and allow the surfaces to dry completely before proceeding with the gluing process.
Drying time and curing process are equally important factors to consider. Some adhesives require a specific amount of time to dry and cure before reaching their full strength. To ensure a robust and lasting bond, follow the manufacturer’s instructions regarding drying times and curing processes. Rushing this step can result in a weaker bond that may fail over time.
Temperature and humidity levels can also impact the bonding process. Extreme temperatures or high humidity can interfere with the adhesive’s effectiveness. For optimal results, work in a controlled environment with moderate temperatures and humidity levels. This allows the adhesive to cure properly and create a strong bond.
Last but certainly not least, safety should always be your top priority when working with adhesives. Some adhesives may emit fumes or be harmful if ingested or inhaled. To protect your health and ensure a safe working environment, operate in a well-ventilated area and wear appropriate protective gear, such as gloves and goggles.
Tips for achieving a durable bond when gluing foam
Gluing foam can be a challenging task, but with the right adhesive and technique, you can achieve a strong and durable bond. Whether you’re working on a craft project or upholstering furniture, these tips will help you achieve exceptional results.
Choose the Right Adhesive:
Using an adhesive specifically designed for foam materials, such as foam glue, foam adhesive, or contact cement, is essential for a strong bond. Regular glue may not provide the desired results and could even damage the foam.
Prepare the Surfaces:
Ensure that the foam surfaces are clean and free from dirt, dust, or oils before applying any adhesive. Use a mild detergent and water to clean the surfaces, then let them dry completely. Properly preparing the surfaces ensures that the adhesive adheres well and creates a strong bond.
Apply the Adhesive Evenly:
To achieve a durable bond, apply the adhesive evenly over both foam surfaces. Use a brush or small spatula to spread the adhesive in a thin and even layer. Avoid applying too much adhesive as it can seep through the foam and create a messy result.
Allow for Proper Drying Time:
Follow the manufacturer’s instructions regarding drying time after applying the adhesive. Letting the adhesive become tacky before joining the foam pieces together is crucial for a strong bond. Rushing this step may result in a weak bond that doesn’t hold up over time.
Apply Pressure During Bonding:
Once the adhesive has become tacky, align and press the foam pieces together with firm and even pressure across the entire surface of the bonded area. This ensures a strong and durable bond. Be careful not to apply excessive pressure that may deform or damage the foam.
Consider Using Clamps or Weights:
Depending on the size and shape of the foam pieces, using clamps or placing weights on top can help maintain pressure during bonding. This is particularly useful when gluing larger or thicker foam pieces. The added pressure enhances the bond and ensures a secure connection.
Removing or repositioning glued foam pieces
We’ve all experienced that heart-stopping moment when we realize our foam pieces are stuck in the wrong place or need some adjustments. But fret not. With a bit of know-how and some handy tips, you can effortlessly undo those sticky mistakes and reposition your foam pieces like a seasoned pro.
Method 1: Unleash the Power of Heat.
One foolproof method is to harness the magic of heat to soften the glue. Grab your trusty hairdryer or heat gun, set it on low heat, and gently apply it to the glued area. Watch as the heat works its wonder by loosening the bond, making it a breeze to separate the foam pieces. Just remember, a delicate touch is key here—too much heat and you risk melting or warping the foam.
Method 2: Super Solvents to the Rescue.
Another option is to call in the cavalry in the form of solvents or adhesive removers. These remarkable liquids are specially formulated to dissolve glue without causing harm to the foam. Simply apply the solvent to the glued area, let it sit for a few minutes, and then delicately pry apart the foam pieces using tools like a putty knife or a plastic scraper. It’s as easy as pie.
But what about those stubborn glues?
Ah, yes. Some glues, such as epoxy or super glue, can be a bit more challenging to remove. In these cases, you may need to employ more aggressive methods like sanding or cutting away the glue. However, proceed with caution as these techniques have the potential to damage the foam. Always test on a small, inconspicuous area first before going all out.
Reposition with Finesse
When it comes to repositioning glued foam pieces, it’s best to opt for less permanent adhesives like craft glue or hot glue. These types of glues offer some flexibility and can be softened with heat or dissolved with solvents if necessary. So, go ahead and give your project a second chance.
Patience is Key, My Friend.
Remember, removing or repositioning glued foam pieces requires patience. Rushing the process can lead to foam damage or tears. It’s always a good idea to have spare foam on hand just in case any pieces get damaged during the removal process. Better safe than sorry.
A Blank Canvas for Fresh Creativity
After successfully separating those glued foam pieces, you might find some lingering glue or adhesive residue. No worries. Gently sand it away with fine-grit sandpaper or use a solvent or adhesive remover to thoroughly clean the surface before attempting to glue again.
DpP-maM8E7k” >
Also Read: How to Glue Vinyl to Foam?
Conclusion
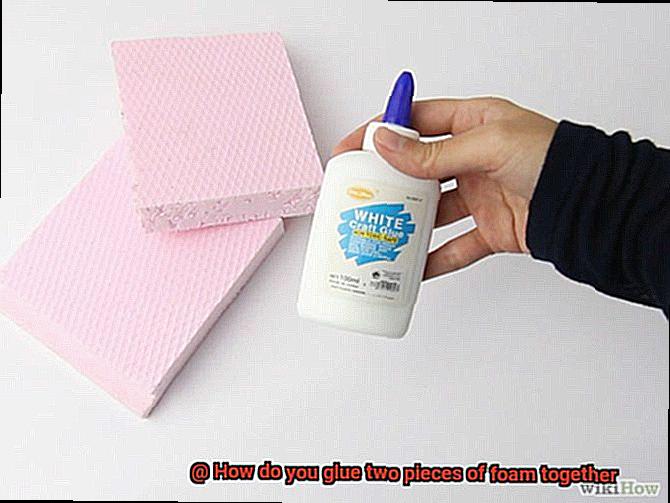
When it comes to gluing two pieces of foam together, there are a few methods you can try. One option is using a specialized foam adhesive, designed to create a strong bond between foam surfaces. These adhesives often come in spray or liquid form, allowing for easy application.
Another technique is using hot glue, which can be effective for smaller projects or quick fixes. With a hot glue gun, simply apply a thin line of glue along one edge of the foam and press the other piece firmly against it. The heat melts the glue, creating a secure bond as it cools.
For those who prefer an alternative approach, double-sided tape can also be used to attach foam pieces together. This method works well when you need a temporary bond or want to avoid any potential mess from adhesives.
If you’re working with thicker or denser foams, such as upholstery foam, sewing them together might be your best bet. Using a heavy-duty needle and thread specifically designed for sewing through foam, stitch along the edges of the pieces to join them securely.
It’s important to note that regardless of the method you choose, preparing the surfaces before gluing is crucial. Make sure both pieces are clean and free from any dust or debris that could hinder adhesion.
In conclusion, gluing two pieces of foam together can be achieved through various techniques such as using specialized adhesive, hot glue, double-sided tape, or sewing them together. Each method has its advantages depending on your project’s requirements and preferences.