Imagine the magic of a stunning piece of furniture, a sculpture that whispers tales of elegance, or an art masterpiece that effortlessly blends the rustic charm of wood with the timeless allure of stone. It’s a breathtaking combination that can turn any project from ordinary to extraordinary. But how exactly do you glue stone to wood?
In a world where materials seem to belong to different realms, bridging the gap may seem like an impossible feat. But fear not. With the right techniques and materials, you can make the impossible possible. In this blog post, we will unravel the mysteries behind bonding stone to wood, revealing the secrets that will bring your creative vision to life.
Hook:
Envision a fireplace mantle where magnificent slabs of granite lovingly embrace a meticulously crafted wooden structure. This union isn’t just about design; it’s about creating a bond so strong that it defies expectations.
Main points:
Selecting the Perfect Adhesive:
Let’s dive into the importance of choosing an adhesive that can withstand the demands placed upon your stone-wood fusion. We’ll explore options that ensure durability and reliability.
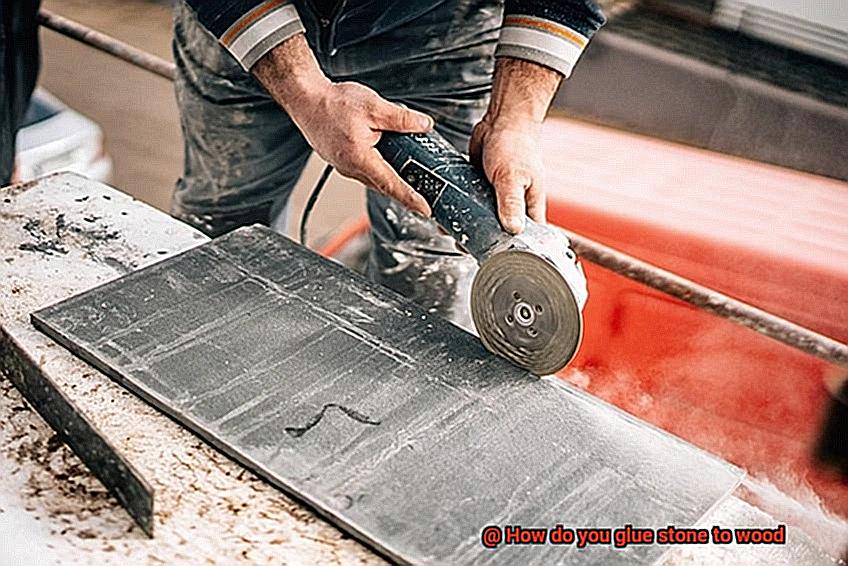
Surface Preparation:
Discover essential steps for preparing both stone and wood surfaces before applying adhesive. These preparations will not only enhance adhesion but also increase the longevity of your project.
Mastering Application Techniques:
Learn foolproof approaches for applying adhesive, including performance tips and tricks that guarantee a strong and enduring bond between stone and wood.
Finishing Touches:
We won’t stop at gluing alone. Explore post-gluing considerations such as grouting stone joints, sealing wood surfaces, and achieving seamless integration between these two captivating materials.
Breaking barriers between stone and wood is no longer just wishful thinking; it’s an achievable reality waiting for you to explore. So if you dream of creating a masterpiece that will leave admirers in awe for generations to come, join us on this creative journey.
Let’s dive into the nitty-gritty details of how to glue stone to wood, unlocking the potential of this extraordinary union and bringing your artistic vision to life.
Choosing the Right Adhesive
Contents
When it comes to bonding stone to wood, selecting the right adhesive is essential for ensuring a secure and long-lasting connection. In this comprehensive guide, we will explore various adhesive options and factors to consider when choosing the perfect adhesive for your stone-to-wood project.
Factors to Consider:
Type of Adhesive:
- Epoxy Glue: Known for its exceptional strength and durability, epoxy glue is a popular choice for heavy-duty applications. Composed of a resin and hardener that must be mixed before use, it provides a strong bond capable of withstanding significant weight and stress.
- Polyurethane Glue: Offering versatility and excellent resistance to water and temperature changes, polyurethane adhesive is well-suited for bonding stone to wood. It forms a robust bond and expands as it cures, effectively filling any gaps or irregularities between the surfaces.
- Construction Adhesive: Ideal for large, heavy objects, construction adhesives like liquid nails provide immense strength and durability. Ensure compatibility with both the stone and wood surfaces to ensure optimal bonding.
Surface Compatibility:
- Consider the specific characteristics of the stone and wood being used. Some stones, such as those with porous or smooth surfaces, may require specialized adhesives capable of penetrating or adhering properly.
- Different types of wood may possess unique properties that can affect the bonding process. Take into account any specific requirements based on the wood’s characteristics to achieve the best results.
Manufacturer’s Instructions:
- Thoroughly read and follow the adhesive manufacturer’s instructions, as they provide crucial information on application methods, curing times, and any additional precautions specific to the adhesive used.
- Consider factors such as drying time, flexibility, and resistance to moisture or temperature changes based on your project’s requirements to ensure optimal bonding results.
Application Process:
Surface Preparation:
- Prior to applying the adhesive, thoroughly clean both the stone and wood surfaces to remove any dirt, dust, or grease. A clean surface is essential for achieving optimal bonding.
- Enhance the adhesive’s grip by lightly sanding the wood surface, creating a rough texture that promotes better adhesion.
Preparing the Surfaces for Bonding
Today, we embark on an adventure into the captivating world of gluing stone to wood. But hold your horses. Before we dive headfirst into the mesmerizing realm of adhesives, let’s uncover the hidden gem that lies beneath the surface: surface preparation. Picture it as the foundation that ensures a flawless performance. So, grab your tools and let’s unveil the secrets of preparing surfaces for bonding.
Step 1: The Dance of Cleanliness
First and foremost, cleanliness reigns supreme. Imagine trying to forge a connection while covered in dirt and debris – not exactly an ideal scenario for bonding. Treat your surfaces with utmost respect.
For the wood surface, arm yourself with a mild detergent and water solution. Gently scrub away any dirt or grease using a sponge or soft brush. Rinse off the residue with crisp, clean water and patiently await complete drying. This is no time for haste; you want that wood surface bone-dry before proceeding.
Step 2: Honing Your Stone Partner
Now it’s time to tend to our stone companion. Employ a trusty vacuum cleaner or wield a stiff brush to sweep away any loose particles or debris from its surface. Remember, we crave nothing less than smooth perfection, so take your time to ensure it’s free from even the tiniest speck of dust or fragments.
If your stone exhibits any cracks or gaps, fill them up with a suitable filler or epoxy compound. This will fashion an even surface that’s ready to embrace a powerful bond.
Step 3: The Artful Caress
Now, let’s lavish some attention on these surfaces by gently sanding them (if necessary). Embrace fine-grit sandpaper and delicately caress the wood surface, bestowing upon it a rough texture that beckons the adhesive to cling tightly. Keep in mind that if your stone possesses inherent smoothness, this step may be omitted.
Step 4: The Waiting Game
Before you proceed, ensure that both surfaces are utterly devoid of moisture. This formidable foe can wreak havoc on a solid bond, so indulge in the art of patience and allow ample time for evaporation. It may test your fortitude, but trust us, the rewards are well worth it.
Applying Epoxy Adhesive
In our previous adventure, we discovered the secrets of surface preparation, laying the foundation for flawless bonds. Now, let us journey further into the captivating realm of applying epoxy adhesive, where true magic unfolds. Prepare your tools and prepare to be captivated by this casual yet professional guide on achieving the perfect bond between stone and wood.
Step 1: Cleanliness Reigns Supreme
In this magical realm, cleanliness is paramount. Begin by treating the wood surface to a gentle scrub with a mild detergent and water solution. As you cleanse, ensure that no dust, dirt, or debris lurks on the stone’s surface. Fill any cracks or gaps with a suitable filler, for perfection hides in the details.
Step 2: A Rough and Ready Texture
To create an irresistible allure, our wood surface craves a touch of roughness. With sandpaper in hand, embark on an artful caress that grants it the texture that beckons the adhesive to cling tightly. Remember, only engage in this step if your wood lacks the desirable roughness that ensures an unyielding bond.
Step 3: Mixing Magic
Prepare for a moment of alchemy as we delve into the heart of our masterpiece: epoxy adhesive. Composed of two components – a resin and a hardener – this mighty substance demands careful mixing in the precise ratio specified by the manufacturer’s instructions. By following these instructions diligently, we ensure both optimal results and unwavering commitment to our craft.
Step 4: Brushing Brilliance
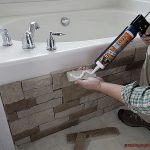
Armed with our perfectly mixed epoxy adhesive, we now unleash its brilliance upon our surfaces. Take hold of a brush or applicator and apply a thin, even layer of this wonderous substance to both stone and wood. Remember, we seek a bond that is unbreakable, but let us not douse our masterpiece in an excessive sea of adhesive.
Step 5: A Perfect Alignment
At last, the long-awaited moment has arrived – stone and wood shall unite. With utmost care, press the surfaces together, aligning them as if two lovers embracing after a lifetime apart. To safeguard against any movement during the curing process, employ clamps or weights. Patience becomes our ally as we await the birth of our unshakeable bond.
Aligning the Stone and Wood
In this journey, we will unlock the secrets to creating a bond that not only withstands the test of time but also captivates the eye. So, let us embark on this adventure where precision meets creativity, and where stone and wood unite in perfect harmony.
Step 1: Lay the Foundation for Success
Before we begin aligning these two magnificent materials, let us ensure a solid foundation. Prepare for greatness by meticulously cleaning both surfaces. Brush away the remnants of dust, banish every speck of dirt, and eliminate any debris that dares to intrude. Only then can we achieve adhesion at its finest.
Step 2: Mark Your Path to Perfection
Aligning stone and wood is akin to solving a puzzle; precise markings shall be your guiding stars. Take your trusted pencil or marker and fearlessly leave your mark on both surfaces. Draw reference lines or create dots that will serve as your unwavering compass, directing you towards a seamless fit.
Step 3: The Dance of Dry Fit
With surfaces pristine and marked, it is time for a dance – a dry fit dance, that is. Gently place the stone upon the wood surface without any adhesive. This moment allows for a final evaluation of alignment, granting you the opportunity to make any necessary adjustments before committing to the bond.
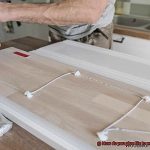
Step 4: Enchant with Clamps
As alignment reaches perfection, unleash the power of clamps and witness true enchantment unfold. Select an adhesive specifically crafted for bonding stone and wood, generously applying it to both surfaces. With utmost care, position the stone onto the wood, ensuring alignment according to your marking masterpiece. It is here that magic takes form.
Step 5: Harnessing the Power of Pressure
Remember, it is through pressure that we forge an unbreakable bond. Apply uniform pressure using clamps or weights, allowing the adhesive to weave its spell. In this act, any rebellious air bubbles are banished to oblivion, leaving you with a connection as solid as a towering rock.
Curing the Bonded Materials
Today, we embark on a new adventure in our quest to master the art of gluing stone to wood. In our previous section, we explored the intricate steps leading up to the bonding process. Now, let us delve into the crucial realm of curing the bonded materials. Get ready to uncover the secrets behind creating an unbreakable bond that will stand the test of time.
The Power of Time:
A strong bond is like a fine wine—it takes time to mature. After applying the adhesive, patience becomes our greatest ally as we allow it to dry and harden. This process, known as curing, ensures that our stone and wood become inseparable companions. Remember, different adhesives have varying curing times, so be sure to consult the manufacturer’s instructions.
Epoxy Resin: A Match Made in Heaven:
In the world of bonding stone to wood, epoxy resin reigns supreme. This dynamic duo consists of two components—a resin and a hardener. When these two come together, magic happens. A chemical reaction occurs, transforming our adhesive mixture into an indestructible fortress. But be warned, curing times can range from hours to days, depending on your chosen epoxy product and environmental conditions.
The Magic of Pressure:
Imagine a dance where stone and wood embrace each other tightly—this is where pressure plays its part. By using clamps or other mechanical means, we ensure that no gaps or air bubbles dare to sneak between our beloved materials. This tight grip guarantees a bond that can withstand even the strongest forces.
Support for Success:
Sometimes, love needs a little extra support. If your stone is heavy or has an uneven surface, additional measures are required during curing. Temporary supports such as blocks or wedges come to the rescue, preventing any sagging or shifting of our materials. Together, they form a foundation that will stand strong throughout the curing process.
The Perfect Environment:
Just like finding the perfect temperature for a cozy night’s sleep, controlling the curing environment can make all the difference. Aim for a controlled space with stable temperature and humidity levels. Extreme conditions can disrupt the curing process, putting our precious bond in jeopardy. Let’s give our materials the ideal environment they need to thrive.
Providing Support During Curing
In our previous adventure, we explored the enchanting world of curing and witnessed the dance between stone and wood as they formed an indestructible bond. Today, we embark on a quest to discover the secrets of providing impeccable support during this curing process. Like a trusty sidekick, the right support is crucial in ensuring our materials stick together and create a connection that withstands the tests of time. So, gather your tools and let’s venture forth into the realm of support when gluing stone to wood.
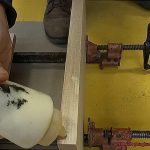
Method 1: Clamps – The Tight Embrace
Imagine the stone nestled against the wood, ready to embark on a journey of unbreakable love. But before we apply the glue, we must summon our mighty clamps. These versatile devices will hold our materials together, forming an unyielding grip. Choose sturdy and adjustable clamps, strategically positioning them around the stone for even pressure distribution. This prevents any wiggling or shifting during curing, allowing our adhesive ample time to work its magic.
Method 2: Weights – Heavy Hearts
Ah, but what if clamps are not at our disposal? Fear not. We have an alternative – weights. Like a heavy heart yearning for love, these weights will hold our stone down firmly. Gather hefty objects or weighty companions and place them on top of the stone. Ensure even distribution across its surface to prevent any lopsidedness. With these steadfast companions, our stone remains steadfast while the glue cures and solidifies their bond.
Method 3: Temporary Supports – The Hidden Heroes
But what if our stone is large or possesses an irregular shape? Fear not; we have another trick up our sleeves. Allow me to introduce our hidden heroes – wooden blocks and braces. These temporary supports provide extra stability, ensuring our stone doesn’t sag or shift during the curing process. Strategically position these sturdy companions underneath the stone, imparting the extra oomph it needs to conquer the world with wood by its side.
Checking Manufacturer’s Guidelines
Step into the realm of awe-inspiring craftsmanship as we embark on a journey to discover the secret behind flawless bonding of stone and wood. In our previous exploration, we unveiled the art of providing unparalleled support for this enchanting alliance. Today, we reveal the key ingredient that will unlock the true potential of your creation – checking the manufacturer’s guidelines. Prepare to be captivated as we unravel the mysteries that will ensure your bond stands the test of time. Let us delve deeper into this magical realm armed with our trusty clamps.
Adhesive Compatibility: A Symphony of Perfect Harmony
The world of adhesives is a symphony of diverse compositions, each tailored for specific materials. When it comes to bonding stone and wood, not all glues can orchestrate a strong and lasting connection. Fear not, for the manufacturer’s guidelines hold the key to choosing an adhesive that harmonizes perfectly with both these materials. Bid farewell to weak bonds and lifting.
The Guiding Light: A Map to Gluing Success
Imagine holding in your hands a treasure map that leads you to the perfect adhesive for your project. This map, my friends, is none other than the manufacturer’s guidelines. Unveiled on adhesive packaging or in accompanying literature, these invaluable instructions reveal the surfaces that the adhesive is designed to bond and provide insight into application techniques that will ensure success.
Deviating from the Path: A Recipe for Catastrophe
Ah, the allure of experimentation. Yet, when it comes to gluing stone to wood, straying from the recommended path is akin to adding salt instead of sugar to your favorite dessert – disastrous. By adhering to the manufacturer’s guidelines, you guarantee that you are using an adhesive compatible with both materials. Do not compromise the integrity of your bond with reckless deviation.
Surface Preparation: Unlocking the Gateway to Strength
Now that we have mastered the art of adhesive selection, it is time to unlock the gateway to strength – surface preparation. The manufacturer’s guidelines hold invaluable advice on how to prepare your surfaces for bonding. They may unveil the secrets of cleaning and sanding, ensuring a pristine canvas free from debris and imperfections. Let us lay the foundation for a masterpiece.
Vr0IQlBBlFU” >
Conclusion
Gluing stone to wood may seem like a tricky task, but with the right techniques and materials, it can be done successfully. There are a few options for adhesive that work well for this purpose, such as epoxy or construction adhesive. These types of glues provide a strong bond and are able to withstand the weight and pressure that may be applied to the stone.
Before applying the glue, it is important to ensure that both the stone and wood surfaces are clean and free from any debris or dust. This will help to create a better bond between the two materials. Additionally, it is recommended to roughen up the surface of the stone slightly using sandpaper or a wire brush. This will provide more texture for the glue to adhere to.
Next, apply a generous amount of adhesive onto both the stone and wood surfaces. Use a spreader or putty knife to evenly distribute the glue over the entire area. Make sure to follow any specific instructions provided by the manufacturer regarding application and drying times.
Once the adhesive has been applied, carefully press the stone onto the wood surface, ensuring that it is aligned properly. Apply even pressure across the entire area of contact to ensure a strong bond. You may want to use clamps or heavy objects to hold everything in place while the glue dries.
Allow sufficient time for the adhesive to cure completely before subjecting it to any stress or weight. This can vary depending on the type of glue used, so be sure to refer back to the manufacturer’s guidelines.
In conclusion, gluing stone to wood requires proper preparation of surfaces, selecting suitable adhesives, and allowing ample curing time. By following these steps carefully, you can achieve a secure and long-lasting bond between these two materials.