Ready to take your interior design game to the next level? Look no further than gluing stainless steel panels to your wall. Whether you’re aiming for a sleek and modern kitchen or an industrial-chic living space, this transformative technique is sure to make heads turn.
But where do you start? Don’t fret – we’ve got you covered. In this guide, we’ll walk you through the essential steps and materials needed to effortlessly and professionally attach stainless steel panels to your wall.
From choosing the perfect adhesive to mastering the installation process, we’ll equip you with all the knowledge you need for a secure and long-lasting installation. Get ready as we unveil the secrets of seamless stainless steel panel attachment, turning your walls into works of art.
So, grab your tools and let’s dive right in. We’ll break down the process and share insightful tips and tricks that will make this DIY project a breeze. Prepare yourself for an interior transformation like no other.
Selecting the Right Adhesive
Contents
When it comes to gluing stainless steel panels to a wall, selecting the right adhesive is crucial. Regular household adhesives may not provide the strength and durability needed for this task. In this blog post, we will explore the various adhesive options available and discuss important considerations to ensure a successful installation.
Choosing the Right Adhesive:
- Epoxy Adhesive: Epoxy adhesives are renowned for their strong bonding properties and versatility in adhering to different substrates, including metal. They consist of two parts that need to be mixed together, resulting in a durable and long-lasting bond.
- Construction Adhesive: Designed for bonding heavy materials, construction adhesives can provide a strong bond between stainless steel panels and the wall. Choose a construction adhesive specifically formulated for metal bonding.
- Silicone Adhesive: Silicone adhesives offer flexibility, durability, and resistance to extreme temperatures. They provide a strong bond while allowing for some movement of the panels.
Important Considerations:
- Surface Preparation: Thoroughly clean both the stainless steel panels and the wall surface, removing any dust, grease, or contaminants. Slightly roughen up the surfaces to enhance adhesion.
- Weight and Size: Take into account the weight and size of the panels when selecting an adhesive. Larger or heavier panels may require high-strength adhesives or additional mechanical fasteners for added support.
Step-by-Step Installation Guide:
- Read Instructions: Carefully follow the manufacturer’s instructions for the selected adhesive, including recommended surface preparation, application method, curing time, and safety precautions.
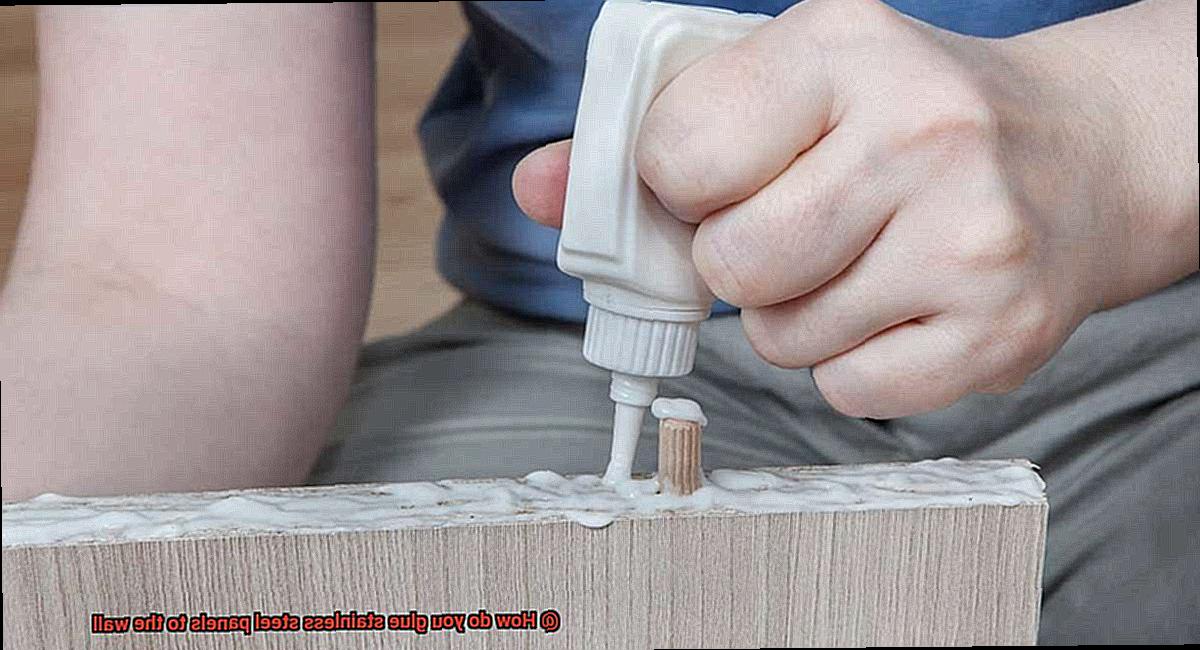
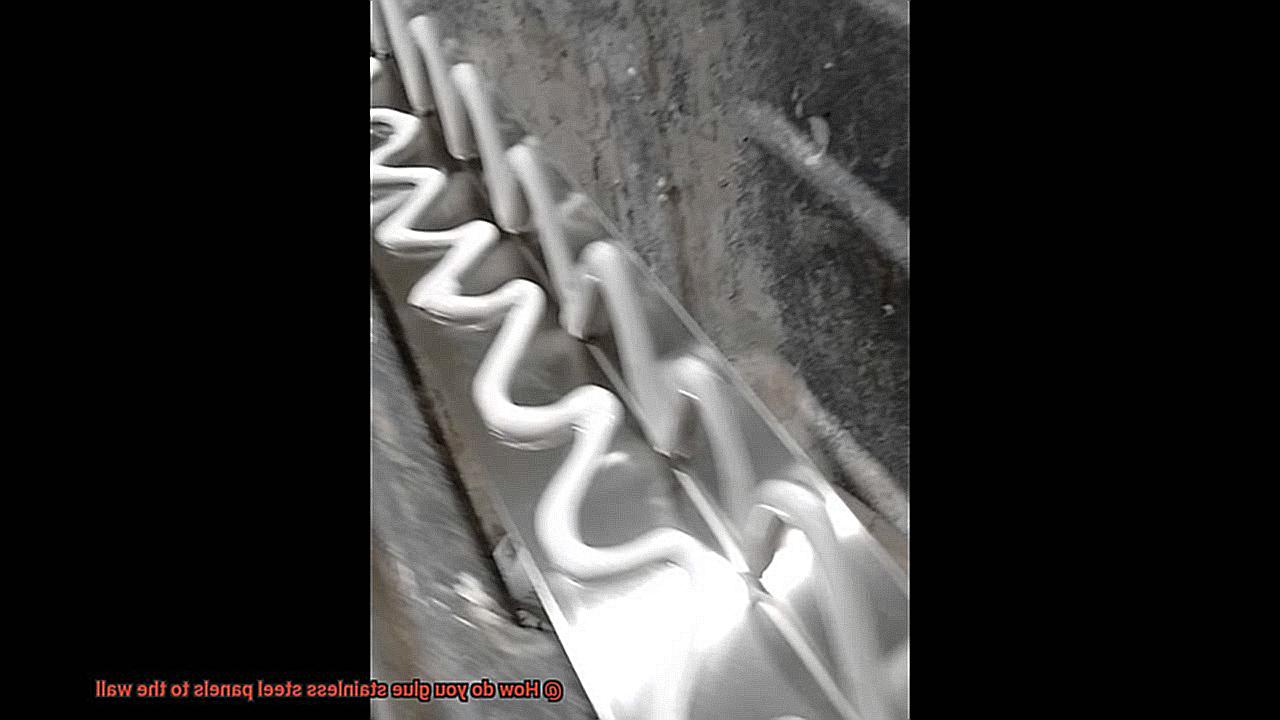
- Apply Adhesive: Apply an even layer of adhesive either on the stainless steel panels or the wall surface, ensuring complete coverage without excess squeezing out.
- Position Panels: Carefully position the stainless steel panels onto the wall surface, pressing firmly and evenly to ensure proper contact between the adhesive and both surfaces. Use temporary supports or clamps to hold the panels in place during curing.
- Allow Curing Time: Follow the manufacturer’s instructions for the adhesive’s curing time before removing any temporary supports or clamps. Avoid putting stress or pressure on the panels until the adhesive has fully cured.
Popular Adhesive Options for Bonding Stainless Steel
Adding stainless steel panels to your walls can give your space a sleek and modern look. But to ensure a secure and long-lasting bond, you need the right adhesive. Let’s explore the most popular adhesive options for bonding stainless steel.
- Epoxy Adhesive: Known for its high strength and durability, epoxy adhesives are perfect for this application. They provide excellent adhesion and can withstand high temperatures, moisture, and chemicals. However, keep in mind that epoxy adhesives come in two parts that require mixing and have a curing time for full bond strength.
- Construction Adhesive: Ideal for heavy-duty applications, construction adhesives work wonders for bonding stainless steel panels to walls. They offer good initial tack and strong bond strength. Available in various formulas like polyurethane or acrylic-based, they can be applied with a caulking gun or trowel.
- Silicone Adhesive: If flexibility and resistance to extreme temperatures are important to you, consider silicone adhesive. It provides a strong bond and can withstand movement and vibrations. Available in different viscosities and cure times, silicone adhesives offer flexibility in application.
- Structural Adhesive: For an industrial-strength solution, structural adhesives are your best bet. Specifically designed for structural applications, they provide high bond strength even under extreme conditions. If you need a secure and permanent bond, go for structural adhesive.
- Double-Sided Tape: If you’re looking for a quick and easy solution for lightweight or temporary applications, double-sided tape might be the answer. Choose a tape with high bond strength that is specifically designed for use on stainless steel surfaces.
Before applying any adhesive, make sure to prepare the surface of both the stainless steel panel and the wall by cleaning them thoroughly and removing any grease, oil, or dust. Consider the weight and size of the panels when selecting an adhesive. Always follow the manufacturer’s instructions for the best results.
Preparing the Surfaces for Bonding
Gluing stainless steel panels to your walls is a great way to achieve that contemporary look. But before you grab your adhesive of choice, it’s important to properly prepare the surfaces for bonding. This step is crucial to ensure a strong and durable bond that will stand the test of time.
First and foremost, cleanliness is key. To remove any dirt, dust, grease, or other contaminants, use a simple solution of mild detergent or degreaser and a clean cloth or sponge. A pristine surface is essential for optimal bonding.
Next up is sanding. Stainless steel panels are often smooth and shiny, making it difficult for adhesives to adhere effectively. Lightly sanding the surface with fine-grit sandpaper creates a slightly roughened texture that greatly improves adhesion. This simple step can make all the difference in the strength of your bond.
Consider applying a primer for an extra boost in adhesion. Primers create a secure base for the adhesive, enhancing its effectiveness. Choose a primer suitable for stainless steel and follow the manufacturer’s instructions for application.
Allow sufficient drying time before applying the adhesive. Moisture can interfere with bonding and weaken the bond. Follow the recommended drying time specified by the manufacturer of the cleaning agents, sandpaper, and primer used.
Don’t forget about temperature. Ensure both the stainless steel panels and wall surface are at room temperature before applying adhesive. Extreme temperatures can alter adhesive properties and impact effectiveness.
Applying the Adhesive
Gluing stainless steel panels is the perfect way to achieve that sleek and contemporary look you’ve been dreaming of. But before you embark on this exciting DIY project, it’s crucial to understand the process of applying the adhesive. Let’s dive in.
- Cleanliness is Key: The first step in applying the adhesive is to ensure both the surface of the wall and the backside of the stainless steel panels are pristine. Remove any dirt, dust, or grease by wiping them down with a gentle detergent or cleaner. Allow them to dry completely before proceeding.
- Choose the Right Adhesive: Selecting the appropriate adhesive is vital for bonding stainless steel to the wall. There are various types available, such as epoxy, construction adhesive, or silicone-based adhesive. Opt for an adhesive specifically designed for metal surfaces like stainless steel.
- Conduct a Test: Before applying the adhesive, it’s always wise to do a small test on an inconspicuous area. This will help ensure compatibility and adhesion strength without risking damage to the panels or wall.
- Follow Manufacturer’s Instructions: When applying the adhesive, carefully follow the instructions provided by the manufacturer. Some adhesives may require mixing or specific application techniques. Apply the adhesive evenly, avoiding excessive amounts that could result in messy or weak bonds.
- Place Panels with Precision: Excitement builds as you position the stainless steel panels onto the wall. Take your time to ensure proper alignment and positioning. If possible, enlist someone’s help to hold the panels in place while the adhesive sets.
- Apply Pressure for a Strong Bond: To guarantee a sturdy bond, apply pressure to the panels for the duration recommended by the adhesive manufacturer. Consider using clamps or placing heavy objects against the panels during this curing period.
- Allow Sufficient Curing Time: Patience is key. Allow the adhesive ample time to fully cure before removing any clamps or releasing pressure on the panels. The curing duration may vary depending on the adhesive used, so consult the manufacturer’s instructions for guidance.
- Inspect and Fill Gaps: Once the adhesive has cured, inspect the panels for any gaps or areas where the adhesive may not have bonded properly. If needed, fill in any gaps or reapply the adhesive to ensure a secure and seamless bond.
Positioning the Panels onto the Wall Surface
Transforming your space with sleek and modern stainless steel panels is an exciting project. Whether you’re updating your kitchen, bathroom, or office, positioning these panels onto the wall surface is a crucial step. In this guide, we will walk you through the process to ensure a successful installation that will leave your space looking polished and sophisticated.
First and foremost, it is essential to prepare the wall surface properly. Just like prepping a canvas before painting, cleaning the wall is crucial for a smooth and secure installation. Use a mild detergent and water solution to thoroughly wipe down the wall, removing any dust, grease, or debris. Once it sparkles clean, allow it to dry completely before moving forward.
Now, it’s time to measure and mark the area on the wall where you want to install the stainless steel panels. This step is like laying out a blueprint for your project. Visualizing the placement beforehand ensures accuracy and prevents any potential mishaps during installation.
With your measurements in hand, it’s time to apply the adhesive. Choosing the correct adhesive for stainless steel panels is like using the right ingredients in a recipe; it is crucial for a strong and long-lasting bond. Follow the manufacturer’s instructions for proper application and curing time. Apply a thin layer of adhesive onto the back of each panel.
Once you have applied the adhesive, it’s time to position the panels onto the wall. Starting from the top and working your way down is highly recommended. Think of it as building a solid foundation for your masterpiece. This method allows for easier alignment and prevents any potential issues with overlapping or misalignment.
As you firmly press each panel onto the wall, use a level to ensure that it is straight and aligned with adjacent panels. This step is like ensuring that all notes in a musical composition are in perfect harmony. Maintaining consistent spacing between panels is also crucial for a uniform and professional look.
If you find that some panels need extra support, use clamps or temporary supports to hold them in place while the adhesive cures. This prevents any movement or shifting during the drying process, much like a construction worker using scaffolding to secure a structure.
Now, take a deep breath and allow sufficient time for the adhesive to fully cure. This step is like waiting for a flower to bloom. The curing time can vary depending on the specific adhesive used, so be sure to refer to the manufacturer’s instructions for recommended times.
Once the adhesive has fully cured, step back and inspect your work like a true craftsman. Look for any gaps or unevenness between the panels. If needed, fill in any gaps with a small amount of adhesive and use a putty knife or similar tool to smooth out imperfections. Just like an artist perfecting their creation, this step ensures a flawless finish.
Allowing Sufficient Time for Curing
Just like an artist allows their masterpiece to dry, curing is the final touch that guarantees a robust and enduring bond between the panels and the wall. In this captivating blog post, we will delve into the realm of adhesives, unraveling the factors that impact curing time and uncovering the secrets to achieving a flawless and impeccable installation.
The Science Behind Curing:
Curing is a mesmerizing process in which the adhesive undergoes a magical transformation from a liquid state to a solid, creating an unyielding bond that can withstand the test of time. Understanding this intricate process is crucial for achieving optimal results.
Timing is Everything:
Each adhesive has its own unique personality, requiring specific amounts of time to cure. Carefully read and follow the manufacturer’s instructions to determine the minimum curing time for your chosen adhesive. Remember, patience is not only a virtue but also the key to unlocking perfection.
Environmental Factors:
Temperature and humidity hold tremendous influence over the curing process. High temperatures can propel curing forward at an accelerated pace, while low temperatures may impede progress. Maintaining ideal humidity levels ensures flawless adhesion.
Ventilation Matters:
During the mesmerizing act of curing, proper airflow is essential for volatile components to dissipate, safeguarding against potential issues with bond strength. Adequate ventilation within the installation area guarantees optimal results and enhances the overall performance.
Handle with Care:
Throughout the enchanting journey of curing, avoid subjecting the panels to excessive pressure or stress. Heavy objects leaning against or hanging from the panels can compromise their integrity, leading to potential failures. Treat them delicately, like precious artifacts.
Inspection and Maintenance:
After the initial curing period, embark on a voyage of regular inspection to gauge the strength of the bond. Should any concerns arise, promptly address them to preserve the longevity and magnificence of your installation.
Avoiding Stress on the Panels Until Fully Cured
Today, we uncover the final touch that guarantees a masterpiece on your wall – the curing process. Just like an artist patiently awaits their creation to dry, we must handle our stainless steel panels with utmost care until the adhesive is fully cured. Join us in this captivating adventure as we explore why avoiding stress during the curing process is crucial.
Choosing the Right Adhesive:
To embark on our quest for flawless installation, it is paramount to select an adhesive specially designed for stainless steel. Not all adhesives are created equal. This ensures a robust bond without risking any potential damage to the panels.
Prepare, Prepare, Prepare:
Laying the foundation for a successful bond requires diligent preparation of the wall surface. Cleanliness is key – remove any dust, dirt, or grease that could hinder adhesion. Repair imperfections before applying the adhesive. A smooth canvas guarantees seamless installation.
Dry Fit for Perfection:
Before permanently attaching the panels, indulge in a dry fit. This preliminary step allows you to ensure a perfect fit and alignment. Make adjustments without any adhesive mishaps.
The Art of Application:
With adhesive in hand, meticulously follow the manufacturer’s instructions. Apply the right amount evenly across each panel’s surface. A strong bond is vital, but beware of excessive adhesive oozing out from between panel and wall.
The Waiting Game:
Ah, patience. Once panels gracefully adhere to the wall, resist any temptation to exert stress until the adhesive has fully cured. Typically taking 24-48 hours, consult your adhesive’s instructions for precise curing times.
Protecting Against Moisture:
Moisture can wreak havoc on our delicate bond during curing. Shield panels from excessive humidity or potential water damage. We want our installation to last a lifetime.
Temporary Supports and Braces:
Ensure panels remain steadfast during curing by employing temporary supports or braces if necessary. These gentle guardians distribute weight and pressure evenly, protecting against sagging or warping.
EfYZq_Exkrs” >
Conclusion
In conclusion, gluing stainless steel panels to the wall is an excellent way to elevate your interior design and achieve a sleek, modern look. The key to a successful installation lies in selecting the right adhesive for the job. Popular options like epoxy adhesive, construction adhesive, and silicone adhesive create strong bonds between stainless steel panels and the wall.
Before applying the adhesive, it’s crucial to prepare the surfaces properly. Thoroughly clean both the stainless steel panels and the wall surface, ensuring no dust, grease, or contaminants remain. Lightly roughen up the surfaces for enhanced adhesion. When choosing an adhesive, consider the weight and size of the panels, following the manufacturer’s instructions for optimal results.
When it comes time to apply the adhesive, take your time for even coverage without any excess squeezing out. Carefully position the stainless steel panels on the wall surface, pressing firmly and evenly to ensure proper contact between both surfaces and the adhesive. During curing, temporary supports or clamps can be used to hold the panels in place.
Allow ample time for curing before removing any temporary supports or clamps. It’s important not to put stress or pressure on the panels until they are fully cured. Afterward, inspect for any gaps or areas that may require additional adhesive for a secure and seamless bond.
By following these steps and selecting a suitable adhesive, you can achieve a professional-looking installation that will transform your walls into captivating works of art.

