Ever found yourself in a sticky situation, desperately seeking a way to attach something to your magnificent granite countertop without leaving a trace? As the proud owner of this stunning stone, you may yearn to personalize it with a cherished trinket or securely fasten a practical addition. Fear not. We’re here to unveil the secret techniques and top-notch practices on seamlessly gluing objects to granite.
Just imagine the possibilities. You can finally grace your bathroom vanity with an elegant soap dispenser or affix a breathtaking vase to your kitchen island – all with confidence and precision. So, if you’re ready to embark on this journey of craftsmanship, let’s dive right in.
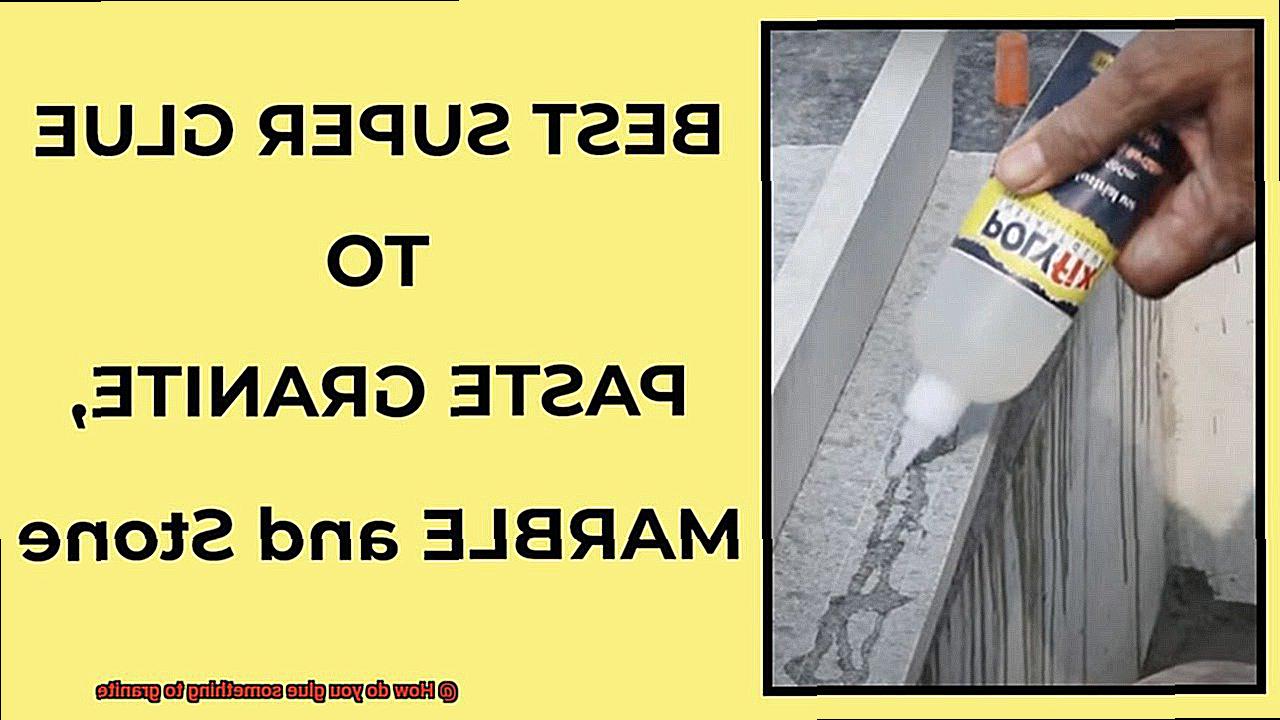
- Select the perfect adhesive: The first vital step is choosing an adhesive specifically formulated for bonding granite. Epoxy or masonry adhesives are widely acclaimed as the most effective options for this purpose. These adhesives guarantee an unyielding and long-lasting bond, even in high-traffic areas.
- Prep that surface like a pro: Achieving a successful bond demands meticulous preparation. Start by cleansing the granite surface with mild detergent and warm water. Rid it of any debris, dirt, or pesky dust that could hinder the adhesive’s effectiveness. Next, ensure complete dryness – creating an ideal bonding canvas.
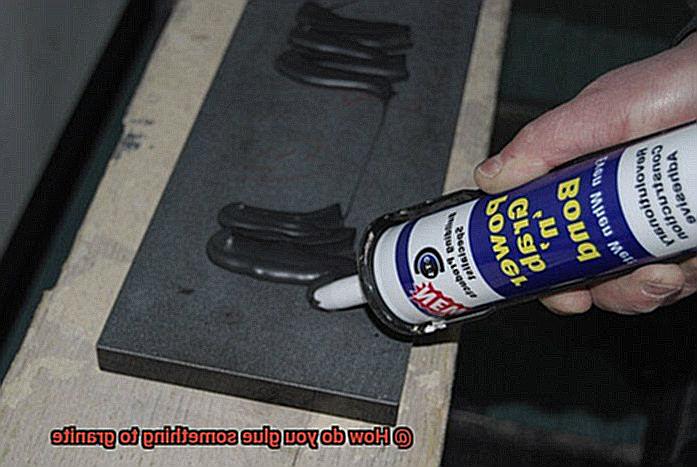
- Apply adhesive with surgical precision: Depending on the size and weight of the object you’re attaching, apply the adhesive meticulously to both the granite surface and the object itself. Employ an appropriate applicator – say hello to dental syringes – for precise and controlled application.
- Lock that bond down tight: Once you’ve applied the adhesive, press that object firmly onto the granite surface. Take care to align it flawlessly as repositioning might weaken its grip. If necessary, employ temporary supports or clamps to hold the object in place until the adhesive cures.
With these initial steps firmly in mind, you’re now armed with the indispensable knowledge to embark on your gluing adventure. From handpicking the perfect adhesive to mastering the bonding process, we’ll delve into every detail step by step – ensuring your granite remains a breathtaking canvas while accommodating your desired additions. Get ready to transform your granite surfaces into personalized masterpieces.
What Adhesive Should You Use?
Contents
When it comes to bonding objects to granite, choosing the right adhesive is essential for achieving a strong and long-lasting bond. With a plethora of factors to consider, such as the material type, resistance to moisture and temperature changes, compatibility with granite, surface preparation, and application process, it can be overwhelming to determine the ideal adhesive. In this comprehensive guide, we will explore these factors in detail to help you make an informed decision on what adhesive to use for granite bonding.
Material Type:
The first step in selecting the perfect adhesive for granite is considering the type of material you are bonding. Non-porous materials like glass, metal, or plastic require an adhesive with superior bonding properties. Epoxy adhesives are highly recommended for their exceptional strength and durability, making them ideal for heavy or load-bearing objects on granite surfaces. On the other hand, porous materials such as wood or fabric require an adhesive that can penetrate the pores and create a secure bond. Polyurethane adhesives are widely used in these cases as they expand during curing, effectively filling gaps and irregularities in the surface.
Resistance to Moisture and Temperature Changes:
Granite surfaces are constantly exposed to water, heat, and cold, making it crucial to select an adhesive that can withstand these conditions without deteriorating. Silicone adhesives are known for their excellent resistance to moisture and temperature fluctuations, making them a top choice for bonding objects to granite in areas prone to moisture or extreme temperatures. By ensuring your chosen adhesive can withstand these elements, you can ensure a reliable and long-lasting bond.
Compatibility with Granite:
To avoid any discoloration or damage to your granite surface, it is vital to choose an adhesive that is specifically designed for use on natural stone surfaces. Some adhesives may contain chemicals that could react with the stone, compromising its appearance and structural integrity. Opting for adhesives formulated for granite and similar materials guarantees compatibility and a secure bond.
Surface Preparation:
Before applying any adhesive, thorough cleaning and preparation of the granite surface are crucial. Removing dirt, dust, and grease using a mild detergent or stone cleaner is essential to ensure optimal adhesion. Additionally, lightly roughening the surface with sandpaper provides a better bonding surface for the adhesive. By properly preparing the granite surface, you enhance the adhesive’s ability to create a strong and durable bond.
Preparing the Granite Surface
Embarking on a DIY project that involves attaching something to granite? Bravo. Granite, a stunning natural stone known for its durability, will provide a solid foundation for your creation. However, before you plunge into the gluing process, it’s imperative to prepare the granite surface meticulously. This crucial step ensures an unbreakable and enduring bond between the glue and the granite. In this captivating guide, we’ll unveil the expert techniques to prepare your granite surface like a pro.
Step 1: Cleanse and Revitalize
To kickstart the preparation of your granite surface, begin by giving it a thorough cleansing. Utilize a mild detergent or stone cleaner to eliminate any pesky dirt, dust, or grease that may have settled over time. Rinse the surface meticulously with pristine water and delicately dry it using a soft cloth. A fresh start lays the foundation for a flawless connection.
Step 2: Inspect and Mend
Next, keenly scrutinize the surface for any signs of cracks, chips, or unevenness. If you discover any imperfections, it’s vital to rectify them before proceeding with the gluing process. Equip yourself with an epoxy resin specifically formulated for repairing granite (easily obtainable at your local hardware store). Adhere to the manufacturer’s instructions religiously to mend any damages and allow the epoxy to cure entirely.
Step 3: Smooth as Silk
Having resolved any underlying issues, it’s time to ensure that your granite surface is as smooth as silk and primed for gluing. Employ a fine-grit sandpaper or a diamond polishing pad to gently caress the surface. This meticulous step creates an impeccable bonding surface by eliminating any roughness. Remember, gentleness is paramount here – avoid going overboard.
Step 4: Banish Dust
After delicately sanding the surface, wipe away any lingering dust particles with a pristine cloth. This crucial step guarantees a completely clean and dry surface, ready for the next stage of the gluing process. A pristine canvas awaits, where your adhesive masterpiece will come to life.
Applying the Epoxy Adhesive
Get ready to dive into the secrets of applying this superhero adhesive and create unbreakable bonds that will stand the test of time.
Step 1: A Clean Canvas
Prepare your granite surface for the epic bonding journey ahead. Clear away any dirt, dust, or grease by using a mild detergent and water solution. Be gentle with your wiping, using a non-abrasive cloth or sponge to protect that flawless granite finish.
Step 2: The Perfect Blend
Mixing is an art, especially when it comes to epoxy adhesive. Combine the resin and hardener in precise proportions, following the manufacturer’s instructions like a maestro conducting a symphony. This is not a time for improvisation.
Step 3: Brushing Brilliance
Equip yourself with a brush or spatula and apply an even layer of the mixed epoxy adhesive onto both the object and the granite surface. Imagine yourself painting a masterpiece, ensuring every stroke is perfection. Evenness is key for a bond that will withstand the ages.
Step 4: The Dance of Connection
Bring your object to life on the granite stage. Carefully position it, aligning it flawlessly with your vision. Once satisfied, apply gentle pressure to forge a connection so tight that even Houdini would be astounded. This bond is meant to last.
Step 5: The Patience Game
Now comes the toughest part – waiting. Allow the epoxy adhesive to work its magic, following the recommended curing time provided by the manufacturer. This is not the moment to test its strength with feats of strength or acrobatics.
Step 6: Test and Triumph
After patiently waiting, it’s time to put your bond to the test. Apply gentle pressure or attempt to move the glued object. If it remains steadfast, you’ve achieved greatness. Celebrate your success and bask in the glory of your unbreakable bond.
Remember, temperature and humidity can influence the performance of epoxy adhesive, so keep your working environment within the recommended range. And don’t forget safety – wear gloves and protective eyewear, ensuring proper ventilation to keep those fumes at bay.
Pressing the Object in Place
We’ve already mastered the art of mixing epoxy adhesive and applying it with finesse. Now, let’s explore the importance of pressing the object in place when gluing something to granite.
Imagine this: your granite surface is pristine after thorough cleaning, ready for the magic to happen. But before you press that object down, let’s delve into why this step is crucial.
First and foremost, pressing the object ensures a proper bond between the adhesive and the granite surface. This bond is so strong and durable that even Houdini would be amazed. Here’s what you need to know:
- Cleanliness is vital: Before pressing anything down, make sure your granite surface is squeaky clean. Use a mild detergent or stone cleaner to banish any dirt, dust, or grease that could interfere with the bonding process. Allow the surface to dry completely.
- Choose the perfect adhesive: Not all adhesives are created equal. It’s essential to select one that suits both the object and the granite surface. There are adhesives specifically designed for bonding materials to granite, so choose wisely.
- Apply with precision: Once you’ve chosen your adhesive, apply a thin layer to both the object and the granite surface. This ensures an even distribution of adhesive and enhances bond strength.
- Position and press: The moment of truth has arrived – position the object on the granite surface with utmost precision. Take your time to align it correctly before applying firm pressure. Remember, gentle pressure is key here; excessive force could damage that beautiful granite surface we’ve worked so hard to protect.
- Time to wait: Depending on your adhesive, you may need to hold or clamp the object in place for a specific period. Refer to the manufacturer’s instructions for curing time and any additional steps required. Patience is indeed a virtue.
- Test that bond: Once the adhesive has fully cured, typically within 24 hours, it’s time to check the bond. Apply gentle pressure to ensure it’s secure and free from any signs of weakness or detachment. If anything seems amiss, don’t worry. Simply reapply adhesive using the same steps.
But before we conclude, let’s remember that gluing objects to granite may not be suitable for all applications. Factors such as weight, size, and intended use should be considered. In some cases, alternative methods like mechanical fasteners or brackets may be more appropriate.
Curing Time for Maximum Strength
In our quest for the perfect bond, we’ve covered the importance of cleanliness, adhesive selection, precision application, and gentle pressure. But what about the unsung hero that ties it all together – curing time? Today, let’s delve into how this seemingly simple factor can make or break the strength of your bond when gluing materials to granite. So grab your lab coat and safety goggles, and let’s explore the fascinating world of curing time.
Understanding Curing Time:
Curing time, my dear readers, is the magical period during which an adhesive transforms from a wet mess into a solid fortress. It’s the moment when your bond reaches its maximum strength and durability. But here’s the thing – not all curing times are created equal.
Epoxy Adhesives: The Mighty Titans:
Our first contender is epoxy adhesive – the Hercules among bonders. These bad boys are renowned for their exceptional strength. However, their curing time can vary depending on the specific product and manufacturer’s instructions. Some epoxies may dry in just a few minutes, while others require several hours of patient waiting. Remember, folks, good things come to those who wait.
Polyurethane Adhesives: Flexibility with a Dash of Durability:
Next up is polyurethane adhesive – the flexible warrior of the bonding world. With their ability to withstand movement and impact, these adhesives are ideal for applications that require a little more give. When it comes to curing time, polyurethane adhesives often take longer than epoxy, ranging from a few hours to a full day. So sit tight and let time work its magic.
Cyanoacrylate Adhesives: The Speedy Sprinters:
Last but not least, we have cyanoacrylate adhesives – aka super glue. These quick-setting wonders are perfect for small or lightweight objects. While they offer speedy bonding, their maximum strength may not match that of epoxy or polyurethane. Curing time for cyanoacrylate adhesives usually falls within a few minutes, giving you a swift yet moderate bond.
Removing Excess Glue
I am here to arm you with the knowledge and techniques to conquer this sticky predicament like a true pro. Removing excess glue from granite can be a bit of a challenge, but with the right approach, you’ll have your surfaces looking flawless once again.
Let’s start with the basics. One tried-and-true method for removing excess glue from granite involves gently scraping it off using either a plastic scraper or a razor blade. But tread lightly. It’s crucial to exercise caution during this process, as scratching or damaging the surface of your beloved granite is the last thing you want.
To make your scraping endeavors even more effective, consider applying a small amount of heat using a hairdryer or a heat gun on a low setting. This ingenious technique softens the glue, making it easier to remove. Just remember to use moderation, as excessive heat can spell trouble for your precious granite.
Now, if scraping isn’t quite your cup of tea or if the glue is putting up an especially stubborn fight, fear not. There’s another method that packs quite a punch. Enter acetone or nail polish remover – your secret weapons against even the most obstinate glue. Simply apply a small amount of acetone on a clean cloth and gently rub it on the offending adhesive. The acetone works its magic by dissolving the glue, allowing you to wipe it away effortlessly. However, before you dive headfirst into acetone paradise, it’s crucial to perform a patch test in an inconspicuous area of the granite to ensure it won’t cause any unsightly damage or discoloration.
For those particularly pesky glue situations that refuse to budge with scraping or acetone, sanding may be your saving grace. Armed with fine-grit sandpaper, gently sand the affected area in circular motions until the glue is no longer visible. But remember, my friend, less is more when it comes to pressure – applying too much force can lead to unintended damage to the delicate surface of your granite.
Once you’ve triumphantly banished the excess glue, it’s time to show your granite some love with a thorough cleaning. Grab a mild detergent or a granite-safe cleaner and a soft cloth to wipe away any lingering residue from the glue removal process. Rinse the surface with water and ensure it’s dried completely to avoid any unsightly water spots.
Special Considerations for Different Materials
Well, get ready because I’m about to share some special considerations that will make your bonding experience a masterpiece.
First off, let’s talk about materials. Different materials have different surface properties, so you need to choose the right adhesive for the job. If you’re gluing metal to granite, you’ll need an adhesive specifically designed for metal and stone surfaces. Plastic or glass? You’ll want an adhesive that’s compatible with those materials. It’s all about finding that perfect match.
Now, let’s move on to surface preparation. Just like an artist wouldn’t paint on a dirty canvas, you shouldn’t glue something to a dirty granite surface. Give it a thorough cleaning with a mild detergent or stone cleaner to remove any dirt or debris. And if you really want to take it up a notch, lightly roughen the surface with sandpaper. This little trick gives the glue more area to bond with and enhances adhesion.
Next up, consider the weight and size of the object you’re gluing. If it’s heavy or has a large surface area, reach for a two-part epoxy adhesive. These superstars are known for their strength and can handle hefty loads like nobody’s business. Plus, they can withstand moisture and temperature changes like champions, which is perfect for granite surfaces.
Now let’s talk about environments. Think about where your glued object will be hanging out. If it’s going to face moisture or extreme temperatures, you’ll want to choose an adhesive that can handle those conditions. Waterproof adhesives are your best bet for outdoor applications or areas that get a little steamy.
Last but definitely not least, follow the instructions. I know, I know, reading instructions isn’t exactly exciting, but trust me on this one. Different adhesives have different curing times and application methods, and sticking to those guidelines will give you the best results. And don’t forget to test the adhesive on a small, inconspicuous area of the granite surface before diving into the whole project. It’s better to be safe than sorry, my friends.
Safety Precautions When Gluing to Granite
Today, we embark on an exciting journey into the realm of gluing to granite. As an expert in the art of bonding, I am thrilled to share essential safety precautions that will guarantee your gluing adventure is not only triumphant but also accident-free. So grab your gear and let’s dive into the world of granite gluing, where safety takes center stage.
Shield Your Hands, Protect Your Craft:
When it comes to working with glue on granite, safeguarding your hands is paramount. Slip on a pair of sturdy protective gloves to shield yourself from potential skin irritations and to prevent any contamination on the pristine granite surface. Remember, clean hands pave the way for flawless bonds.
Eyes Wide Open:
Glue fumes can be a formidable opponent, particularly when it comes to your delicate eyes. To ward off any unwanted mishaps or irritations, equip yourself with reliable protective eyewear. It serves as an impregnable barrier, safeguarding your precious peepers from accidental splashes and ensuring those pesky fumes remain at bay.
Breathe Freely with Adequate Ventilation:
In the realm of gluing on granite, proper ventilation takes center stage. Some adhesives emit potent odors or fumes that can cause discomfort if inhaled excessively. Ensure you work in a well-ventilated area, inviting fresh air to circulate by opening windows or employing the aid of a trusty fan. For an added layer of protection, embrace the expertise of a respirator mask like a seasoned pro.
Skin Sensitivity: Handle with Care:
Adhesives can be finicky about their company, so it’s crucial to keep them at arm’s length from your skin whenever possible. Certain glues have the potential to trigger irritation or allergic reactions upon contact. If, by chance, you find yourself entangled with glue, wash it off promptly with soap and water. Should any unexpected reactions occur, do not hesitate to seek immediate medical attention.
Z_mXLTVMx2k” >
Conclusion
Gluing something to granite may seem like a daunting task, but with the right approach and materials, it can be accomplished successfully. The key is to ensure that the glue you choose is specifically designed for bonding with stone surfaces like granite.
One option is to use an epoxy-based adhesive, which offers excellent adhesion and durability. Before applying the glue, it’s essential to clean the granite surface thoroughly, removing any dirt, dust, or grease. This will help create a strong bond between the adhesive and the granite.
Next, apply a thin layer of the epoxy adhesive onto both the object you want to glue and the granite surface. Use a small brush or applicator to spread the glue evenly. It’s important not to use too much adhesive as excess glue can seep out and mar the appearance of your project.
Once you’ve applied the adhesive, carefully align and press the object onto the granite surface. Apply gentle pressure for a few minutes to ensure a secure bond. It’s crucial to follow any specific instructions provided by the adhesive manufacturer regarding curing time and temperature requirements.
In some cases, additional support may be necessary while waiting for the adhesive to cure fully. You can use clamps or weights to hold the object in place until the glue sets completely. Be sure to protect both the object and granite from any damage during this process.
Remember that different glues may have varying drying times and strengths, so it’s essential to select one that suits your specific needs. Additionally, always test a small inconspicuous area before gluing larger or more visible objects onto your granite surface.
By following these steps and using high-quality adhesive products designed for bonding with stone surfaces like granite, you can confidently glue objects securely in place without compromising its aesthetic appeal or longevity.