Tired of those disappointing concrete repair jobs? Fed up with false promises from articles that leave you hanging? Well, fear no more, my fellow DIY enthusiasts. Today, we’re diving headfirst into the art of gluing things to concrete. Whether you’re hanging a heavy mirror or securing a loose tile, this step-by-step guide will equip you with all the knowledge you need to achieve concrete bonding perfection.
Hook:
Imagine this: a towering skyscraper held together by an invisible force. A force so powerful, it defies the laws of nature. What’s the secret behind this magic, you ask? It’s none other than the incredible power of adhesive bonding.
Main Points:
Point 1: Get to Know Your Concrete Surface
Contents
- 0.1 Point 1: Get to Know Your Concrete Surface
- 0.2 Point 2: Choosing the Perfect Adhesive
- 0.3 Point 3: Prep Like a Pro
- 0.4 Point 4: Master Application Techniques
- 0.5 Point 5: Curing and Post-Bonding Maintenance
- 0.6 Conclusion:
- 1 Types of Adhesives for Concrete
- 1.1 Epoxy Adhesives: The Unyielding Stronghold
- 1.2 Epoxy adhesives are the superheroes of the concrete adhesive world, renowned for their exceptional strength and durability. Comprising two components – resin and hardener – epoxy adhesives form an unbreakable chemical bond with concrete surfaces. This makes them ideal for heavy-duty projects that demand unwavering bond strength. Moreover, epoxy adhesives exhibit excellent resistance to moisture, chemicals, and temperature fluctuations. However, they require meticulous mixing and application, and their higher cost may be a consideration for some projects.
- 1.3 Polyurethane Adhesives: Flexibility Meets Reliability
- 1.4 Construction Adhesives: The Reliable All-Rounder
- 1.5 Silicone Adhesives: The Flexible Guardians
- 2 Preparing the Concrete Surface
- 3 Applying Bonding Agents
- 4 Applying Epoxy Adhesive
- 5 Applying Construction and Polyurethane Adhesive
- 6 Curing the Glue
- 7 Tips for Glue Application and Curing
Before embarking on your gluing adventure, it’s crucial to understand the nature of concrete. We’ll explore key factors like porosity, texture, and moisture content that can affect adhesion.
Point 2: Choosing the Perfect Adhesive
Not all glues are created equal when it comes to concrete. Let’s dive into the world of construction adhesives and explore options like epoxy, polyurethane, and acrylic adhesives. We’ll weigh their pros and cons so you can select the ideal adhesive for your project.
Point 3: Prep Like a Pro
In any bonding endeavor, surface preparation is paramount. Discover why cleaning, degreasing, and sanding the concrete surface are essential steps for ensuring maximum adhesive grip.
Point 4: Master Application Techniques
The moment of truth has arrived. Uncover the secrets behind applying adhesive to concrete as we delve into tips and tricks for achieving flawless and durable bonds. From spreading techniques to filling gaps and ensuring even distribution – we’ve got you covered.
Point 5: Curing and Post-Bonding Maintenance
Patience is a virtue, especially when it comes to bonding with concrete. We’ll unveil the secrets behind the curing process and provide expert tips on post-bonding maintenance. With our guidance, your glued objects will stay firmly in place for years to come.
Conclusion:
As we wrap up this captivating introduction, prepare yourself to become a concrete bonding master. Armed with knowledge, techniques, and the perfect adhesive, you can achieve the seemingly impossible. So grab your tools, put on your DIY cap, and let’s embark on an adhesive adventure that will leave your concrete projects looking flawless. Stay tuned
Types of Adhesives for Concrete
When it comes to bonding materials to concrete, selecting the right adhesive is crucial for a successful and long-lasting result. With a wide range of options available, it can be overwhelming to determine which adhesive is best suited for your specific project.
In this comprehensive guide, we will explore the different types of adhesives that can be used on concrete surfaces and delve into their unique advantages and disadvantages. By understanding these factors, you can confidently choose the adhesive that meets your project’s requirements.
Epoxy Adhesives: The Unyielding Stronghold
Epoxy adhesives are the superheroes of the concrete adhesive world, renowned for their exceptional strength and durability. Comprising two components – resin and hardener – epoxy adhesives form an unbreakable chemical bond with concrete surfaces. This makes them ideal for heavy-duty projects that demand unwavering bond strength.
Moreover, epoxy adhesives exhibit excellent resistance to moisture, chemicals, and temperature fluctuations. However, they require meticulous mixing and application, and their higher cost may be a consideration for some projects.
Polyurethane Adhesives: Flexibility Meets Reliability
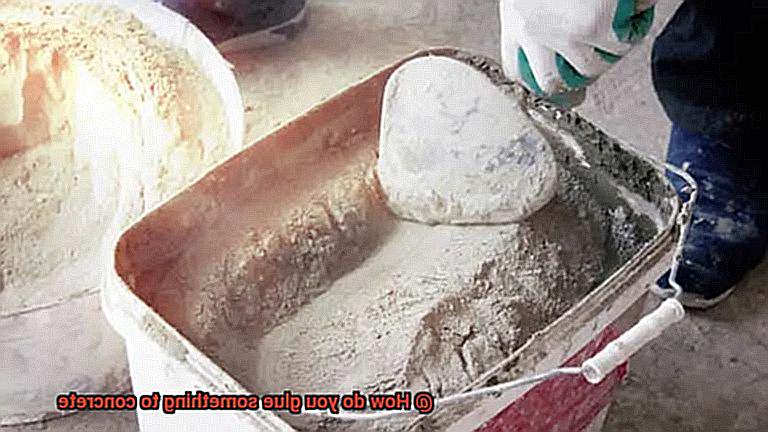
If flexibility is a priority, polyurethane adhesives are the perfect choice. These versatile adhesives retain their bond strength even in situations where movement or expansion occurs, making them well-suited for outdoor applications or areas prone to temperature variations. Additionally, polyurethane adhesives offer superb resistance to moisture and chemicals, ensuring a reliable bond under challenging conditions. However, their longer curing time and difficulty in removing once fully set should be taken into account.
Construction Adhesives: The Reliable All-Rounder
Construction adhesives are the Swiss Army knives of bonding materials to concrete surfaces. With strong bond strength and good flexibility, they are suitable for a wide range of applications. Construction adhesives are user-friendly and come in various formulations tailored to different needs. While they provide a solid bond, they may not offer the same level of resistance to moisture and temperature changes as epoxy or polyurethane adhesives. Therefore, for projects exposed to harsh outdoor conditions, other options may be more suitable.
Silicone Adhesives: The Flexible Guardians
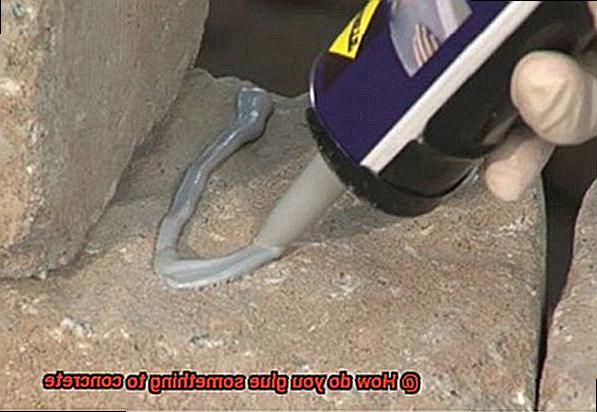
When flexibility and waterproofing are paramount, silicone adhesives rise to the occasion. Even after curing, these adhesives maintain their flexibility, allowing them to withstand movement and vibrations without compromising the bond. Silicone adhesives excel in resisting moisture and UV rays, making them ideal for both indoor and outdoor applications. However, they may not provide the same level of bond strength as epoxy or polyurethane adhesives, making them more suitable for lightweight materials.
Preparing the Concrete Surface
When it comes to gluing something onto a concrete surface, preparation is the key to success. Your project, whether it’s a sturdy shelf or an eye-catching tile, deserves a bond so unbreakable it could rival superheroes. But fear not, for I am here to reveal the secrets of concrete surface preparation that will ensure a bond that stands the test of time. So, fasten your DIY cape and prepare to embark on a journey into the world of concrete surface preparation.
Step 1: The Cleansing Ritual
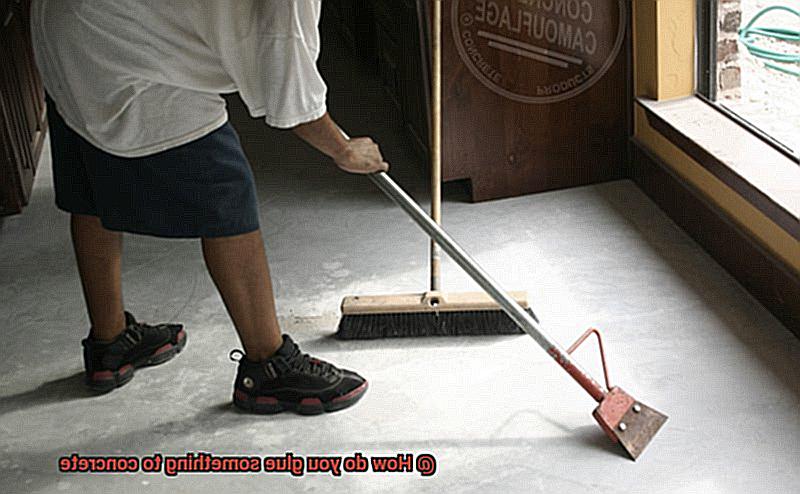
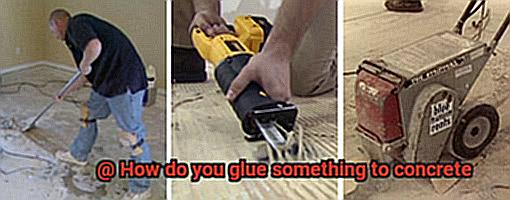
Before anything else, we must cleanse the concrete surface of all impurities. Armed with a stiff brush or broom, sweep away any dirt, dust, or loose particles that dare to challenge your bond. For those stubborn stains or residues, unleash the power of mild detergent or concrete cleaner.
Gently scrub the surface and rinse it thoroughly with water. Now, let the surface air dry completely. Remember, cleanliness is not just a virtue but a vital step towards achieving an unbreakable bond.
Step 2: Embrace the Roughness
Listen closely, aspiring heroes. Sometimes, our concrete surfaces are too smooth or sealed for adhesive perfection. But worry not, for we have a secret weapon – roughening up the surface. Choose your method wisely; mechanical or chemical.
The mechanical path involves sanding or grinding the surface to create texture and enhance adhesion. If you prefer a chemical adventure, follow the instructions of an etching solution. This will awaken the gripping power your surface needs to hold on tight.
Step 3: Mend the Cracks
Even superheroes have their weaknesses, and so do concrete surfaces with cracks and damages that threaten our adhesive stronghold. But fear not. Our trusty sidekick, the concrete patching compound, is here to save the day. Fill those cracks and holes with this magical substance, smoothing them out with finesse. Allow it to cure according to the manufacturer’s instructions, and behold. Your surface is now ready for action.
Applying Bonding Agents
Welcome back, DIY superheroes. In our quest for concrete mastery, we’ve conquered the art of surface preparation and crack mending. Now, it’s time to dive into the world of bonding agents – the unsung heroes that ensure your adhesive sticks to concrete like never before.
So grab your cape, because we’re about to reveal the secrets behind applying bonding agents like a true pro.
The Power of Primers:
Our first superpower in the world of bonding agents is the mighty primer. Think of it as your trusty sidekick, preparing the concrete surface for an unbreakable bond. Primers are your secret weapon, providing two essential functions:
- Sealing the Pores: Primers act as a superhero force field, sealing those pesky pores in your concrete. By doing so, they prevent moisture from sneaking in and weakening your bond. No moisture means no weak spots – it’s like giving your adhesive an impenetrable shield.
- Enhancing Adhesion: With primers on your side, you’re giving your adhesive an extra boost of adhesion powers. It’s like turning up the strength dial to maximum – ensuring a bond that can withstand even the toughest challenges.
Preparing for Action:
Before you can unleash the power of bonding agents, you need to prepare your concrete surface for battle. Here’s a checklist to ensure you’re ready to take on any bonding mission:
- Cleanliness is Key: Clear away any loose particles, dirt, or contaminants that could stand in the way of a strong bond. A pristine surface is essential for maximum adhesion.
- Say Goodbye to Coatings: Eliminate any existing coatings or sealants on your concrete. These sneaky foes can interfere with your bonding agent’s ability to do its job effectively. Strip them away to reveal a clean canvas for your adhesive.
Applying the Bonding Agent:
Now that your concrete is primed and ready, it’s time to apply the bonding agent and solidify your bond. Here’s how to do it like a true expert:
Applying Epoxy Adhesive
Get ready to embark on a journey into the world of epoxy adhesive and its application to concrete surfaces. Known for its unparalleled strength and durability, epoxy adhesive has become the top choice for bonding materials to concrete.
Prepare yourself for a comprehensive guide that will equip you with the skills to apply epoxy adhesive like a seasoned professional.
Step 1: Prepare the Concrete Surface
First things first, it’s crucial to lay a solid foundation by preparing the concrete surface. Leave no room for compromise by meticulously cleaning the surface, eliminating any dirt, dust, or grease that could hinder the bond. Employ a suitable cleaner or solvent to ensure every inch is spotless – after all, a clean surface sets the stage for a robust and enduring bond.
Step 2: Roughen the Surface
Enhance adhesion by giving the concrete surface a rough edge. Sanding or gently etching the surface with an acid solution creates microscopic valleys and peaks, providing an optimized surface for the epoxy adhesive to grip onto. This simple step ensures a bond that can weather any storm.
Step 3: Mix the Epoxy Adhesive
It’s time to tackle the star of the show – epoxy adhesive. This dynamic duo typically consists of two parts: resin and hardener. To unleash their full potential, meticulously mix them together according to the manufacturer’s instructions. Properly combined, these components create a chemical reaction that results in an unbreakable bond.
Step 4: Apply the Epoxy Adhesive
With your mixed epoxy adhesive eagerly waiting, it’s time to make your mark on the concrete surface. Arm yourself with a trusty trowel or putty knife as you spread the adhesive evenly across every nook and cranny that requires bonding. Pay close attention to detail, ensuring that not a single spot is left untouched – the devil is in the details, after all.
Step 5: Press Materials into Place
Prepare for the moment of truth as you press the materials you’re gluing firmly into place immediately after applying the epoxy adhesive. This action guarantees maximum contact between the two surfaces, forging an unyielding bond that will stand strong against the test of time.
Don’t hold back – use your strength to ensure a connection that can withstand anything thrown its way.
Applying Construction and Polyurethane Adhesive
Get ready to dive into the fascinating world of applying construction and polyurethane adhesive to concrete surfaces. Let’s grab our caulk guns and embark on this adhesive adventure.
Construction adhesive is the rockstar of the adhesive world when it comes to bonding something to concrete. Its unparalleled strength makes it the go-to choice for construction projects.
However, before we unleash its power, we must properly prepare the surface.
First things first, let’s tackle that concrete. Clear away any loose debris or dust by sweeping or vacuuming the area. Then, with a damp cloth, banish stubborn dirt and stains, leaving behind a squeaky clean and dry surface ready for adhesive application.
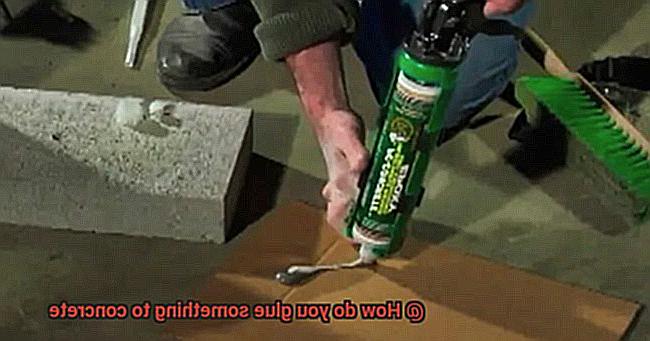
Now that our canvas is primed, it’s time to unleash the construction adhesive. Whether you opt for a caulk gun or a trowel, it’s time to get creative. Apply the adhesive in a zigzag pattern, ensuring optimal coverage. Let those lines dance across the concrete.
Once the adhesive is applied, it’s time for the grand finale. Press that object firmly onto the concrete surface, exerting just the right amount of pressure. Hold it in place for a few minutes, allowing the adhesive to work its magic. Some construction adhesives may require clamping or additional support until they fully cure, so heed the manufacturer’s instructions for maximum success.
Now, let’s explore the wonders of polyurethane adhesive. This versatile option boasts exceptional bonding strength and flexibility, making it a true chameleon for various applications. Concrete included.
Just like with construction adhesive, preparing the concrete surface is crucial before diving into polyurethane territory. Cleanse and dry that surface meticulously, leaving no room for compromise in adhesion.
Now comes the moment of truth. Load up your caulk gun or grab that trowel and apply the polyurethane adhesive onto the concrete. Remember, a zigzag pattern is your secret weapon for superior coverage. But tread lightly, my friend, as too much adhesive can lead to a sticky situation when pressure is applied.
Curing the Glue
In the quest for a rock-solid connection to concrete, curing is the secret sauce that transforms your adhesive from ordinary to extraordinary. So, buckle up and embark on a journey to discover the power of properly curing glue.
Let’s start by unraveling the mystery behind curing. It’s more than just idle waiting; it’s the pivotal moment when the adhesive hardens and reaches its maximum strength. Imagine your adhesive as a superhero, going through an awe-inspiring transformation to become a formidable warrior. And trust me, when it comes to bonding something to concrete, you want your adhesive to be as mighty as Hercules.
Now, not all adhesives are created equal. Epoxy, polyurethane, construction adhesive – each has its own set of rules for curing. The key? Follow the manufacturer’s instructions. They hold the map to success, guiding you towards a bond that will stand the test of time. Don’t underestimate their wisdom; they know what it takes to achieve proper curing and unleash the full potential of your adhesive.
But how long does this transformation take? Ah, my friend, that depends on various factors – temperature, humidity, material composition – all play a role in the grand scheme of curing. Typically, most adhesives require at least 24 hours to reach their full potential. However, be prepared for longer wait times in colder or more humid conditions. Remember, patience is not just a virtue; it’s the key ingredient in creating a bond that can weather any storm.
During the curing process, handle your bond with care. Treat it as delicately as you would a newborn taking its first steps. Avoid any unnecessary movement or weight until the adhesive has fully cured. Premature pressure can weaken the bond, leaving you heartbroken and searching for a second chance. So, resist the temptation to test it out too soon, and let your bond become a force to be reckoned with.
Crafting the perfect environment for curing is crucial. Ensure proper ventilation, maintaining a consistent temperature and humidity level. Extreme fluctuations or excessive moisture can be the kryptonite to your adhesive’s transformation. So, provide a cozy and controlled space for your bond to thrive.
Tips for Glue Application and Curing
Are you ready to embark on a project that involves gluing something to concrete? Whether you’re undertaking a DIY craft or a home improvement task, the key to success lies in choosing the right adhesive, preparing the surface meticulously, and following proper application and curing techniques. In this comprehensive guide, we’ll delve into the importance of these steps and provide you with expert tips to ensure a rock-solid bond between your object and concrete surface.
Unleash the Power of the Perfect Adhesive:
The choice of adhesive is paramount for a strong and enduring bond. Amidst the sea of options, epoxy, polyurethane, and construction adhesives reign supreme in concrete applications.
Each type possesses unique properties and strengths, making it crucial to select the adhesive that aligns with your project’s specific requirements. Consult with a knowledgeable expert at your local hardware store for guidance in making this critical decision.
Prepare the Surface: A Clean Canvas for Success:
Before diving into the gluing process, dedicate time to preparing the concrete surface meticulously. The act of cleaning cannot be emphasized enough. Armed with a wire brush or vacuum cleaner, banish any traces of dirt, dust, or grease that may lurk on the surface. For more stubborn stains, introduce mild detergent or degreaser into the equation. By ensuring a pristine canvas, you pave the way for optimal adhesion and an unyielding bond.
Apply with Precision: An Even Coat for Unbreakable Connections:
Now that your surface gleams with cleanliness, it’s time to apply the glue. Pay meticulous attention to the manufacturer’s instructions for precise application techniques. Utilize a notched trowel or putty knife to distribute the adhesive evenly across both the concrete surface and the object you are gluing. Beware of excessive glue usage, as an overabundance may result in unsightly squeezing out once pressure is applied.
Press Firmly: Merging Surfaces with Unwavering Strength:
Once the adhesive is in place, bring your object and concrete surface together with unwavering force. Apply steady and resolute pressure as recommended by the manufacturer. This crucial step ensures maximum contact between the two surfaces, elevating adhesion to new heights and creating a bond capable of withstanding any challenge that comes its way.
Cultivate Patience: Allowing for Proper Curing:
After the glue has been applied and surfaces have been united, resist the temptation to disturb or move your object prematurely. Grant the adhesive the time it needs to cure fully before subjecting it to stress or load. Bear in mind that curing times can fluctuate based on the adhesive type and environmental conditions. By adhering faithfully to the manufacturer’s instructions, you ensure a bond that is not only robust but also enduring.
Ccvj1sFWxw8″ >

