I’ve got the ultimate solution for you. Gluing these two materials together may seem like an insurmountable challenge, but fear not – where there’s a will, there’s always a way.
In this blog post, we’re diving headfirst into the captivating world of adhesive solutions for silicone rubber and glass bonding. Prepare to be enchanted by the mystical properties of silicone adhesives and learn step-by-step application techniques that will leave no stone unturned.
So, grab your safety goggles and get ready to unlock the secrets of this magical union.
What is Silicone Rubber?
Contents
Silicone rubber is a remarkable material that offers a myriad of applications due to its exceptional properties. From its ability to withstand extreme temperatures to its seamless bonding with glass, silicone rubber has become a go-to material in various industries. In this article, we will delve into the fascinating world of silicone rubber and explore its diverse features.
Temperature Resistance:
Silicone rubber’s resilience in the face of extreme temperatures is truly impressive. Whether enduring freezing cold or scorching heat, this material remains durable and flexible. With a temperature range spanning from a bone-chilling -60°C to a blistering 230°C (-76°F to 446°F), silicone rubber is the top choice for environments that experience drastic temperature fluctuations.
Chemical Resistance:
Another commendable attribute of silicone rubber is its resistance to chemicals, oils, and solvents. This material is highly inert, meaning it does not react with most substances. This quality makes silicone rubber an ideal choice for industries where exposure to harsh chemicals is unavoidable.
Electrical Insulation Properties:
Silicone rubber possesses excellent electrical insulation properties, making it indispensable in electrical and electronic applications. As a non-conductive material, it effectively insulates against electricity, ensuring safety and reliability in electrical systems.
Flexibility and Elasticity:
The flexibility and elasticity of silicone rubber are unparalleled. It can stretch and compress without losing its shape or suffering permanent deformation. This resilience makes it perfect for applications that involve frequent movement or exposure to mechanical stress.
Weathering and UV Resistance:
Silicone rubber does not degrade or become brittle when subjected to sunlight or outdoor conditions for extended periods. Its remarkable weathering and UV resistance make it an excellent choice for outdoor applications such as seals, gaskets, and weatherstripping.
Biocompatibility:
Silicone rubber’s biocompatibility renders it safe for use in medical and food-grade applications. It is non-toxic and does not react with bodily fluids or food substances, making it suitable for products like medical implants, baby bottle nipples, and kitchen utensils.
Bonding with Glass:
Silicone rubber’s seamless bonding with glass requires careful consideration. Silicone adhesives or sealants are commonly used for this purpose because they are compatible with both materials. Achieving a strong bond involves proper surface preparation, including thorough cleaning and roughening of the surfaces. By applying a thin and even layer of adhesive to both the silicone rubber and glass surfaces and allowing it to cure adequately, a durable bond can be achieved.
Adhesive Options for Gluing Silicone Rubber to Glass
In the world of adhesive bonding, silicone rubber and glass may seem like an unlikely duo. However, with the right adhesive, they can form an unbreakable bond that defies expectations. In this captivating exploration, we will delve into the exciting realm of adhesive options for gluing silicone rubber to glass, helping you find the perfect adhesive sidekick for your project.
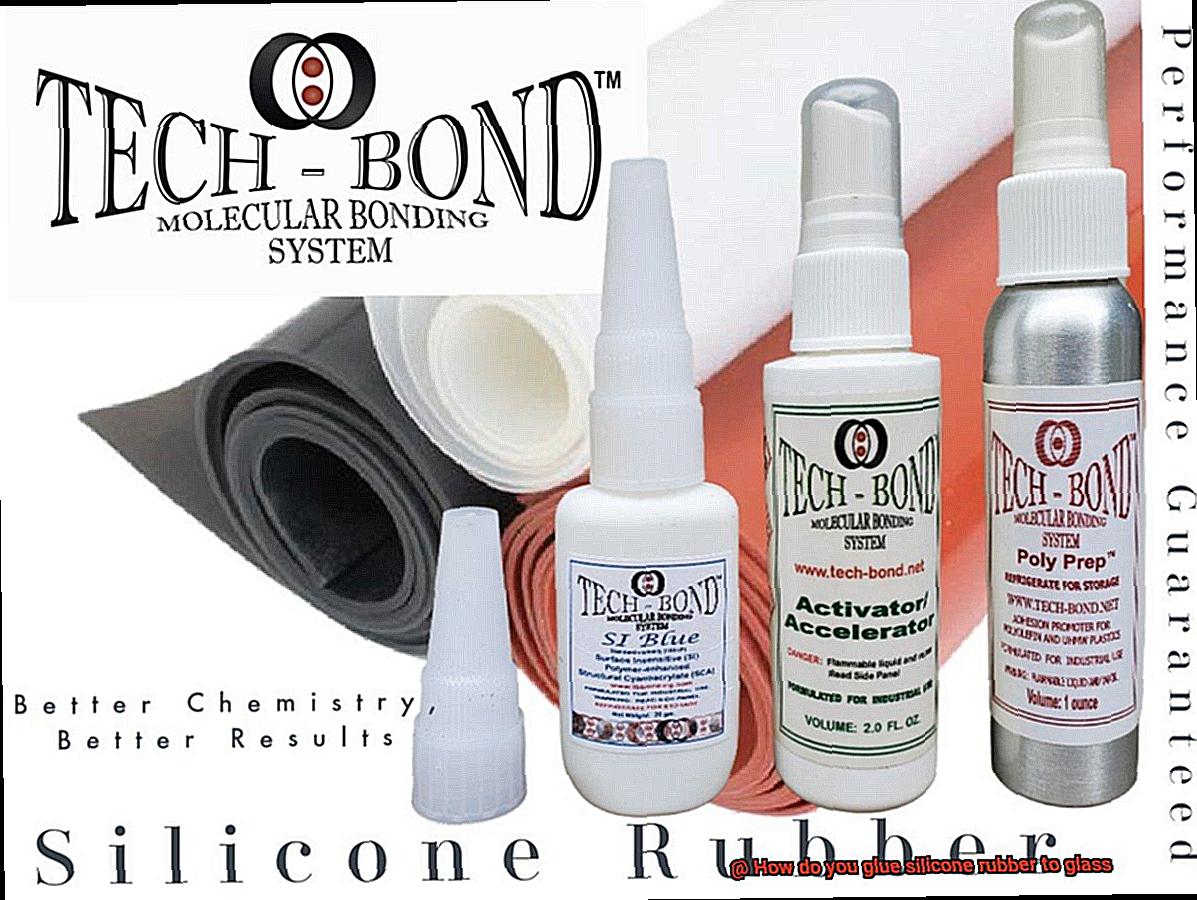
Silicone-Based Adhesives:
Prepare to meet the first contender in our lineup – the formidable silicone-based adhesive. Crafted specifically to bond silicone rubber to various surfaces, including glass, these adhesives showcase their prowess by coming in two parts – a base and a catalyst – that must be mixed before application. With outstanding flexibility, temperature resistance, and durability, these adhesives excel in applications where strength and longevity are paramount.
Cyanoacrylate Adhesives:
Next up is the legendary cyanoacrylate adhesive, also known as super glue. Revered for its lightning-fast bonding properties, it can indeed be used to unite silicone rubber with glass. However, heed this cautionary tale: not all cyanoacrylate adhesives are compatible with silicone rubber. Only those that explicitly declare their suitability for bonding silicone should be trusted to join these materials in holy matrimony.
Epoxy Adhesives:
Prepare to witness a show of raw strength and durability as we unveil the power of epoxy adhesives. These mighty warriors offer exceptional bonding capabilities and reign supreme in applications where a Herculean bond is required. Yet, tread carefully on this treacherous path – ensure that the chosen epoxy adhesive harmonizes with both silicone rubber and glass before venturing forth.
Specialized Adhesives:
Sometimes, ordinary adhesives don’t possess the extraordinary abilities required for certain tasks. Enter the realm of specialized adhesives, where silicone-based pressure-sensitive adhesives (PSAs) reign supreme.
These sticky superheroes cling tenaciously to both silicone rubber and glass under the weight of applied pressure. Their powers are often harnessed in the medical device and electronic component domains, where an unyielding bond is non-negotiable.
Tips for Success:
To unlock the full potential of the bond between silicone rubber and glass, heed these pearls of wisdom: embark on your adhesive adventure by meticulously preparing the surfaces with thorough cleaning and roughening; follow the sacred path laid down by the adhesive manufacturer, adhering strictly to their instructions regarding application techniques and curing times; and consider enlisting the aid of a primer or surface treatment to bolster the strength of your bond.
Surface Preparation for Gluing Silicone Rubber to Glass
Surface Preparation for Gluing Silicone Rubber to Glass: Unleashing the Power of a Solid Bond
In the mesmerizing world of adhesive bonding, where unlikely pairs become unbreakable duos, silicone rubber and glass join forces in a captivating dance of strength and resilience.
Prepare to embark on an enchanting journey as we uncover the secrets to gluing these two materials, unveiling the mighty prowess of silicone-based adhesives, the legendary strength of cyanoacrylate adhesives, the raw power of epoxy adhesives, and the specialized abilities of pressure-sensitive adhesives.
Along this magical path, we will share invaluable tips for success, ensuring your bond between silicone rubber and glass stands tall against all odds.
Brace yourself for an adventure like no other – where surfaces are meticulously prepared, instructions are devoutly followed, and the aid of primers and surface treatments elevates your bond to extraordinary heights.
But before we dive into the realm of adhesives, let’s start with the foundation – surface preparation. This crucial step sets the stage for a bond that defies time.
Step 1: Cleanliness is Key
To achieve a bond that withstands the test of time, both the glass surface and silicone rubber must be free from contaminants like dirt, dust, oils, or residues. Begin by meticulously cleaning the glass surface with a mild detergent or glass cleaner. Armed with a trusty lint-free cloth or sponge, gently scrub away any impurities and rinse with water. Allow the glass to bask in the sun’s rays or simply air dry until it sparkles.
Step 2: Banishing Residues from Silicone Rubber
Silicone rubber may harbor uninvited guests in the form of release agents or mold residue on its surface – unwelcome distractions that hinder bonding. Fear not. Wield the power of solvents like isopropyl alcohol or acetone to wipe away these intruders. With a clean cloth as your ally, let the solvent work its magic, banishing contaminants and ensuring optimal adhesion.
Step 3: Embrace the Art of Roughening
To enhance adhesion, it’s time to give the glass surface a makeover. Embrace the art of roughening by lightly sanding the surface with fine-grit sandpaper or employing a glass etching product.
The goal is not to strip away layers but rather to create a textured landscape that beckons the adhesive, enticing it to penetrate and grip with unwavering strength.
Step 4: The Waiting Game
Patience is a virtue, especially when it comes to bonding silicone rubber to glass. After completing the surface preparation steps, it’s crucial to allow both surfaces to revel in solitude, drying completely before applying the adhesive.
Moisture, like a sly trickster, can compromise the adhesive’s effectiveness and result in a feeble bond. Wait at least 24 hours after cleaning before proceeding – an investment in time that guarantees success.
Applying the Adhesive
To successfully glue silicone rubber to glass surfaces, it is vital to understand the process of applying the adhesive. Let’s dive into the enchanting world of adhesives and unlock the secrets to a strong and durable bond.
First and foremost, cleanliness is key. Just like a knight in shining armor needs a clean shield, your silicone rubber and glass surfaces need to be free from any dirt, dust, or grease. Grab a mild detergent or rubbing alcohol and give those surfaces a thorough cleaning. Rinse them with water and let them dry completely before moving on.
Now that our surfaces are sparkling clean, it’s time to choose the perfect adhesive for the job. Silicone rubber and glass have different properties, so it’s crucial to select an adhesive specifically designed for bonding these materials. Look for adhesives that proudly proclaim their suitability for silicone rubber and glass bonding.
Once you’ve found your adhesive match made in heaven, it’s time to apply it. Follow the manufacturer’s instructions carefully, but here’s a general guideline: apply a thin layer of adhesive onto one surface using a brush or applicator. Just like spreading butter on toast, make sure the entire surface is evenly coated with adhesive.
With the adhesive applied, it’s time for the magical moment of bonding. Carefully place the silicone rubber onto the glass surface, aligning them properly. Apply gentle pressure to create a strong bond between the two materials. This is where the real magic happens.
But wait, there’s more. To elevate your bond even further, consider using additional techniques like primers or adhesion promoters specifically formulated for silicone rubber and glass bonding. These little helpers can enhance adhesion and make your bond even stronger.
Now comes the waiting game. Patience is a virtue here – allow the adhesive to cure according to the manufacturer’s recommended curing time. While you wait, envision your bond getting stronger and stronger with each passing moment.
Once your bond has had sufficient time to cure, it’s time to put it to the test. Gently pull on the silicone rubber to see if there are any signs of weakness or separation. If you encounter any issues, it may be necessary to reapply the adhesive or try a different bonding technique. Don’t worry, troubleshoot like a pro and you’ll find the perfect solution.
Remember, each adhesive may have its own set of instructions and curing times, so always consult the manufacturer’s guidelines for the best results. And don’t forget to do a small test on a non-visible area before going all-in to ensure compatibility and desired adhesion strength.
Joining the Surfaces Together
Today, we embark on a magical journey to discover the secrets of gluing silicone rubber to glass using adhesive. Prepare to be amazed as we unravel the steps required to create a strong and durable bond between these two materials. So, grab your caulk guns and let’s dive in.
Step 1: Cleanliness is the Knight in Shining Armor
To ensure a successful bond, our first quest is to ensure pristine surfaces. Use a mild detergent or isopropyl alcohol to wipe away dirt, oils, or contaminants that may hinder the adhesive’s magical powers. Remember, a clean surface is key to a strong connection.
Step 2: Choosing the Perfect Adhesive – A Match Made in Heaven
Now that our surfaces are pristine, it’s time to select the perfect adhesive for this magical union. Silicone adhesives are our knights in shining armor, offering excellent resistance to water, temperature changes, and chemicals. Look for a silicone adhesive designed specifically for bonding silicone rubber to glass for optimal results.
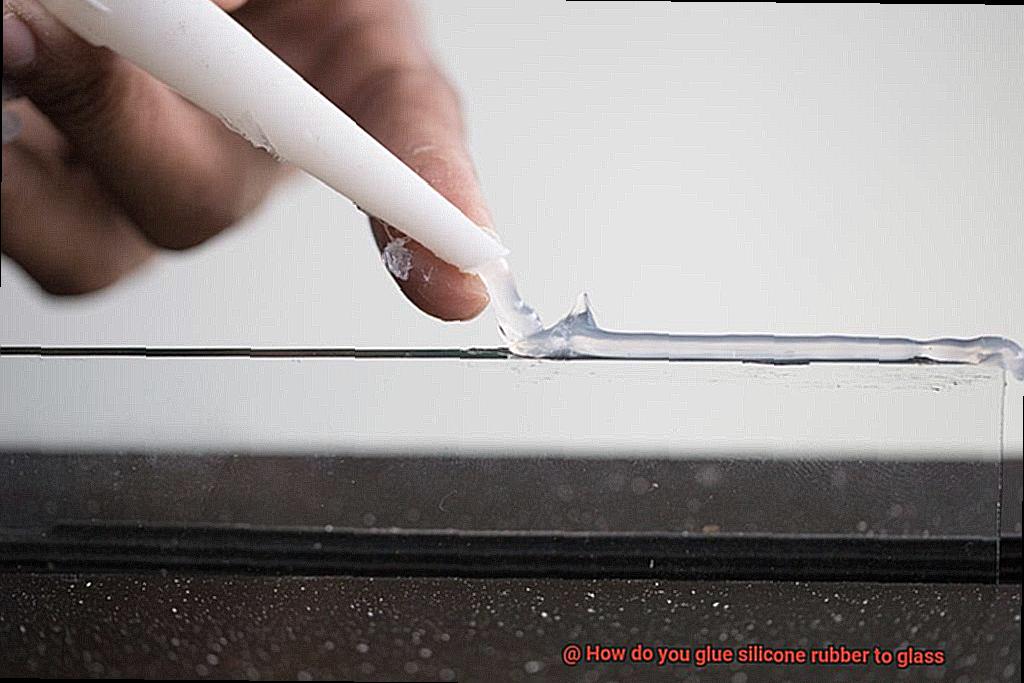
Step 3: The Art of Application – Spreading Butter on Toast
With our trusty caulk gun or syringe in hand, delicately apply a thin layer of silicone adhesive onto either the silicone rubber or glass surface. Spread the adhesive with precision and care, ensuring even distribution for a strong bond.
Step 4: Bonding – The Magical Moment
Gently press the two surfaces together, ensuring complete contact between the adhesive and both materials. Enlist clamps or tape if needed to hold them in place while the magic happens. Allow time for the adhesive to work its wizardry.
Step 5: Patience – The Strength Grows with Time
Patience is a virtue. Give the adhesive ample time to cure and create a bond that will stand the test of time. Follow the manufacturer’s instructions regarding curing time, as it can vary depending on the product. Remember, a strong bond requires patience.
Curing Time and Techniques
Embark on a magical journey as we uncover the secrets of forging an unbreakable bond between silicone rubber and glass. In this quest, we will explore the importance of curing time and techniques in achieving a strong and everlasting connection. With knowledge and determination, we will witness the birth of a powerful alliance that defies the ages.
Chapter 1: The Crucial Role of Curing Time
Unlocking the adhesive’s full potential lies in understanding curing time. Each adhesive has its own unique curing time, making it crucial to follow the manufacturer’s instructions diligently. Remember, patience is key to achieving a robust bond.
Chapter 2: The Dance of Moisture and Silicone
Silicone adhesives rely on moisture to cure, reacting with the moisture present in the air or on the substrates. To ensure proper curing, maintain a relative humidity level of 40-60% throughout the process. Adequate moisture exposure paves the way for a durable seal.
Chapter 3: Temperature Control for Optimal Results
Temperature plays a significant role in curing time. While higher temperatures expedite silicone adhesive curing, it is essential to stay within the manufacturer’s recommended range. Excessive heat weakens bonds, while extremely low temperatures halt curing altogether.
Chapter 4: Applying Pressure for Strength
Enhancing bond strength requires uniform pressure during the curing process. Utilize clamps, weights, or appropriate tools to evenly spread adhesive across surfaces, ensuring a resilient connection.
Chapter 5: The Two-Part Potions
Certain silicone adhesives involve a two-part curing process, necessitating careful mixing of a base and catalyst before application. Adhere strictly to the pot life—the time frame in which the adhesive can be applied—for optimal bonding results.
Stress and Load Considerations
When it comes to the mystical art of gluing silicone rubber to glass, stress and load considerations reign supreme. This enchanting process requires meticulous attention to detail in order to forge a connection that will defy the ages.
First and foremost, one must confront the challenge of thermal expansion and contraction. Behold, for silicone rubber and glass possess different coefficients of thermal expansion, causing them to expand and contract at different rates when faced with temperature changes. This juxtaposition can create a tremendous amount of stress on the adhesive joint, potentially leading to its downfall if not handled with care. Fear not, for there is a solution. One must select an adhesive that possesses the remarkable ability to accommodate the differential thermal expansion between silicone rubber and glass.
But wait, there’s more. The load or force applied to the bonded surfaces is yet another factor that demands our attention. In this grand adventure, the adhesive joint may face tension, compression, shear, or even a combination of these formidable forces. Thus, it is imperative to choose an adhesive that possesses the strength and flexibility necessary to withstand such trials. Ah, the distribution of this load is also a crucial piece of the puzzle, for understanding how it is dispersed across the bond area is key to designing a bond that will stand strong against any adversity.
Surface preparation, my dear friends, is an absolute necessity when seeking a bond of epic proportions. Both the silicone rubber and glass surfaces must be purified with meticulous care, free from any contaminants or residues that may hinder adhesion. Lo and behold. Techniques such as primers or adhesion promoters may be employed to enhance the strength of this bond.
Now, let us not forget the purpose behind this grand endeavor. Understanding the intended use of this bonded assembly is essential in selecting the perfect adhesive for our cause. The forces of chemicals, moisture, UV radiation, or even extreme temperatures may conspire against our noble bond. Thus, we must choose an adhesive that possesses the extraordinary ability to resist these destructive forces and emerge victorious.
vQ_nXbUdAcA” >
Also Read: How to Glue Rubber to Glass? – Glue Things
Conclusion
To sum it up, gluing silicone rubber to glass might seem intimidating at first, but fear not. With the right adhesive and techniques, success is within reach. Silicone rubber boasts a plethora of remarkable qualities – think temperature resistance, chemical resistance, electrical insulation properties, flexibility and elasticity, weathering and UV resistance, and even biocompatibility. It’s truly a versatile material for countless applications.
Now let’s talk about adhesive options. Silicone-based adhesives are tailor-made for bonding silicone rubber to glass, offering unbeatable flexibility, temperature resistance, and durability. If you opt for cyanoacrylate adhesives, make sure they play well with both silicone rubber and glass. And if exceptional bonding capabilities are what you seek, epoxy adhesives won’t disappoint – just double-check compatibility beforehand. For medical devices and electronic components, specialized adhesives like silicone-based pressure-sensitive adhesives (PSAs) are the way to go.
But hold on. Before diving into the gluing process headfirst, proper surface preparation is key. That means giving both surfaces a thorough cleaning to banish any pesky contaminants. And don’t forget to roughen up the glass surface a bit – it’ll amp up the adhesion game.
When it’s time to apply the adhesive, remember this: spread a thin layer evenly on one surface before gently placing the silicone rubber onto the glass surface. Apply some gentle pressure to ensure that sweet contact between the adhesive and both materials.
Patience is virtue when it comes to curing time. Follow those manufacturer’s instructions closely – they’ll guide you through everything from curing time itself to maintaining ideal humidity levels and controlling temperatures during the process.
Oh. And let’s not forget about stress and load considerations. You’ll want an adhesive that can handle differential thermal expansion between silicone rubber and glass while standing strong against forces like tension, compression or shear – maybe even all three.
Armed with these tips, you’re ready to embark on your magical journey of bonding silicone rubber to glass.