Picture yourself strolling barefoot on a sun-drenched beach, feeling the gentle touch of waves on your toes, as you collect an array of delicate seashells. These little treasures from the sea hold a captivating charm, evoking memories of unforgettable vacations, hidden wonders, and the mesmerizing allure of marine life.
But what can we do with these marvelous gifts once we’re back home? Fear not. We have just the solution – the art of gluing seashells. Whether you’re an experienced collector or just dipping your toes into the enchanting world of seashell decor, this guide will equip you with invaluable tips and tricks to ensure your seashell creations withstand the test of time.
Hook:
Did you know that by skillfully adhering and preserving seashells, their natural beauty can be enhanced? This mesmerizing craft allows us to transform these ocean gems into stunning crafts, captivating home decor pieces, and exquisite jewelry. It’s like capturing our beachcombing adventures in tangible creations that become lasting reminders of cherished memories.
Key Points:
- Choosing the Perfect Adhesive: Let’s explore a variety of adhesives, weighing their pros and cons to help you find the ideal glue for your specific seashell project. Different surfaces and shell types may require different adhesives. Get ready for some secret tips on achieving long-lasting bonds that defy time.
- Prepping Like a Pro: Discover crucial steps to ensure your seashells are impeccably cleaned, sanitized, and free from any unwanted debris. We’ll reveal secrets to preserve their natural shine and vibrant colors – setting the stage for breathtaking creations.
- Masterful Techniques: From delicate jewelry-making to intricate home decor projects, we’ll delve into various application techniques required for different endeavors. You’ll gain insights into foolproof practices for positioning, securing, and layering seashells. Prepare to witness designs that are not only visually stunning but also structurally sound.
Gone are the days when those cherished seashells from your beach escapades lay forgotten in jars or drawers. With the art of gluing seashells mastered, you can transform these natural wonders into treasured keepsakes, awe-inspiring decor pieces, and exquisite jewelry that will capture hearts.
Join us as we dive deeper into the captivating world of gluing seashells – unlocking the secrets to
Gather the Necessary Materials
Contents
- 1 Gather the Necessary Materials
- 1.1 Glue: The Foundation of Bonding Brilliance
- 1.2 Disposable Gloves: Shielding Hands, Preserving Perfection
- 1.3 Protective Covering: Crafting Oasis on a Clean Canvas
- 1.4 Selection of Seashells: Diversity Breeds Artistic Brilliance
- 1.5 Support/Base: Elevating Seashells to New Heights
- 1.6 Additional Decorative Elements: Unleashing Creativity’s Flourish
- 2 Clean and Prepare the Seashells
- 3 Choose the Right Adhesive
- 4 Test and Mix the Epoxy Resin
- 5 Apply a Thin Layer of Glue to the Shells
- 6 Hold the Shells Together Until Set
- 7 Use Temporary Supports for Larger or Heavier Shells
- 8 Allow Adhesive to Cure Undisturbed
- 9 Conclusion
The key to creating stunning seashell crafts lies in gathering the necessary materials. In this comprehensive guide, we will explore the importance of acquiring the right tools and provide you with a detailed list of must-have items. Get ready to dive into the world of seashell artistry.
Glue: The Foundation of Bonding Brilliance
To achieve a strong and durable bond between seashells, selecting the right adhesive is paramount. Opt for epoxy resin glue or clear-drying craft glue, as they are renowned for their exceptional ability to bond porous materials like seashells.
Disposable Gloves: Shielding Hands, Preserving Perfection
Shield your hands and maintain the pristine beauty of your shells by donning disposable gloves during the crafting process. These protective gloves not only keep your hands clean but also prevent any oils or dirt from transferring onto the delicate shells.
Protective Covering: Crafting Oasis on a Clean Canvas
Creating a clean and organized workspace is crucial for successful seashell crafting. Lay down a plastic sheet or newspaper to protect your work surface from accidental spills or glue drips, ensuring an unblemished masterpiece.
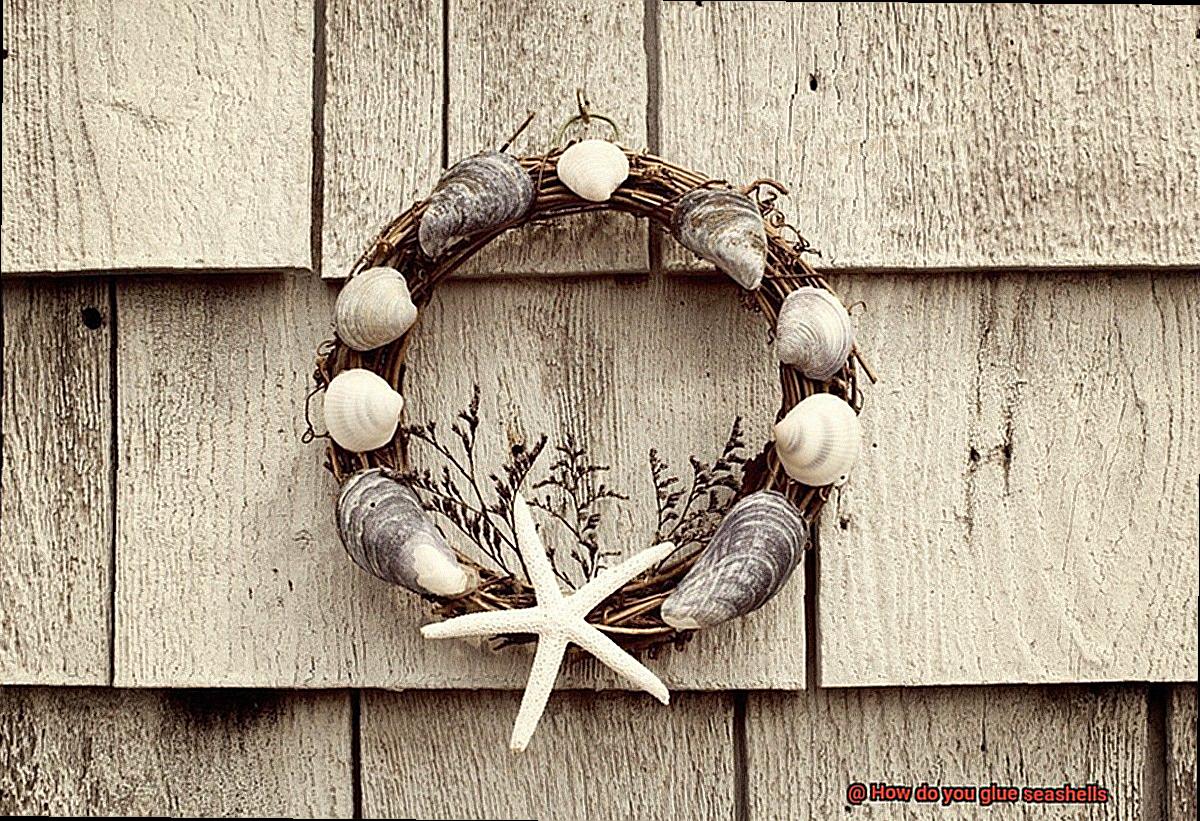
Selection of Seashells: Diversity Breeds Artistic Brilliance
To infuse your creations with visual appeal, curate a captivating collection of seashells. Experiment with different shapes, sizes, and colors to add depth and intrigue to your artwork. Seek shells from beaches or specialized stores to amass a fascinating assortment.
Support/Base: Elevating Seashells to New Heights
Give your glued seashells a sturdy foundation by selecting an appropriate support or base. Choose from options such as plain canvases, wooden boards, picture frames, or even jewelry boxes, depending on your artistic vision and intended use.
Additional Decorative Elements: Unleashing Creativity’s Flourish
Unleash your creativity and take your seashell crafts to the next level by incorporating additional decorative elements. Enhance the overall allure of your project with small beads, pearls, or even a sprinkling of glitter, infusing it with irresistible charm and uniqueness.
Clean and Prepare the Seashells
Immerse yourself in the captivating world of seashell artistry, where the ocean’s treasures are transformed into stunning crafts. But before you embark on this creative journey, it is essential to unlock the secrets of cleaning and preparing seashells for their grand debut. In this comprehensive guide, we will unravel the steps that will ensure your seashells shine with unparalleled brilliance. Let us delve into the enchanting process of bringing these natural wonders to life.
Step 1: Embarking on a Shell Quest
Begin your seashell preparation by gathering a bountiful collection of these exquisite gems from sandy shores. Assemble your treasures and embark on a meticulous inspection, searching for any signs of dirt, debris, or unwelcome inhabitants. Treat live organisms with reverence, delicately returning them to their rightful home within the ocean’s embrace.
Step 2: A Soapy Symphony
Prepare a container with warm water and introduce a gentle symphony of mild dish soap or detergent. Immerse your precious seashells in this soothing mixture, allowing them to luxuriate for approximately 15-20 minutes. This tranquil bath will coax even the most stubborn dirt and grime to relinquish their hold on the shells’ delicate surfaces.
Step 3: The Delicate Dance of Cleansing
Following their tranquil soak, engage in a delicate dance with your shells, armed with a soft-bristled brush or an old toothbrush. Tenderly caress each shell, gently scrubbing away any lingering impurities with graceful strokes. Exercise caution not to exert excessive pressure, cherishing the fragile beauty of the shells. Rinse them meticulously under a cascade of clean water, ensuring no traces of soap remain.
Step 4: Conquering Stubborn Foes
In certain instances, tenacious adversaries such as barnacles or algae may cling stubbornly to the shells. Prepare a vial of equal parts water and white vinegar, creating a potent elixir capable of dissolving even the most formidable foes.
Allow the shells to submerge within this magical concoction for several hours or, for optimal results, overnight. The acidic properties of vinegar will wage war against these encumbrances, rendering them susceptible to swift removal.
Choose the Right Adhesive
Step into a world of enchantment as we unlock the secrets to creating seashell masterpieces with the perfect adhesive. In our previous adventure, we prepared our ocean treasures for their grand debut.
Now, let’s dive even deeper into the mystical realm of adhesive selection. The right adhesive is the key to ensuring your seashells shine with unparalleled brilliance, creating a bond that withstands the test of time. So, let’s embark on this magical journey and explore the world of gluing seashells together.
Epoxy Resin: Unleashing Strength and Beauty
Discover the power of epoxy resin, a popular adhesive option that offers a strong and durable bond. This enchanting elixir creates a clear, glossy finish that enhances the beauty of your seashells. Ideal for crafts and art projects, epoxy resin works wonders when gluing seashells. Remember to mix its two parts properly, following the manufacturer’s instructions for optimal results.
Marine-Grade Epoxy: Defying the Elements
When your projects are destined to encounter water exposure, marine-grade epoxy comes to the rescue. Crafted specifically for marine applications like boat repairs, this adhesive defies moisture and humidity often associated with seashells. Say goodbye to worries about your beautiful creations losing their luster as they brave the elements.
Super Glue: Swift and Convenient
For those seeking speed and convenience, enter cyanoacrylate glue, also known as super glue. This magical adhesive bonds quickly and securely, making it perfect for smaller seashell projects. However, beware of its vulnerability to water exposure; it may not hold up as well as epoxy resin or marine-grade epoxy in wet environments.
Clear Silicone Adhesive: Embrace Flexibility
Some shells and projects require flexibility to accommodate their delicate nature. Fear not, for clear silicone adhesive has arrived. This flexible bonding agent allows shells to expand and move without fear of cracking or damage. It’s a must-have for those seeking a little more flexibility in their seashell artistry.
Test and Mix the Epoxy Resin
In our quest to create impeccable seashell crafts, we now venture into the enchanting world of epoxy resin. Today, we unlock the secrets of testing and mixing this magical adhesive to achieve flawless bonds. So, don your goggles, gather your supplies, and let the adventure begin.
Step 1: Selecting the Perfect Potion
To embark on our resin mixing journey, we must first choose a high-quality epoxy resin specifically formulated for seashell bonding. This ensures that our creations will withstand the test of time and leave us in awe.
Step 2: Unveiling the Manufacturer’s Spellbook
Like a wise sorcerer, we must heed the instructions provided by the epoxy resin manufacturer. Each brand possesses its own unique formula, offering guidance on mixing ratios and application methods. Pay heed to these sacred words for a successful endeavor.
Step 3: A Prelude of Trials
No great alchemical undertaking is complete without a test run. Prepare a small batch of epoxy resin to evaluate its working time and adhesive strength before diving headfirst into your grand seashell project. This allows you to conquer any obstacles that may arise and ensures triumph in your final masterpiece.
Step 4: Measuring with Precision
As we prepare to mix our potion, accuracy becomes paramount. Measure the exact amounts of epoxy resin and hardener as directed by the manufacturer. This precise ratio is the key to forging an unbreakable bond that will withstand the harshest tides.
Step 5: Separation Is Vital
To avoid disastrous consequences, keep your ingredients separate. Utilize distinct measuring cups for both the resin and hardener, preventing premature mingling that can lead to incomplete curing or feeble adhesion. Let us protect our precious seashells from any unintended mishaps.
Step 6: A Symphony of Fusion
Pour the carefully measured resin and hardener into a pristine mixing container, forsaking disposable plastic vessels that may disrupt our magical concoction. Now, armed with a stirring stick or a disposable wooden craft stick, blend these elements together with finesse. Stir gently yet diligently, ensuring every particle surrenders to the dance of fusion.
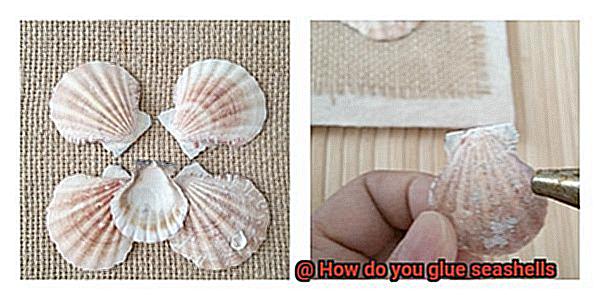
Apply a Thin Layer of Glue to the Shells
In our previous adventures, we delved into the magical realm of epoxy resin, creating flawless bonds that withstand the harshest tides. Today, we shall uncover the secrets of applying a thin layer of glue to our beloved seashells, preserving their beauty for years to come. So gather your supplies and let’s dive right in.
Preparation: Cleanliness is Key
Before embarking on our gluing adventure, it is essential to ensure our seashells are pristine. Gently rinse them with water, removing debris and residue that may hinder the bonding process. Once washed, allow them to dry completely, ready to embrace their new adhesive companion.
Choosing the Perfect Glue:
As skilled sorcerers of seashell crafts, selecting the right glue is crucial for a successful bond. Opt for a clear-drying adhesive that is waterproof and suitable for various materials, including shells. Popular choices like E6000 glue, marine epoxy, or clear silicone adhesive work wonders in this realm.
Applying the Glue: A Brushstroke of Magic
Now let us embark on the delicate process of applying a thin layer of glue:
Prepare a disposable surface such as cardboard or wax paper to place a small amount of glue. This ensures better control and minimizes any potential mess.
Armed with a small brush or toothpick, dip it into the glue and gently spread a thin layer on the backside of your seashell. Remember, less is more. Avoid excessive glue application as it may cause unsightly ooze-out when pressed onto a surface.
Once applied, swiftly position the shell onto the desired surface, ensuring correct placement. Hold it in place for a few seconds, allowing the glue to work its magic and create a strong bond.
Extra Support for Heavyweights:
For larger or heavier shells in need of extra support while drying, fear not. We have a trick up our sleeves. Prop them against another object or secure them with masking tape until the glue is fully cured. This guarantees a sturdy bond that can withstand the test of time.
Tailoring Techniques to Different Shells:
Each shell possesses its own charm and demands a unique approach. Here are some considerations:
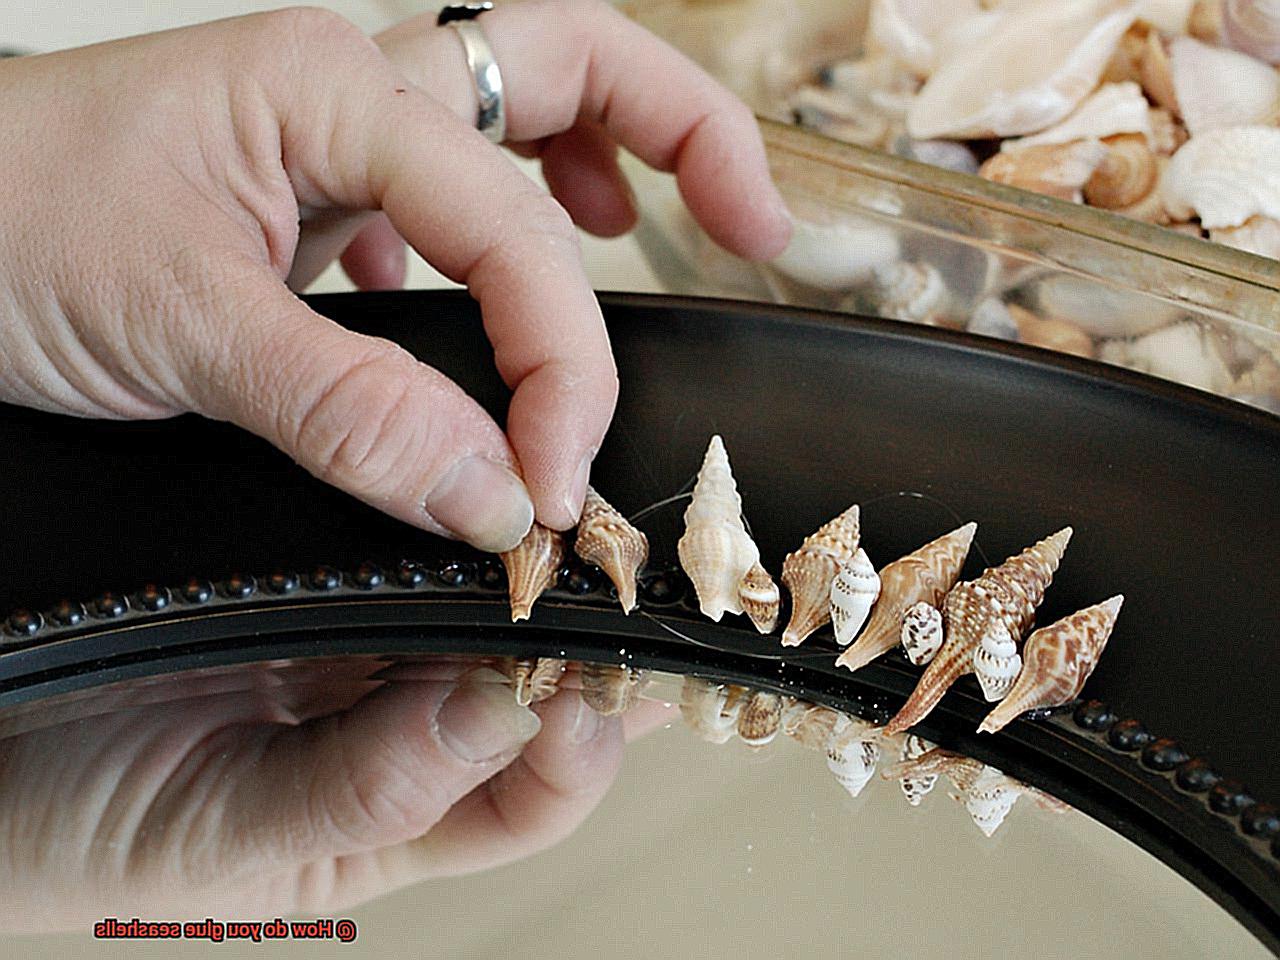
Hold the Shells Together Until Set
The enchanting allure of seashells captivates crafters and collectors alike. Their delicate beauty and intricate patterns make them perfect for creating stunning decorations or unique keepsakes. Now that you’ve learned about selecting the right adhesive and preparing your shells, it’s time to dive into the final step – holding those shells together until they’re fully set.
In this article, we’ll explore expert methods and secrets to ensure your seashells stick together like best buds. Get ready to unlock the fascinating world of seashell bonding.
Method 1: Rubber Bands and Tape – Friends in Need:
When working with larger shells or aiming for specific shapes or designs, rubber bands and tape become your trusted allies. These versatile tools provide support and hold the shells in place while the glue dries. Wrap a rubber band or tape around the shells, securing them together. You can even add a dash of creativity by using colorful rubber bands or decorative tape to elevate your projects.
Method 2: Clamps and Clothespins – The Mighty Grip:
For smaller shells or when you need an extra secure hold, clamps and clothespins are your go-to weapons. Apply glue to the shells, press them firmly together, and use a clamp or clothespin to keep them in place until the adhesive sets. These powerful tools ensure that your shells stay put while you sit back and relax, knowing your project is on its way to perfection.
Method 3: The Power of Your Hands – A Test of Patience:
If you find yourself without rubber bands, tape, clamps, or clothespins (pun intended), fear not. You can still achieve seashell bonding bliss with just your trusty hands. Apply glue to one shell, press it firmly against the other shell, and hold them together using your hands until the adhesive dries. This method may require patience and precision, but with practice, you’ll become a pro at keeping those shells intact.
Remember: Timing is Everything.
Different types of glue have varying drying times. Always consult the instructions on the glue packaging to determine how long it takes for the adhesive to fully set. And while your shells are drying, handle them with utmost care to avoid disrupting their position and potentially causing them to come apart. Patience is key – resist the temptation to check if they’re set every five minutes.
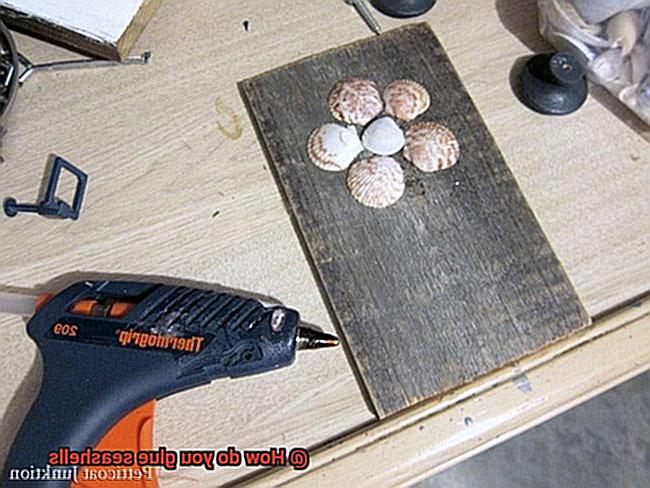
Use Temporary Supports for Larger or Heavier Shells
Immerse yourself in the captivating world of seashell crafts. Whether you’re a seasoned artist or an enthusiastic hobbyist, the allure of gluing seashells together is irresistible.
But when faced with larger or weightier shells that test the limits of your adhesive, despair not. Discover the secret to success by employing temporary supports. In this guide, we will delve into the art of using temporary supports for larger or heavier shells, ensuring your creations withstand the trials of time.
So, prepare to embark on a journey of creative exploration as we unveil invaluable tips and techniques. Let’s dive in and harness the true potential of your seashell masterpieces.
Why Use Temporary Supports?
When dealing with larger or heavier seashells, the importance of utilizing temporary supports cannot be overstated. These ingenious contrivances act as stalwart guardians, preserving the position and integrity of your shells while the glue dries. By adorning your shells with these supportive scaffolds, you guarantee a union that defies gravity and endures through the ages.
Choosing the Right Materials:
In your quest for crafting supremacy, selecting suitable materials for your temporary supports is paramount. Enter toothpicks, popsicle sticks, and small pieces of cardboard – your trusty allies in this endeavor. Toothpicks, with their dexterity and adaptability, are ideal for navigating tight spaces and can be easily contoured to meet each shell’s unique requirements.
For larger shells or when a robust foundation is imperative, popsicle sticks emerge as unwavering pillars of support. Their stability and adjustability make them indispensable companions throughout the bonding process. And if delicate edges threaten to succumb to pressure, small pieces of cardboard swoop in to save the day. Cut them with precision and position them strategically to bolster fragile areas before commencing the gluing ceremony.
Allow Adhesive to Cure Undisturbed
In our previous section, we delved into the enchanting world of seashell crafts and the support systems that elevate our creations to enduring masterpieces. Today, we dive deeper into the glue that binds it all together – adhesive. But here’s the secret sauce – to achieve the mightiest bond possible, we must unleash the power of undisturbed curing. So, grab a cup of seashell-shaped tea and let’s unravel why this step is absolutely crucial for your seashell creations.
Time duration – Don’t cut corners on magic:
Just like a fine wine needs time to age, adhesive demands a specific duration to cure properly. Each adhesive has its own enchanting curing time, so be sure to heed the instructions from the manufacturer. By granting the adhesive ample time to work its spell, you’re ensuring a robust bond that will withstand the sands of time.
Avoiding disturbance – Let it be, let it cure:
Imagine sculpting a sandcastle only to have it crumble before it solidifies. Utter devastation, right? Well, the same principle applies to our glued seashells. Once they’ve been joined together, it is imperative to resist any urge to disturb or jostle them. Even the most delicate movement can disrupt the alchemy of bonding, resulting in feeble adhesion and potential failure.
Temperature and humidity – The Goldilocks effect:
Just as Goldilocks sought the perfect porridge temperature, our adhesive requires an environment with ideal conditions for proper curing. Extreme temperatures or high humidity levels can cast a shadow on the bonding process. So, discover a controlled environment with temperature and humidity levels that are just right for your glued seashells to work their bonding magic undisturbed.
Support and stability – Building on a solid foundation:
Picture trying to balance a tower of seashells on an unstable surface – a recipe for calamity, isn’t it? Providing adequate support and stability during the curing process is paramount. Whether it entails placing your glued seashells on a steady surface or utilizing props to hold them in place, ensure they will not shift or budge accidentally. This way, you’re laying the groundwork for a triumphant and durable bond.
h9UIvqlOzgM” >
Conclusion
When it comes to gluing seashells, there are a few key steps you need to follow.
First and foremost, make sure you have the right adhesive for the job. Epoxy or super glue are both good options, as they provide a strong bond that will withstand the test of time.
Next, prepare your shells by cleaning them thoroughly and removing any dirt or debris. This will ensure that the adhesive sticks properly.
Now, apply a small amount of glue to the back of each shell, using a toothpick or small brush for precision. Press the shell firmly onto the desired surface and hold it in place for a few seconds to allow the glue to set.
Remember, patience is key when working with glue – allow ample drying time before handling your newly adorned item.