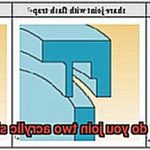
Ever found yourself mesmerized by the seamless dance of a table tennis ball in a professional match? The secret lies not only in the players’ remarkable skills but also in their equipment. The rubber on a table tennis racket plays a pivotal role in enhancing performance and achieving that perfect spin. But how do these experts glue rubber onto their rackets?
Get ready for an exhilarating journey as we uncover the secrets of effectively gluing rubber onto your table tennis racket. Whether you’re a newbie just starting out or a seasoned player aiming to up your game, this guide has got you covered.
But hold on, there’s more than meets the eye. Gluing rubber to your racket requires precision, patience, and some ingenious techniques. In this article, we’ll break down the process step-by-step, revealing the key points you need to know to achieve professional-level results.
Let’s start with the essentials. We’ll discuss the must-have tools and materials, including the perfect glue-rubber combo that guarantees optimal performance. Don’t underestimate the importance of preparing your racket and rubber before applying any adhesive – cleaning and sanding are crucial steps.
Now it’s time to dive into the nitty-gritty of applying the glue. Discover foolproof techniques that ensure a flawless application without any pesky bubbles, ensuring your rubber stays firmly in place. And let’s not forget about the delicate art of cutting the rubber – precision is everything when it comes to customizing your playing style.
To wrap things up, we’ll share expert tips and shortcuts that will make your gluing process even more efficient. We’ll troubleshoot common issues and provide advice on how to maintain your newly glued racket for long-lasting performance.
Whether you crave control, lightning-fast speed, or mind-boggling spin, our comprehensive guide is here to elevate your game. Get ready to unlock the enchanting world of gluing rubber to your table tennis racket and take your skills to new heights.
What You Will Need
Contents
Get ready to take your table tennis game to the next level by gluing rubber onto your racket. In this step-by-step guide, we’ll cover everything you need to know about the tools and materials required for a seamless and professional gluing process.
What You Will Need:
High-quality table tennis glue:
>Look for a specially formulated glue that guarantees durability and flexibility for optimal performance.
Clean and flat surface:
Set up your workspace on a table or countertop, making sure to protect it with a sheet or newspaper to avoid any mess or damage.
Scissors or sharp knife:
Trim the rubber sheet to fit your racket’s blade perfectly, ensuring a precise fit.

Roller or flat object:
Grab a credit card or rubber roller to evenly spread the glue across the racket, ensuring proper adhesion between the rubber and the blade.
Cotton swabs or small brushes:
Clean paper towels or lint-free cloths:
Keep these nearby for wiping away any excess glue, ensuring a clean and professional finish. They will also help you maintain your equipment after the gluing process is complete.
Step-by-Step Guide:
Prepare the racket surface:
- Thoroughly clean the racket surface using mild detergent or rubbing alcohol, ensuring it is free from dirt, dust, or any old glue residue.
- Make sure to dry the surface completely before moving on to the gluing process.
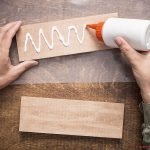
Apply adhesive glue:
- Use a small brush or sponge applicator to apply a thin layer of adhesive glue onto the racket surface.
- Be careful not to apply too much glue, as it may affect the performance of your racket.
Allow glue to become tacky:
- Let the glue sit for a few minutes, following the manufacturer’s specified drying time.
- This step is crucial for creating a strong bond between the rubber and the racket.
Preparing the Racket Surface
Are you ready to unleash your true table tennis potential? Brace yourself, as we delve into the art of preparing the perfect racket surface. Often overlooked, this crucial step ensures flawless rubber adhesion and unlocks optimum performance during gameplay. So, grab your racket and get ready to elevate your game to new heights.
Step 1: Cleanliness is Key
To start off on the right foot, ensure your racket surface is pristine. Bid farewell to dirt, dust, and residue that can sabotage adhesive properties. Armed with a damp cloth or sponge and a touch of mild soap or specialized racket cleaner, embark on a circular motion cleaning spree. Leave no stone unturned as you meticulously wipe away impurities. Remember, thorough drying is essential before advancing to the next stage.
Step 2: Smooth Operator
Now comes the moment to create a texture that fosters the perfect bond. Armed with fine-grit sandpaper, embark on a delicate sanding mission. Employ gentle back-and-forth strokes to achieve a subtly textured surface that enhances rubber-to-racket adherence. Caution is paramount here – avoid excessive pressure or aggressive sanding that could harm your beloved racket.
Step 3: Primed for Success
To fortify the connection between rubber and racket, it’s time to unleash the power of primer. This secret weapon acts as an additional bonding agent, guaranteeing unparalleled strength. Seek out primers crafted exclusively for table tennis rackets and heed the manufacturer’s application instructions like a pro. Coat every nook and cranny evenly with this magical elixir, allowing ample drying time before proceeding.
Step 4: The Glue Game
The exhilarating moment has arrived – it’s time to glue it all together. With an array of glues at your disposal, select one tailored to your preferences and needs. Apply a whisper-thin, uniform layer of glue to both sides of the racket where the rubber will call home. Employ a brush or sponge for seamless glue distribution that spans the entire surface area. Remember, precision is paramount at this stage.
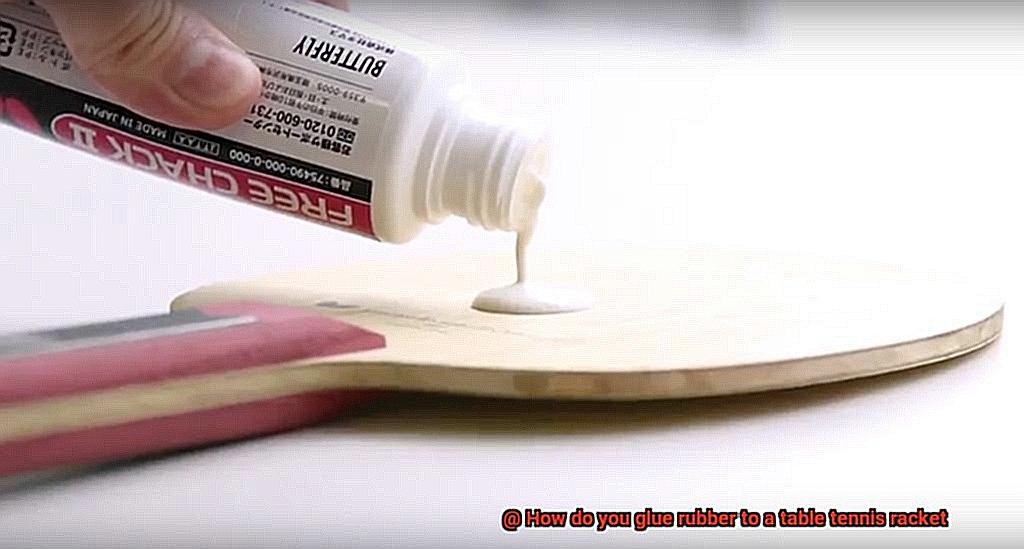
Applying the Glue
In our previous section, we explored the meticulous process of preparing your racket surface for optimal rubber adhesion. Now, let’s delve into the exciting world of applying glue and witness the magic as rubber and racket bond together to unlock your ultimate table tennis potential. Get ready to become a glue guru as we guide you through this vital step with finesse and precision.
The Right Glue for the Job:
Just like a secret ingredient in a recipe, choosing the right glue is crucial. Table tennis glue, designed specifically for bonding rubber to racket surfaces, is your key to success. Invest in a high-quality table tennis glue that suits your needs and guarantees a strong and long-lasting bond.
Cleanliness is Key:
Before we start the gluing process, cleanliness becomes our mantra. Prepare both the rubber and racket surfaces by thoroughly cleaning them with warm water, mild soap, and a non-abrasive sponge or cloth. Remove any dirt, dust, or residue to create an immaculate bonding surface.
Applying the Glue:
Now, let’s get down to business. With a brush or sponge applicator in hand, apply a thin and even layer of glue on both the rubber and racket surfaces. Remember, less is more – we want a smooth layer of glue, not a gooey mess that affects performance.
The Tacky Waiting Game:
Patience is a virtue when it comes to glue application. Allow the glue to become tacky before proceeding. This tackiness indicates that the glue is ready for bonding – a crucial step that ensures a strong connection between the rubber and racket. Take a deep breath and resist the temptation to rush this vital stage; it’s worth the wait.
Aligning and Bonding:
Like finding your table tennis soulmate, aligning the rubber with the racket surface is crucial. Ensure the rubber is centered correctly before pressing down firmly and evenly across the entire surface. For maximum contact and to eliminate any air bubbles, consider using a roller or rolling pin. This step guarantees a uniform bond between the two materials.
Aligning the Rubber Sheet
Today, we embark on a journey to unleash your true potential by mastering the art of aligning the rubber sheet on your table tennis racket. This seemingly simple step holds the power to create a harmonious connection between rubber and blade, propelling your game to new heights. So, let’s dive in and discover the secrets to achieving finesse and precision in aligning your rubber sheet.
Gather Your Materials:

Prepare yourself for success by gathering the necessary materials: a pristine table tennis racket, a fresh rubber sheet, masking tape, and clean hands or gloves. Remember, cleanliness is the cornerstone of greatness.
Positioning Perfection:
With utmost care, position the rubber sheet over the racket’s blade, ensuring complete coverage without overlap or gaps. Pay attention to the orientation of the rubber, as different sides offer varying properties to suit your playing style.
Temporary Securement:
Harness the power of masking tape to temporarily secure the rubber sheet in place. Begin by gently attaching a piece of tape on one side of the racket, lightly pressing it onto the rubber. Stretch the tape across to the opposite side, creating a firm hold without excessive tension.
Immaculate Alignment:
Examine the alignment of the rubber sheet both horizontally and vertically on the racket blade. Fine-tune perfection by delicately shifting the rubber with your fingertips or reapplying tape if necessary.
Permanently Bonded:
Now comes the moment of truth: permanent attachment. Begin by removing one strip of masking tape at a time, starting from one side and peeling it off with slow and fluid motions. As each strip is released, exert firm pressure on the rubber for flawless adhesion.
Unyielding Pressure:
To solidify an unbreakable union between rubber and blade, employ the power of a roller or a flat object. Apply even pressure across the entire surface of the rubber sheet, ensuring consistent performance during every game.
Embrace Patience:
Grant the glued rubber the gift of time to set and dry. While specific drying times may vary, it is generally recommended to wait approximately 24 hours. During this period, refrain from using the racket, allowing the adhesive to cure and solidify its hold.
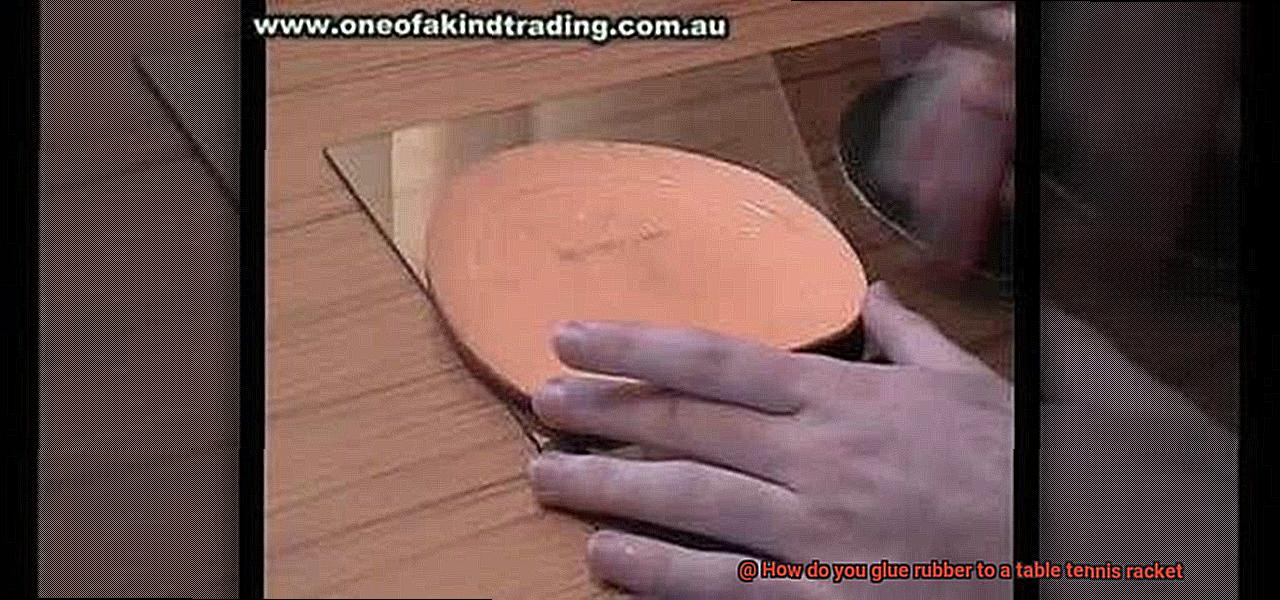
Pressing Down the Rubber Sheet
In our quest to unlock your true potential on the court, we have arrived at a pivotal moment – pressing down the rubber sheet onto your table tennis racket. This step is like the final stroke of a masterpiece, ensuring a harmonious connection between the rubber and the blade. So grab your racket, gather around, and let’s dive into the captivating process of pressing down that rubber sheet.
Step 1: Prepping for Perfection
Before we embark on this thrilling journey, let’s prepare our playing canvas. Wipe away any dust or debris from both the rubber sheet and the blade using a clean cloth or sponge. We want a clean, solid foundation for our rubber to adhere to.
Step 2: Align with Precision
Ah, alignment – the secret ingredient to success in so many aspects of life. Take a moment to carefully align the rubber sheet with the blade. No gaps, no overlaps – just a flawless fit. Remember, patience is key here; take your time to achieve immaculate alignment.
Step 3: The Gentle Touch
Now that we’ve achieved alignment nirvana, it’s time to press down that rubber sheet onto the blade. But hold on, my friends, we must tread carefully. Use a roller or a specialized tool designed for this purpose. Apply even and gentle pressure as you roll from one end of the racket to the other. We want a bond that is secure and long-lasting, not a battlefield of bubbles and wrinkles.
Step 4: Pay Attention to the Edges
Ah, the edges – where precision meets vulnerability. Take extra care with this delicate area as it is prone to lifting or peeling during intense gameplay. Assert your dominance by using your nimble fingers or a small brush to press down and smooth out any rebellious areas that may not have adhered properly. Show those edges who’s the boss.
Step 5: A Moment to Settle
After this exhilarating pressing process, we must grant our rubber sheet a few minutes of well-deserved rest. Let it bask in the glory of its newly formed bond, allowing the adhesive to cure and solidify the union between rubber and blade. Patience, my friends, patience.
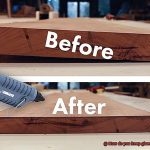
Letting the Glue Dry
Are you ready to unlock the true potential of your game? Prepare yourself, because today we are delving into the captivating world of letting the glue dry when attaching rubber to your beloved table tennis racket. Brace yourself, for this could very well be the secret ingredient that has eluded you in your quest for table tennis supremacy.
Now, let’s dive headfirst into this enthralling topic. When it comes to gluing rubber onto your racket, the glue plays the role of a superhero adhesive, holding everything together with unwavering strength. It is this bond that ensures a perfect fit and elevates your game to unimaginable heights. But here’s the kicker – you can’t rush it. You must allow that glue to dry completely before stepping onto the battleground.
I know what you’re thinking – why does this drying process hold such immense importance? Fear not, my fellow ping pong virtuosos, for I shall elucidate:
- Unyielding Bond: By allowing the glue to dry thoroughly, you forge an unbreakable connection between the rubber and the racket surface. Say farewell to those mortifying moments of your rubber peeling off during intense gameplay. Bid adieu to lackluster performance and potential damage to your cherished racket.
- Timing is Paramount: Patience is a virtue, my friends. Different types of glue and varying environmental conditions can influence drying times. Hence, it is imperative to diligently follow the instructions provided by the glue manufacturer. Remember, shortcuts lead nowhere; greatness is achieved through patience and perseverance.
- The Quest for Perfection: A smooth playing surface sets the stage for a seamless game. As you await the drying process, carefully place your racket on a pristine, level area devoid of any dust or debris. This meticulous attention ensures a flawlessly secure attachment of the rubber.
Hands Off. Beware of the urge to fiddle and fuss. Once you have applied the glue, refrain from excessive manipulation of the rubber or racket. Any unnecessary movement has the potential to disrupt the bonding process and undermine the adhesive’s strength. Embrace serenity and allow the glue to weave its magic.
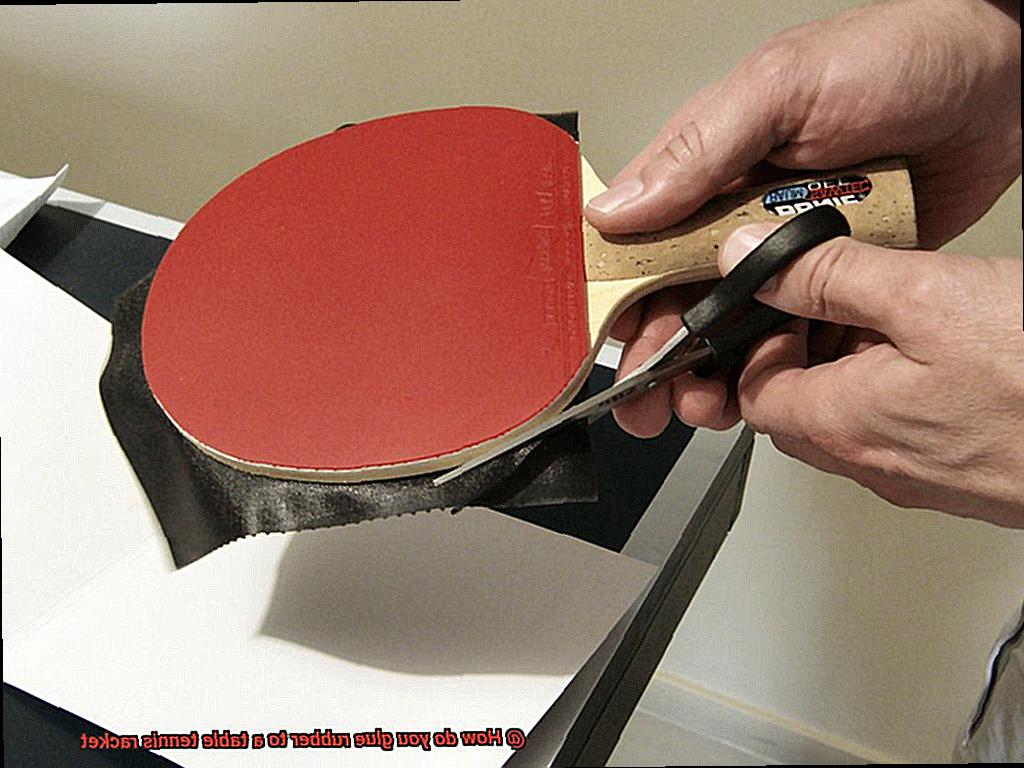
Trimming Off Excess Rubber
Prepare to enter the world of trimming off excess rubber from your racket, a vital step in achieving peak performance. Grab your sharp knife or specialized scissors and embark on this transformative journey.
Before we delve into the details, let’s understand why trimming off excess rubber is crucial. Imagine being in the midst of an intense match when suddenly, your control falters. The culprit? Excess rubber throwing off your grip and control. Fear not, for I will guide you towards that flawless playing surface.
First, arm yourself with the proper tools – a sharp knife or specialized scissors designed for cutting table tennis rubbers. Safety is of utmost importance, so exercise caution to preserve your cherished racket and avoid any personal injuries.
Now, let’s get down to business. Thoroughly examine the edges of your rubber. Seek out any uneven or loose areas craving a trim. Before commencing, ensure your racket is stable and firmly grasped, ready for the trimming extravaganza.
With precision and finesse, start by removing large sections of excess rubber along the edges. Take your time, employing small, deliberate cuts. Remember, our objective is to eliminate excessive material without compromising the playing surface.
Once you have conquered the larger sections, conduct another meticulous inspection of the edges. We aim for immaculate perfection. Should you find remnants of excess rubber, fear not – bid them farewell with controlled precision cuts. Patience becomes your ally as you strive for a clean and seamless edge that showcases your racket.
Once the perfect trim is achieved, caress those edges gently with your fingers. Smoothness is paramount, ensuring no rough or jagged areas disrupt your rhythm on the table.
But wait. Before you unleash your inner Edward Scissorhands on your rubber, let me impart a nugget of wisdom. Excessive trimming can abbreviate the lifespan of your rubber. Thus, my friend, trim only what is necessary for optimal performance.
Checking for Loose Edges or Areas that Need Re-Gluing
In our ongoing quest to perfect our game, we’ve delved into the world of trimming excess rubber and achieved a flawless grip on our rackets. But wait, there’s more. Today, we’ll be exploring another crucial step in the gluing process – checking for loose edges or areas that need re-gluing. So grab your rackets, let’s dive in and become experts in ensuring a rock-solid bond.
Inspecting for Loose Edges or Areas:
Before we jump into re-gluing, it’s important to carefully inspect the rubber surface on your racket. Look out for any signs of peeling, lifting, or separation between the rubber and the blade. These issues can crop up due to wear and tear or improper gluing techniques.
Gently Peeling Back:
If you spot any loose edges or areas, don’t panic. Take a deep breath and summon your gentle touch. The first step is to delicately peel back the affected section of rubber without causing any further damage. Slowly and methodically, reveal the underlying surface with precision.
Removing Old Glue or Residue:
Underneath that peeled-back rubber section lies remnants of old glue or residue, like ghosts from past battles. It’s crucial to exorcise them completely before re-gluing to ensure a secure attachment. Equip yourself with a trusty rubber cleaner or a mild solvent specifically designed for table tennis rubbers. Apply a small amount to a clean cloth and embark on a gentle cleansing ritual. With each stroke, let the traces of glue vanish into oblivion – be cautious not to disturb the delicate balance of the rubber.
Applying Fresh Glue:
With a clean slate before you, it’s time to embark on a fresh start. Arm yourself with a high-quality table tennis glue that harmonizes with your rubber and blade materials. Channel your inner artist as you wield a brush or sponge applicator, laying down a thin, even layer on both surfaces. The glue becomes the invisible thread that binds the rubber and blade in perfect harmony.
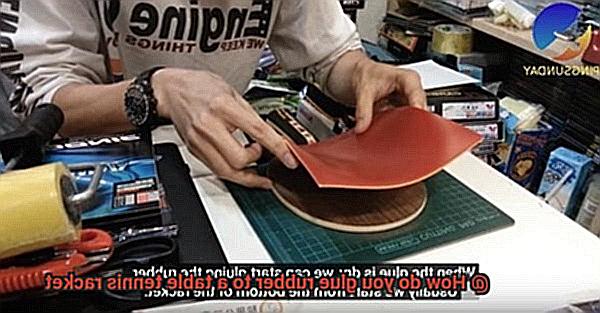
bYBOo8vOSVw” >
Conclusion
When it comes to gluing rubber to a table tennis racket, there are a few key steps you need to follow. First and foremost, make sure you have the right adhesive for the job. A high-quality rubber glue specifically designed for table tennis rackets is essential.
Begin by cleaning the surface of your racket thoroughly. Use a mild detergent and warm water to remove any dirt or debris that may be present. Once clean, dry the surface completely before moving on to the next step.
Next, apply a thin layer of adhesive to both the rubber and the blade of your racket. Be careful not to use too much glue, as this can result in an uneven playing surface. Spread the adhesive evenly using a small brush or sponge.
After applying the glue, carefully align the rubber with the blade of your racket. Take your time during this step to ensure proper placement and avoid any air bubbles or wrinkles in the rubber.
Once aligned, firmly press down on the rubber, starting from the center and working your way outwards towards the edges. This will help secure it in place and ensure a smooth playing surface.
Allow sufficient drying time for the adhesive as per manufacturer’s instructions. This is crucial for achieving a strong bond between the rubber and racket.
Finally, trim any excess rubber around the edges of your racket using a sharp knife or scissors. Be cautious not to damage the blade while doing so.
In conclusion, gluing rubber to a table tennis racket requires attention to detail and precision.