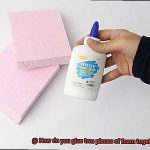
Picture this: a shattered pottery piece, once beloved and now broken, lying before you. It’s a heartbreaking sight, but fear not. With the right tools and techniques, you can bring back its former glory. Whether it’s a treasured family heirloom or a stunning art piece, gluing pottery requires finesse and know-how.
In this all-inclusive guide, we’ll delve into the art of gluing pottery back together. We’ll spill the secrets to success in a way that keeps you engaged and informed. Our mission? To preserve the integrity and aesthetic appeal of your precious piece while guiding you through the necessary materials and techniques for seamless repairs.
Get ready to witness your pottery shine with renewed beauty.
How do you glue pottery back together
Contents
- 1 How do you glue pottery back together
- 2 Gathering Necessary Materials
- 3 Cleaning the Broken Pottery
- 4 Applying Adhesive to the Broken Edges
- 5 Aligning and Gently Pressing the Pieces Together
- 6 Securing with Clamps or Rubber Bands
- 7 Allowing Adhesive to Set
- 8 Inspecting and Filling Any Gaps or Rough Edges
- 9 Conclusion
Materials Needed:
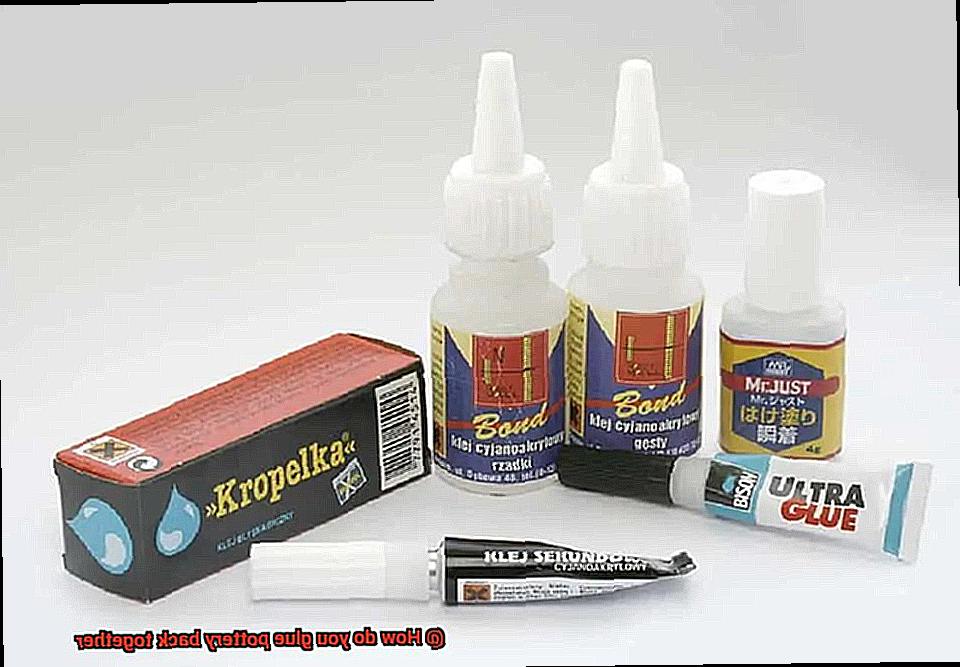
- Cyanoacrylate Glue (Super Glue): Choose a top-notch glue specially designed for bonding pottery. Look for one that dries clear, is waterproof, and can handle heat. That way, your repaired masterpiece will withstand everyday use and maybe even gentle washing.
- Tweezers: Think of these as your delicate-handling superheroes. Fine-tipped tweezers will save the day by allowing precise placement of those fragile shards without leaving fingerprints or accidentally causing more damage.
- Sandpaper or Emery Board: Smooth sailing ahead. Use fine-grit sandpaper or an emery board to buff away any rough edges or excess dried glue after the repair process. This step ensures a flawless finish that seamlessly blends in.
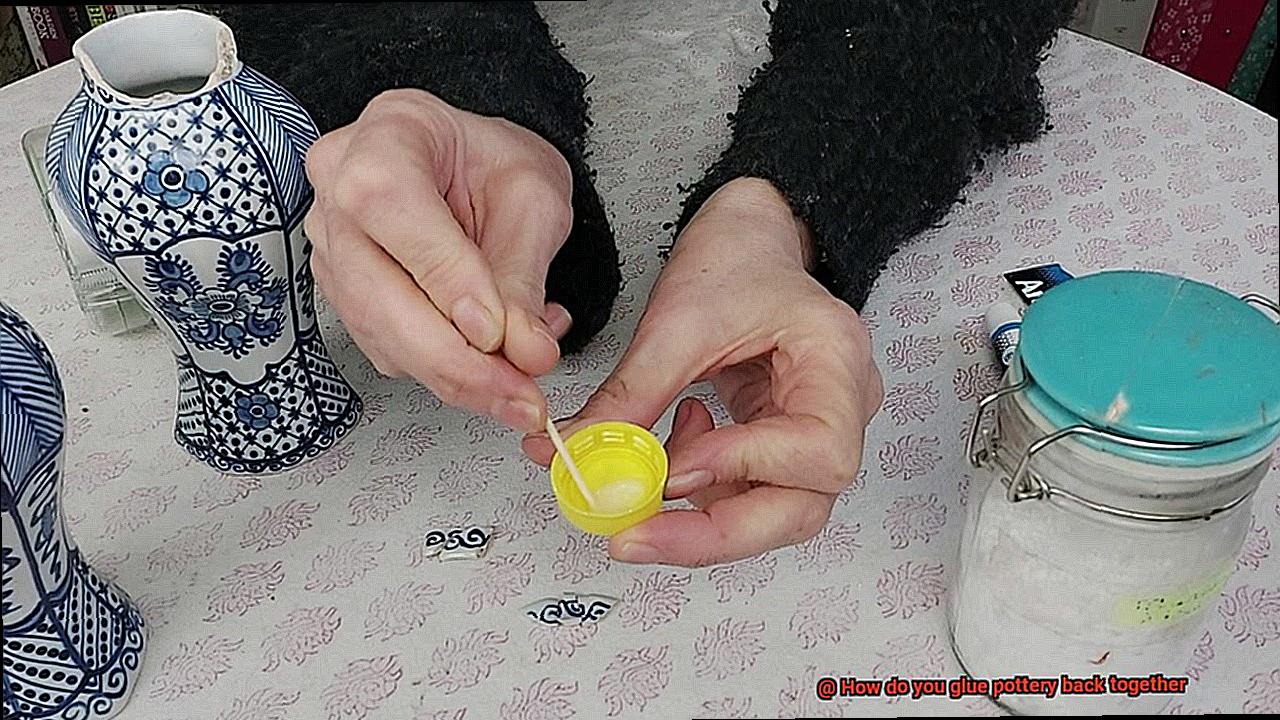
- Toothpicks or Cotton Swabs: These trusty sidekicks help apply glue with accuracy—no messy mishaps here. Control the amount applied and achieve an even bond by using toothpicks or cotton swabs during your restoration adventure.
Techniques for Successful Repairs:
- Preparation: Imagine yourself as Sherlock Holmes solving a three-dimensional puzzle. Gather all the broken pieces with care, avoiding further damage. Lay them out on a clean, flat surface and inspect each one meticulously. It’s time to piece together the mystery.
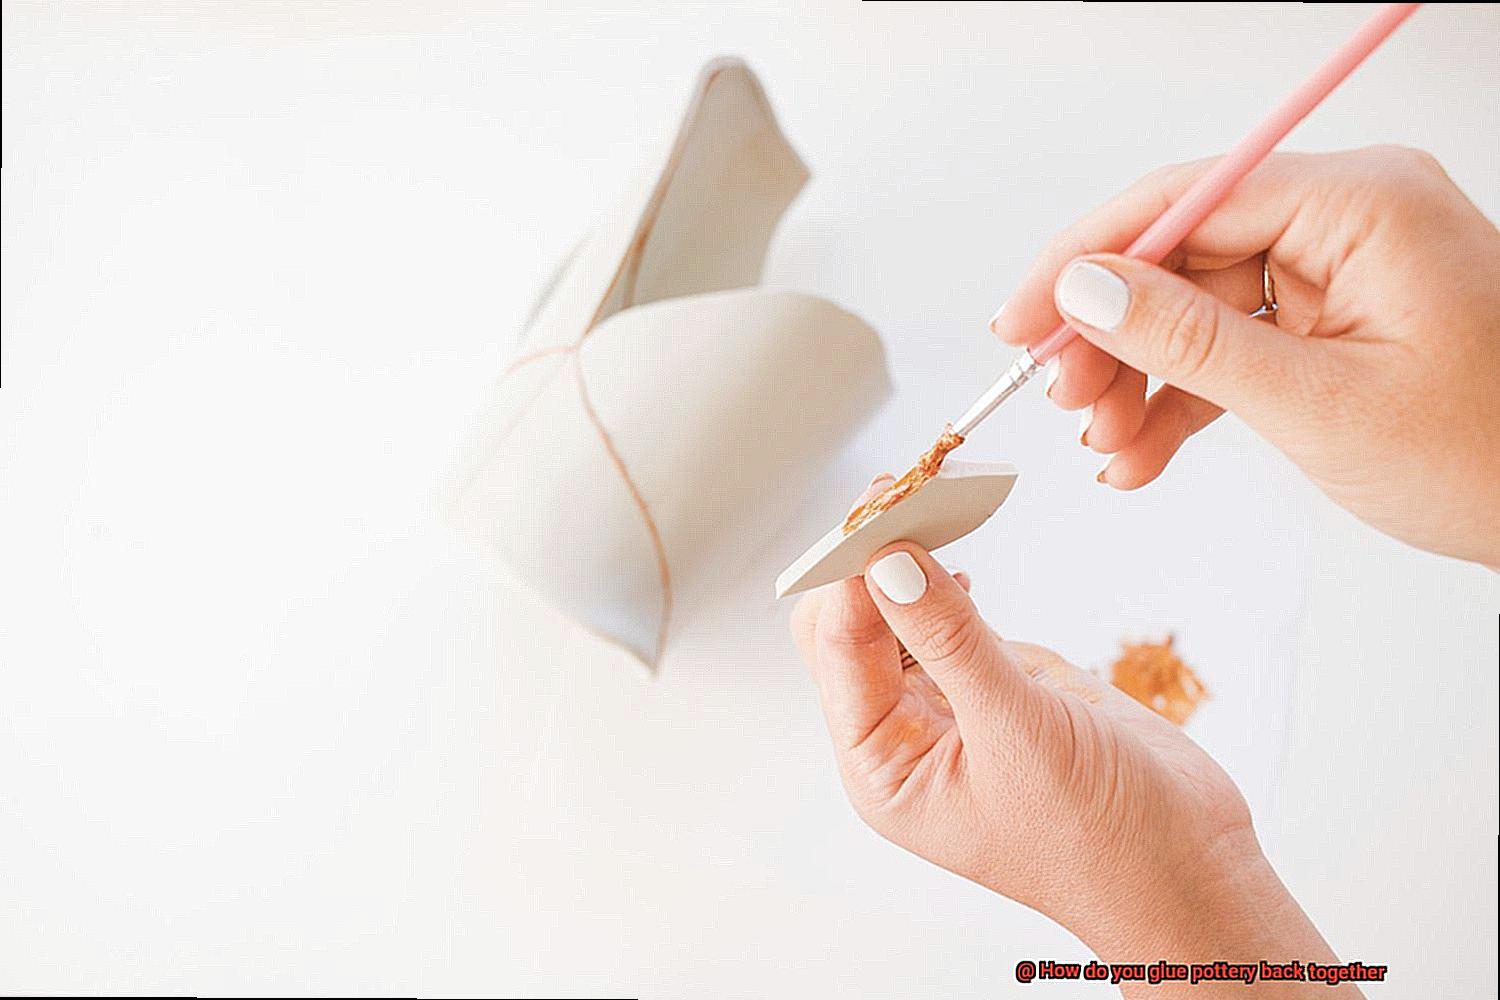
- Gluing Process: Armed with your trusty toothpick or cotton swab, apply a small amount of cyanoacrylate glue to one of the broken surfaces. Ensure even distribution before gently pressing the pieces together, aligning them perfectly. Voila. You’re on your way to pottery restoration greatness.
Gathering Necessary Materials
Pottery, with its timeless allure and storied past, holds a special place in our hearts. But what happens when a cherished piece shatters into fragments? Fear not, for there is hope. With the right materials and expert guidance, you can restore your broken pottery to its former glory. In this guide, we will walk you through the art of gathering necessary materials for the enchanting process of gluing pottery back together.
Gathering the Materials:
Embarking on this journey of restoration requires a few essential materials:
- Pottery Glue: Seek out adhesives specifically formulated for ceramics, such as epoxy or cyanoacrylate-based glues. These marvels of bonding offer strength and endurance, capable of withstanding the stress and heat that pottery may encounter.
- Disposable Gloves: Shield your hands from harmful adhesives and maintain cleanliness throughout the delicate repair process.
- Cleaning Supplies: Prepare for a seamless bond by meticulously cleansing the broken pieces. Employ mild soap, warm water, and a soft-bristled brush to remove any impurities.
- Sandpaper: Sculpt smoothness from rough edges and uneven surfaces on the fractured pottery with fine-grit sandpaper. Achieve an impeccable fit between fragments.
- Clamps or Rubber Bands: Safeguard the glued pottery pieces during drying by utilizing clamps or rubber bands. These gentle yet firm tools ensure a secure bond without compromising aesthetics.
- Toothpicks or Small Brushes: Master precision with toothpicks or small brushes when applying glue. These instruments enable the creation of thin, even layers of adhesive across pottery surfaces, guaranteeing an immaculate union.
- Protective Work Surface: Create a sanctuary for your creative endeavor by shielding your workspace from potential spills or damage. Choose between plastic sheets, newspapers, or an old towel to lay the foundation for your artistic restoration.
The Gluing Process:
Now that you possess the necessary materials, let us embark on the enchanting gluing process:
- Clean: Immerse the broken pottery pieces in a soothing bath of warm soapy water, banishing any dirt or debris that may hinder the bonding process. Thoroughly dry the fragments before proceeding.
- Apply Glue: With the finesse of a master artisan, brush a whisper-thin layer of glue onto one of the broken edges. Pay heed to gaps or uneven surfaces, gently sanding them down if necessary to achieve a seamless fit.
- Align and Hold: With tender precision, align the broken edges, fusing them together with a gentle touch. Maintain pressure on the pieces for several minutes to facilitate initial bonding.
- Secure: Embrace the power of clamps or rubber bands to fortify the bond, delicately exerting pressure and preserving contact between the fractured edges.
Cleaning the Broken Pottery
Restoring shattered pottery requires careful and thorough cleaning before attempting to glue the pieces back together. In this guide, we will walk you through the essential steps of cleaning broken pottery, ensuring a successful repair job that brings your cherished pieces back to life.
Step 1: Gently Brush Away Dust
Start by using a soft-bristled brush to gently remove any loose dirt or dust from the broken pottery. Take your time to ensure that every nook and cranny is free from debris, avoiding rough brushes that may cause further damage.
Step 2: Soaking for Stubborn Stains
For stubborn stains or residue, soak the pottery in warm water for a few minutes. This gentle bath helps to loosen pesky marks. However, exercise caution with delicate or antique pottery, as excessive moisture can cause further harm.
Step 3: Mild Detergent Magic
Prepare a mild detergent or dish soap solution mixed with warm water to tackle tougher stains or dried-on residue. Dip a soft cloth or sponge into the solution and gently wipe away the affected areas. Thoroughly rinse off any soap residue after cleaning.
Step 4: Say No to Abrasives
Avoid using abrasive cleaners, harsh chemicals, or scouring pads on your precious pottery. These can scratch or damage the surface, leaving permanent marks. Opt for gentle cleaning methods to ensure the pottery’s preservation.
Step 5: Adhesive Residue Remedy
In some cases, old adhesive residue may be present on the pottery from previous repairs. Use a solvent specifically designed for removing adhesive residues. Apply a small amount of the solvent to a cotton swab and delicately dab it on the affected area. Allow it to work for a few minutes before gently wiping it away with a clean cloth.
Step 6: Patience is a Virtue
After completing the cleaning process, exercise patience and allow the broken pottery to air dry completely. Moisture hinders successful gluing, so ensure every surface is free from water traces. Remember, haste makes waste.
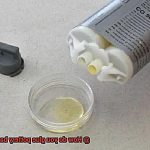
Applying Adhesive to the Broken Edges
Today, we embark on a journey of delicate craftsmanship as we explore the intricacies of applying adhesive to the broken edges of your cherished shattered pottery. Much like an archaeologist piecing together fragments of history, we will guide you through this process step by step. So gather your tools, don your crafting hat, and let’s begin.
Step 1: Choose the Perfect Adhesive:
To ensure a strong and durable bond, it is crucial to select the right adhesive for bonding ceramics. Epoxy and cyanoacrylate (super glue) are the go-to choices due to their exceptional strength and resistance to moisture, heat, and chemicals. Remember, not all glues are created equal – choose wisely.
Step 2: Cleanliness is Paramount:
Prepare those broken edges for their grand reunion by meticulously cleaning them. Just as an archaeologist carefully cleans artifacts, remove any dirt, dust, or oils from the surfaces. A gentle detergent or rubbing alcohol will work wonders here. Ensure everything is completely dry before moving on.
Step 3: Fit the Pieces Together:
The moment of truth has arrived. With bated breath, align the broken pieces with utmost care. Temporary assistance from tape or rubber bands can be invaluable in holding everything in place while you work your magic.
Step 4: Brush on a Thin Layer of Adhesive:
Now it’s time to unleash your inner Picasso with the adhesive. Utilize a toothpick or a small brush to artfully apply a thin layer along one of the broken edges. Remember, less is more – excess glue can mar the appearance and compromise the bond. Apply multiple thin layers if necessary.
Step 5: Press Gently, Without Distress:
With deft hands, gently press the broken edges together to achieve a firm connection. Exercise caution not to shift or disturb the pieces, as this could weaken the bond. Take a moment to admire your handiwork – you’re one step closer to resurrecting your beloved pottery.
Step 6: Tidy Up the Masterpiece:
It’s time for some spring cleaning. Inspect the joined edges for any excess adhesive that may have squeezed out. Armed with a cotton swab or clean cloth dampened with acetone or rubbing alcohol, meticulously remove any unwanted glue before it sets.
Step 7: Patience is the Virtue of the Skilled:
Lastly, grant your newly glued pottery the gift of time. Different adhesives have varying drying times, so consult the manufacturer’s instructions. In general, it is best to let it rest undisturbed for at least 24 hours. Resist the urge to test its strength prematurely – patience yields remarkable results.
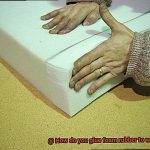
Aligning and Gently Pressing the Pieces Together
Aligning and Gently Pressing the Pieces Together
Restoring your shattered pottery is a delicate process that requires precision and patience. Once you’ve identified the broken edges and applied the adhesive, it’s time to embark on the crucial step of aligning and gently pressing the pieces together. With a steady hand and a keen eye, you can bring your beloved pottery back to life.
First, carefully examine the edges of the broken pottery, studying them like a detective solving a puzzle. Take note of how they fit together, making mental connections or lightly marking with a pencil to ensure perfect alignment. Every piece has its place, waiting to be reunited.
Next, apply a thin layer of adhesive to both edges of the broken pottery. Choose a glue specifically designed for pottery repair, such as ceramic or epoxy glue. These specialized glues possess the strength to withstand temperature changes and moisture, ensuring a lasting bond.
Now comes the moment of truth: gently press the pieces together. Like a delicate dance, coax them into alignment with a touch as light as a feather. Avoid applying too much pressure, for excess glue may seep out, marring the beauty of your restoration. The goal is perfection, an invisible seam that belies the damage once done.
Hold firm for a few minutes, allowing the adhesive to set. If necessary, enlist the aid of clamps or rubber bands to keep the pottery in place during this crucial bonding time. Allow the magic of chemistry to work its wonders, bringing together what was once broken.
Time is now your ally; let the glued pottery dry for at least 24 hours before further handling. This grace period allows the adhesive to fully cure, creating an unbreakable bond between the pieces. Patience pays dividends in strength.
Inspect your handiwork with discerning eyes. Are there any visible gaps or rough edges? If so, take up your tools once more: fine-grit sandpaper or a nail file. With gentle strokes, smooth out imperfections, bringing the repaired area to seamless perfection.
Remember, while glue can mend pottery, it may not restore its original strength. Treat your restored piece with care, avoiding unnecessary stress or pressure. Handle it as you would a delicate treasure, for it is a testament to your skill and dedication.
Securing with Clamps or Rubber Bands
With the right tools and techniques, you can restore that broken beauty to its former glory. In this article, we’ll explore the art of securing broken pottery using clamps or rubber bands. So, let’s dive in and get ready to revive those shattered masterpieces.
Choose the Perfect Tools:
Just like a handyman needs the right tools for the job, repairing pottery requires selecting the appropriate clamps or rubber bands. Consider the size and weight of the broken pieces when choosing your tools. Miniature clamps or thin rubber bands work well for smaller fragments, while larger and heavier sections may require more robust options.
Prep Work Is Key:
Before applying any adhesive or securing the fragments, ensure that the broken edges are clean and dry. Gently remove any dust or debris using a soft brush or cloth. Make sure there are no oils or residues on the surfaces that could hinder the bonding process.
Adhesive Application:
Now comes the sticky part. Apply a specialized adhesive designed for ceramics or pottery along the broken edges. Epoxy resin or cyanoacrylate glue (aka super glue) are popular choices. Follow the instructions provided by the manufacturer for proper application and drying time.
Embrace the Power of Clamps:
Once you’ve applied the adhesive, gently align the broken edges and press them firmly together. Use clamps to hold the pieces in place until the adhesive sets. Be careful not to overdo it with the clamping pressure, as that could cause additional damage. Adjust the clamps to evenly distribute pressure across the broken areas.
Rubber Bands to the Rescue:
If clamps aren’t suitable or available, don’t despair—rubber bands can save the day. Wrap them around the pottery, ensuring they’re tight enough to hold the pieces firmly but not so tight that they cause deformation or cracking. Multiple rubber bands spaced evenly along the broken edges provide ample support and prevent any shifting of the fragments.
Patience Is a Virtue:
After securing the pottery pieces with clamps or rubber bands, give them ample time to dry and cure. Follow the adhesive manufacturer’s instructions for the recommended duration. Avoid moving or disturbing the pottery during this period to ensure a successful bond.
Allowing Adhesive to Set
Today, we embark on a journey into the world of allowing adhesive to set when gluing pottery back together. This seemingly simple yet crucial step can determine the durability and aesthetics of your beloved ceramics. So, let’s explore why it’s important to exercise patience and allow the adhesive to properly set for optimal results.
Strong and Durable Bond:
Allowing the adhesive to set properly ensures a robust bond between the broken pottery pieces. This is vital for both functional and aesthetic reasons, as a weak bond can lead to further damage and an unsightly appearance.
Time Varies:
Different adhesives require varying amounts of time to set. Some may only take a few hours, while others need several days to fully cure. Always read and follow the instructions provided by the adhesive manufacturer for best results.
Gentle Pressure:
During the setting process, apply gentle pressure to the glued pottery pieces. Use clamps or hold them firmly with your hands. But be cautious not to exert excessive pressure, as this can cause adhesive squeeze-out and compromise the bond.
Secure Placement:
To ensure proper bonding, securely hold the glued pottery in place during the setting period. Use a stable surface or additional support like wedges or props if needed. This prevents any accidental movement that could disrupt the bonding process.
Undisturbed Setting:
Once you’ve positioned the glued pottery, resist the temptation to disturb it during the setting period. Premature handling or movement can weaken the adhesive bond and compromise its effectiveness.
Additional Curing Time:
Depending on the complexity of the repair and adhesive type, additional curing time might be necessary beyond the initial setting period. This allows for a stronger bond, ensuring your repaired pottery is fully functional and safe to use.
Thorough Inspection:
After the adhesive has fully set and cured, carefully inspect the glued pottery before handling or using it. Look for any signs of weak bonding or areas that may require additional reinforcement.
Protective Sealant:
For added strength and protection, consider applying a clear protective sealant over the glued area. This helps prevent further damage and ensures the longevity of your repaired pottery.
Proper Care and Maintenance:
Always follow the manufacturer’s recommendations for cleaning and maintaining your glued pottery. By providing proper care and handling, you can preserve the repair and keep your pottery in excellent condition for years to come.
Inspecting and Filling Any Gaps or Rough Edges
Inspecting and filling any gaps or rough edges is a crucial step in the process of repairing broken pottery. Before reaching for that adhesive, it is essential to thoroughly examine the broken pieces to identify any missing fragments or areas that require extra attention. Handle the pottery with care to avoid causing further damage during this inspection.
Once you have identified the areas that need filling, there are several options available to you. One popular choice is epoxy clay or putty, which provides a strong bond once cured. Mold the clay or putty to fit perfectly into the gaps or rough edges, and choose from different colors to match your pottery.
Another option is ceramic filler paste, specifically designed for repairing ceramics and pottery. This paste has excellent adhesive properties and comes in various shades to seamlessly fill cracks, chips, or missing fragments.
Before applying any filler, ensure that the broken edges are thoroughly cleaned. Dust and debris can hinder the effectiveness of the adhesive. Use a soft brush or cloth to remove any particles.
When applying the filler, follow the manufacturer’s instructions carefully. Use a small spatula or toothpick to apply a thin layer of epoxy clay or ceramic filler paste, completely filling in all gaps. Smooth the surface to match the surrounding areas.
Allow the filler to dry or cure according to the instructions provided. Patience is key. Once dry, inspect your handiwork. If necessary, refine the shape and smoothness with sandpaper or a fine-grit file. Be cautious not to damage the surrounding pottery.
kneRDtIU5e8″ >
Conclusion
When it comes to gluing pottery back together, there are a few key steps to follow. First, gather all the broken pieces and make sure they fit together properly. It’s like putting together a puzzle, but with delicate shards instead of cardboard cutouts. Next, choose the right adhesive for the job. You want something strong and durable, yet safe for use on pottery. Epoxy or cyanoacrylate glue are often recommended options.
Now comes the tricky part – applying the glue. Take your time and be precise. Apply a thin layer of adhesive to both sides of each broken piece and carefully press them together. It’s like performing surgery on your beloved pottery, mending its wounds with skill and care.
Once you’ve glued all the pieces back in place, let it dry completely. Patience is key here; rushing could result in a weak bond or even further damage. Give it at least 24 hours to ensure a solid connection.
Finally, if desired, you can touch up any visible cracks or gaps with pottery filler or paint. This step adds an extra layer of protection and helps restore the pottery’s aesthetic appeal.
Remember, gluing pottery back together requires patience, precision, and the right materials. With these steps and a steady hand, you can repair your cherished ceramics and give them new life once again.