Get ready to dive into the wonderful world of gluing plant pots together. Whether you’re dreaming of a towering garden masterpiece, need to fix a broken pot, or simply want to add a personal touch to your plant collection, mastering the art of adhesive bonding is key.
When done right, glued plant pots open up a whole new realm of possibilities for your indoor or outdoor space. But let’s be real – we’re not just looking for any old bond. We want something that can withstand the elements and stand the test of time. Lucky for you, this blog post has got your back.
We’ll walk you through everything you need to know about gluing plant pots together – from choosing the right materials and adhesives to step-by-step instructions that even beginners can follow.
Terracotta? Ceramic? Plastic? Wood? No matter what type of pot you have in mind, we’ve got you covered. So put on those gardening gloves and let’s jump right in.
Letting it cure and adding those finishing touches
Contents
By the time you reach the end of this guide, you’ll have all the knowledge and confidence needed to tackle any gluing project that comes your way. Ordinary pots will become extraordinary works of art – trust us. So without further ado, let’s unlock the secrets behind seamless plant pot bonding.
What Adhesive Should You Use?
Gluing plant pots together can be a practical solution for creating unique plant arrangements or repairing broken pots. However, selecting the right adhesive is crucial to ensure a strong and long-lasting bond. In this guide, we will explore the best adhesives for gluing plant pots together and provide tips for achieving successful results.
Epoxy Adhesive:
Epoxy adhesive is a top choice for bonding plant pots due to its exceptional strength and durability. With its ability to withstand outdoor conditions, moisture, and heat, epoxy forms a robust bond that will stand the test of time.
To use epoxy adhesive, mix the resin and hardener components together and apply it evenly on the surfaces to be glued. Allow sufficient curing time, typically 24 hours or more, for maximum strength.
Silicone Adhesive:
When it comes to flexibility and water resistance, silicone adhesive is unbeatable. It is ideal for gluing plant pots together as it can withstand sunlight, temperature changes, and moisture without losing its adhesive properties. Apply silicone adhesive using a caulking gun or by hand, ensuring even coverage on the surfaces.
Polyurethane Adhesive:
If you need an adhesive that offers excellent bonding strength and flexibility, polyurethane adhesives are your best bet. They are suitable for joining different materials such as plastic, ceramic, or terracotta pots. Furthermore, they have good resistance to water, heat, and chemicals. During the curing process, consider using clamps to ensure a secure bond.
Cyanoacrylate Adhesive:
For small repairs or lightweight plant pots made of materials like plastic or ceramic, cyanoacrylate adhesive (super glue) is perfect. It dries quickly and forms a strong bond within seconds. However, keep in mind that cyanoacrylate adhesives may not be as resistant to moisture or outdoor conditions compared to other options.
Construction Adhesive:
When heavy-duty applications involving large or heavy plant pots are on the horizon, construction adhesive is your go-to choice. Make sure the adhesive is suitable for outdoor use and can withstand moisture and temperature changes. Follow the manufacturer’s instructions for application and curing time.
Important Tips:
- Clean the surfaces of the plant pots thoroughly and ensure they are dry before applying adhesive.
- Follow the manufacturer’s instructions for proper application, curing time, and safety precautions.
- Test the bond strength after the adhesive has cured before subjecting the pots to any stress or weight.
- Handle glued plant pots with care to avoid putting excessive strain on the bond.
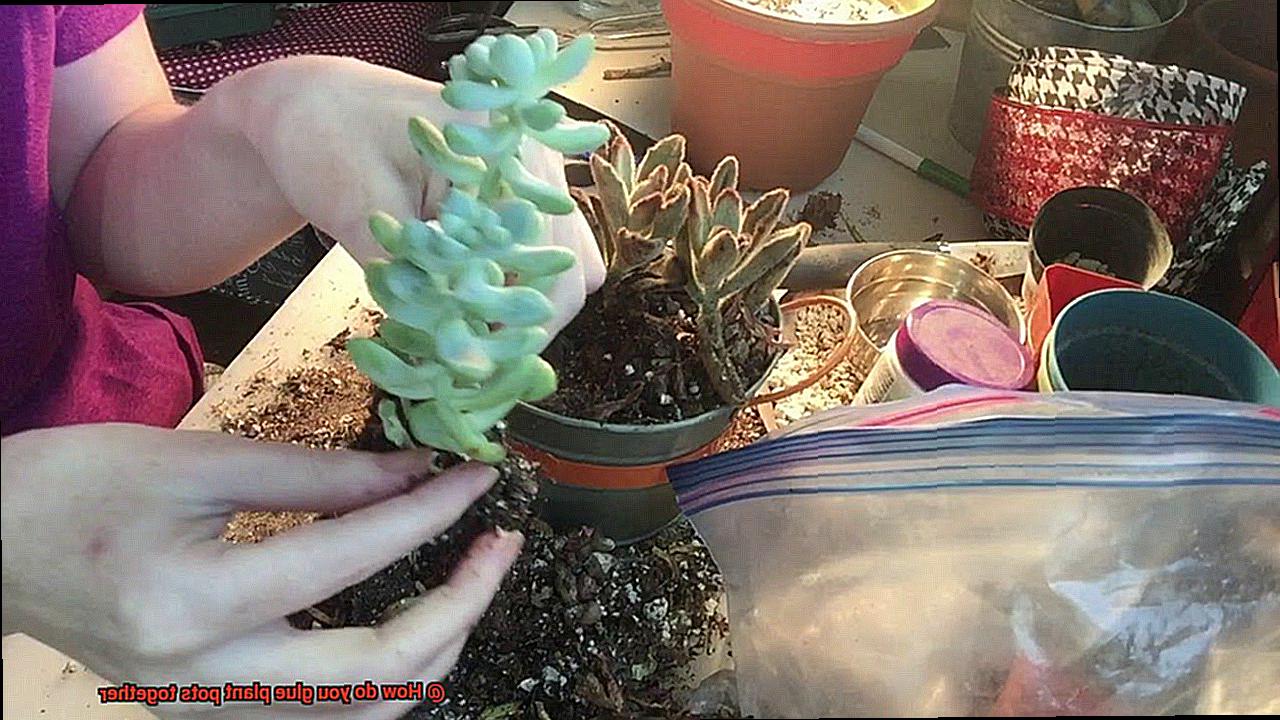
Preparing the Plant Pots for Gluing
Well, you’ve come to the right place. In this blog post, we’ll walk you through the essential steps for preparing your plant pots for gluing, ensuring that your creations stay intact and beautiful.
- Cleanliness is key: Start by grabbing a damp cloth or sponge and giving those pots a thorough wipe-down. We want to make sure they’re free from any dirt, dust, or debris that could interfere with the glue’s bonding power. Once they’re nice and clean, let them dry completely before moving on to the next step.
- Roughen up the surface: To create a better bond, gently rub some fine-grit sandpaper in circular motions on the areas where you’ll be applying the glue. This step is like a dance between the pots and the sandpaper, ensuring they stick together like glue soulmates.
- Clean again: After sanding, it’s important to clean the pots again to get rid of any leftover dust or debris. A quick wipe-down with a damp cloth or sponge should do the trick. Make sure those pots are bone-dry before moving on to the glue application phase.
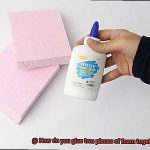
- Choose your glue wisely: There are plenty of glues out there that can do the job, so select one that suits your needs and preferences. Epoxy glue is great for outdoor use and can withstand the elements like a champ. Silicone adhesive is flexible and water-resistant, perfect for those pesky plant pots that need extra durability. And let’s not forget about hot glue, a quick and easy option for smaller projects.
- Read the instructions: Before slapping on that glue, take a moment to read the instructions provided by the manufacturer. Some glues may require mixing or specific application techniques, and we don’t want any glue mishaps on our hands. Apply the glue evenly and sparingly, making sure to avoid excess glue seeping out from between the pots.
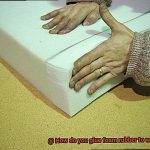
- Stick those pots together: Gently press the pots together, ensuring they’re aligned properly. Apply some gentle pressure for a few seconds to allow the glue to work its magic. And here’s a tip: if you’re dealing with larger or heavier pots, consider reinforcing the bond with wire or zip ties. They’ll provide that extra support and stability, so your pots won’t budge an inch.
- Patience is key: Avoid moving or disturbing the pots for at least 24 hours to give the glue enough time to cure and set. Trust us, it’ll be worth the wait when you see your beautifully glued creations standing strong and proud.
Applying the Adhesive
If you’re ready to create stunning and durable creations by joining your pots together, then you’ve come to the right place. In this section, I’ll guide you through the steps for applying adhesive when gluing plant pots together.
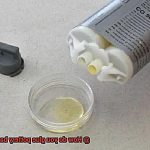
First and foremost, let’s discuss the critical task of selecting the right adhesive. There are several options available, including epoxy, super glue, and silicone adhesive. Each adhesive has its own unique advantages and disadvantages, so it’s crucial to choose one that suits your specific needs. Consider factors such as the materials of your pots, the desired bond strength, and whether you want a transparent or visible bond.
Once you’ve made your adhesive choice, it’s time to prepare your pots for gluing. Properly cleaning the surfaces of both plant pots is essential for creating a strong bond. Any dirt, dust, or grease can hinder the adhesive’s effectiveness. Grab a mild detergent or some rubbing alcohol and give those pots a thorough cleaning. Ensure they are completely dry before proceeding to the next step.
Now that your pots are squeaky clean, it’s time to apply the adhesive. Begin by applying a thin layer of adhesive to one of the pot’s surfaces. Exercise caution not to use excessive glue, as any excess can seep out when the pots are pressed together, resulting in an unsightly mess. Less is more in this case.
With the adhesive skillfully applied, it’s time to bring those pots together. Align their edges perfectly and press them firmly. Hold them in place for a few minutes to allow the adhesive to bond effectively. Keep in mind that different adhesives have varying curing times, so be sure to follow the manufacturer’s instructions closely.
It’s worth noting that some adhesives may expand or foam up slightly as they cure. This expansion fills any gaps between the pots, providing additional strength to the bond. However, if you prefer a seamless and invisible bond, opt for an adhesive specifically designed for transparent bonding.
Once the adhesive has fully cured, which can range from a few hours to several days depending on the type of adhesive used, it’s time to put the bond to the test. Gently tug at the pots. If they hold together firmly without any movement or separation, congratulations. Your adhesive has successfully done its job.
Before we conclude, let’s touch on two important aspects: repositioning and safety. Some adhesives allow for repositioning or removal of the glued pots in the future, while others create a permanent bond. Consider your long-term plans for the pots when choosing your adhesive.
Lastly, safety should always be a priority when working with adhesives. Some adhesives emit strong fumes, so ensure that you work in a well-ventilated area or wear a mask if necessary. Remember to keep adhesives out of reach of children and pets, as they can be toxic if ingested.
Securing the Bond
Are you curious about the secret behind those stunning and seemingly unbreakable plant pot creations? Prepare to be amazed as we dive deep into the world of glue and its magical bonding properties. Join us on this journey as we explore the importance of securing a strong bond when gluing plant pots.
Glue: The Magic Ingredient
Before we delve into the art of bonding plant pots, let’s talk about glue. There are various types available, each with its own strengths and weaknesses. Epoxy, known for its exceptional strength, super glue for quick fixes, and hot glue for flexibility and repositioning options. Choosing the right glue is crucial for a successful project.
Preparation is Key
To ensure a strong bond, it’s essential to prepare the plant pots properly. Clean and dry the surfaces thoroughly, removing any dirt or moisture that could compromise the bond. For better adhesion, rough up the surfaces using sandpaper to create texture.
The Gluing Process
Now that our glue is ready and the pots are prepped, it’s time to apply the adhesive with finesse. Start by applying a thin layer of glue on both surfaces that will be bonded together. Then, press the pots firmly, ensuring perfect alignment. Hold them in place for a few minutes to allow the glue to set and create a strong bond.
Tips and Tricks for an Unbreakable Bond
To achieve an unbreakable bond between plant pots, consider these tips:
- Use enough glue: Apply a generous amount to cover the entire surface area for maximum bonding power.
- Give it time: Patience is key. Allow the glue to fully cure before subjecting your creation to stress or weight.
- Avoid common mistakes: Follow the instructions on the glue packaging and avoid using excessive pressure when pressing the pots together.
- Safety first: Work in a well-ventilated area, wear gloves when handling strong adhesives, and be mindful of any toxic fumes emitted during the curing process.
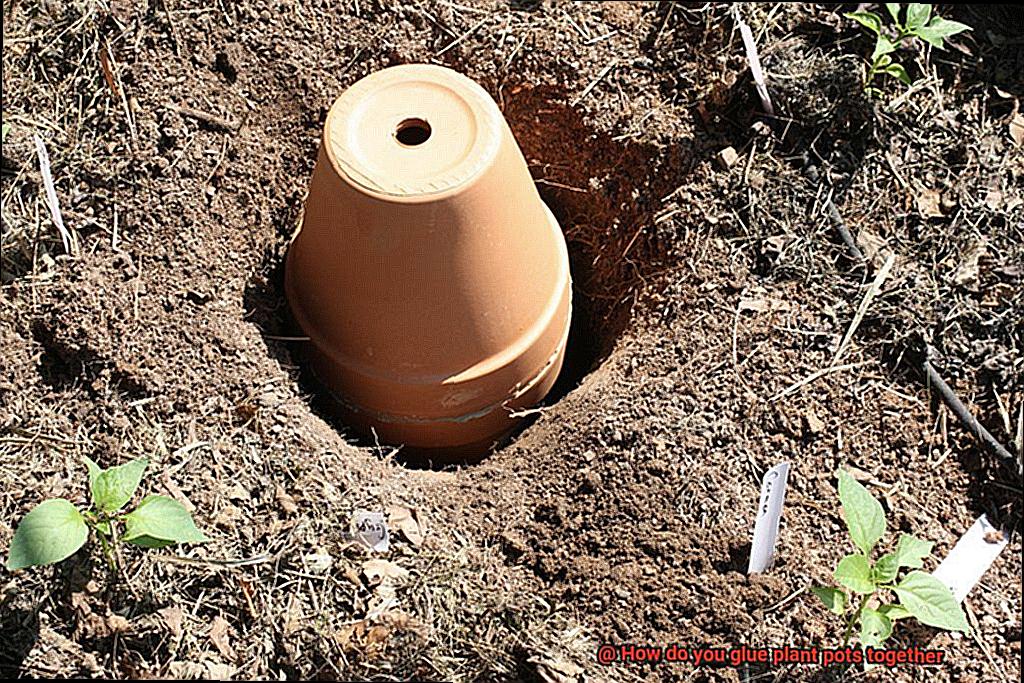
Alternative Bonding Methods
If glue isn’t your preference, alternative methods like zip ties or wire can be used to hold the pots together. However, they may not provide the same level of strength and durability as a well-glued bond.
Curing Time for Adhesives
When it comes to gluing plant pots together, understanding the curing time of different adhesives is crucial. In this blog post, we will delve into the fascinating realm of adhesive bonding and explore how environmental factors can influence the curing process. So, let’s dive right in.
Types of Adhesives and Their Curing Times:
Adhesive bonding is an art, and each type of adhesive has its own unique curing time. Let’s take a closer look at some popular adhesives and their respective curing times:
- Epoxy Adhesives: Known for their exceptional strength and durability, epoxy adhesives require patience. Curing times can range from a few hours to several days, depending on temperature and humidity levels. It’s important to follow the manufacturer’s instructions for optimal results.
- Super Glue: Need a quick fix? Super glue, also known as cyanoacrylate adhesive, is your go-to option. While it bonds within seconds or minutes, full curing can take up to 24 hours. So, exercise a little patience before putting any stress on your glued plant pots.
- Silicone Adhesive: For outdoor applications requiring weather resistance, silicone adhesive is the star. Its curing time varies based on product and application conditions but typically takes around 24 hours to fully cure. Again, check the manufacturer’s guidelines for precise information.
The Influence of Environmental Factors:
Environmental factors play a significant role in the adhesive curing process. Here are two key factors to keep in mind:
- Temperature: Higher temperatures generally speed up the curing process, while lower temperatures slow it down. So, if you’re in a hurry, opt for warmer environments (within the adhesive’s recommended range) to accelerate curing.
- Humidity: Higher humidity levels can prolong curing time, while lower levels can expedite it. Consider these factors when planning your gluing project and adjust your working environment accordingly.
Tips for Successful Bonding:
Now that we understand the different adhesive types and environmental factors at play, here are some tips for a successful bonding experience:
- Patience is key: Avoid disturbing or moving the glued plant pots during the curing process. Trust the adhesive and leave them undisturbed for the specified curing time.
- Strengthening over time: While curing time indicates maximum strength, allowing the adhesive some additional time to strengthen further before applying excessive stress or heavy loads is advisable.
Checking the Bond Strength
Today, we will delve into the world of adhesives and explore how to check the bond strength of your precious creations. Get ready for some tips that will leave your plant pots standing tall and proud.
First and foremost, let’s talk about testing that bond strength. We have a couple of simple methods up our sleeves that will give you a good idea of how strong your adhesive is holding:
- The Tap Test: Grab a small hammer or mallet and gently tap the glued area. Listen closely – if you hear a hollow sound or notice any movement or separation, it’s time to reinforce that bond.
- The Gentle Pull: Apply some gentle force and try to pull those pots apart. If they easily come undone, it’s a sign that your adhesive might not be up to the task. It’s time to switch things up.
Now, choosing the right adhesive is crucial for achieving a strong bond. Consider these factors:
- Material Compatibility: Different adhesives work better on certain materials. Make sure you choose one that plays well with both pots you’re working with.
- Environmental Conditions: Temperature and humidity can play tricks on your glue’s strength. Follow the instructions provided by the adhesive manufacturer for optimal bond strength.
But what if things don’t go as planned? Don’t fret. Here’s what you can do:
- Reinforce and Reapply: Add more glue to the joint and let it cure properly before testing again. Sometimes, a little extra love is all it takes to make that bond unbreakable.
- Porous Pot Problems: Some pots have irregular surfaces or textures, making it harder to achieve a strong bond. In these cases, opt for adhesives specifically designed for porous or uneven surfaces. They’ll have your back.
Handling Gluing Plant Pots Carefully
Plant pots not only hold our beloved green friends but also serve as decorative accents in our homes and gardens. When it comes to gluing plant pots together, handling them with care is essential to ensure a strong and lasting bond.
In this guide, we will explore the steps necessary for safely handling and gluing plant pots, from choosing the right adhesive to cleaning up excess glue.
Choose the Right Glue:
Selecting the appropriate glue is crucial for a successful bonding process. Consider the material of your plant pots – ceramic, plastic, or another type – and choose a glue specifically designed for that material. Epoxy, super glue, or silicone adhesive are common options for bonding plant pots.
Prepare the Surface:
Before applying any glue, prepare the surface of the plant pots by cleaning them thoroughly. Use warm soapy water and a soft brush to remove dirt, dust, or grease that may hinder the bonding process. Ensure the pots are completely dry before proceeding.
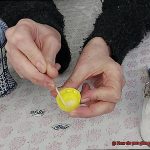
Apply Glue with Precision:
To handle gluing plant pots carefully, apply the glue with precision. Follow the manufacturer’s instructions for application, ensuring a thin and even layer of adhesive on both surfaces that need bonding.
Align and Hold Firmly:
Once the glue is applied, carefully align the plant pots in the desired position. Double-check their alignment before pressing them together firmly. Consider wearing disposable gloves to avoid skin contact with the glue.
Allow Sufficient Drying Time:
After gluing the plant pots together, allow sufficient drying time for the adhesive to set properly. Refer to the manufacturer’s instructions for specific drying times. Avoid moving or disturbing the pots during this period to ensure a strong bond.
Clean Excess Glue:
If excess glue squeezes out from the edges, clean it immediately using a clean cloth or sponge. If the glue has already dried, carefully scrape it off with a plastic scraper or blunt knife. Removing excess glue enhances the aesthetic appeal of the pots and prevents interference with plant growth.
kneRDtIU5e8″ >
Conclusion
When it comes to gluing plant pots together, there are a few key steps you need to follow. First, make sure you have the right adhesive for the job. Look for a waterproof and weather-resistant glue that is suitable for use on porous materials like terracotta or ceramic.
Next, clean the surfaces of the pots that you plan to glue together. Remove any dirt or debris using a soft brush or cloth. This will ensure that the adhesive has a clean and smooth surface to bond to.
Before applying the glue, it’s important to roughen up the surfaces slightly. You can do this by lightly sanding them with fine-grit sandpaper. This will create more surface area for the adhesive to adhere to, improving its strength and durability.
Now, apply a thin layer of adhesive onto one of the pot surfaces. Be careful not to use too much glue as it may squeeze out when you press the pots together. A little goes a long way in this case.
Once you’ve applied the adhesive, carefully align and press the two pot surfaces together firmly. Hold them in place for a few minutes to allow the glue to set and bond properly.
Afterward, wipe away any excess glue that may have oozed out from between the pots using a damp cloth or sponge. It’s best to do this while the glue is still wet so that it doesn’t leave behind any residue once it dries.
Finally, let your glued plant pots sit undisturbed for at least 24 hours before handling them or placing plants inside. This will give ample time for the adhesive to fully cure and provide maximum strength.
Remember, proper preparation and patience are key when gluing plant pots together.