Looking to add a touch of rustic charm to your home decor or create a one-of-a-kind gift? Well, gluing photos to wood is the way to go. It’s like turning your favorite memories into works of art that will stand the test of time.
To get started, grab yourself some top-notch wood. Think plywood or a solid wooden board – clean and smooth for maximum adhesion. And don’t forget those precious photographs. Make sure they’re printed on photo paper, not just any old printer paper.
Now, let’s dive into the gluing process. Get your hands on some adhesive goodness like Mod Podge or a fancy photo transfer medium. Spread it evenly with a foam brush or sponge – no streaks or bubbles allowed.
Once you’ve got that adhesive all set up, carefully position your photo on the wood surface. Take a soft cloth or use your nimble fingers to press it down gently. Smooth out any excess glue or pesky air bubbles that dare to ruin your masterpiece.
Now comes the waiting game – let that glue dry completely. Be patient, my friend, as rushing this step can lead to less-than-perfect results. Give it a few hours or even overnight, depending on the adhesive you chose.
Once everything is nice and dry, it’s time for the finishing touches. Protect your creation with a waterproof sealer or varnish – this will keep moisture at bay and make it look oh-so-professional. Your artwork deserves nothing but the best.
And there you have it. A stunning photo glued to wood that’s ready for its moment in the spotlight. Display it proudly in your humble abode or gift it to someone who’ll treasure it forever.
Remember, my creative comrade, with a little time and effort, you can transform ordinary photos into extraordinary wooden wonders. So gather those cherished memories and let the gluing extravaganza begin.
Gather Materials Needed
Contents
- 1 Gather Materials Needed
- 2 Prepare the Wood Surface
- 3 Trim and Arrange Photos
- 3.1 Precision Trimming for Perfect Fit
- 3.2 Unleash Your Creativity: Arranging for Visual Harmony
- 3.3 Preparing the Canvas: A Clean Wood Surface
- 3.4 Selecting the Perfect Adhesive
- 3.5 Applying Adhesive and Placing Photos: A Delicate Process
- 3.6 Section 6: Embrace Depth and Dimension: Spacing for Visual Appeal
- 4 Apply Adhesive Glue
- 4.1 Step 1: Choose the Right Glue for a Strong Bond
- 4.2 Step 2: Prepare the Wood Surface for Perfection
- 4.3 Step 3: Apply the Adhesive Glue with Precision
- 4.4 Step 4: Position and Press for Picture-Perfect Results
- 4.5 Step 5: Remove Excess Glue with Finesse
- 4.6 Step 6: Allow Ample Drying Time for Perfection
- 5 Attach Photos to Wood
- 6 Allow Time for Drying
- 7 Optional: Apply Protective Sealant
- 8 Tips for Glueing Photos to Wood
- 9 Conclusion
Look no further than gluing photos to wood surfaces. This DIY project adds a unique touch to your home decor while preserving cherished memories. In this article, we will guide you through the materials needed for this craft, ensuring that your memories are preserved beautifully and for years to come.
Wood Surface:
Begin by selecting a high-quality wooden surface for your project. Choose unfinished wood or a specially designed wooden plaque for crafting. Ensure the wood is clean, smooth, and free from any dirt or roughness, providing a solid foundation for secure photo adhesion.
Photos:
Gather the photographs that hold sentimental value or are relevant to your project. Print them on quality photo paper, ensuring vibrant colors and sharp details. This step lays the foundation for an aesthetically pleasing end result.
Glue:
Choosing the right adhesive is crucial for a strong and long-lasting bond between photo and wood. Consider these popular options:
- Mod Podge: This versatile adhesive acts as both an adhesive and sealant, offering a clear finish. Widely used in decoupage projects, it excels at gluing photos to wood.
- Craft Glue: Look for craft glue designed specifically for bonding porous materials like wood and paper. Select one that dries clear and provides a strong bond.
- Epoxy Resin: For maximum durability and waterproofing, opt for epoxy resin. It requires mixing two components and dries into a hard, clear finish.
Brushes:
Depending on the chosen glue, you may need brushes to apply it evenly on both the wood surface and the back of the photo. Foam brushes or soft-bristled brushes work well for achieving a smooth application, preventing lumps or bumps that could affect the final result.
Sandpaper:
While not always necessary, sandpaper can be useful for smoothing out any rough edges or surfaces on the wood. This step ensures a better adhesive surface, enhancing the overall bond between wood and photo.
Optional Protective Sealant:
Consider using a protective sealant to give your photo a glossy or matte finish and added protection. Clear acrylic spray, varnish, or polyurethane are suitable options. Ensure compatibility with the chosen glue and no damage to the photo. This step enhances the longevity of your glued photos, safeguarding against fading, discoloration, and other external factors.
Prepare the Wood Surface
Gluing photos to wood is a fantastic way to showcase your favorite memories and create a unique and eye-catching display. However, before you embark on this exciting project, it’s crucial to prepare the wood surface properly for a strong and long-lasting bond between the photo and the wood.
The first step in preparing the wood surface is to clean it thoroughly. Dust, dirt, and debris can hinder the adhesive from sticking properly, so grab a soft cloth or brush and gently wipe away any particles. Pay close attention to corners and crevices where dirt tends to accumulate.
Once the wood is clean, examine its surface for rough patches or imperfections. If you find any, it’s time to sand them down. Using sandpaper with a fine grit, carefully sand the surface in the direction of the wood grain. This will create a smooth and even surface that will enhance adhesion. Remember to remove any sanding dust before proceeding.
With a clean and smooth wood surface, it’s time to prime it. Priming helps seal the wood and provides a suitable base for the glue to adhere to. Look for a primer that is compatible with your wood type, such as acrylic or latex-based primers. Follow the manufacturer’s instructions for proper application techniques and drying time.
After priming, it’s crucial to select the right adhesive for gluing photos to wood. Look for a quality craft glue specifically designed for bonding porous materials like wood and paper. It’s essential to choose an adhesive that is acid-free and archival-safe to ensure the longevity of your photos.
Before applying glue to the entire wood surface, it’s wise to do a small test area first. Apply a thin layer of glue on a corner of the wood and let it dry. This will help you determine if the glue is compatible with the wood and if it provides the desired results.
Once you’ve found the perfect adhesive, it’s time to apply it to the entire wood surface. Use a brush or applicator to spread a thin and even layer of glue. Be careful not to leave any excess or gaps that could affect the adhesion of the photo.
Now comes the thrilling part – placing the photos onto the glued wood surface. Start from one corner and carefully press the photo down, smoothing it out as you go. If you notice any air bubbles or wrinkles, use a clean cloth or roller to gently smooth them out. Work from the center towards the edges to ensure a secure bond.
After placing the photos, give them ample time to dry according to the glue manufacturer’s instructions. It’s crucial not to disturb or move the glued photos during this period to prevent misalignment or detachment.
Trim and Arrange Photos
In this comprehensive guide, we will explore the process of trimming and arranging photos on a wood surface, using the perfect adhesive to create captivating displays. Whether you aspire to be an artist or simply want to add a personal touch to your home decor, this step-by-step guide will help you create stunning displays that demand attention.
Precision Trimming for Perfect Fit
Begin by gathering your favorite photos and trimming them to the desired size and shape. Utilize sharp scissors or a precise paper trimmer for clean cuts. For accuracy, rely on a ruler or straight edge to ensure impeccable measurements. This crucial step guarantees that each photo fits flawlessly into your overall layout.
Unleash Your Creativity: Arranging for Visual Harmony
Before adhering the photos, take a moment to arrange them on the wood surface. Embrace your artistic vision and experiment with different layouts until you capture the essence of your memories. Play with angles, sizes, and orientations fearlessly. This visual exploration breathes life into your display and allows your creativity to shine.
Preparing the Canvas: A Clean Wood Surface
Ensure the wood surface is pristine by thoroughly cleaning it. Rid it of any dust or debris, and if necessary, gently wipe it down with a damp cloth. This preparation guarantees optimal adhesion and creates a seamless display that truly showcases your photos.
Selecting the Perfect Adhesive
Choosing the right adhesive is vital for long-lasting results. Consider glue sticks, double-sided tape, or adhesive sprays specifically designed for both photos and wood surfaces. Exercise caution not to use excessive adhesive as it may cause warping or create an untidy appearance.
Applying Adhesive and Placing Photos: A Delicate Process
Apply a thin, even layer of adhesive to the back of each trimmed photo, ensuring complete coverage. Carefully place each photo onto the wood surface, commencing from one corner and progressing across. Press firmly to guarantee proper adhesion and smooth out any air bubbles or wrinkles as you proceed.
Section 6: Embrace Depth and Dimension: Spacing for Visual Appeal
When working with multiple photos, create visual appeal by leaving space between each one. Utilize small wooden dowels or spacers to achieve this desired effect. This spacing adds depth and dimension to your display, taking it from ordinary to extraordinary.
Apply Adhesive Glue
Gluing photos to wood is a brilliant way to showcase your favorite memories and create stunning wall art. In this comprehensive guide, we will take you through the process of applying adhesive glue, ensuring a secure and long-lasting bond. So, gather your supplies, grab those cherished photos, and let’s dive into the art of gluing photos to wood.
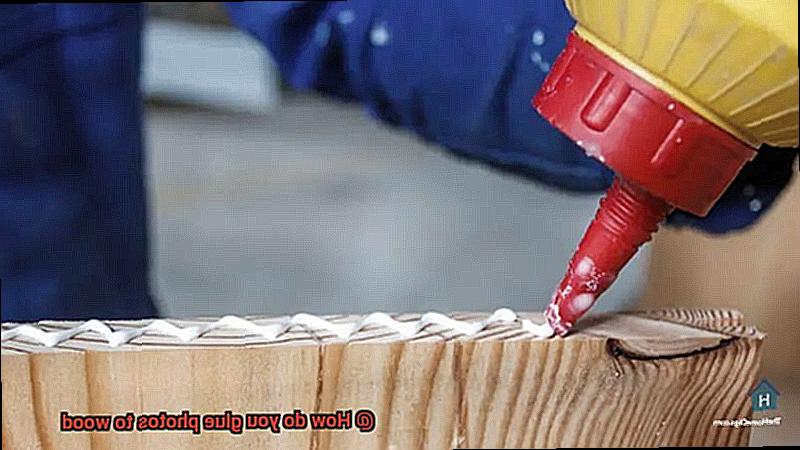
Step 1: Choose the Right Glue for a Strong Bond
To achieve a bond that is both robust and flexible, opt for a PVA (polyvinyl acetate) glue or a wood glue. These adhesives are specially designed to bond porous surfaces like wood, providing exceptional holding power.
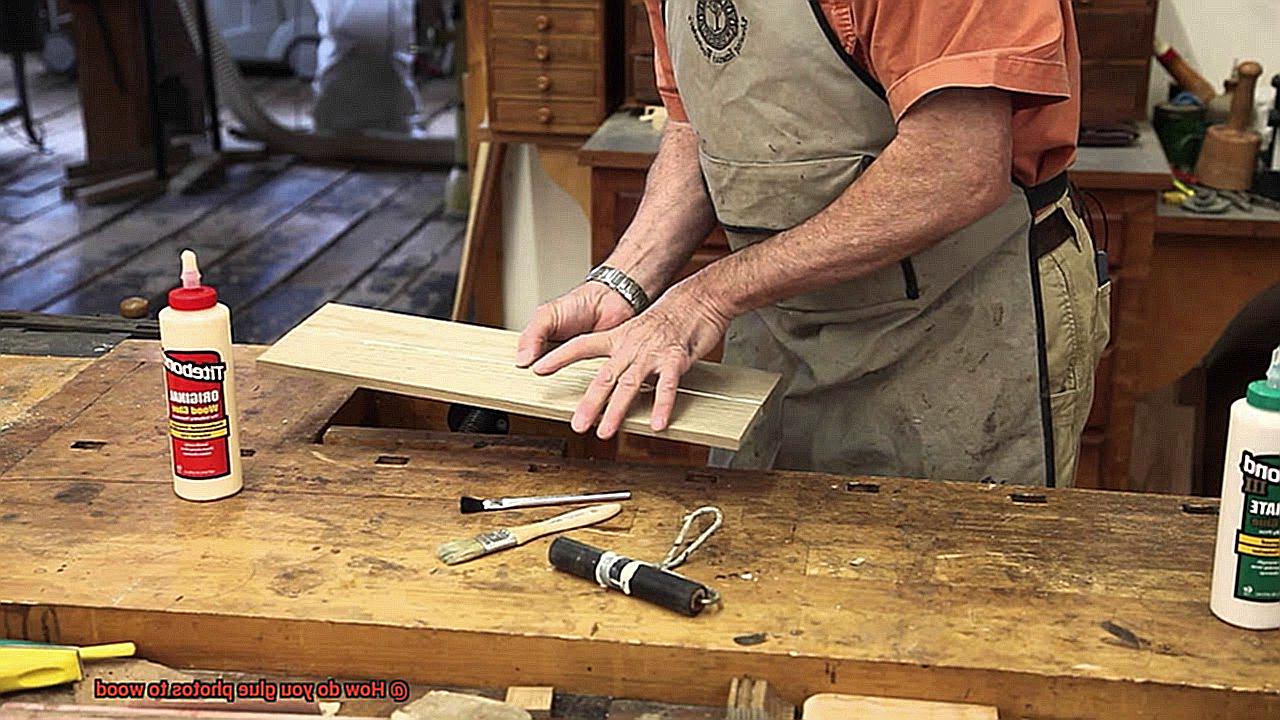
Step 2: Prepare the Wood Surface for Perfection
Cleanliness is the key to success. Wipe the wood surface with a soft cloth or use a mild cleaning solution to eliminate any dust or debris. Smooth out any imperfections or bumps for an even finish that will enhance the beauty of your photo display.
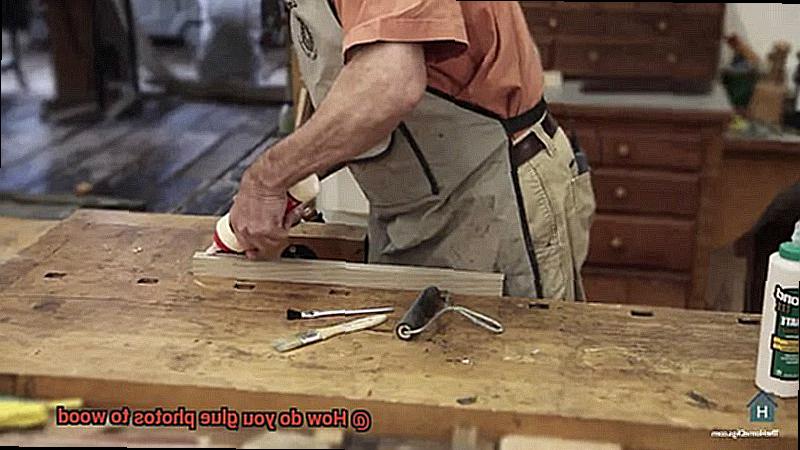
Step 3: Apply the Adhesive Glue with Precision
Brush or roll on a thin and even layer of adhesive glue onto the back of the photo. Remember, less is more. Avoid using excessive glue, as it may cause warping or unsightly bubbles when pressed onto the wood.
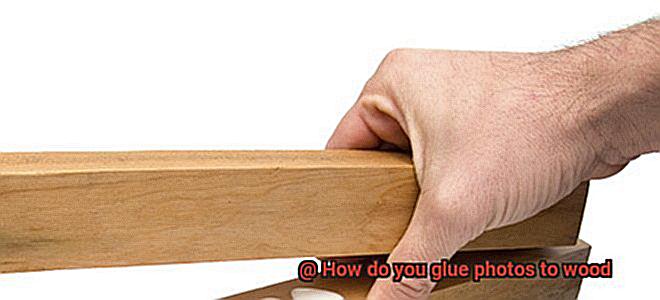
Step 4: Position and Press for Picture-Perfect Results
Take your time to position the photo carefully on the prepared wood surface, ensuring proper alignment. Gently press down on the photo, creating solid contact between the glue and wood. Gradually smooth out the photo from one edge to another, eliminating any pesky air bubbles that may try to sneak in.
Step 5: Remove Excess Glue with Finesse
If any excess glue oozes out from the sides of the photo, swiftly wipe it away with a damp cloth before it dries. This thoughtful touch will maintain a clean and professional-looking finish that will catch everyone’s eye.
Step 6: Allow Ample Drying Time for Perfection
Patience is paramount. Allow the glued photo to dry completely, following the instructions provided by the adhesive glue manufacturer. During this time, resist the urge to move or disturb the photo, preventing any misalignment that may occur.
Attach Photos to Wood
Look no further. Attaching photos to wood is a unique and charming way to showcase your memories while adding a rustic touch to your decor. In this guide, we’ll explore the step-by-step process of attaching photos to wood using decoupage glue or medium.
First things first, gather your materials:
Now, let’s dive into the step-by-step process:
- Prepare the wood surface: Clean the wood by wiping it down with a damp cloth or mild cleaning solution. This ensures better adhesion of the glue.
- Apply the glue: Use a brush or foam applicator to apply a thin, even layer of decoupage glue or medium onto the back of the photo. Cover the entire surface evenly, applying in sections for larger photos.
- Position and press: Carefully place the photo onto the prepared wood surface, aligning one corner with the corresponding corner of the wood. Press it down firmly, smoothing out any air bubbles or wrinkles with your fingers or a clean cloth.
- Remove excess glue: If any excess glue seeps out from the edges of the photo, gently wipe it away with a clean cloth to avoid smudging.
- Allow drying time: Let the glue dry completely according to the manufacturer’s instructions, usually at least 24 hours. Avoid touching or disturbing the photo during this time.
- Optional: Apply additional coats of decoupage glue or medium over the top of the photo for added protection against fading or damage.
Allow Time for Drying
Today, we’re diving into the captivating world of gluing photos to wood and uncovering the vital importance of allowing ample time for that glue to dry completely. Trust me when I say this is a step you absolutely cannot rush.
Imagine spending hours meticulously selecting the perfect photos, artfully arranging them on a lustrous wooden surface, only to have your masterpiece crumble over time. What a heartbreaking disaster that would be. That’s why patience is an absolute virtue when it comes to drying time.
Different types of glue boast varying drying times, so it’s crucial to carefully peruse those instructions provided by the manufacturer. However, as a general rule of thumb, it is best to leave your glued marvel untouched for a minimum of 24 hours. This waiting period allows the glue to attain its peak strength and forge an unyielding bond that can effortlessly withstand the test of time.
Now, let’s not forget about the impact of temperature and humidity on drying time. Higher temperatures and lower humidity levels expedite the process, while lower temperatures and higher humidity levels dawdle along. Thus, it’s imperative to select a well-ventilated sanctuary, allowing air to gracefully circulate and hasten the drying process.
I understand that waiting can feel agonizing, especially when you’re bubbling with enthusiasm for the final masterpiece. However, trust me when I say that it will be worth every second. Handling or manipulating the glued photos before they are fully dried jeopardizes their adhesion and can lead to grievous consequences such as peeling or detachment. And let’s face it: nobody wants that.
Remember this: great things come to those who wait. By graciously allowing ample time for drying, you are ensuring a robust and enduring connection between your cherished photos and the resplendent wooden surface. Your finished project will exude unparalleled quality and withstand the relentless passage of time.
Optional: Apply Protective Sealant
Today, we are delving into the captivating world of gluing photos to wood and exploring an optional yet essential step that can elevate your projects to new heights – the application of a protective sealant. Believe me when I say that it is well worth the extra effort.
But why should you bother with a protective sealant, you may ask? Well, let me paint a picture for you: imagine spending hours meticulously arranging and gluing your cherished photos onto a stunning wooden surface. The end result is simply breathtaking. However, without the safeguard of a protective sealant, your masterpiece becomes vulnerable to the elements.
Moisture is undeniably one of the greatest adversaries of photos on wood. Without adequate protection, moisture can seep into the wood, causing your precious memories to distort, fade, or even succumb to unsightly mold. None of us want that. A protective sealant acts as an impenetrable barrier, warding off moisture and preserving your photos for years to come.
Let us not forget about those relentless UV rays. We are all aware of the havoc sunlight can wreak upon anything it touches, and your glued photos are no exception. Over time, exposure to UV rays can cause colors to fade and intricacies to blur. By applying a sealant with UV protection, you are adding an additional layer of defense against these detrimental rays.
Now, let’s delve into the options available to you. There exists a wide array of sealants, each possessing its own unique qualities. Varnish reigns supreme as a popular choice due to its durability and water-resistant properties. For those seeking exceptional protection against scratches and stains, polyurethane is an excellent option. If you are embarking on a paper-to-wood project like this one, decoupage medium ensures a robust bond and provides an added protective layer. And for those desiring a matte finish, Mod Podge is your go-to solution.
Before embarking on the sealing process, it is imperative to ensure that your glued photo is completely dry and free from any dust or debris. Allow sufficient time for the adhesive to set and cure properly. Additionally, it is crucial to adhere to the manufacturer’s instructions specific to the sealant you have chosen. Skipping even a single vital step could prove disastrous.
Tips for Glueing Photos to Wood
Whether you want to create personalized gifts, unique wall art, or beautiful keepsakes, this step-by-step guide will help you master the art of gluing photos to wood. Get ready to unleash your creativity and bring your cherished memories to life.
Choose the Perfect Glue:
The first step in gluing photos to wood is selecting the right adhesive. Opt for a strong and durable glue that is specifically designed for use with porous surfaces like wood. Craft glue or clear drying liquid adhesives, such as Mod Podge, are excellent choices. These adhesives provide a secure bond while also protecting your precious photos from damage.
Prepare the Wood Surface:
Before diving into the gluing process, prepare the wood surface for optimal adhesion. Smooth out any roughness or imperfections by sanding the area where you plan to attach the photo. A clean and smooth bonding surface ensures better contact between the glue and the wood.
Test Before Gluing:
To avoid any mishaps with your actual photo, it’s always wise to conduct a test run. Cut out a small piece of scrap wood and apply a small amount of glue onto it. Place a test photo on top of the glue and press it firmly. Once dry, check if the bond is secure and if there are any issues with the photo’s appearance. This test run allows you to make any necessary adjustments before proceeding with your treasured photos.
Apply Glue Like a Pro:
Now it’s time to apply the glue. Use a brush or sponge applicator to spread a thin and even layer of glue onto the wood surface where you will be placing the photo. Remember, less is more – too much glue can cause wrinkles, while too little may result in inadequate adhesion.
Smooth Out Air Bubbles:
Once you’ve attached the photo onto the glued wood surface, it’s time to smooth out any air bubbles or wrinkles. Starting from the center, gently press outwards using a clean cloth or your fingers. Take your time during this step to ensure a flawless and professional finish.
Patience is Key: Allow Drying Time:
After gluing your photo to the wood, exercise patience and allow sufficient drying time. Follow the instructions provided by the adhesive manufacturer, as drying times can vary. Avoid disturbing or moving the photo during this period to prevent any shifting or damage to the bond. Remember, good things come to those who wait.
81j70QRy7Ow” >
Conclusion
Gluing photos to wood is a creative and unique way to display your favorite memories.
But how do you do it? Well, the process is actually quite simple.
First, gather all the materials you’ll need: a wooden surface, your chosen photos, Mod Podge glue, a foam brush, and a clear sealer. Next, prepare the wood by sanding it lightly to create a smooth surface for the glue to adhere to.
Then, arrange your photos on the wood in the desired layout. Once you’re happy with the arrangement, apply a thin layer of Mod Podge to the back of each photo using the foam brush.
Press firmly to ensure good contact between the photo and the wood. Allow each layer of glue to dry completely before adding another one.
Once all your photos are glued down and dry, apply a final coat of Mod Podge over the entire surface for added protection. Let it dry completely before applying a clear sealer if desired.
Your photos are now securely attached to wood, ready to be admired for years to come.