Ready to transform your floors with a touch of DIY magic?
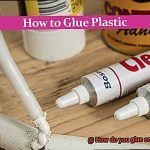
Gluing linoleum flooring is the secret sauce to achieving that fresh and stylish look you’ve been dreaming of. But how exactly do you make this seamless bond happen?
Don’t worry, we’ve got your back. In this step-by-step guide, we’ll walk you through everything you need to know to ensure your linoleum flooring stays put for years to come.
So grab your tools, get ready to dive into the world of gluing linoleum flooring, and let’s make your home shine from the ground up.
Preparing the Subfloor
Contents
Properly preparing the subfloor is vital for a successful and long-lasting linoleum flooring installation. In this comprehensive guide, we will walk you through the essential steps of preparing the subfloor. By following these steps, you can ensure a smooth and stable surface for your linoleum flooring, resulting in a beautiful and durable finish.
Step 1: Remove Existing Flooring
Begin by removing any existing flooring material, such as carpet, hardwood, or vinyl. It is crucial to eliminate all traces of the previous flooring, including adhesive residue. Use a scraper or putty knife to scrape away stubborn residue, and then sweep or vacuum the subfloor to remove loose debris.
Step 2: Inspect and Repair
Thoroughly inspect the subfloor for imperfections or damage. Fill cracks and holes with a suitable floor patching compound or self-leveling underlayment. Smooth out any uneven areas using sandpaper or a sander. This step ensures there are no obstacles that could affect the adhesion of the linoleum flooring.
Step 3: Check Moisture Levels
Excessive moisture can cause damage to both the subfloor and linoleum flooring. Use a moisture meter to determine if the subfloor has high moisture content. If it does, take appropriate measures such as installing a vapor barrier or using a moisture-resistant adhesive. This precautionary step helps prevent future issues with your linoleum flooring.
Step 4: Level the Subfloor
Create a smooth surface for your linoleum flooring by checking for dips or high spots using a straightedge or level. If you find any uneven areas, use a floor leveling compound to even out the surface. Follow the manufacturer’s instructions carefully when applying the leveling compound, and allow it to dry completely before proceeding. This step ensures a level and stable subfloor for optimal adhesion.
Step 5: Clean the Subfloor
Before applying the glue, ensure that the subfloor is completely clean and free of dust and debris. Wipe down the entire surface with a damp cloth or mop to ensure thorough cleanliness. Allow the subfloor to dry completely before moving on to the next step. A clean and dry subfloor is essential for a strong bond between the linoleum and the adhesive.
Choosing the Right Adhesive
When it comes to installing linoleum flooring, choosing the right adhesive is essential. It’s the secret ingredient that ensures a strong and durable bond between the flooring material and the subfloor.
But with so many options available, how do you know which one is right for your project? Don’t worry, we’ve got you covered. In this comprehensive guide, we will walk you through the important factors to consider when choosing the right adhesive for gluing linoleum flooring.
Type of Linoleum Flooring:
- Sheet linoleum: Requires a full spread adhesive, which is applied to the entire surface of the subfloor.
- Tile linoleum: May use a releasable or pressure-sensitive adhesive, allowing for easier removal if needed.
Subfloor Material:
Method of Installation:
Climate and Humidity Levels:
Consult with Professionals and Manufacturers:
- Seek advice from professionals or refer to the manufacturer’s guidelines for valuable insights and recommendations based on your specific project requirements.
- Follow their instructions regarding application techniques, open time, and drying time to ensure a successful and long-lasting bond.
Laying Out the Linoleum Flooring
If you’ve made the decision to install linoleum flooring in your home, congratulations. Not only is linoleum a durable and eco-friendly option, but it also offers a wide range of design possibilities. Now, let’s delve into the step-by-step process of laying out and preparing your linoleum flooring for a flawless glue-up.
- Start with a Clean Slate: Before you begin, it is essential to ensure that your subfloor is clean, dry, and smooth. Take the time to repair any bumps, cracks, or imperfections. Trust me; this extra effort will pay off in the long run by providing a solid foundation for your new flooring.
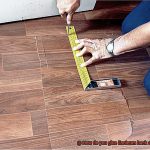
- Measure Twice, Cut Once: Accurate measurements are key to a successful linoleum installation. Take precise measurements of your room to determine how much linoleum flooring you’ll need. Remember to add a few extra inches for trimming and adjustments during installation.
- Acclimate and Relax: Now that you have your linoleum, it’s time to let it acclimate. Unroll the flooring in the room and let it sit for at least 24 hours. This allows the material to adjust to the temperature and humidity of the space, preventing any subsequent shrinkage or expansion.
- Find Your Starting Point: Once your linoleum has acclimated, it’s time to find your starting point. Begin by positioning the linoleum in a corner of the room. Use a chalk line or straight edge to mark a guideline for the first row of flooring, ensuring a straight installation.
- Spread the Magic Glue: Now comes the fun part – applying adhesive. Use a notched trowel or recommended adhesive spreader to apply the glue evenly on the subfloor. Start at the guideline and spread the adhesive in one direction, ensuring complete coverage.
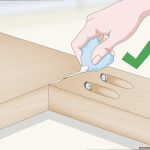
- It’s Time to Lay It Down: Carefully lay down the first row of linoleum along the guideline, making sure it aligns properly with the walls. Smooth out any air bubbles or wrinkles using a hand roller or a heavy object. This step is crucial for a seamless and professional finish.
- Repeat and Trim: Repeat the process for the remaining rows, butting each piece tightly against the previous one without overlapping them. If necessary, trim any excess linoleum using a sharp utility knife. Pay attention to detail to ensure a flawless installation.
- Patience is a Virtue: Allow the glued linoleum flooring to set according to the manufacturer’s recommendations before walking on it or moving furniture back into place. This patience will ensure a strong and long-lasting bond between the linoleum and subfloor.
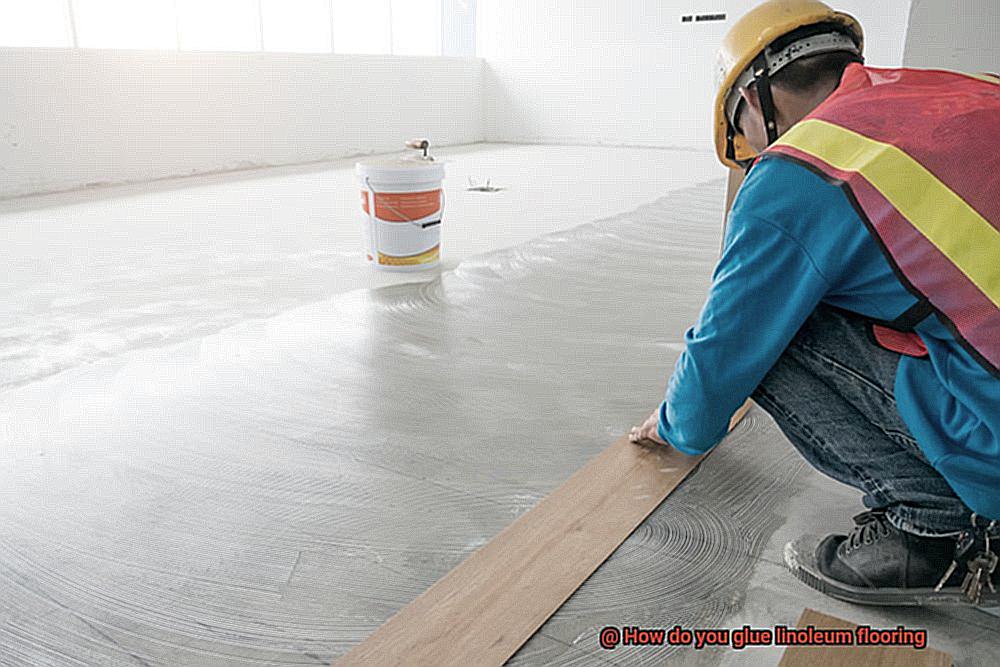
Applying the Adhesive
When it comes to installing linoleum flooring, applying the adhesive is a crucial step that holds everything together. Think of it as the glue that bonds the linoleum to the subfloor, creating a seamless and durable surface. In this section, we will delve into the intricate details of how to achieve that perfect bond between your linoleum and subfloor.
First and foremost, preparing the subfloor is of utmost importance. It should be squeaky clean, free from any dirt, dust, or debris that could hinder the adhesive’s effectiveness. A smooth and pristine surface sets the foundation for a successful installation.
Before you start slathering on the adhesive, give your linoleum some time to acclimate. Allow it to hang out in the room where it will be installed for at least 24 hours. This crucial step helps prevent any unexpected surprises like expansion or contraction once it’s glued down.
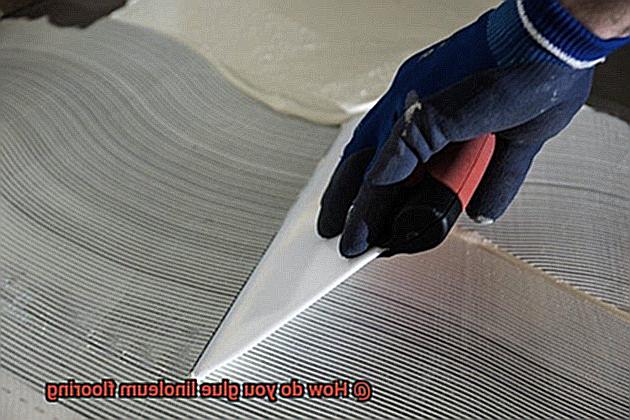
Now comes the fun part – applying the adhesive. Armed with a notched trowel, spread the adhesive evenly on the subfloor. The size of the notches will depend on what the manufacturer recommends, but typically 1/16 inch or 1/8 inch notches are used. This ensures proper coverage and adhesion.
Working in small sections is key. Only spread enough adhesive that you can cover with linoleum within 20 minutes. You don’t want the adhesive to dry out before you can lay down the flooring – time is of the essence.
With precision and care, place your linoleum onto the subfloor, making sure to align it properly and avoid any pesky air bubbles. Take hold of a roller and firmly press down on the linoleum, starting from the center and rolling outwards towards the edges. This technique guarantees a strong bond while eliminating any unsightly air pockets.
Remember, perfection lies in the details. If any excess adhesive seeps through the seams, swiftly wipe it away with a damp cloth or sponge. Don’t let it dry, or you’ll find yourself in a sticky situation later.
Lastly, exercise patience and allow the adhesive to fully cure before exposing your beautiful new linoleum to foot traffic. The specific curing time will depend on the type of adhesive used, so be sure to heed the manufacturer’s instructions.
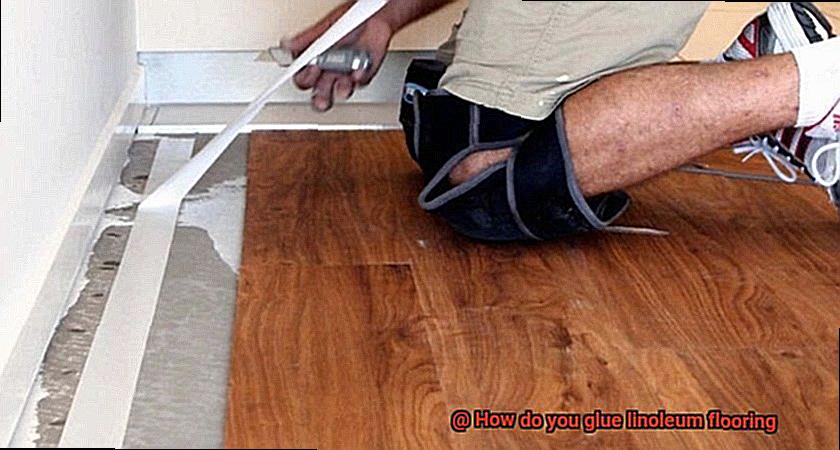
Rolling Back and Pressing Down on the Flooring
This durable and stylish option offers a wide range of colors and patterns to create a unique and beautiful space. However, before you start rolling out that linoleum, it’s crucial to understand the process of rolling back and pressing down on the flooring to ensure a perfect adhesion that will stand the test of time.
Preparation is key to a successful installation. Clear the area of furniture and obstacles that might hinder the process. A clean subfloor is essential, so make sure to remove any dust or debris that could affect the adhesive’s performance.
Now, let’s get rolling. Begin by gently rolling back a small section of the linoleum from one corner of the room using a flooring roller or even a heavy-duty rolling pin. Lift the linoleum while applying gentle pressure to avoid tearing or damaging the material.
As you roll back the linoleum, keep it flat and even to prevent wrinkles or creases when you lay it back down. In case you encounter stubborn areas that are not lifting easily, use a putty knife or scraper to gently pry them off the subfloor.
Once enough of the linoleum is rolled back, it’s time to apply the adhesive. Choose an adhesive recommended by the manufacturer and follow the instructions carefully. Using a trowel or notched spreader, apply an even layer onto the subfloor, covering the entire area where the linoleum will be laid back down. Remember, less is more when it comes to adhesive to avoid uneven surfaces.
Now comes the exciting part – laying the linoleum back down. Start from one end and work your way towards the other, ensuring no air bubbles are trapped between the linoleum and subfloor. To achieve a strong bond, use a flooring roller or a heavy object to press down firmly on the linoleum.
Continue rolling back and pressing down on small sections of the linoleum until the entire floor is covered. Take your time to ensure a smooth and secure installation. If any areas are not adhering properly, lift them back up and reapply adhesive as needed.
Once the linoleum is fully laid down, go over the entire floor with a flooring roller to eliminate any remaining air bubbles and ensure a tight bond between the linoleum and subfloor.
Applying Adhesive to Other Half of Flooring
Today, we embark on an exciting journey into the world of linoleum flooring installation. In our previous section, we learned how to carefully roll back the first half of the flooring. Now, it’s time to get our hands dirty and apply the adhesive to the other half. So, roll up your sleeves and let’s dive in.
Step 1: Prepare the Subfloor:
As with any successful project, preparation is key. Your subfloor should be clean, dry, and free from dust or debris. Take the time to sweep and repair any imperfections. Remember, a smooth subfloor is essential for flawless linoleum installation.
Step 2: Choose the Right Adhesive:
Choosing the right adhesive is paramount for a strong bond between your linoleum and subfloor. Seek advice from your flooring manufacturer or supplier to find an adhesive specifically designed for linoleum flooring. Trust me; you don’t want to cut corners here.
Step 3: Apply the Adhesive:
Now it’s time to get sticky. Follow the manufacturer’s instructions for applying the adhesive. Typically, you’ll use a trowel or notched spreader to create a thin and even layer on the subfloor. Be cautious not to go overboard – we want smooth sailing, not bubbling.
Step 4: Wait for Tackiness:
Patience is a virtue in this process. Allow the adhesive to set for the recommended amount of time specified by the manufacturer. This waiting period ensures that the adhesive becomes tacky, guaranteeing a solid bond with the linoleum.
Step 5: Lay Down the Linoleum:
The moment has arrived. Carefully lay down the remaining half of your linoleum flooring onto the adhesive-covered subfloor. Pay close attention to align it seamlessly with the already laid half. Now, take a deep breath – we’re nearing the finish line.
Step 6: Press and Roll:
To achieve a professional-looking installation, press down firmly on the linoleum using a roller or a weighted object. This step ensures proper bonding and eliminates any air bubbles or gaps that may have sneaked in. Work in small sections, taking your time to ensure each piece is properly aligned and bonded.
Allowing Drying Time
When it comes to gluing linoleum flooring, one crucial step that often gets overlooked is allowing sufficient drying time. This may seem like a minor detail, but trust me, it can make all the difference in the success of your installation. So, buckle up and let’s dive into the world of linoleum flooring.
Why is drying time so important, you ask? Well, let me break it down for you. When you glue linoleum flooring, you want the adhesive to fully cure and bond the linoleum to the subfloor. And guess what? That takes time. The specific drying time can vary depending on a few factors.
First off, the type of adhesive used plays a role. Different adhesives have different drying times, so it’s important to follow the manufacturer’s instructions. They’ve tested their products and know what works best. So, don’t skimp on this step – trust the experts.
Secondly, temperature and humidity conditions can influence drying time. In areas with higher humidity or colder temperatures, you might need to wait a bit longer for the adhesive to dry properly. It’s like waiting for a cake to bake – you can’t rush it if you want it to turn out just right.
And let’s not forget about the thickness of the adhesive layer. If you go overboard with the glue, it’ll take longer to dry. So, make sure to apply a thin and even layer for optimal results. It’s all about finding that perfect balance – not too much, not too little.
Now, here’s the million-dollar question: how long should you wait? Well, most adhesive manufacturers recommend at least 24 hours before subjecting your linoleum flooring to foot traffic or placing heavy furniture on top. But hey, if you can wait longer, go for it. A longer drying time ensures a stronger bond and reduces the risk of premature damage or loosening. Patience is key when it comes to achieving a long-lasting and beautiful linoleum floor.
To help speed up the drying process, keep the installation area well-ventilated and maintain a consistent temperature and humidity level. Good airflow and stable conditions will work wonders for drying time. And please, avoid any moisture or spills during the drying period. We don’t want any unwanted surprises ruining your hard work.
Benefits of Glue Linoleum Flooring
This versatile and practical choice comes with a plethora of benefits that will have you falling in love with it.
First and foremost, let’s talk about durability. Glue linoleum flooring is built to last. With proper installation and maintenance, this type of flooring can withstand heavy use and still look as good as new for decades. So if you have pets or children running around, you can rest easy knowing that your floors will hold up to the challenge.
Maintenance is a breeze with glue linoleum flooring. Unlike other flooring options, linoleum is resistant to stains and moisture. Simply sweep or vacuum regularly to keep it clean, and mop with a damp cloth or mild cleaning solution when necessary. The glue used during installation also helps seal the seams, preventing dirt and moisture from seeping in between the tiles or sheets.
Now let’s talk about design options. Glue linoleum flooring offers a wide range of designs to suit any style or preference. With advancements in manufacturing techniques, linoleum can now mimic the look of various natural materials, such as wood or stone, at a fraction of the cost. So whether you prefer a classic or contemporary aesthetic, there is a linoleum design that will complement your space perfectly.
If you’re environmentally conscious, glue linoleum flooring is an excellent choice. It’s made from natural materials such as linseed oil, cork dust, wood flour, and limestone – all renewable and biodegradable ingredients. Plus, the glue used in linoleum installation is typically low in volatile organic compounds (VOCs), ensuring that the indoor air quality remains healthy.
Last but not least, let’s talk about cost-effectiveness. Glue linoleum flooring is not only affordable in terms of material costs but also in terms of installation. The process is often simpler and less time-consuming, which can result in significant savings. And thanks to its durability, you won’t have to worry about frequent repairs or replacements, saving you even more money in the long run.
Conclusion
When it comes to gluing linoleum flooring, there are a few key steps you need to follow.
First, make sure the surface is clean and free of any debris or dust. Next, apply a thin layer of adhesive evenly across the floor using a notched trowel.
Then, carefully place the linoleum onto the adhesive, making sure to smooth out any air bubbles or wrinkles. Press down firmly on the linoleum to ensure a strong bond with the adhesive.
By following these steps and taking your time, you can achieve a professional-looking installation that will last for years to come.