Crafting and woodworking are all about combining different materials to create something truly remarkable. And when it comes to elegance and sophistication, nothing beats the seamless bond between leather and wood. Whether you’re working on furniture upholstery, decorative accents, or custom-made accessories, knowing how to glue leather to wood can take your craftsmanship to new heights.
In this guide, we’ll walk you through the step-by-step process of achieving a durable and stunning bond between leather and wood. From choosing the right adhesive to preparing the surfaces for a flawless finish, we’ve got you covered. Get ready to achieve professional-grade results that will leave everyone in awe.
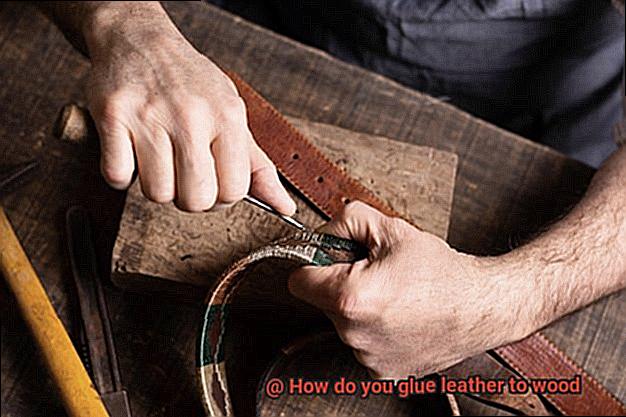
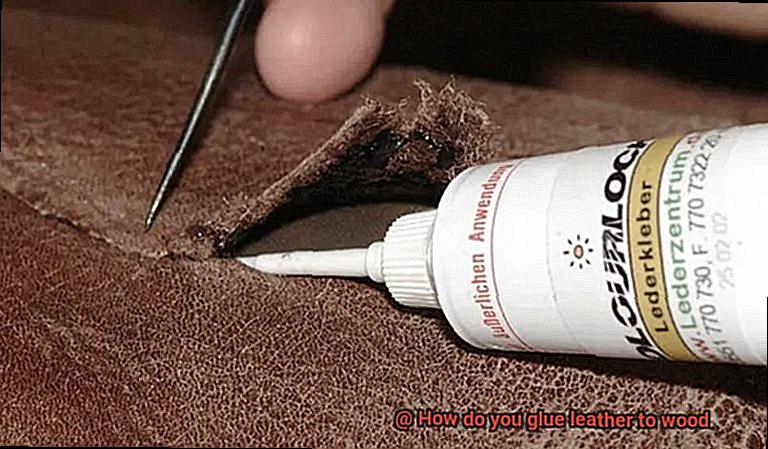
How do you glue leather to wood
Contents
- 1 How do you glue leather to wood
- 2 What is Contact Cement?
- 3 How to Prepare the Surfaces for Gluing Leather to Wood
- 4 How to Apply Contact Cement for Gluing Leather and Wood
- 5 What is Epoxy Adhesive?
- 6 How to Use Epoxy Adhesive for Gluing Leather and Wood
- 7 What is Hide Glue?
- 8 How to Use Hide Glue for Gluing Leather and Wood
- 9 Conclusion
Step 1: Choose the Right Adhesive
Before diving into gluing, it’s crucial to pick an adhesive specifically designed for porous surfaces like leather and wood. Options like contact cement, epoxy, or wood glue all have their advantages. Consider factors such as drying time, strength, and flexibility based on your project requirements.
Step 2: Prepare the Surfaces
To ensure a strong bond that lasts, start by cleaning both the wood and leather surfaces thoroughly. Remove any dust, oils, or debris that might interfere with adhesion. Smooth out imperfections on the wood using sandpaper for a clean surface. Lightly scuff the leather with sandpaper to enhance adhesion.
Step 3: Apply the Adhesive
Follow the manufacturer’s instructions to apply an even coat of adhesive onto both surfaces using a brush or another suitable applicator. Make sure you cover every area that will be bonded. Avoid excessive application to prevent seepage. Let the adhesive become tacky or dry as specified in the instructions.
Step 4: Align and Bond
Carefully align the leather piece with the wood surface while applying gentle pressure for full contact between them. Start at one end and press down gradually, removing any air bubbles or wrinkles as you go. Use a roller or a clean cloth to ensure uniform adhesion and eliminate gaps.
What is Contact Cement?
Contact cement is a remarkable adhesive that is widely used for bonding materials such as leather to wood. It possesses an incredible ability to create an instantaneous and permanent bond, making it the go-to choice for numerous applications. Let’s dive deeper into the fascinating world of contact cement:
- Adhesion: Contact cement showcases its versatility by adhering to various surfaces, including both porous and non-porous materials. This characteristic makes it an excellent choice for bonding leather, a porous material, to wood, which can have either a porous or non-porous surface.
- Types: Contact cement is available in two forms – solvent-based and water-based. The solvent-based variant offers a stronger bond and contains volatile solvents that evaporate during the drying process. On the other hand, water-based contact cement is a safer and more environmentally-friendly option, utilizing water as its carrier.
- Application: To ensure a successful bonding process when gluing leather to wood, it is crucial to prepare both surfaces meticulously. Cleanliness is key – ensure that both surfaces are free from any dirt or debris before application. Using a brush or roller, apply a thin, even layer of contact cement to both the leather and wood surfaces. Allow the adhesive to dry for a few minutes before bringing the leather into contact with the wood.
- Bonding: Once the leather is in position on the wood surface, take a moment to align it perfectly before pressing down firmly. Avoid any movement or repositioning of the surfaces at this stage, as it may weaken the bond.
- Curing time: Patience is rewarded with contact cement. After bonding, it takes approximately 24 hours for contact cement to reach its full strength. During this critical period, refrain from subjecting the bonded surfaces to excessive stress or movement to allow the adhesive to cure effectively and establish a robust and long-lasting bond.
Contact cement’s popularity stems from its exceptional ability to bond different materials, instant adhesion, and remarkable durability. Whether you opt for the solvent-based or water-based variant, following proper application techniques will guarantee a successful bonding process when gluing leather to wood.
How to Prepare the Surfaces for Gluing Leather to Wood
To prepare the surfaces for gluing leather to wood, there are a few important steps you need to follow. Proper surface preparation is crucial for achieving a strong and long-lasting bond between the two materials. Here are some key points to consider:
Clean the surfaces
Before applying any adhesive, make sure both the leather and wood surfaces are clean and free from any dirt, dust, or debris. Use a soft cloth or brush to remove any loose particles, and if necessary, wipe the surfaces with a mild soap and water solution. This will ensure that the glue adheres properly to the surfaces. Allow them to dry completely before proceeding.
Sand the wood
To improve adhesion, it is recommended to lightly sand the wood surface that will come in contact with the leather. This helps create a slightly rough texture, allowing the glue to penetrate better and bond securely. Use fine-grit sandpaper and sand in the direction of the wood grain. Be careful not to sand too aggressively, as this could damage the wood.
Remove existing finishes
If the wood has any existing finishes such as varnish, paint, or wax, it is important to remove them before gluing the leather. These finishes can create a barrier that prevents proper bonding. You can use sandpaper or a chemical stripper specifically designed for removing finishes. Be sure to follow the manufacturer’s instructions when using chemical strippers.
Prime the wood
Depending on the type of wood you are working with, it may be beneficial to apply a primer before gluing. Priming helps seal the wood surface and enhances adhesion. Choose a primer that is suitable for both wood and leather applications, and follow the manufacturer’s instructions for application. Apply a thin coat of primer evenly on the sanded surface and allow it to dry completely before proceeding.
Test for compatibility
Before proceeding with gluing, it is advisable to conduct a compatibility test on a small, inconspicuous area of both the leather and wood surfaces. Apply a small amount of glue and press the two materials together firmly. Allow it to dry according to the glue manufacturer’s instructions. Afterward, check if the bond is strong and if there are any adverse reactions such as discoloration or damage. If the test is successful, you can proceed with gluing the rest of the surfaces.
How to Apply Contact Cement for Gluing Leather and Wood
Gluing leather to wood requires a strong and versatile adhesive, like contact cement. To achieve a successful bond, thorough preparation is essential. This includes cleaning and drying the surfaces before applying the adhesive. By following the proper application process, you can ensure a durable and long-lasting bond between leather and wood.
Prepare the Surfaces:
Before applying contact cement, it is crucial to clean both the leather and wood surfaces thoroughly. Use a mild detergent solution to wipe away any dirt, dust, or grease that may hinder the adhesive’s effectiveness. Allow the surfaces to dry completely before proceeding. This step ensures optimal adhesion.
Apply Contact Cement:
Using a brush or roller, apply a thin and even layer of contact cement to both the leather and wood surfaces. It is important to cover the entire surface with the adhesive to ensure proper bonding. Take care to apply an even coat, avoiding excessive amounts that could lead to uneven drying or weak adhesion.
Allow Drying Time:
Let the contact cement dry for the recommended time specified by the manufacturer, typically ranging from 10 to 30 minutes. The adhesive should become tacky before proceeding to the next step. This tackiness is crucial for achieving a strong bond between the leather and wood.
Align and Press Firmly:
Once the contact cement is tacky, carefully align the leather piece with the wood surface. Pay attention to proper positioning since contact cement bonds quickly and cannot be repositioned once the surfaces are in contact. Press the two surfaces firmly together, applying even pressure across the entire bonded area. This ensures maximum adhesion and helps eliminate air bubbles or gaps in the bond.
Cure Time:
Leave the glued leather and wood to cure for at least 24 hours before subjecting it to any stress or strain. This allows sufficient time for the adhesive to fully set and create a strong bond. Avoid handling or putting stress on the glued area during this curing period to ensure optimal results.
What is Epoxy Adhesive?
Epoxy adhesive is a powerful and versatile glue that is commonly used to bond a wide range of materials, including leather and wood. It consists of two components – a resin and a hardener – that must be mixed together in specific ratios before use.
What sets epoxy adhesive apart is its incredible strength. It forms a bond that can endure substantial stress and strain, making it perfect for securing leather to wood, even when subjected to pulling or bending forces. With its ability to withstand moisture, heat, and chemicals, epoxy adhesive ensures a long-lasting bond that won’t weaken over time.
One of the key advantages of epoxy adhesives is their exceptional gap-filling properties. Even if there are gaps or uneven surfaces between the leather and wood, this adhesive can fill in those spaces, creating a strong and seamless bond. This is particularly useful when working with leather and wood, as their different textures and shapes may present challenges in achieving a smooth connection.
Moreover, epoxy adhesives provide users with ample working time. This means you can position and adjust the bonded materials before the adhesive sets, allowing you to meticulously align and smooth out any wrinkles or folds in the leather, ensuring a flawless finish.
However, it is crucial to prepare the surfaces properly before applying epoxy adhesive. Both the leather and wood should be clean, dry, and free from any dirt, grease, or contaminants. Slightly roughening the surfaces with sandpaper will enhance adhesion.
When applying epoxy adhesive to glue leather to wood, it is recommended to spread a thin and even layer of the adhesive on both surfaces. This guarantees maximum contact between the materials and enhances the strength of the bond. After applying the adhesive, firmly press the leather onto the wood surface and allow sufficient drying time for the adhesive to fully cure.
How to Use Epoxy Adhesive for Gluing Leather and Wood
Using epoxy adhesive for gluing leather to wood is a popular choice due to its strength and durability. Epoxy adhesive is a two-part adhesive that consists of a resin and a hardener, which need to be mixed together in equal parts before application. Here is a step-by-step guide on how to use epoxy adhesive for gluing leather and wood:
Prepare the surfaces
Before applying the epoxy adhesive, it is crucial to prepare the surfaces of both the leather and wood. Clean the surfaces thoroughly, ensuring they are free from any dirt, dust, or grease. It is recommended to lightly sand the wood surface to create a rough texture, which will enhance adhesion.
Mix the epoxy adhesive
Follow the manufacturer’s instructions to mix the epoxy adhesive. Typically, you will need to combine equal parts of the resin and hardener on a clean surface. Use a stir stick or a small spatula to mix them together thoroughly. Ensure that the mixing is done quickly as epoxy adhesive tends to cure rapidly.
Apply the epoxy adhesive
Once the epoxy adhesive is mixed, apply it to one of the surfaces using a brush or a small spatula. Depending on the size and complexity of the project, it may be useful to apply an even layer of adhesive over the entire surface. Be cautious not to apply too much adhesive as it can seep through the leather or create excess mess.
Press the leather onto the wood
After applying the epoxy adhesive, carefully press the leather onto the wood surface. Apply pressure evenly across the entire area to ensure proper adhesion. It is recommended to use clamps or weights to hold the leather in place while the adhesive cures. This will prevent any movement or shifting during the curing process.
Allow curing time
The curing time for epoxy adhesive can vary depending on the brand and type of adhesive used. It is important to follow the manufacturer’s instructions regarding curing time and temperature requirements. Generally, epoxy adhesives require several hours to cure fully. However, some may require longer curing times, especially in colder temperatures.
Check and reinforce the bond
Once the adhesive has cured, check for any gaps or areas that may require additional adhesive. If necessary, apply more epoxy adhesive to ensure a strong bond between the leather and wood. It is essential to reinforce any weak areas or gaps to prevent future separation.
Allow sufficient curing time
After completing the gluing process, it is important to allow sufficient time for the adhesive to fully cure before using or handling the glued item. This will ensure maximum strength and durability of the bond. Avoid putting any stress on the glued area until it has fully cured.
It is crucial to follow safety precautions when working with epoxy adhesive. Wear gloves and work in a well-ventilated area to avoid skin contact and inhalation of fumes. If any adhesive comes into contact with your skin, wash it off immediately with soap and water.
What is Hide Glue?
It is derived from the connective tissues and bones of animals like cattle, horses, and rabbits.
The process of making hide glue involves boiling the animal parts in water to extract the collagen, which is a gelatinous substance. This substance can then be dried and ground into a powder, which is the form in which hide glue is typically sold.
One of the unique characteristics of hide glue is its reversibility. Unlike modern synthetic adhesives that form a permanent bond, hide glue can be dissolved and reactivated with heat and moisture. This makes it ideal for applications where materials may need to be separated or repaired in the future.
Hide glue comes in various strengths, indicated by bloom values. The higher the bloom value, the stronger the adhesive properties of the glue. This allows for flexibility in choosing the right strength based on project requirements.
When gluing leather to wood, hide glue offers several advantages. It has a long open time, meaning it remains workable for an extended period before setting. This allows for adjustments to be made during the gluing process, ensuring precise alignment of the leather and wood surfaces.
Hide glue also creates a flexible bond that can withstand temperature changes. This is important when working with leather, as it expands and contracts with fluctuations in humidity and temperature. The flexibility of hide glue ensures that the bond remains intact even under these conditions.
Furthermore, hide glue is non-toxic and environmentally friendly. Unlike many synthetic adhesives that contain harmful chemicals, hide glue is made from natural ingredients. It is also compatible with a wide range of finishes and can be easily cleaned up with water.
How to Use Hide Glue for Gluing Leather and Wood
Prepare the Surfaces:
Before applying hide glue, it is crucial to prepare the surfaces that will be bonded. Begin by cleaning both the leather and wood surfaces thoroughly. Wipe them down with a damp cloth to remove any dirt, dust, or oil. Allow the surfaces to dry completely before proceeding. By ensuring that the surfaces are clean and free from contaminants, you will create the ideal conditions for a strong bond.
Prepare the Hide Glue:
The next step is to prepare the hide glue for application. If you are using liquid hide glue, warm it up according to the manufacturer’s instructions. This will help to improve its flowability and make it easier to work with. If you are using solid hide glue, dissolve it in water following the manufacturer’s guidelines. Allow the mixture to sit until it reaches a gel-like consistency. The proper preparation of hide glue is crucial for achieving optimal adhesion.
Apply the Glue:
Once the hide glue is prepared, use a brush or spatula to apply an even layer of glue on both the leather and wood surfaces. Ensure that you cover the entire area that needs to be bonded. The goal is to achieve a consistent and thin layer of glue on both materials.
Press the Surfaces Together:
After applying the hide glue, firmly press the leather and wood surfaces together. It is essential to align them properly before applying pressure to ensure a strong bond. You can use clamps or weights to hold the pieces in place while the glue dries. Applying even pressure will help create a secure connection between the leather and wood.
Allow the Glue to Dry:
Once the surfaces are pressed together, allow the hide glue to dry completely. Follow the manufacturer’s instructions for the recommended drying time. This will typically take several hours or overnight. It is important not to disturb the glued surfaces during this time to ensure a strong and durable bond. The drying process allows the hide glue to set and create a reliable connection between the leather and wood.
Trim Excess Glue:
After the hide glue has fully dried, you can trim away any excess glue using a sharp knife or scissors. Be careful not to damage the leather or wood while trimming. Removing the excess glue will give your project a clean and professional finish.
u_sZe9IRA4k” >
Conclusion
When it comes to gluing leather to wood, there are a few key steps you need to follow.
First, make sure both surfaces are clean and free of any dirt or debris. This will ensure a strong bond between the leather and the wood.
Next, choose the right adhesive for the job. There are specific adhesives designed for bonding leather and wood together, such as contact cement or epoxy.
These adhesives provide a strong and durable bond that will withstand the test of time. Apply the adhesive evenly to both surfaces, using a brush or applicator tool.
Then, press the leather firmly onto the wood, making sure to smooth out any wrinkles or bubbles. Allow the glue to dry completely before handling or using the glued item.
And there you have it – a simple yet effective method for gluing leather to wood.