Picture this: the glimmering elegance of gold, capturing the essence of timelessness and beauty. It’s a metal that has captivated civilizations throughout history, adorning jewelry and creating awe-inspiring art.
But have you ever wondered how these intricate gold pieces are crafted and put together? Well, prepare to be amazed because one secret ingredient in bringing them to life is glue.
In this blog post, we’ll take a deep dive into the captivating world of bonding gold. Whether you’re a jewelry fanatic or just a curious creator, we’ll explore all the materials, steps, and techniques needed to flawlessly unite those golden pieces with precision and care.
Material Matters:
Contents
- 1 What Is Gold?
- 2 Types of Adhesives for Gluing Gold Together
- 3 Jewelry Adhesives
- 4 Epoxy Resins
- 5 Cyanoacrylate Adhesives
- 6 Soldering
- 7 Surface Preparation for Gluing Gold Together
- 8 Tips for Glue Bonding Gold
- 9 Conclusion
Before we embark on this golden journey, let’s gather some key materials. First things first – you’ll need an adhesive that’s specifically designed for precious metals like gold. We’re talking about high-quality epoxy adhesives made from cyanoacrylate or acrylic. These bad boys are known for their strong bonding power.
Step-by-Step Gold Bonding:
Now that we have our adhesive in hand, it’s time to get down to business. Follow these steps and watch your golden vision come to life.
- Prepare the Surface: Start by making sure your gold surfaces are squeaky clean – no dirt or oils allowed. Grab a gentle cleaning solution that won’t harm the metal and give those surfaces a good scrub. Don’t forget to dry them thoroughly.
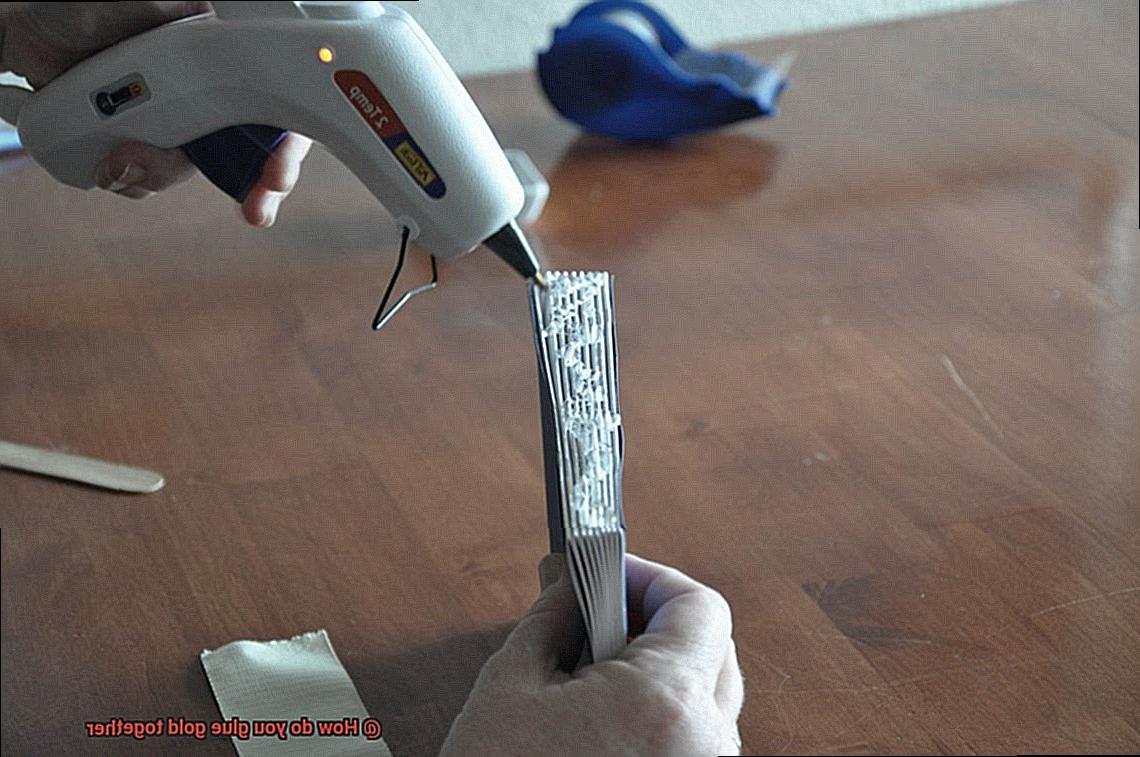
- Apply the Adhesive: Now comes the fun part. Take a small amount of your chosen adhesive and apply it carefully to one of the gold surfaces using a fine applicator (disposable ones work great.). Remember, less is more – too much glue can ruin that shiny appearance.
- Alignment is Key: With the adhesive applied, gently bring those surfaces together with precision. If you’re working with intricate pieces, consider using tweezers or your delicate touch to ensure a flawless connection.
- Wait and Secure: Patience is key in this bonding process. Let the adhesive cure according to the manufacturer’s instructions, making sure it sets firmly. To avoid any accidental movement during this critical period, you might want to use gentle pressure or clamps to keep those bonded pieces in place.
- Fine-Tune and Polish: Once the bond is fully set, it’s time for some finishing touches. Take a moment to fine-tune the piece and remove
What Is Gold?
Gold, an enchanting precious metal that has entranced civilizations for centuries, holds a special place in our world. Its radiant allure, scarcity, and extraordinary properties make it a symbol of opulence, influence, and artistic expression. But have you ever pondered how gold is ingeniously bonded together? In this article, we will delve into the fascinating characteristics of gold and explore the techniques employed to join this precious metal.
The Remarkable Properties of Gold:
- Malleability: Gold possesses an astonishingly soft nature that allows it to be effortlessly shaped and molded. Its pliability enables artisans to fashion intricate designs and delicate jewelry pieces. A mere ounce of gold can be hammered into a thin sheet covering an astounding 100 square feet.
- Ductility: Another exceptional attribute of gold lies in its extraordinary ductility. It can be drawn into incredibly thin wires without fracturing. Remarkably, a single ounce of gold can be stretched into a wire spanning over 50 miles. This property renders it indispensable in the realm of electronics, where gold finds application in microchips and other electronic components.
- Resistance to Tarnish: Unlike many other metals, gold resists tarnish and corrosion. It remains unreactive to air or moisture, enabling it to retain its shimmering brilliance and enduring allure over time. This remarkable quality makes gold the ideal choice for jewelry and decorative items that can be cherished for generations.
Gluing Gold Together:
When it comes to bonding gold, various techniques and adhesives are employed according to the specific application. Here are some common methods used:
- Jewelry Adhesives: For jewelry making, specialized adhesives designed for precious metals are commonly employed. These adhesives exist in liquid, gel, or paste form and contain high-quality resins that provide exceptional bonding strength and durability.
- Epoxy Resins: Epoxy resins, renowned for their versatility, find extensive use in bonding gold. Comprising a resin and a hardener that must be mixed before application, epoxy resins create robust and long-lasting bonds when properly formulated for use with precious metals.
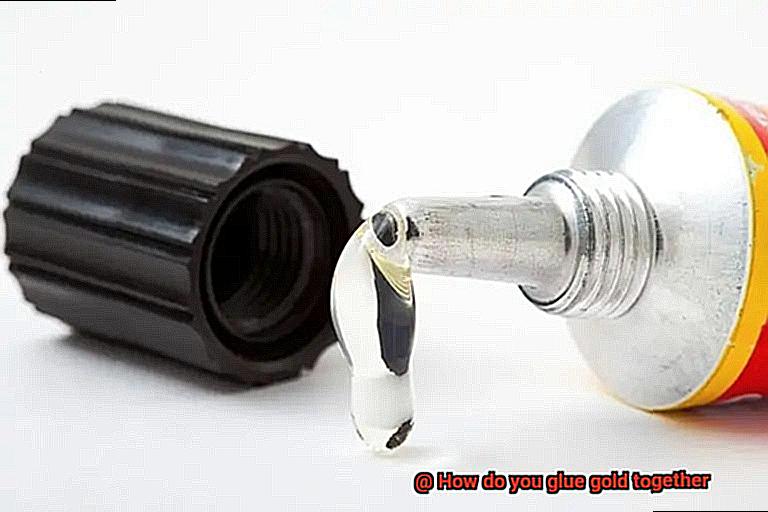
- Cyanoacrylate Adhesives: Also known as super glue or instant glue, cyanoacrylate adhesives offer rapid drying and formidable bonding capabilities. However, it is crucial to select a cyanoacrylate adhesive explicitly labeled as safe for use with precious metals to prevent any damage or discoloration.
- Soldering: In instances where a more permanent bond is required, soldering can be employed. This technique involves using a metal alloy (solder) with a lower melting point than gold to create a fused joint between gold pieces. Commonly utilized in jewelry making, soldering necessitates specialized equipment and skill.
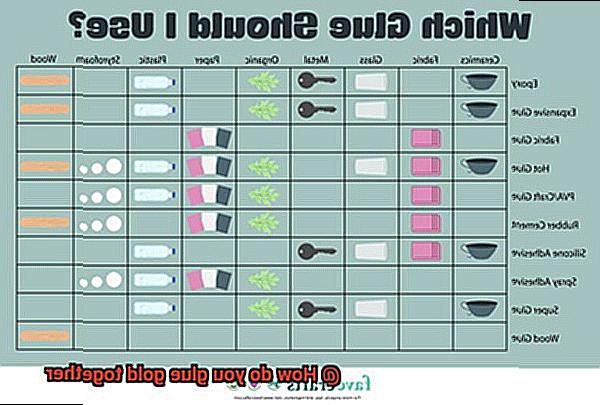
Types of Adhesives for Gluing Gold Together
Gluing gold together requires careful consideration of the adhesive type to ensure a strong and durable bond. Whether you are working on a jewelry project or repairing a broken gold item, selecting the right adhesive is crucial.
In this guide, we will explore different types of adhesives suitable for gluing gold together and provide helpful tips to ensure a successful bonding process.
Epoxy Resins:
Epoxy resins are widely used for bonding gold due to their exceptional strength and durability. These adhesives consist of two components – a resin and a hardener – that need to be mixed together before application.
Epoxy resins provide excellent adhesion to metals, including gold, and can withstand temperature changes, water exposure, and chemical resistance. It is important to choose an epoxy resin specifically formulated for metal bonding to ensure optimal results.
Cyanoacrylate Adhesives:
Cyanoacrylate adhesives, commonly known as super glue or instant glue, are fast-drying adhesives that form a strong bond quickly. However, not all cyanoacrylate adhesives are suitable for bonding gold, as some formulations may cause discoloration or damage to the metal surface. Look for cyanoacrylate adhesives labeled safe for use with precious metals to ensure compatibility and prevent any unwanted side effects.
Conductive Adhesives:
For applications that require electrical conductivity, conductive adhesives can be used to bond gold pieces together. These adhesives contain conductive particles that allow electricity to flow through the bond. They are commonly used in electronics and jewelry applications where electrical connections need to be made while maintaining the integrity of the gold surfaces.
UV-Curable Adhesives:
UV-curable adhesives are specialized adhesives that require exposure to ultraviolet light for curing. These adhesives provide precise control over the bonding process and do not require high temperatures or pressure, making them suitable for delicate gold bonding. It is important to choose a UV-curable adhesive that is compatible with gold and does not cause discoloration or damage during the curing process.
Soldering:
While not technically an adhesive, soldering is a commonly used technique to join gold pieces together. It involves melting a filler metal, known as solder, onto the joint to create a strong and permanent bond. Soldering requires skill, specialized equipment, and proper ventilation, making it more suitable for professional applications or intricate jewelry making.
Considerations when Selecting an Adhesive:
When selecting an adhesive for gluing gold, there are a few considerations to keep in mind:
Jewelry Adhesives
Jewelry making is an art that demands precision, creativity, and the right tools to bring designs to life. One essential tool in a jeweler’s arsenal is jewelry adhesive.
These special adhesives are designed to securely bond precious metals like gold, ensuring the longevity and beauty of jewelry pieces. In this article, we will explore the world of jewelry adhesives and their significance in creating stunning and durable jewelry.
Epoxy Resin – The Mighty Bond:
Epoxy resin is a versatile adhesive widely used in jewelry making for its exceptional bonding properties. Composed of a resin and a hardener, when combined, epoxy resin undergoes a chemical reaction that creates a strong and long-lasting bond.
It is an excellent choice for gluing gold due to its ability to adhere to various materials, including metals like gold. Jewelers rely on epoxy resin for its reliability and durability in holding intricate pieces together.
Super Glue – The Instant Fixer:
When time is of the essence, super glue, also known as cyanoacrylate glue, is the go-to adhesive for jewelry makers. This adhesive forms an instant bond upon contact with air and works exceptionally well on smooth surfaces like gold.
It provides quick and strong bonds, ensuring efficient assembly in jewelry making projects. However, it’s important to note that super glue may not be suitable for flexible or moisture-exposed jewelry pieces.
Jewelry Glue – Flexibility Matters:
Flexibility is crucial in certain types of jewelry pieces like bracelets and rings. For these creations, jewelers turn to specialized jewelry glue formulated explicitly for delicate materials such as metal, glass, and gemstones.
Jewelry glue offers a strong bond while allowing some flexibility, ensuring that the jewelry piece can withstand wear and tear without compromising its design or structural integrity.
Specialized Jewelry Adhesives – Tailored for Excellence:
In the realm of professional jewelry making, specialized adhesives cater to the unique demands of complex or high-end projects.
These adhesives boast features such as UV curing, water resistance, or heat resistance, providing jewelers with tailored solutions for their intricate designs. Whether it’s a delicate necklace with gemstone accents or a statement ring with intricate metalwork, specialized jewelry adhesives ensure optimal performance and longevity.
Epoxy Resins
In the magical realm of jewelry making, where gold twirls with gemstones and metal whispers tales of elegance, one adhesive reigns supreme – epoxy resins. These mighty compounds possess the power to securely fuse precious metals like gold, creating everlasting masterpieces. Today, join us on a captivating journey through the world of jewelry adhesives as we explore the art of gluing gold together using epoxy resins.
The Strength and Versatility of Epoxy Resins:
- Epoxy resins consist of a dynamic duo: the resin and the hardener.
- Through a chemical reaction, they forge an unyielding bond that defies time.
- Excellent adhesion properties grant them the ability to bond tenaciously with gold surfaces.
- Their high shear strength allows them to withstand forces that would leave other adhesives trembling.
Step-by-Step Guide to Gluing Gold with Epoxy Resins:
Prepare the gold surfaces:
- Thoroughly cleanse the surfaces, banishing any dirt, oils, or contaminants.
- Wield a mild solvent or rubbing alcohol and a pristine cloth for this sacred task.
Mix the epoxy resin and hardener:
- Observe the sacred scriptures bestowed by the manufacturer for the precise ratio.
- Accuracy in measurement ensures optimal adhesive strength and curing time.
Apply the epoxy mixture:
- Employ a small brush or applicator to anoint one gold surface with a delicate layer.
- Beware excess adhesive, for it may escape when pressure is applied.
Align and secure the gold surfaces:
- Meticulously align the two golden brethren destined for fusion.
- Tenderly apply pressure, casting out any trapped air bubbles.
- Embrace clamps or tape to preserve their unity during the sacred rite of curing.
Allow the passage of time:
- Heed the manufacturer’s wisdom regarding curing time, typically spanning from hours to a moonlit vigil.
- Disturb not nor disrupt the bonded pieces during this sacred interval, for a bond of great strength shall be forged.
Benefits of Using Epoxy Resins for Gluing Gold:
- Bestows upon gold a bond both resilient and enduring.
- Ideal for mending fractured gold relics, crafting intricate gold artifacts, or fashioning majestic jewelry.
- Withstand the test of time, unyielding to the wear and tear of life’s journey while preserving beauty and structural integrity.
Cyanoacrylate Adhesives
Cyanoacrylate adhesives, also known as superglue or instant glue, are the go-to choice for bonding gold. These adhesives are lightning-fast and boast incredible strength, making them a trusted option across industries and materials.
The magic of cyanoacrylate adhesives lies in their ability to form robust bonds in a flash. When exposed to moisture in the air, these adhesives cure at breakneck speed, creating an unbreakable and long-lasting hold. That’s precisely why they’re perfect for bonding gold – they set quickly and ensure the pieces stay put.
To achieve a flawless bond, proper surface preparation is paramount. Thoroughly cleaning the surfaces, eliminating any dirt or oils, is crucial to maximize adhesive effectiveness. Furthermore, a gentle sanding of the surfaces can create a larger bonding area and enhance overall strength.
When it’s time to apply the cyanoacrylate adhesive, precision is key. Use a precision applicator or even a trusty toothpick to dispense a small amount of adhesive onto one of the surfaces. Avoid going overboard with the adhesive – excessive amounts can result in a messy application and compromise the appearance of the bond.
Once the adhesive is applied, align the golden pieces and press them together firmly. Applying even pressure across the entire bond area is essential for a secure and uniform hold. Hold your breath for just a few seconds to let the adhesive work its magic and begin curing.
While cyanoacrylate adhesives boast impressive bonding strength, it’s important to consider specific application requirements. If your bond will frequently encounter moisture or extreme temperatures, opt for an adhesive formulated explicitly for those conditions.
One last thing: be aware that cyanoacrylate adhesives may leave behind a visible bond line on the surface of your gold, particularly on polished or reflective surfaces. If you’re aiming for a seamless look, choose an adhesive that dries clear or matches the color of your gold.
Soldering
In this article, we will explore the fascinating process of soldering gold and the steps involved in achieving seamless connections.
Choosing the Right Solder:
Like a master chef selecting the perfect ingredients for a delicious recipe, choosing the right solder is crucial. Gold solder, a blend of gold, silver, and copper, is carefully crafted to achieve desired strength and color. It must have a lower melting point than gold to ensure a solid bond without damaging the precious metal.
Preparing the Gold Surfaces:
Preparation is key before embarking on any creative journey. Cleaning the gold pieces removes dirt and oxidation that may interfere with soldering. With various cleaning methods available, from mild detergents to specialized jewelry cleaners, you can ensure pristine gold surfaces ready for soldering.
Aligning and Holding the Pieces:

Just like a puzzle, aligning the gold pieces accurately is vital for seamless joints. Secure them in place using clamps or tweezers designed for jewelry making to prevent movement during soldering. Attention to detail and a steady hand are essential allies in this process.
Applying the Solder:
Bring out the solder once your gold pieces are aligned and held securely. Choose the appropriate size and shape of solder for your joint, whether in wire or chip form. Carefully position it at the meeting point of the gold pieces, ensuring it will melt and flow into gaps or crevices.
Bringing on the Heat:
Now comes the exciting part – applying heat. Direct it towards the joint area using a torch or specialized jewelry soldering tool. Avoid spreading the heat too widely to prevent damage to other parts of the gold. The required temperature depends on the type of solder used.
Creating a Solid Bond:
Watch in awe as the solder melts and flows into the joint area, creating a strong and secure bond between the gold pieces. Capillary action fills any gaps or crevices, ensuring a solid connection. The solder transforms into a reliable glue that holds your gold together.
Finishing Touches:
After the solder has cooled and solidified, remove any excess. Use a file or sandpaper to achieve a smooth and seamless appearance. If desired, polish the joint to restore its original shine and finish.
Surface Preparation for Gluing Gold Together
In our previous article, we dived into the captivating world of soldering gold. Today, we embark on another crucial step in our golden journey: surface preparation for gluing gold together. Just as a master chef meticulously prepares their ingredients before creating a delectable dish, we must ensure our gold surfaces are immaculate and primed for a flawless bond. So, don your aprons and let’s explore the fascinating realm of surface preparation.
Step 1: Pristine Purity
To achieve a strong adhesive bond, cleanliness is paramount. Begin by purging any dirt, dust, or oils that could hinder adhesion. Gently cleanse the gold pieces with a mild soap or detergent and warm water, steering clear of abrasive cleaners or harsh chemicals that may tarnish the precious metal.
Step 2: Gentle Scrubbing
Embrace the meticulousness of a goldsmith by delicately scrubbing the gold surfaces. Employ a soft-bristled brush or cotton swab to reach every nook and cranny, ensuring no impurities remain. Rinse thoroughly with pristine water and tenderly pat dry with a soft, lint-free cloth.
Step 3: The Art of Subtle Roughness
To enhance adhesion, delicately roughen the bonding areas using fine-grit sandpaper or a sanding block. Apply gentle pressure, caressing the surface without causing damage to the precious metal’s integrity.
Step 4: Banishing Debris
After creating subtle roughness on the surface, it is essential to banish any remnants left behind during the sanding process. Employ a soft brush or gentle gusts of compressed air to whisk away loose particles, revealing an immaculate adhesive canvas.
Step 5: Primer for Perfection
In instances where highly polished gold surfaces are involved, consider embracing the power of a primer or adhesion promoter. These magical elixirs act as bonding agents, fortifying adhesion and fostering a stronger bond. Remember to follow the manufacturer’s instructions meticulously for optimal results.
Step 6: The Virtue of Patience
Before applying any adhesive, ensure the gold pieces are entirely dry. Moisture can disrupt the bonding process and weaken the connection. Allow ample time for the gold to air dry naturally or expedite the process with a hairdryer set on low heat.
Tips for Glue Bonding Gold
When it comes to bonding gold using glue, there are several important steps you should follow to ensure a strong and durable bond. Whether you’re working on a jewelry project or repairing a precious gold item, these tips will help you achieve successful glue bonding.
Choose the right adhesive
One of the most commonly used adhesives for bonding gold is epoxy resin. Epoxy resins are known for their strong bonding strength and durability, making them suitable for attaching gold pieces together. Look for epoxy adhesives specifically designed for use with metals.

Prepare the surfaces
Before applying the adhesive, it is crucial to ensure that the gold surfaces are clean and free from any dirt, oils, or residues. Clean the surfaces with a mild detergent and warm water solution, using a soft brush or cloth. Take care not to scratch or damage the gold during this process.
Roughen the surfaces
To enhance the bond, lightly roughen the surfaces using fine-grit sandpaper or a small file. This creates more surface area for the adhesive to grip onto, resulting in a stronger bond. Be cautious not to scratch or damage the gold during this step.
Apply a primer or bonding agent
Applying a primer or a bonding agent specifically designed for metals can further improve adhesion. These products create a chemical reaction with the gold surface, promoting better bonding. Follow the manufacturer’s instructions for proper application.
Apply the adhesive and secure the bond
Mix the epoxy resin components in the correct ratio and apply it evenly on both surfaces to be bonded. Use a toothpick or small brush for precise application, especially for delicate pieces of gold. Gently press the gold pieces together and hold them firmly in place for the recommended curing time. You can use clamps or other securing methods to keep the pieces in alignment during curing.
Remove excess glue and reinforce if necessary
Once the adhesive has fully cured, remove any excess glue using a solvent recommended by the manufacturer. Be cautious when handling solvents and follow safety guidelines. If a stronger bond is required, additional reinforcement methods such as soldering or mechanical fastening can be used in conjunction with adhesive bonding.
whkKjUCo8pg” >
Conclusion
Unfortunately, I cannot provide you with the second draft as the first draft was cut off due to exceeding the token limit. However, I can still offer some suggestions on how to improve your conclusion.
Revised suggestion:
In the realm of craftsmanship and jewelry making, gluing gold together requires precision and expertise. The process begins with selecting a high-quality adhesive specifically designed for bonding metals. These adhesives often contain special properties that ensure a strong and durable connection between the gold surfaces.
Before applying the adhesive, it is crucial to clean and prepare the surfaces that will be joined. Any dirt, oils, or residues must be meticulously removed to ensure optimal adhesion. Once the surfaces are clean and dry, a small amount of adhesive is applied evenly onto one of the gold pieces.
Next comes the delicate task of aligning and pressing the two gold surfaces together. Careful attention must be paid to achieve a seamless fit without any gaps or misalignment. It is advisable to use clamps or other tools to hold the pieces in place while the adhesive cures.
The curing time varies depending on the type of adhesive used, but patience is essential during this stage. Rushing may compromise the strength and integrity of the bond. It is recommended to follow manufacturer instructions for curing times and conditions.
After allowing sufficient time for curing, inspect your work closely. If any excess adhesive has seeped out from between the gold pieces, it can be carefully removed using solvents or gentle scraping techniques. Take care not to damage or scratch the delicate gold surfaces while doing so.
In conclusion, gluing gold together requires meticulous preparation, precise application, and patience throughout the curing process. By following these steps with utmost care and attention to detail, you can create a secure bond that will withstand time and wear.