Cracked frames, wobbly hinges, and broken bridges – we’ve all been there. It’s frustrating when our favorite pair of glasses falls victim to wear and tear. But fear not. With a little insider knowledge and a few handy tools, you can resurrect your spectacles and save yourself some precious time and hard-earned cash.
In this comprehensive guide, we’ll take you on a journey into the art of gluing glasses together. From plastic to metal frames, even those tricky hybrids, we’ve got all the tricks up our sleeves. Say goodbye to flimsy tape or expensive trips to the optometrist – it’s time to become your very own DIY glasses repair guru.
So buckle up as we unveil the secrets of seamless repairs and plunge headfirst into the fascinating world of gluing glasses together.
The Best Adhesive for Gluing Glasses Together
Contents
- 1 The Best Adhesive for Gluing Glasses Together
- 2 Preparing the Surfaces of the Glasses for Gluing
- 3 Applying the Glue to One of the Surfaces
- 4 Aligning and Bonding the Two Surfaces Together
- 5 Allowing Time for Curing and Strengthening the Bond
- 6 Compatible Materials for Gluing Glasses with Cyanoacrylate Glue
- 7 Other Specialty Adhesives Available on the Market for Gluing Glasses
- 8 Safety Precautions When Working with Adhesives
- 9 Conclusion
When it comes to gluing glasses together, finding the best adhesive is crucial. The adhesive needs to be strong enough to securely hold the pieces together, but also safe for use on glass surfaces. After conducting thorough research, several options have emerged as the top contenders:
- Epoxy Resin: Epoxy resin is a formidable adhesive that creates a durable bond on glass surfaces. It consists of a resin and a hardener that are mixed together before application. Epoxy resin boasts resistance to water and heat, making it ideal for gluing glasses.
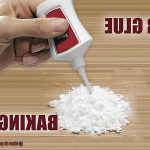
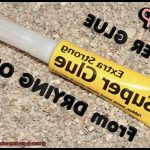
- Cyanoacrylate Glue (Super Glue): Super glue is a fast-acting adhesive that forms a bond within seconds. However, not all super glues are suitable for glass bonding, so it is important to choose one specifically designed for this purpose. Super glue is especially handy for small repairs and quick fixes.
- UV-Curing Adhesives: UV-curing adhesives require exposure to ultraviolet light to cure and form a robust bond. What sets them apart is their ability to leave no visible residue or discoloration on the glass surface. Consequently, UV-curing adhesives are perfect for transparent bonds and intricate glass designs.
- Silicone-Based Adhesives: Silicone adhesives provide flexibility and resistance to temperature changes, making them well-suited for glass surfaces. They remain transparent, ensuring that the bond remains discreet, while also excelling in moisture resistance.
When selecting an adhesive, one must consider factors such as the type of glass, desired bond strength, and exposure to moisture or heat. For optimal bonding, it is crucial to clean the glass surfaces thoroughly before applying any adhesive.
Follow the manufacturer’s instructions diligently during application and use clamps or tape to secure the pieces in place while the adhesive cures. Remember to allow ample time for the adhesive to fully cure before handling or using the glued glasses.
It is important to note that gluing glasses together may not always be a long-term solution. In cases where the glasses are valuable or possess sentimental value, it is advisable to consult a professional for repair or replacement options.
Preparing the Surfaces of the Glasses for Gluing
Preparing the surfaces of glasses for gluing is a meticulous process that requires attention to detail. To achieve a strong and durable bond, follow these steps:
- Clean the surfaces: Start by meticulously cleaning the surfaces of the glasses that will be bonded. Use a gentle yet effective cleaner, like a mild detergent or glass cleaner, to remove any dirt, grease, or fingerprints. This ensures that the adhesive can properly adhere to the glass, leaving no room for contaminants.
- Remove any coatings: Some glasses may have coatings on their surfaces, such as anti-reflective or scratch-resistant coatings. These coatings can disrupt the bonding process, so it’s crucial to eliminate them before gluing. Use a specialized coating remover or a gentle abrasive to strip off these coatings and expose the bare glass.
- Sand the surfaces: With clean and coating-free glasses, lightly sand the bonding surfaces using fine-grit sandpaper. This step roughens up the surface, creating more surface area for the adhesive to grip onto. Be cautious not to sand too forcefully, as you don’t want to compromise the integrity of the glasses.
- Degrease the surfaces: After sanding, it’s essential to degrease the surfaces to remove any lingering oils or residue. Take a clean cloth and dampen it with isopropyl alcohol or acetone, then carefully wipe down the bonding surfaces. This guarantees that there are no contaminants present that could weaken the adhesive bond.
- Apply a primer (if necessary): Depending on the type of adhesive you are using and the materials of your glasses, applying a primer may be necessary. Primers enhance adhesion by establishing a robust bond between the adhesive and the glass surface. Review the instructions provided with your adhesive to determine if a primer is required and how to properly apply it.
Applying the Glue to One of the Surfaces
Applying the glue to one of the surfaces is a vital step in the process of gluing glasses together. It’s a make-or-break moment that determines whether your glasses will stay intact or fall apart. To ensure success, follow these expert tips:
- Choose the right adhesive: The type of adhesive you use depends on factors like the type of glasses and the desired strength of the bond. Options include cyanoacrylate glue (super glue), epoxy resin, or UV-curing adhesive. Consider drying time, clarity, and resistance to water or heat when making your choice.
- Read the instructions: Each adhesive has its own specific instructions for application. Take the time to read and follow them carefully. This ensures you apply the glue correctly and achieve optimal results.
- Clean the surfaces: Before applying the glue, thoroughly clean both surfaces of the glasses. Use a mild detergent or glass cleaner to remove any dirt, grease, or residue. Wipe them dry with a lint-free cloth to ensure no contaminants interfere with the bonding process.
- Apply a small amount of glue: Use a precision applicator or small brush to apply a thin layer of glue onto one surface. Avoid using too much glue, as it can create messy drips or seep into unwanted areas.
- Align and press: Quickly align the two surfaces and firmly press them together. Apply even pressure across the entire surface area to ensure proper adhesion. Hold the glasses in place for a few minutes to allow the glue to set before releasing them.
- Clamp or tape (if necessary): Depending on the adhesive used, you may need to clamp or tape the glasses together for additional pressure during curing. Follow the manufacturer’s recommendations regarding clamping or taping, if applicable.
- Remove excess glue: Immediately after pressing the glasses together, wipe away any excess glue with a clean cloth or cotton swab. This helps maintain the aesthetics and functionality of the glasses.
Aligning and Bonding the Two Surfaces Together
Aligning and bonding two surfaces together when gluing glass requires careful attention to detail and precision. Here are the steps to follow:

- Clean the surfaces: Make sure both surfaces are free from dirt, grease, or residue. Use a mild detergent or glass cleaner and a lint-free cloth to wipe them down.
- Align the glasses: Use alignment marks or reference points on both surfaces for proper alignment. You can make these marks with a permanent marker or a small piece of tape.
- Apply the adhesive: Use a specialized glass adhesive or epoxy designed for bonding glass surfaces. Follow the manufacturer’s instructions to apply a thin, even layer of adhesive on one surface. Use a small applicator for precise application.
- Bring the surfaces together: Carefully align the two surfaces according to the marks or reference points made earlier. Apply gentle pressure to ensure proper contact between them, avoiding excessive force.
- Let the adhesive cure: Leave the glasses undisturbed for the specified curing time mentioned in the manufacturer’s instructions. This allows the adhesive to bond and harden properly.
- Maintain stability during curing: Keep the glasses in a stable position without any movement or vibrations during the curing process. Placing them on a flat surface or using clamps can help maintain their alignment and prevent accidental shifting.
- Remove excess adhesive: After the adhesive has fully cured, carefully remove any excess adhesive that may have squeezed out from the bond. Use a razor blade or sharp knife, taking caution not to scratch or damage the glasses.
Allowing Time for Curing and Strengthening the Bond
When gluing glasses together, the adhesive undergoes a curing process where it hardens and reaches its maximum strength. This process is crucial as it determines the durability and longevity of the bond. If the adhesive is not allowed to cure properly, the bond may be weak, leading to potential failure or separation of the glasses.
The time required for curing can vary depending on several factors, including the type of adhesive used, temperature, humidity, and the materials being glued. Different adhesives have different curing times, with epoxy resin typically requiring at least 24 hours to cure fully. It is important to follow the manufacturer’s instructions regarding curing time for the specific adhesive being used.
Temperature and humidity also play a significant role in the curing process. Higher temperatures generally accelerate curing, while lower temperatures can slow it down. Similarly, high humidity can affect the curing time and potentially weaken the bond. It is essential to ensure that the gluing area is within the recommended temperature and humidity range for optimal bonding.
While an adhesive may cure within a specific timeframe, it may take longer for the bond between the glasses to reach its full strength. This strengthening process occurs as the adhesive molecules continue to crosslink and form stronger connections over time.
Allowing sufficient time for this strengthening process ensures that the bond achieves its maximum strength and durability. During this period, it is crucial to avoid subjecting the glued glasses to excessive stress or pressure that could compromise the bond.
To achieve optimal bonding strength when gluing glasses together, it is recommended to follow these guidelines:
- Clean and prepare the surfaces properly before applying the adhesive.
- Follow the manufacturer’s instructions regarding curing time for the specific adhesive being used.
- Consider temperature and humidity conditions, ensuring they fall within the recommended range for curing.
- Avoid subjecting the glued glasses to excessive stress or pressure during the curing and strengthening period.
- Remove any excess adhesive gently after the curing process is complete.
Compatible Materials for Gluing Glasses with Cyanoacrylate Glue
When it comes to repairing glasses, using the right adhesive is crucial for a secure and long-lasting bond. Cyanoacrylate glue, also known as super glue or instant glue, is a popular choice due to its fast-drying and strong bonding properties. However, it is important to ensure compatibility between the adhesive and the materials being bonded for a successful repair.
For glasses frames, two common materials are plastic and metal. Cyanoacrylate glue can work effectively with various types of plastic frames, including acetate or cellulose acetate frames. These plastics have good compatibility with cyanoacrylate glue and will bond securely. On the other hand, metals such as stainless steel or titanium frames are also compatible with cyanoacrylate glue. The adhesive forms a strong bond with the metal surface, ensuring a secure repair.
However, it is worth noting that cyanoacrylate glue may not be suitable for all types of glasses. Glass lenses themselves cannot be glued using cyanoacrylate glue due to its inability to bond effectively with glass surfaces. In such cases, seeking professional assistance or considering lens replacement is recommended.
Before applying cyanoacrylate glue, it is crucial to clean the surfaces thoroughly to remove any dirt, oil, or residue. This will ensure better bonding and strengthen the repair. Following the manufacturer’s instructions regarding curing time is important, and it is advisable to avoid putting stress on the glued area until the adhesive has fully cured.
Other Specialty Adhesives Available on the Market for Gluing Glasses
When it comes to gluing glasses together, there are more options than just the typical epoxy or super glue. In fact, there are several specialty adhesives on the market that are specifically designed for this purpose. These adhesives offer unique properties and advantages that cater to different types of glass and specific gluing needs.
One popular option is UV-curing glue, also known as UV resin. This adhesive is activated by exposure to ultraviolet light, which causes it to harden and create a strong bond. UV-curing glue is often used for delicate glass repairs or when a transparent, strong bond is required. It can be applied in thin layers and is ideal for bonding small pieces of glass or attaching decorative elements to glass surfaces.
Another specialty adhesive for gluing glasses is silicone adhesive. Silicone adhesives provide excellent flexibility and resistance to moisture, making them suitable for bonding glass surfaces that may experience expansion or contraction due to temperature changes. They also offer high adhesive strength and durability, ensuring long-lasting repairs.
If you’re dealing with heat-resistant glasses or glass surfaces that will be exposed to high temperatures, such as oven doors or fireplace screens, heat-resistant adhesive is the way to go. These adhesives are specially formulated to withstand extreme temperatures without losing their bonding strength or integrity.
For those looking for a quick and easy solution for temporary glass bonding or repositioning, removable adhesive dots or strips can be a convenient option. These adhesives are usually double-sided and come in pre-cut shapes or rolls. They provide a temporary bond that can be easily removed without leaving any residue or damaging the glass surface.
In certain cases where precise application is required or when dealing with porous surfaces, gel adhesives can be a suitable choice. Gel adhesives have a thicker consistency compared to regular liquid adhesives, allowing for better control during application. They are less likely to drip or run, making them ideal for vertical or overhead applications.
It’s important to note that when using any specialty adhesive, it’s crucial to follow the manufacturer’s instructions carefully. Surface preparation, temperature conditions, and curing times may vary depending on the specific adhesive being used. Always ensure proper ventilation when working with adhesives and use appropriate safety precautions to protect yourself and your work area.
Safety Precautions When Working with Adhesives
When it comes to working with adhesives, ensuring safety should always be your top priority. Adhesives can contain harmful chemicals that can cause skin irritation, respiratory problems, or even more serious health issues if not handled properly. Here are some crucial safety precautions to keep in mind:
- Work in a well-ventilated area: It is absolutely crucial to work in an area with good air circulation to prevent inhaling fumes from the adhesive. If possible, work outdoors or in a room with open windows. If working indoors, consider using a fan or wearing a respirator mask to reduce exposure to fumes.
- Read and follow instructions: Before starting the gluing process, carefully read and follow the instructions on the adhesive product. Different adhesives may have specific safety precautions and application methods, so it’s essential to understand them beforehand.
- Wear protective gear: When handling adhesives, always wear protective gloves to prevent direct contact with the skin. Some adhesives can cause skin irritation or allergic reactions, so it’s better to be safe than sorry. Additionally, wearing safety goggles can protect your eyes from accidental splashes or spills.
- Keep the work area clean and organized: Accidents happen, so it’s important to clean up spills and drips immediately. Avoid leaving adhesive containers open for extended periods as this can lead to spills or evaporation of the adhesive.
- Proper storage: Store adhesives in a cool and dry place, away from direct sunlight and heat sources. Extreme temperatures can affect the quality and effectiveness of the adhesive. Always check the expiration date on the adhesive container before use.
- Keep adhesives out of reach: Ensure that adhesives are stored in a secure location where they cannot be accessed by children or pets. Many adhesives are toxic if ingested, and accidental consumption can lead to serious health issues.
- Know how to react in case of contact: In case of accidental contact with adhesives, such as getting it on your skin or in your eyes, it’s important to know how to react. Follow the instructions on the adhesive product for proper first aid measures. If necessary, seek medical attention immediately.
- Take breaks and rest your body: When working with adhesives, it’s crucial to take breaks and rest your body. Prolonged exposure to adhesives and repetitive motions can strain your muscles and joints. Incorporate stretching exercises and regular breaks to prevent any discomfort or injuries.
d81VnEunObs” >
Conclusion
In conclusion, gluing glasses together offers a budget-friendly and convenient solution for fixing your beloved eyewear. By mastering the right techniques and selecting the perfect adhesive, you can achieve an unbreakable bond that stands the test of time.
When it comes to choosing an adhesive, take into account factors like the glass type, desired bond strength, and exposure to moisture or heat. Among the top contenders for gluing glasses are epoxy resin, cyanoacrylate glue (super glue), UV-curing adhesives, and silicone-based adhesives.
Preparing the glass surfaces properly is paramount to a successful repair job. Thoroughly clean the surfaces, eliminate any coatings, gently sand them for enhanced adhesion, degrease them to remove residue, and apply a primer if necessary.
Applying the glue demands precision and attention to detail. Select an adhesive that suits your needs, carefully read and follow the instructions provided, cleanse the surfaces before applying the glue, evenly distribute a small amount of glue on one surface, and firmly align and press both surfaces together.
Allowing ample time for curing and strengthening the bond is crucial. Adhere to the manufacturer’s instructions regarding curing time for optimal results. Take temperature and humidity conditions into account during curing and avoid subjecting your glued glasses to excessive stress or pressure.
While cyanoacrylate glue works well with plastic frames as well as stainless steel or titanium metal frames, it may not be suitable for bonding glass lenses.
Specialty adhesives tailored to specific glass types or particular gluing needs are also available on the market. These include UV-curing glue for transparent bonds or delicate repairs, silicone adhesive for flexibility and resistance against moisture, heat-resistant adhesive for high-temperature applications, removable adhesive dots or strips for temporary bonding or repositioning purposes, and gel adhesives for precise application.
Lastly, safety should always be your top priority when working with adhesives. Ensure you work in a well-ventilated area, wear protective gear, maintain a clean and organized workspace, store adhesives correctly, keep them out of reach of children and pets, know how to react in case of contact, and take breaks to rest your body.