Ever found yourself knee-deep in a DIY project, only to be stumped by the challenge of gluing foam board to wood? Don’t fret. We’re about to unravel the secrets behind achieving a flawless and unbreakable bond between these two materials.
Picture this: you’re dreaming up a whimsical headboard for your bedroom or crafting custom wall-mounted shelves to showcase your prized possessions. Both projects demand the perfect fusion of foam board and wood, but how do you make it happen?
Prepare to be captivated as we embark on this thrilling journey. In this guide, we’ll explore a range of tried-and-true methods for gluing foam board to wood, ensuring that your creations stay intact for years to come.
We’ll dive into the perks of using foam boards—lightweight, insulating, and versatile—and guide you through selecting the right adhesive for your unique needs. But that’s not all. We’ll also delve into surface preparation, adhesive application techniques, and the crucial drying and curing times.
Whether you’re an expert crafter or just dipping your toes into the DIY realm, this guide is here to equip you with all the knowledge you need. Let’s peel back the layers of mystery together and discover the secrets behind this fascinating bonding process.
What is Foam Board?
Contents
- 1 What is Foam Board?
- 2 Types of Adhesives Used for Gluing Foam Board to Wood
- 3 Preparing the Surfaces for Glue Application
- 4 Applying the Adhesive Properly
- 5 Pressing the Foam Board Against the Wood Surface
- 6 Reinforcing the Bond with Screws or Nails
- 7 Special Considerations for Polystyrene Foam Boards
- 8 Conclusion
Foam board, also known as foam core or foam sheet, is a lightweight and versatile material that has become a staple in various applications. Whether it’s for crafts, signage, model building, or architecture, foam board has proven itself to be an indispensable tool.
With its unique construction consisting of three layers, foam board offers a combination of rigidity, insulation, protection, and stability. At its core lies expanded polystyrene (EPS), a type of plastic foam that is created by expanding tiny beads of polystyrene through the application of heat and steam. This ingenious process results in a closed-cell structure filled with air pockets, making the foam incredibly lightweight and buoyant. Not only does this make foam board easy to handle and transport, but it also provides excellent thermal insulation properties, making it an ideal choice for insulation purposes.
The outer layers of foam board are typically made from paper or plastic. Craft and DIY enthusiasts often opt for paper-faced foam boards, while those looking for weather resistance prefer plastic-faced boards for outdoor applications. These outer layers not only add strength and durability but also allow for easy adhesion of various materials such as glue, paint, or tape. With foam board, the possibilities are endless when it comes to creating intricate designs and three-dimensional structures.
Foam board comes in various thicknesses ranging from 3/16 inch to 1 inch or more. Thicker boards offer increased rigidity and strength, perfect for projects that require extra support. On the other hand, thinner boards are more flexible and easier to cut or shape, providing greater versatility for creative endeavors. With the standard size of a foam board sheet being 4 feet by 8 feet, larger projects can be accomplished with fewer pieces.
One of the standout features of foam board is its lightweight nature. Compared to heavier materials like plywood or solid wood, foam board shines with its ease of handling and transport. It’s the go-to choice for hanging signs or portable displays where weight is a concern.
Versatility is another key characteristic of foam board. Armed with simple tools like knives or utility blades, foam board can be easily cut, shaped, and manipulated to bring intricate designs and three-dimensional structures to life. Not only that, but foam board also readily accepts paint, prints, and laminations with other materials, allowing for a wide range of aesthetic and functional possibilities.
Types of Adhesives Used for Gluing Foam Board to Wood
Prepare to be amazed as we unravel the enchanting world of adhesives. In this captivating journey, we will explore the diverse range of adhesives used for this purpose. Whether you’re embarking on a school project or indulging in a DIY craft, understanding the right adhesive can unlock endless possibilities. So, let’s plunge into the depths and unlock the full potential of gluing foam board to wood.
Solvent-based Adhesives: Unyielding Strength and Resilience
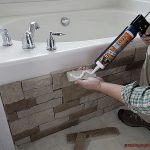
Prepare to be mesmerized by the might of solvent-based adhesives when it comes to bonding foam board to wood. Possessing unparalleled strength and unwavering durability, these adhesives emerge as superheroes in their domain. Packaged in tubes or cans, they effortlessly glide onto surfaces using a caulk gun or brush. Nevertheless, tread cautiously, for they emit potent fumes, necessitating work in a well-ventilated ambiance.
Water-based Adhesives: Safety and Effortless Tidiness
If you seek an adhesive that exudes lesser toxicity and boasts a gentler aroma, water-based adhesives are your beacon of hope. Notably safe for usage around children and pets, these adhesives facilitate easy cleanup with a mere splash of water. Their versatility shines bright in arts and crafts projects. However, keep in mind that their strength may pale slightly in comparison to solvent-based alternatives, demanding patience during drying.
Foam Board Adhesive: A Love Story Etched in Bond
Witness the magic unfold as foam board adhesive unveils its extraordinary affinity for bonding foam board to wood. This adhesive is meticulously crafted for this very purpose, ensuring an unbreakable bond without inflicting harm. Available in spray or liquid form, its application is a breeze. Embrace this adhesive’s charm when you yearn for an unwavering attachment of foam board to wood.
Construction Adhesive: A Harmonious Symphony of Strength and Durability
Prepare to be awestruck by the sheer might of construction adhesive when undertaking robust projects. Its formidable strength and exceptional durability make it the epitome of reliability for long-lasting bonds. However, brace yourself for its thick and sticky consistency, which might require a touch of tenacity during application. Nevertheless, the fruits of your labor will be nothing short of extraordinary.
Double-sided Tape: A Swift Dance of Convenience
For projects that lean toward the lighter side or temporary applications, double-sided tape emerges as your trusty companion. Its swift and hassle-free application allows you to swiftly unite foam board with wood. Alas, keep in mind that its bond may not possess the same fortitude as other adhesives, making it ideal for temporary endeavors.
Preparing the Surfaces for Glue Application
Today, we embark on a journey to unlock the secrets of preparing surfaces for glue application. Together, we will delve into the depths of sandpaper and harness the magic of primers. So, grab your tools and let us sculpt a connection that will withstand the test of time.
Step 1: A Pristine Foundation:
To begin our masterpiece, we must cleanse our surfaces of any impurities. Armed with a damp cloth or sponge, we meticulously wipe away the remnants of dust, dirt, and debris that dare to mar the beauty of our foam board and wood. Patience is our ally as we await the complete drying of these surfaces.
Step 2: Embracing Texture:
Now, it is time to awaken the power of sandpaper. With finesse and precision, we caress both the foam board and wood surfaces in gentle circular motions. Our goal? To create a rough texture that will enthrall the glue and entwine it with our materials. Remember, dear artisans, balance is key – firmness without destruction.
Step 3: Banishing Residue:
The aftermath of our sandpaper symphony leaves behind remnants that must be vanquished. We reach for a clean cloth or summon the might of compressed air to whisk away any lingering sanding residue. Patience prevails once more as we ensure these surfaces are devoid of moisture before moving forward.
Step 4: The Catalyst for Connection:
Now, let us introduce our secret weapon – primers or adhesive promoters. These elixirs possess the power to enhance compatibility between our materials and glue, forging an unbreakable bond. Heed the instructions bestowed upon us by their creators, for they hold the key to unlocking adhesive greatness.
Step 5: Sealing the Path:
Porous wood and foam board, though challenging, shall not deter us. We shall seal these surfaces before gluing, granting us a realm of control during application. For our wooden warriors, the illustrious shellac stands as the guardian of wood’s integrity. As for our foam board champions, behold the wonders of acrylic medium or latex paint.
Applying the Adhesive Properly
In this edition, we will explore the secrets to achieving a flawless bond when gluing foam board to wood. So, grab your tools, put on your creative cap, and let’s embark on this adhesive adventure.
Step 1: Cleanliness is Key
In our quest for a secure bond, cleanliness reigns supreme. Before applying adhesive, ensure both the foam board and wood surfaces are free from dust, dirt, and debris. Wipe them down with a damp cloth or use a mild detergent solution to banish those pesky particles.
Step 2: Choosing the Perfect Adhesive
The age-old question of which adhesive to choose is easily solved. Opt for a high-strength adhesive specifically designed for bonding foam board to wood. Whether it’s spray adhesives, liquid adhesives, or adhesive tapes, make sure they’re up to the challenge and ready to create an unbreakable bond.
Step 3: Follow the Manufacturer’s Instructions
Unlock the full potential of your adhesive by heeding the manufacturer’s instructions. These sacred scrolls contain valuable information on application techniques and drying times unique to each adhesive. Read them carefully for a flawless bond.
Step 4: The Art of Application
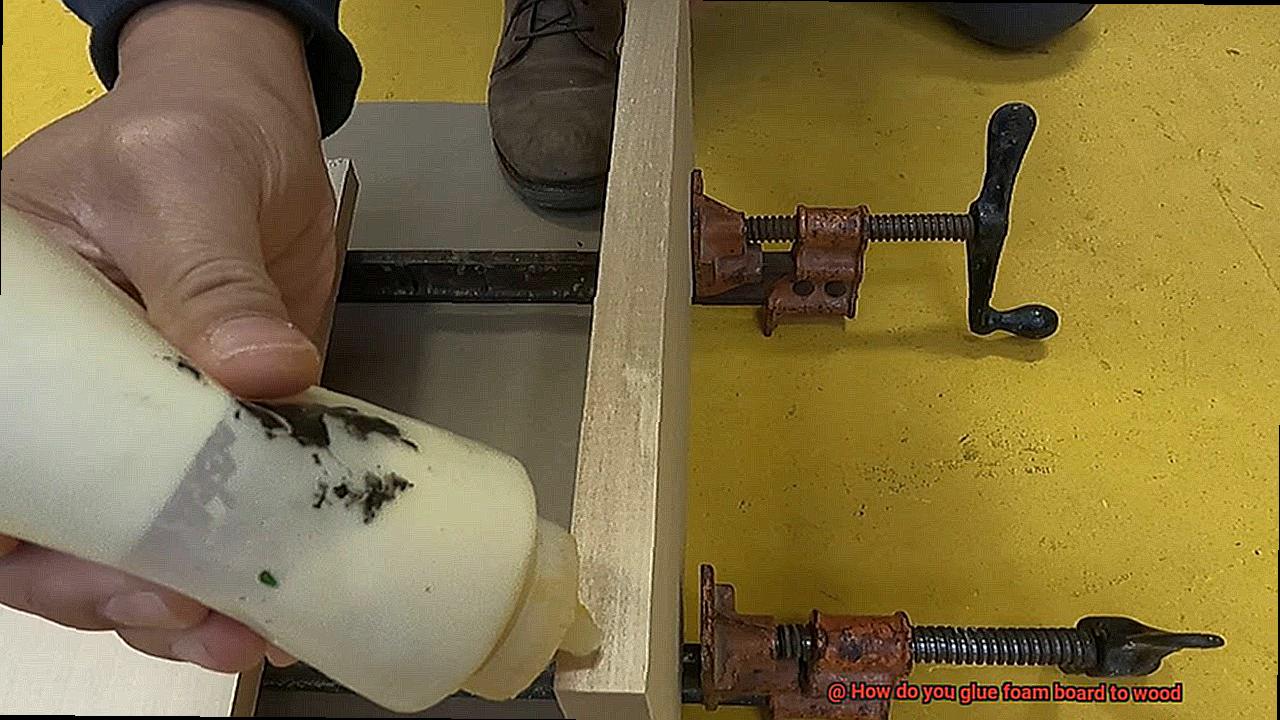
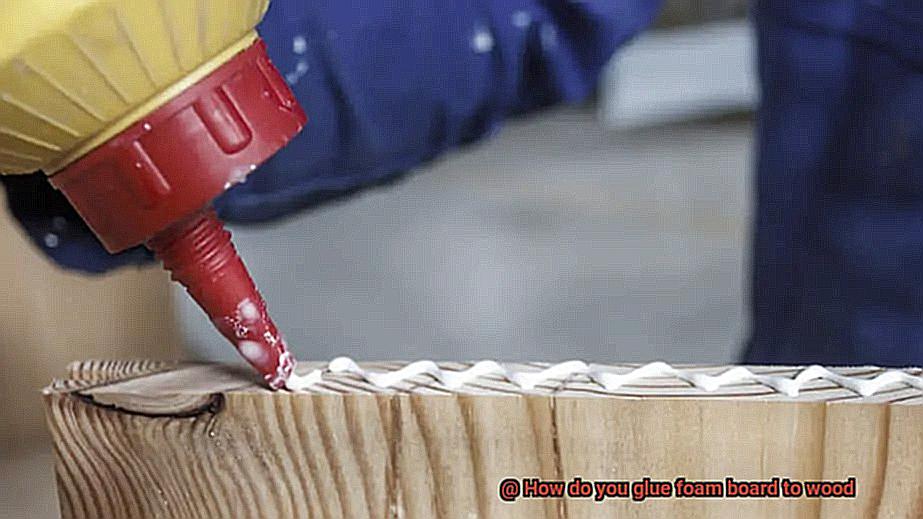
Now comes the moment we’ve all been waiting for – applying the adhesive. With grace and precision akin to a painter’s brushstroke, evenly spread or spray a thin layer onto the wood surface. Cover every nook and cranny, as this forms the foundation of our bond.
Step 5: Embrace the Union
Gently place the foam board onto the adhesive-covered wood surface, ensuring a full and loving connection between the two materials. Apply gentle pressure like a comforting hug to encourage a strong bond. Secure the bond further by using clamps or weights while the adhesive dries.
Step 6: The Patience of a Craftsman
Allow the adhesive to dry for the recommended time, as specified by the manufacturer. Avoid disturbing or moving the foam board during this period to maintain the bond’s strength. Exercise the patience of a craftsman, and you shall be rewarded.
Pressing the Foam Board Against the Wood Surface
In our adhesive journey, we’ve covered the importance of choosing the right adhesive and applying it with precision. Now, let’s dive into the crucial step of pressing the foam board against the wood surface. Get ready to unlock the secrets of achieving a flawless bond that will make your projects stand strong and proud.
Method 1: The Mighty Clamps
Clamps, those versatile superheroes of the adhesive world, come in various sizes and designs. Here’s how you can use them to press your foam board against the wood surface:
- Select the right clamps: Choose clamps suitable for your foam board and wood thickness. Ensure they provide enough pressure without damaging the materials.
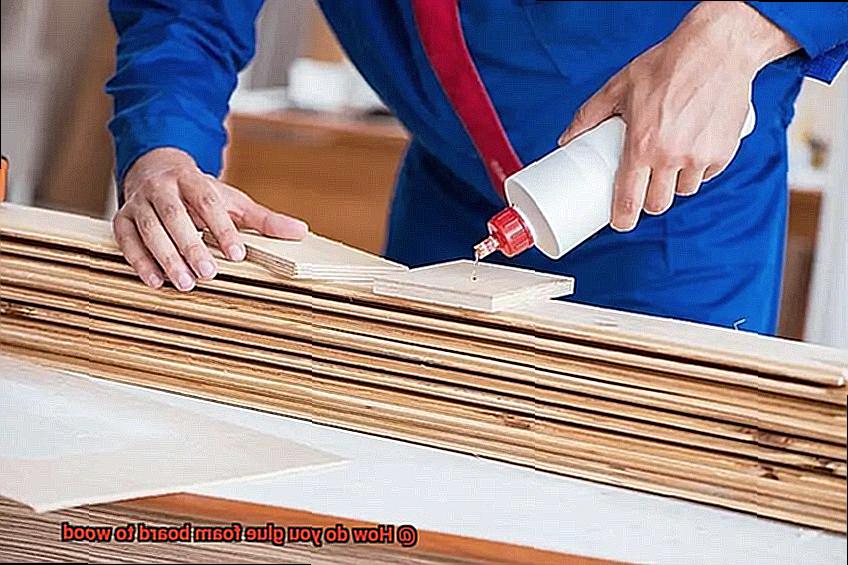
- Apply adhesive with finesse: Spread a thin, even layer of adhesive onto the wood surface using a brush or roller. Cover every inch where the foam board will be attached.
- Position and align to perfection: Carefully place your foam board on top of the adhesive-coated wood surface, ensuring precise alignment with edges and corners.
- Clamp it down like a boss: Securely fasten clamps along the edges of the foam board at regular intervals. Apply enough pressure to create a firm bond, taking care not to distort or damage the foam board.
Method 2: Heavy Objects – The Reliable Allies
When clamps aren’t available or suitable for your project, heavy objects can swoop in to save the day:
- Prepare for battle: After applying adhesive to the wood surface, position your foam board correctly.
- Distribute evenly for maximum impact: Place heavy objects like books, weights, or even bricks wrapped in protective material on top of the foam board. Ensure they are evenly distributed, exerting uniform pressure across the entire surface area.
- Wait for victory: Allow ample time for the adhesive to dry and cure, following the manufacturer’s instructions. Refrain from disturbing or stressing the glued area until a rock-solid bond is formed.
Method 3: Tape It Down – The Temporary Stabilizer
When you need a quick fix to hold the foam board in place, adhesive tape or masking tape can be your best friend:
Reinforcing the Bond with Screws or Nails
Are you ready to elevate your foam board and wood projects to new heights? Buckle up because we’re about to dive into the world of screws and nails – the unsung heroes that reinforce bonds like no other.
When it comes to reinforcing the bond between foam board and wood, adding screws or nails to the mix can provide that extra stability and ensure a connection that’s built to withstand the test of time. So, grab your tool belts and let’s uncover the proper techniques for this dynamic duo.
Choosing the right screws or nails is a crucial first step. Opt for those with wide heads or washers – these prevent them from piercing through the foam board, ensuring pressure is evenly distributed while safeguarding your precious materials. Safety always comes first.
Now that you’ve armed yourself with trusty fasteners, it’s time to embark on the pre-drilling journey. Don’t underestimate its importance. Pre-drilling is your shield against splitting or cracking when inserting those screws or nails. Remember, size matters – make sure your holes are slightly smaller than the fasteners’ diameter for that snug fit.
To guarantee a rock-solid connection, strategically place your screws or nails at regular intervals along the edges and corners of your foam board. Consistency is key; maintaining even spacing will ensure support is evenly distributed. We’re all about strength in numbers here.
When it’s time to drive those screws or nails in, channel your inner Zen master. Avoid overtightening, as it can wreak havoc on your materials. Tighten them until they’re snug – just enough for a secure hold without going overboard. We strive for that perfect balance.
For that sleek, professional finish, consider the art of countersinking. This technique allows the screw or nail to sit flush with the surface of the foam board, creating a seamless look that will impress even the most discerning eye. Arm yourself with a countersink bit or drill a larger hole on top of the pre-drilled one, and behold the magic unfold.
Special Considerations for Polystyrene Foam Boards
In our previous section, we embarked on a thrilling journey to bond foam board and wood. Now, get ready to explore the special considerations for achieving a flawless union between polystyrene foam boards and wood. Prepare for another adhesive adventure.
Choosing the Right Adhesive:
When it comes to gluing polystyrene foam boards to wood, not all adhesives are created equal. Regular glue or adhesive can be your worst enemy, causing your foam material to dissolve and compromise its structural integrity. Instead, arm yourself with an adhesive specifically designed for polystyrene foam.
Option 1: Solvent-Based Construction Adhesives:
Enter the superheroes of bonding – solvent-based construction adhesives. These mighty companions are capable of creating a strong and durable bond between both porous and non-porous surfaces. With their exceptional powers, they work wonders on wood and foam materials without causing any harm.
Option 2: Specialized Foam Board Adhesives:
For those seeking an even more specialized solution, look no further than foam board adhesives formulated explicitly for foam materials. These heroes boast a low solvent content, minimizing any risk of damaging your precious polystyrene foam. They offer unparalleled adhesion and flexibility, ensuring a bond that stands the test of time.
Preparing the Surfaces:
Before we embark on our gluing journey, let’s ensure our surfaces are primed for action. Cleanliness is paramount. Rid both the foam board and wood surfaces of dirt, dust, oil, or any pesky contaminants that might hinder the bonding process. Give them a thorough scrub with a mild detergent or rubbing alcohol for optimal adhesion.
Roughening Up for a Stronger Bond:
To enhance the strength of our bond, let’s roughen up the surfaces ever so slightly. A gentle sanding of the wood or scoring the foam board with a sharp utility knife will do the trick. By creating a textured surface, we provide more area for the adhesive to grip onto, resulting in a bond that’s rock-solid.
E-le_7S0_4k” >
Conclusion
When it comes to gluing foam board to wood, there are a few key steps you need to follow.
First, make sure the surfaces are clean and free from any dust or debris. Next, apply a generous amount of adhesive to both the foam board and the wood.
Press the two surfaces together firmly and hold them in place for a few minutes to allow the adhesive to bond. Finally, let the glue dry completely before moving or handling the project.
By following these simple steps, you can ensure a strong and secure bond between your foam board and wood.