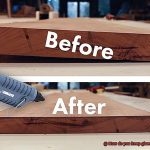
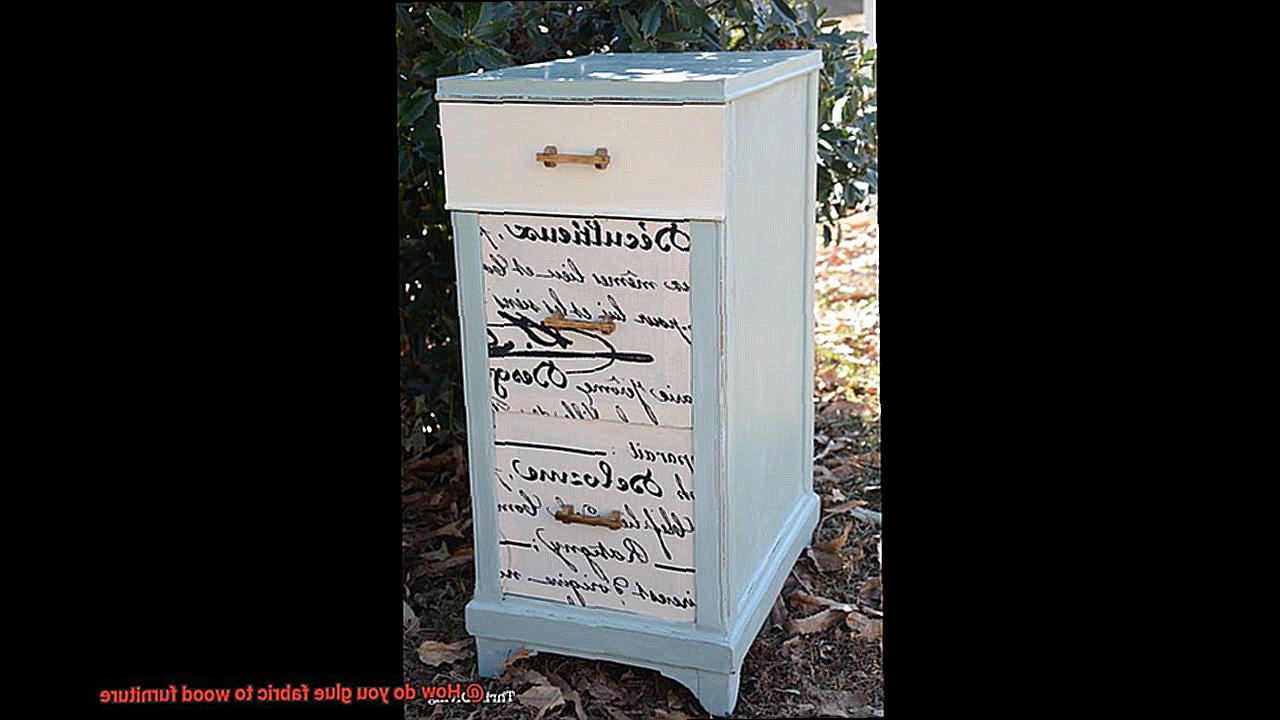
Tired of your furniture looking like it’s stuck in a time warp? Want to spruce things up without emptying your wallet or tossing everything out? Well, you’re in luck. This blog post is all about the enchanting art of gluing fabric to wood furniture. It’s a simple technique that can work wonders and give your beloved pieces a whole new lease on life.
Imagine this: your trusty wooden chair, transformed into a showstopper that steals the spotlight. Picture it draped in a fabulous fabric that matches your style perfectly. Vintage vibes? Bold prints? Soft and cozy textures? You name it, we’ve got you covered. But how do you make this dream come true?
First things first, gather the right materials and learn the tricks of the trade. We’ll spill all the secrets on creating a bond between fabric and wood that’s so strong, it’ll last for ages. Plus, we’ll guide you through prepping your furniture like a pro, choosing fabrics that are up to the task, and applying glue with precision.
Get ready for an exhilarating adventure as we share expert tips and tricks that guarantee success. Say goodbye to worn-out furniture and hello to pieces infused with your own personal flair.
Excited yet? In the upcoming sections, we’ll dive deep into every little detail of this creative process. We’ll explore different adhesives and where they shine brightest, reveal techniques for banishing wrinkles and achieving smooth surfaces, and even throw in some clever alternatives to traditional gluing methods.
So fasten your seatbelts because we’re about to embark on a restoration journey that will take your decor from drab to fab. Let’s unravel the mysteries of gluing fabric to wood and breathe new life into your space.
Choosing the Right Fabric
Contents
Revitalizing wood furniture with fabric is a creative endeavor that requires careful consideration and selection of the perfect fabric. In this article, we will explore the essential factors to consider when choosing the right fabric for gluing to wood furniture. By following these guidelines, you can achieve a flawless and long-lasting bond that will enhance the aesthetic appeal of your furniture.
Selecting the Perfect Fabric:
When embarking on a fabric gluing project, it’s vital to choose a fabric that not only aligns with your style but also possesses the necessary characteristics for optimal adhesion. Consider the following factors:
- Durability: Upholstery fabrics, specifically designed to withstand wear and tear, are an excellent choice. Ensure your chosen fabric can handle the demands of its intended use.
- Colorfastness: Preserve the vibrancy of your fabric by selecting one that is resistant to fading caused by sunlight or cleaning agents.
- Style: Harmonize your furniture’s overall aesthetic by choosing a fabric that complements the surrounding decor. With a plethora of patterns and textures available, you can create a look that suits your taste, whether it be classic, modern, or eclectic.
Preparing the Wood Surface:
To ensure a strong and lasting bond, proper preparation of the wood surface is essential. Follow these steps:
- Sanding: Create a textured surface on the area where you will apply the fabric using sandpaper. This texture enhances grip for adhesive, ensuring a secure bond between the fabric and wood.
- Eliminating Debris: Cleanliness is crucial for effective adhesion. Remove dust or debris using a vacuum cleaner or a clean cloth before proceeding.
Choosing an Appropriate Adhesive:
The adhesive you choose plays a significant role in determining the success of your fabric gluing project. Consider these factors when selecting an adhesive:
- Drying Time: Different adhesives have varying drying times. Choose one that aligns with your project timeline, allowing sufficient time for proper bonding.
- Flexibility: Wood furniture can experience slight movement due to environmental changes or usage. Opt for an adhesive that offers flexibility, ensuring the fabric remains securely attached even under stress.
- Ease of Application: Select an adhesive that is easy to work with, allowing smooth and even application without hassle.
Preparing the Wood Surface
Revitalize your wood furniture and unleash your creativity by gluing fabric onto it. But before you embark on this transformative journey, it’s crucial to prepare the wood surface properly. In this step-by-step masterclass, we will unveil the secrets to achieving a strong and long-lasting bond between fabric and wood. Get ready to elevate your DIY skills and breathe new life into your furniture.
Step 1: Cleanliness is Key
The first brushstroke of preparation is to thoroughly clean the wood surface. Dirt, dust, or grease can hinder the adhesive’s ability to form a steadfast union between fabric and wood. Armed with a mild detergent, warm water, and a soft cloth, gently wipe down every nook and cranny, banishing debris and residue. Take your time, leaving no stone unturned. Once done, allow ample time for the wood to dry completely before proceeding.
Step 2: Sanding for Success
Now that your wood surface is pristine and dry, it’s time to unleash the power of sanding. This technique creates a subtle roughness on the wood, providing an enhanced grip for the adhesive. Armed with a fine-grit sandpaper, stroke it along the grain of the wood. Be gentle, avoiding excessive pressure that could mar its beauty. Our goal is to create a smooth yet slightly textured canvas.
Step 3: Banish Dust Bunnies
After sanding, we must wage war against any lingering dust particles that dare to mar our masterpiece. Even the tiniest speck can sabotage the adhesive’s hold. Equip yourself with a vacuum cleaner or a soft brush, sweeping away any remnants of sanding dust. Leave no trace behind; only then can our adhesive reign supreme.
Step 4: Restoring Perfection
With a clean and smooth canvas, we must address any imperfections or blemishes that may mar our vision. Fill in cracks, holes, or dents with a suitable wood filler or putty, following the manufacturer’s instructions. As it dries, our surface takes on a new life. Gently sand it down until it harmonizes seamlessly with the surrounding wood, ensuring a flawlessly unified surface.
Selecting an Appropriate Adhesive
Today, we embark on a quest to unravel the secrets behind choosing the perfect adhesive for gluing fabric to wood furniture. Prepare to elevate your furniture revamping endeavors to unprecedented heights. So, don your creative cap and let us embark on this enthralling journey.
The Fabric-Wood Connection:
Imagine a world where you’ve meticulously handpicked the most exquisite fabric for your furniture project, only to be thwarted by an inadequate adhesive. Fear not. Selecting an appropriate adhesive is the gateway to achieving a robust and enduring bond between fabric and wood.
Fabric Glue: The Crafty Companion:
In the realm of fabric-wood bonding, fabric glue reigns supreme. This adhesive is exclusively crafted for this noble task, ensuring an unwavering and long-lasting bond. Its liquid form facilitates effortless application, while its water-based nature guarantees easy cleanup. Moreover, it dries clear, leaving no unsightly residue on your cherished fabric or wood surface.
Contact Adhesive: The Powerhouse:
For grandiose fabric pieces or weighty projects, behold the mighty contact adhesive. By applying it to both the fabric and wood surface and allowing it to dry until tacky, you unleash its formidable bonding prowess. When these surfaces unite, an instant and unbreakable bond is forged. Embrace its power.
Spray Adhesive: Delicate Fabrics’ Best Friend:
When dealing with delicate fabrics or intricate designs, fear not. For in the realm of adhesive options, spray adhesive emerges as their gallant savior. Its fine mist application gracefully blankets both fabric and wood surface, permitting effortless repositioning before the bond solidifies. Precision and convenience reign supreme.
Compatibility Matters:
Ah, the fickle nature of adhesives. Not all are created equal, my friends. Before pledging your allegiance to one, embark on a noble quest: test it on a small, inconspicuous area. Only then shall you ascertain its compatibility with your precious fabric and wood furniture. Avert disaster, for no one desires unexpected damage befalling their masterpiece.
Applying the Adhesive
Today, we embark on an enchanting journey into the realm of adhesive application, where we will unravel the secrets to flawlessly gluing fabric to wood furniture. With a touch of creativity and the right techniques, your revamping endeavors will reach unprecedented heights, ensuring a masterpiece that stands the test of time. So, roll up your sleeves as we delve into the fascinating world of applying adhesive.
Step 1: Choose the Perfect Adhesive
To begin our adhesive adventure, we must first select the ideal adhesive for the job. Options abound, with fabric glue, spray adhesive, and contact adhesive at our disposal. Each type offers unique advantages and considerations, so take your time in choosing the one that best suits your needs.
Step 2: Prepare the Surface
Before diving into the adhesive application process, it is vital to prepare the surface of your wood furniture. Dust, dirt, or grease can impede the adhesion process and compromise the final result. Arm yourself with a mild detergent and water solution to thoroughly cleanse the surface. Remember to ensure it is completely dry before proceeding to the next step.
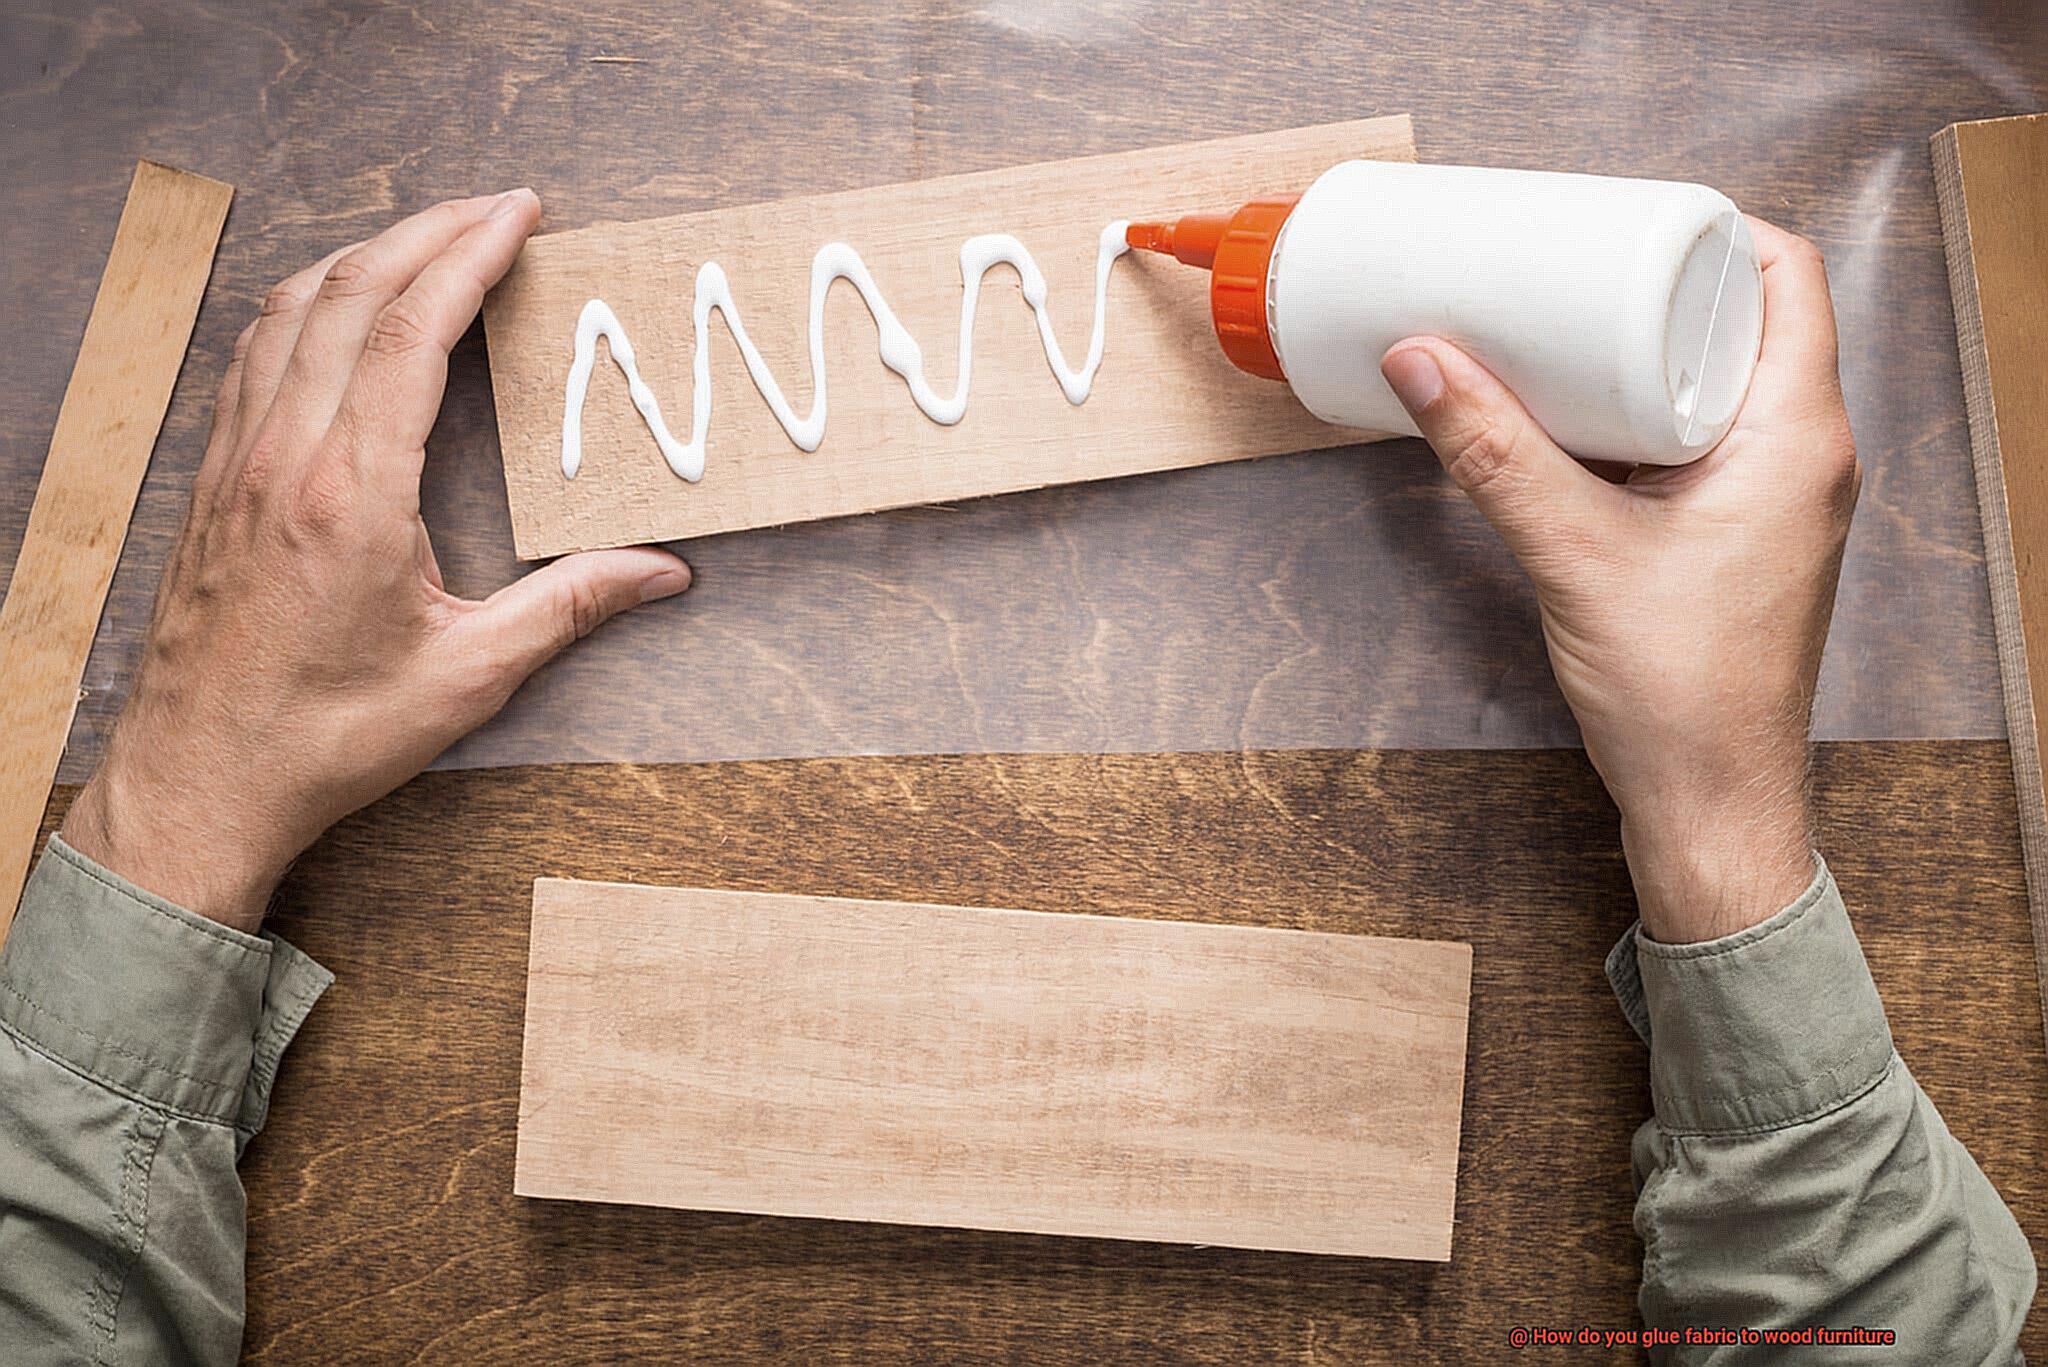
Step 3: Apply the Adhesive
Now comes the exhilarating part – applying the adhesive. The method of application varies depending on the chosen adhesive type. For fabric glue, wield a brush or applicator to spread a thin and even layer onto the wood furniture. Spray adhesives demand a well-ventilated environment, following precise instructions from the product label. Contact adhesives necessitate coating both surfaces (fabric and wood), allowing them to dry before joining them together.
Step 4: Place and Press
With the adhesive skillfully applied, it’s time to delicately position the fabric onto the wood furniture. Ensure perfect alignment with any desired patterns or designs. Once in place, apply gentle pressure to foster a strong bond between the two surfaces. To banish any pesky wrinkles or air bubbles, enlist the aid of a roller or flat tool – just like ironing out the creases in our artistic masterpiece.
Pressing and Securing the Fabric
In our previous section, we delved into the enchanting world of gluing fabric to wood furniture. Now, it’s time to take the next step and unlock the secrets behind pressing and securing the fabric. Get ready to transform your wooden masterpieces into works of art that will stand the test of time. Are you excited? Let’s dive in.
Step 1: Preparing the Fabric
In the realm of creativity, preparation reigns supreme. Treat your fabric like royalty by giving it some tender loving care. Start by washing away any imperfections and ironing out those stubborn wrinkles and creases. This meticulous process ensures that your fabric is primed for greatness, making it easier to work with and guaranteeing a flawless finish once it’s bonded to the wood furniture.
Step 2: Applying Heat
Now it’s time to unleash the magic of heat upon your project. Grab your trusty iron or heat press machine and set it to medium heat (no steam.). With a firm hand, press the iron onto the fabric, moving it in gentle, circular motions. The goal here is to apply even pressure, allowing the fabric to meld seamlessly with the wood surface. Imagine yourself as a sorcerer, manipulating heat as your secret weapon.
Step 3: Securing the Fabric
With the fabric pressed onto the wood furniture, we need to ensure it remains steadfast until the glue dries completely. Fear not, for we have a few tricks up our sleeves:
- Clamps: Bring out your loyal companions – small clamps or binder clips. Strategically position them along the edges of the fabric, ensuring they won’t leave any unsightly marks on your precious wooden canvas.
- Weights: If clamps aren’t your cup of tea, gather an army of heavy books or objects that won’t harm your fabric or furniture. Distribute them evenly across the surface, applying just the right amount of pressure to guarantee a secure bond.
- Tape: For those who prefer a more adhesive solution, masking tape or painter’s tape will come to the rescue. Seal the fabric in place by carefully applying strips of tape along the edges. Make sure it adheres tightly to both the fabric and wood surface, forging a bond that can withstand the test of time.
Allowing Proper Drying Time
In our quest for flawless fabric-to-wood bonding, we have discovered a hidden gem – allowing proper drying time. This crucial step is the secret ingredient that guarantees a strong and long-lasting bond. So, grab your imagination and let’s embark on a journey to master this art.
The Power of Proper Drying Time:
Imagine the disappointment of seeing your carefully aligned fabric peel off or shift on your beloved wooden furniture. It’s heart-wrenching, isn’t it? That’s why allowing proper drying time is essential. Let’s dive into the reasons why:
Building Unbreakable Bonds:
Just like love needs time to grow, your fabric and wood need time to create an unbreakable connection. Proper drying time ensures that the glue cements the two materials together, forming a bond that can withstand the test of time.
Shielding from Disaster:
Rushing through this crucial step can spell disaster. Without adequate drying time, your fabric may end up damaged or displaced, undoing all your hard work. Patience is indeed a virtue in this case.
Varying Drying Times:
Different glues have different drying requirements, and it’s crucial to follow them diligently. Some may demand overnight drying, while others are ready within a few hours. Choosing the right glue and adhering to the manufacturer’s guidelines are key to success.
Preparing for Perfection:
Before applying any glue, make sure both your fabric and wood surface are immaculate – clean, smooth, and dry. This simple preparation lays the foundation for a flawless bond.
The Magic of Flatness:
Once you’ve applied the glue, place the fabric on a flat surface. Apply gentle pressure using weights or clamps to secure the bond and promote even drying. Witness the magic unfold before your eyes.
Environmental Enigmas:
The environment can play a significant role in drying time. Factors like temperature and humidity levels can affect the process. Creating an ideal drying environment involves working in a well-ventilated area with moderate room temperature. Mother Nature will be your ally in this journey.
Finishing Touches
In this exploration of gluing fabric to wood furniture, we will unearth the final steps and considerations that will transform your project from ordinary to extraordinary. Prepare to embark on a journey towards a smooth, professional finish that will leave you in awe.
Step 1: Clean the Surface – A Fresh Start
Begin your quest for perfection by purifying the surface of your wood furniture. Wipe away any pesky dust, dirt, or debris that may impede the adhesive’s effectiveness. With a gentle touch, cleanse the entire area where the fabric will soon embrace the wood, leaving no room for imperfections.
Step 2: Apply Glue Evenly – The Smooth Operator
Now it’s time to unleash your artistic prowess. Apply the glue with precision, ensuring an even and delicate layer across the wood furniture. Avoid any unsightly lumps or bumps that may lurk beneath the fabric’s embrace. With a stroke of brilliance, use a small paintbrush or foam brush to spread the glue, conquering one section at a time.
Step 3: Press Firmly – Seal It with Love
Embrace the power of connection as you press the fabric firmly onto the wood, starting from one end and gradually traversing its expanse. Smooth out any wrinkles or air bubbles that dare to challenge your expertise. Unleash a forceful yet tender touch, forging an unbreakable bond between fabric and wood.
Step 4: Trim Excess Fabric – The Perfect Fit
Like a master tailor perfecting every stitch, trim away any excess fabric that lies beyond the boundaries of perfection. With surgical precision, use sharp scissors or a craft knife to remove any remnants that may mar your masterpiece. The result? A project exuding elegance and meticulous attention to detail.
Step 5: Allow Sufficient Drying Time – Patience is a Virtue
Ah, the virtue of patience. After pouring your heart and soul into this endeavor, grant the glue its rightful time to set. Adhere to the manufacturer’s instructions, abiding by the recommended drying time. Resist the urge to disturb or utilize the furniture until the glue has fully embraced its role, ensuring longevity and stability.
Common Mistakes to Avoid When Glueing Fabric to Wood Furniture
In our previous section, we delved into the fascinating art of gluing fabric to wood furniture, uncovering the secrets to achieving extraordinary results. Now, let’s take a closer look at the common mistakes that can transform your dream project into a sticky nightmare. But fret not. Equipped with this expert advice, you’ll effortlessly sidestep these pitfalls and create a masterpiece that will leave your friends and family in awe.
Choosing the Wrong Glue:
Imagine this: after painstakingly selecting the perfect fabric for your furniture piece, you realize with horror that you have chosen the wrong adhesive. Avoid this catastrophe by opting for a glue specifically formulated for bonding fabric to wood. Whether it’s fabric glue, upholstery adhesive, or even epoxy resin for heavy-duty applications, ensure that you have the right tool for the job. By using the correct adhesive, you’ll prevent weak bonds and protect both the fabric and wood surface from potential damage.
Skipping Surface Preparation:
When it comes to gluing fabric to wood, preparation is paramount. Don’t dismiss this critical step. Before applying any glue, meticulously clean both surfaces, ensuring they are dry and free from dust, dirt, or grease. A gentle wipe-down with mild detergent or rubbing alcohol followed by thorough drying will set the stage for a strong and lasting bond. Remember, proper preparation is the foundation of success.
Not Applying Enough Glue:
Finding the perfect balance is vital here – don’t be stingy with the glue. Applying an ample amount guarantees a robust bond between the fabric and wood. Use a brush or small roller to evenly distribute a thin layer of glue on both surfaces. However, exercise caution not to go overboard; excessive glue can lead to seepage or unsightly clumps that could mar your hard work. Strike the right balance for a flawless finish.
Impatience with Drying Time:
Patience truly is a virtue, especially when it comes to drying time. Different glues have varying drying times, so adhere closely to the manufacturer’s instructions. Hastening this process can result in feeble bonds or fabric that detaches from the wood. Trust the process and grant your glue ample time to dry – your masterpiece will be eternally grateful.
dYJ-Wyv8ALc” >
Conclusion
When it comes to gluing fabric to wood furniture, there are a few key steps you need to follow. First, gather all the necessary materials: fabric, adhesive glue, a paintbrush, and scissors. Next, ensure that the wood surface is clean and free of any dust or debris. This will allow for better adhesion and a smoother finish.
Once your workspace is prepared, cut the fabric to the desired size and shape. It’s important to measure accurately and leave some extra fabric for folding over the edges of the wood. This will give your project a clean and polished look.
Now it’s time to apply the adhesive glue. Using a paintbrush, evenly spread the glue onto the wood surface. Make sure to cover every inch of the area where you’ll be attaching the fabric.
Carefully place the fabric onto the glued surface, starting from one edge and smoothing it out as you go along. Be gentle but firm to avoid any wrinkles or bubbles in the fabric.
Once your fabric is in place, fold over the edges and press them firmly onto the glued surface. This will create a neat and secure bond between the fabric and wood.
Allow ample time for drying before moving or using your newly transformed piece of furniture. Patience is key here – rushing can lead to less effective adhesion or even damage to your project.
In conclusion, gluing fabric to wood furniture requires preparation, precision, and patience. By following these steps and taking your time with each stage of the process, you can achieve a professional-looking result that adds personality and charm to your furniture pieces.