Step into a world where nature’s beauty meets artistic expression. Dried flowers, with their everlasting allure, have the power to transform any space into a haven of charm and nostalgia. Whether you’ve collected these delicate blooms from a cherished occasion or stumbled upon them in nature’s embrace, learning how to glue dried flowers together opens up a realm of endless possibilities.
In this blog post, we’ll unravel the secrets behind creating stunning arrangements that capture the essence of your dried blossoms. From selecting the perfect adhesive to ensuring your masterpiece stands the test of time, we’ll be your trusty guide through this delicate craft. So grab your collection of dried wonders, unleash your creativity, and let’s embark on an enchanting journey into the art of gluing dried flowers together.
Are you ready to bring life back into those precious petals? Let’s dive in.
Supplies Needed for Gluing Dried Flowers Together
Contents
Preserving the natural beauty of dried flowers and turning them into exquisite floral arrangements is a delightful craft. This blog post will guide you through the essential supplies required for gluing dried flowers together, along with step-by-step tips to help you create stunning arrangements that will stand the test of time.
Adhesive Options:
- Craft Glue: Versatile and clear, it forms a strong bond perfect for most dried flower projects.
- Hot Glue: Offers rapid drying time and an exceptionally sturdy hold.
- Floral Adhesive: Specifically formulated for flower arrangements, it provides a secure and long-lasting bond.
Precision Tools:
Reliable Support:
- Floral Tape: Flexible and sticky, it wraps around stems to hold them in place during the gluing process.
- Floral Foam: Ideal for larger arrangements, it provides stability by securing stems into a foam base.
- Floral Frog: A metal or plastic device with pins that securely holds stems in place while gluing.
Delicate Handling:
- Tweezers or Small Pliers: Safely handle delicate dried flowers, especially smaller or intricately designed blooms.
Protective Gear:
- Gloves or Aprons: Keep hands and clothes clean while working with glue, ensuring a mess-free crafting experience.
Expert Tips for Gluing Dried Flowers Together:
- Select fully dried flowers that are vibrant and undamaged.
- Prepare a clean and suitable surface or base for your project.
- Choose an adhesive based on the specific requirements of your project.
- Apply a small amount of adhesive onto the back of each flower and firmly press it onto the surface.
- Follow the adhesive’s instructions regarding drying time before handling or moving the arrangement.
- Enhance your creation by adding decorative elements such as ribbons, beads, or leaves.
Selecting the Dried Flowers
Look no further. In this comprehensive guide, we will explore the art of selecting dried flowers for gluing purposes. We will delve into the factors that contribute to the overall aesthetic and durability of your glued arrangement, such as color, condition, size, shape, texture, and durability. So grab your glue gun and let your creativity bloom as we dive into the world of dried flowers.
Choosing the Right Type of Dried Flowers:
- Consider a wide variety of dried flowers available, such as roses, lavender, baby’s breath, and eucalyptus.
- Select flowers that align with your desired aesthetic and complement each other harmoniously.
- Opt for pastel-colored flowers for a romantic and soft look or vibrant blooms for a bold and eye-catching arrangement.
Ensuring Good Condition:
- Inspect the dried flowers for signs of wilting, discoloration, or brittleness.
- Choose flowers that have retained their shape and color well during the drying process.
- Avoid using damaged or deteriorated flowers as they may not adhere properly when glued.
Playing with Size and Shape:
- Vary the size and shape of the dried flowers in your arrangement to create visual interest and dynamic compositions.
- Experiment by combining small delicate blossoms with larger focal flowers to achieve balance and harmony.
- Create a visually pleasing composition by selecting flower sizes that complement each other.
Adding Texture:
- Consider the texture of the dried flowers – smooth, rough, feathery, or even velvety.
- Combine different textures to add depth and visual appeal to your glued arrangement.
- Incorporate foliage or grasses to enhance the overall texture and create a natural and organic feel.
Considering Durability:
- Be mindful of the fragility of certain dried flowers and handle them with extra care during the gluing process to avoid breakage.
- Balance delicate flowers with sturdier blooms to ensure the longevity and durability of your arrangement.
- Consider using floral preservatives or sealants to protect your glued arrangement from environmental factors.
Preparing the Surface or Base
Preparing the surface or base is an essential step when it comes to gluing dried flowers together. This process ensures that the flowers adhere properly and securely to the chosen surface, allowing them to maintain their form and beauty for a longer period of time. There are a few important factors to consider when preparing the surface or base for gluing dried flowers.
First things first, you need to choose the perfect surface or base for your dried flower masterpiece. Think about what material will best showcase your beautiful blooms. Canvas, wood, glass, and ceramic are popular options, but don’t be afraid to think outside the box. Picture frames, vases, and decorative trays can add an extra touch of creativity to your project.
Once you have your surface or base selected, it’s time to give it a good cleaning. Nobody likes a dusty canvas or a dirty vase, right? Grab a soft cloth or a brush and gently remove any loose particles from the surface. If needed, you can also lightly sand the surface to create a slightly rough texture that will help the glue adhere better.
Now that your surface is spick and span, it’s time to prime it. Think of priming as creating a smooth canvas for your dried flowers to stick to. It also helps prevent any potential discoloration or damage caused by the glue. Acrylic gesso is a popular primer choice for most surfaces. Apply a thin layer of primer according to the manufacturer’s instructions and let it dry completely before moving on.
Next up is planning your flower arrangement. This is where your artistic side gets to shine. Before applying any glue, take some time to arrange your dried flowers on the surface. Play around with different positions and see what looks best to you. This will help you visualize the final design and make any necessary adjustments before committing to glue.
Now, let’s talk about the glue. The adhesive you choose will depend on the materials involved and your personal preference. Hot glue, craft glue, and adhesive sprays are all popular options. Just make sure to use a clear-drying adhesive that is specifically designed for bonding delicate items like dried flowers. Apply a small amount of glue to the back of each flower or petal and gently press it onto the surface in the desired position. Be careful not to go overboard with the glue, as too much can ruin the appearance of your flowers.
Choosing an Adhesive
Choosing an adhesive for your dried flower project is a crucial step in creating a stunning and enduring arrangement. With a plethora of options available, it’s essential to carefully consider several key factors that will guide you towards the perfect adhesive.
First and foremost, take into account the type of surface you’ll be working with. Different adhesives work best on specific materials, so ensure compatibility between the adhesive and the surface. For instance, when gluing dried flowers onto fabric, opt for a clear craft glue that bonds seamlessly with fabric, yielding a flawless result.
Consider the type of dried flowers you’re working with as well. If you’re dealing with larger or heavier flowers, a hot glue gun is your best bet. Its rapid bonding capabilities make it ideal for securing weighty blooms in place. However, exercise caution as the high temperature can potentially damage or melt certain types of dried flowers.
For more delicate dried flowers like petals or small blooms, floral adhesive or floral adhesive tape is an excellent choice. These specialized adhesives are waterproof, ensuring a secure bond without compromising the fragile nature of these blossoms.
Longevity is another critical consideration. To ensure your dried flower arrangement stands the test of time, opt for an adhesive specifically designed for use with preserved or dried materials. These moisture-resistant adhesives provide a robust bond that will endure over the years.
Lastly, always conduct a small-scale test before applying the adhesive to your entire project. This precautionary step guarantees compatibility between the adhesive and your dried flowers, preventing any potential damage or disappointment down the line.
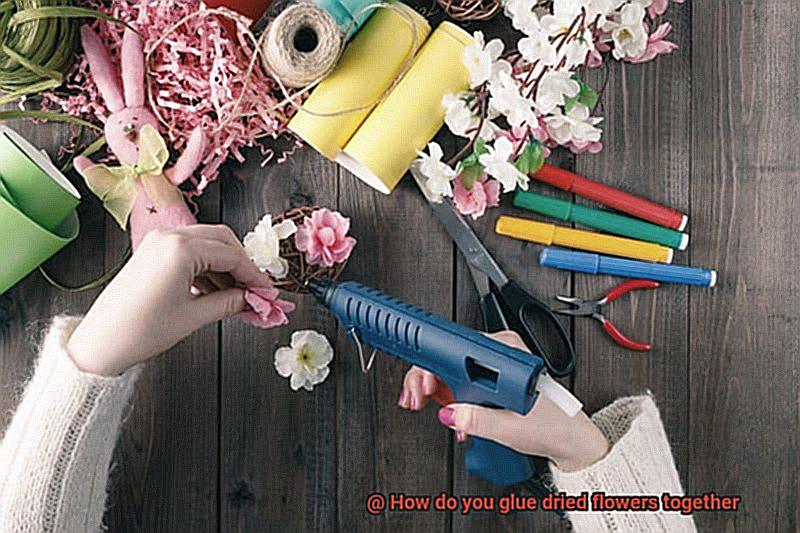
Using Hot Glue
The secret lies in the skilled use of hot glue, an unsung hero of the floral world. In this comprehensive guide, we will embark on a journey that unravels the benefits and uses of hot glue in crafting stunning dried flower arrangements. So, grab your hot glue gun and let your creativity bloom.
Set Up Your Workspace:
Prepare your creative sanctuary by ensuring it is clean and well-ventilated. As the hot glue emits fumes, proper ventilation is essential. Safeguard your workspace with a heat-resistant mat or a vibrant silicone sheet, shielding it from potential damage.
Heat Up Your Hot Glue Gun:
Plug in your trusted hot glue gun and await its transformation. As it heats up, feel the anticipation growing. Within minutes, the gun reaches its optimum temperature, ready to transform your vision into reality. While waiting, gather your dried flowers and bask in their fragile beauty.
Choose Your Desired Arrangement:
Let your imagination take flight as you envision your desired arrangement. Will it be a cascading masterpiece or a delicate symphony of colors? This step allows you to plan where to apply the hot glue, bringing cohesiveness to your floral composition.
Apply Hot Glue:
With precision and purpose, apply a small amount of hot glue onto the designated area where you wish to attach the flowers. Like an artist wielding a brush, be mindful not to overwhelm the canvas with excessive glue, for it may disrupt the natural harmony of your creation.
Attach the Flowers:
With gentle grace and unwavering focus, press the flowers onto the molten embrace of the hot glue. Feel the connection forming, a bond that defies time and gravity. Hold each flower in place for a few heartbeats, allowing the glue to cool and set, securing their place in your artistic vision. To achieve perfection, employ the aid of tweezers or a wooden stick, ensuring precise placement.
Repeat the Process:
As your masterpiece unfurls before your eyes, you may find yourself desiring more elements to enhance its beauty. Fear not, for hot glue is your steadfast ally. With deliberate intention, repeat the process of applying hot glue and attaching each flower, one by one. Revel in the meditative rhythm of creation as you meticulously craft your floral opus.
Allow the Hot Glue to Dry:
Time stands still as you bask in the satisfaction of your artistic endeavor. Hot glue possesses a remarkable quality – it dries quickly, within mere moments. Its transformation from liquid to solid is awe-inspiring, creating a formidable bond that unites your dried flowers with unwavering strength.
Using Craft Glue
Craft glue is not just an adhesive; it is a key tool that allows you to bring your creative vision to life. Whether you are creating unique designs, securing materials together, or making repairs, craft glue offers a multitude of benefits. In this comprehensive guide, we will explore the advantages of using craft glue in your projects and how it can enhance your artistic endeavors.
Versatility:
Craft glue is a versatile adhesive that can be used on a wide range of materials. Whether you are working with paper, fabric, wood, plastic, or even glass, craft glue can securely bond them together. Its compatibility with various surfaces makes it a go-to choice for any craft enthusiast.
Easy Application:
Craft glue is user-friendly, making it accessible to crafters of all skill levels. Its smooth consistency allows for easy application, ensuring a hassle-free experience. With just a squeeze or a brush stroke, you can quickly and effortlessly apply craft glue to your project.
Strong and Durable Bond:
Craft glue forms a strong and durable bond between materials. Once dry, it creates a secure connection that withstands the test of time. This ensures that your projects remain intact for years to come, whether it’s a handmade card or a decorative piece.
Various Formulas:
Craft glue comes in various formulas to suit different project requirements. From clear-drying to quick-drying and even waterproof options, you can choose the perfect formula for your specific needs. This flexibility allows you to work efficiently and achieve desired results.
Precision and Control:
Craft glue provides excellent precision and control during application. Its fine-tip applicators or nozzle attachments allow for precise placement of the adhesive, ensuring neat and accurate bonding. This level of control is particularly beneficial when working on intricate designs or delicate materials.
Quick and Efficient:
Craft glue dries relatively quickly, allowing you to complete your projects in a timely manner. Its quick-drying nature minimizes the waiting time, enabling you to move forward with your creative process without delay. This efficiency is especially advantageous when working on time-sensitive projects or when you have multiple crafts in progress.
Versatile Craft Projects:
Using craft glue opens up endless possibilities for your craft projects. From scrapbooking and cardmaking to jewelry making and home decor, craft glue can be used in a wide range of applications. Its adaptability makes it an essential tool for any crafter looking to explore different artistic avenues.
Repairs Made Easy:
Craft glue is not only useful for creating new projects but also for repairing damaged ones. Its strong adhesive properties can fix broken pieces, mend tears, and restore items to their original condition. This saves both time and money by allowing you to salvage cherished possessions instead of replacing them.
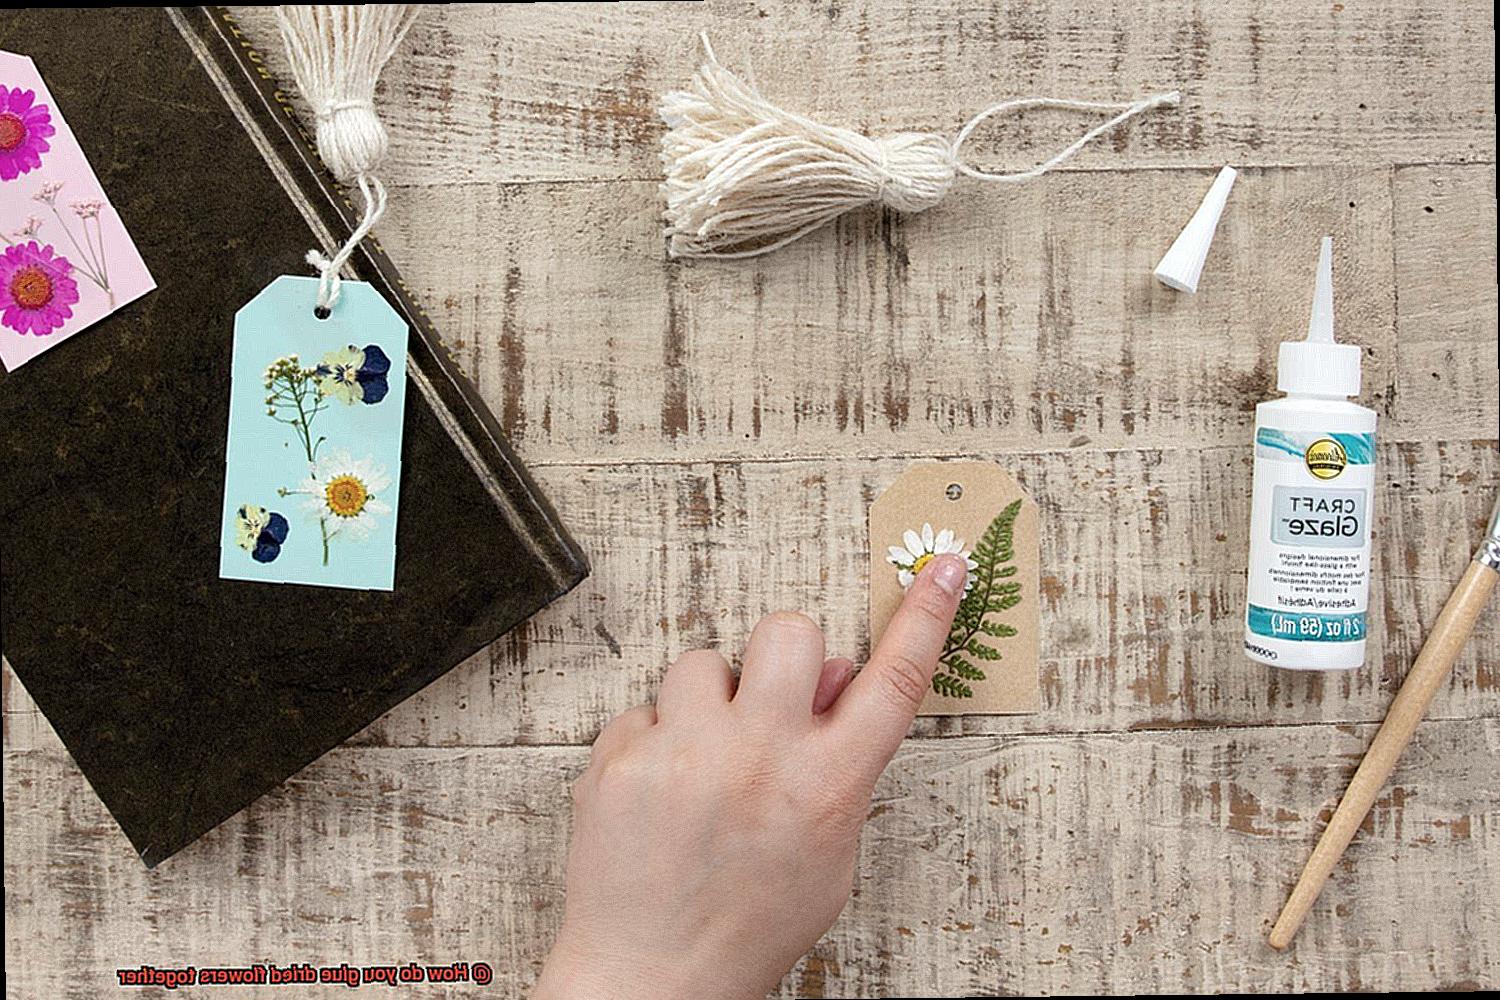
Using Floral Adhesive
Floral adhesive is a versatile and essential tool for creating stunning floral decorations. In this guide, we will explore the proper use of floral adhesive, from preparing the flowers to displaying your finished masterpiece. With these tips, you’ll be able to create beautiful and long-lasting floral arrangements for any occasion.
Preparing Your Flowers:
Before using floral adhesive, ensure that your flowers are clean and dry. Any dirt or moisture on the flowers can affect the adhesive’s ability to bond properly. Gently clean your flowers and allow them to fully dry before proceeding.
Arranging and Bonding:
To achieve a natural and harmonious arrangement, take the time to arrange your flowers in the desired position before applying floral adhesive. This step will help you identify where the adhesive should be applied and ensure a seamless bond.
Applying Floral Adhesive:
Squeeze a small amount of floral adhesive onto a disposable surface such as wax paper or a plastic lid. Using a toothpick or a small brush, apply a thin layer of adhesive to one of the surfaces you wish to bond together. Remember, less is more when it comes to adhesive application.
Press and Hold:
Once you’ve applied the adhesive, press the surfaces firmly together and hold them in place for a few seconds. This allows the adhesive to set and ensures a strong bond. Avoid moving or disturbing the flowers while the adhesive is drying, as this can weaken the bond.
Final Touches:
If adjustments are needed or additional flowers must be added, wait until the adhesive has completely dried. This prevents any accidental damage or dislodging of flowers. Keep in mind that floral adhesive dries clear, making any excess glue invisible once fully dry.
Displaying Your Creation:
Once your arrangement is complete and the adhesive has dried completely, proudly display your creation. However, note that floral adhesive may not be suitable for outdoor use or in areas with high humidity, as it may not hold up well under these conditions.
Safety Precautions:
Always prioritize safety when working with floral adhesive. Follow the manufacturer’s instructions and safety guidelines, use it in a well-ventilated area, and avoid contact with skin or eyes. Store it out of reach of children and pets.
Using Epoxy Resin
Epoxy resin is not just for industrial applications – it’s a versatile adhesive that can elevate your craft projects to new heights. One popular use of epoxy resin is gluing dried flowers together, allowing you to create stunning floral arrangements, unique jewelry pieces, and eye-catching decorative art.
Before diving into the gluing process, a little preparation is necessary. First, ensure that your dried flowers are completely dry. Moisture is the enemy when it comes to epoxy resin, as it can interfere with the bonding process. Take the time to remove any lingering dampness from your flowers. Once they’re dry, give them a gentle clean to remove any dust or debris. A quick brush or a burst of compressed air will do the trick.
Now let’s get down to business. Mix equal parts of the epoxy resin and hardener according to the manufacturer’s instructions. This two-part adhesive requires proper proportions for a successful bond. Once mixed, apply a small amount of the epoxy resin onto one of the dried flowers using a toothpick or brush. Cover the area where you want the bond to form.
Next, press the second dried flower onto the epoxy resin, aligning it with the first flower. Apply gentle pressure to ensure a secure bond between the two. Now comes the hard part – patience. Allow the epoxy resin to cure for several hours or overnight, following the manufacturer’s instructions. During this time, resist the temptation to move or disturb your glued flowers.
Once the epoxy resin has fully cured, check for any excess resin that may have seeped out between the flowers. If there is any, carefully trim it off with a sharp craft knife or scissors. Now that your dried flowers are securely bonded together, you can let your creativity soar.
Incorporate these glued flowers into stunning floral arrangements that will add a touch of elegance to any space. Create unique jewelry pieces by encasing them in resin pendants or earrings. Turn them into eye-catching decorative art pieces by framing them or arranging them in a shadow box. The possibilities are endless.
cZcWt5ucy_Y” >
Conclusion
When it comes to gluing dried flowers together, there are a few key steps you need to follow.
First and foremost, you’ll want to gather all the necessary materials: dried flowers, a strong adhesive, and any additional decorative elements you may want to incorporate. Once you have everything ready, begin by arranging your flowers in the desired arrangement.
Take your time with this step, as it’s important to create a visually pleasing composition. Next, carefully apply a small amount of adhesive to the back of each flower and press them firmly together.
Be sure to hold them in place for a few seconds to allow the glue to set. Repeat this process until all your flowers are securely glued together.
Finally, if desired, add any extra embellishments or accents to enhance the overall look of your floral creation. And voila.
You now have a beautiful arrangement of dried flowers that will last for years to come.