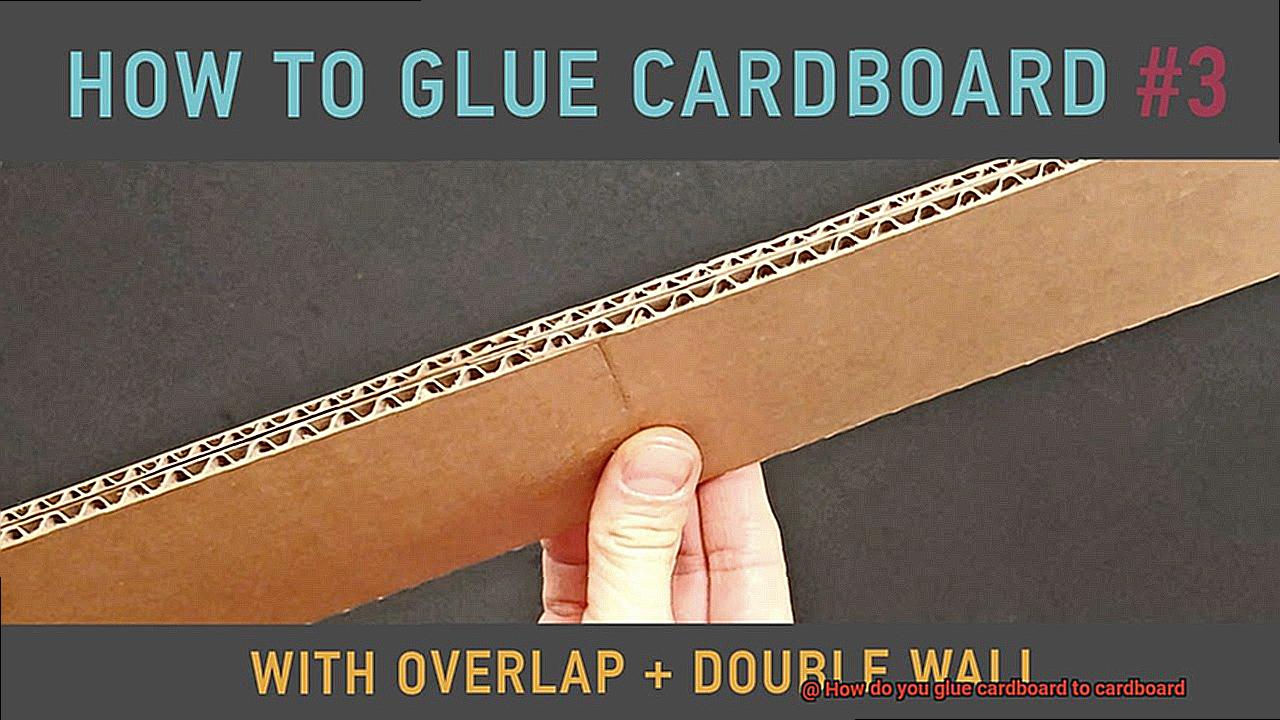
Picture this: you’re on the verge of creating a magnificent cardboard castle or a mind-blowing DIY masterpiece that’ll make jaws drop. But there’s one tiny obstacle standing in your way – how the heck do you glue cardboard to cardboard? Fear not, my fellow craft enthusiasts. In this guide, we’re about to spill the beans on achieving flawless and rock-solid bonds that’ll defy the test of time.
Now, gluing cardboard may seem like child’s play, but trust me, it takes finesse and know-how. So prepare yourself for an exhilarating journey through the realm of adhesive sorcery. We’ll delve into different types of glue, uncover secret surface preparation techniques, and share expert tips that’ll make your cardboard creations shine brighter than ever before.
So roll up those sleeves, gather your favorite pieces of cardboard, and buckle up for a wild ride. Get ready to unleash your imagination and witness the magic unfold as we explore the ins and outs of gluing cardboard together like bona fide pros.
Choosing the Right Adhesive for Gluing Cardboard
Contents
- 1 Choosing the Right Adhesive for Gluing Cardboard
- 2 Preparing the Surfaces for Gluing
- 3 Applying the Adhesive to Cardboard
- 4 Pressing the Surfaces Together
- 5 Allowing Proper Drying Time
- 6 Reinforcing the Bond with Additional Materials
- 7 Testing the Bond Before Use
- 8 Tips for Successfully Gluing Cardboard to Cardboard
- 9 Conclusion
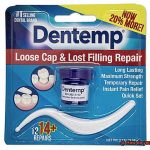
When it comes to gluing cardboard to cardboard, selecting the right adhesive is crucial for a strong and long-lasting bond. With several factors to consider, choosing the best adhesive can seem overwhelming. But fear not. As an expert in the field, I’m here to provide you with valuable insights and recommendations that will make your decision-making process easier.
Consider the Type of Cardboard:
Different adhesives work better on specific types of cardboard. Thinner or denser cardboard may require different adhesives for optimal results. Take note of the thickness, density, and surface texture of your cardboard before making a choice. For example, a thin, lightweight cardboard may benefit from a fast-drying adhesive, while a dense, heavy-duty cardboard might require a stronger bonding adhesive.
Determine the Intended Use:
Consider the purpose of your project. Are you creating a craft project, assembling a functional object, or constructing a display piece? The level of durability required will influence the type of adhesive you should choose. Structural bonding adhesives are ideal for projects that need to withstand heavy usage or handling. If you’re working on a decorative project where appearance is important, opt for an adhesive that dries clear and doesn’t leave residue.
Evaluate Drying Time and Curing Process:
Take into account the drying time and curing process of the adhesive. Some adhesives require longer drying times, while others cure faster under specific conditions. Ensure that you have enough time to properly position and align the pieces of cardboard before the adhesive sets. Look for adhesives with quick-drying capabilities if you’re working on time-sensitive projects or need to move on to the next step quickly.
Ease of Application and Cleanup:
Consider how easy it is to apply and clean up the adhesive. Look for adhesives that come in convenient applicator bottles or pens, making it easier to control the amount and placement of the adhesive. Opt for user-friendly options, especially if you’re working with children or in a shared workspace. Additionally, consider adhesives that are water-based or have low odor to minimize fumes and make cleanup easier.
Environmental Considerations:
If you’re sensitive to smells or prefer eco-friendly options, look for adhesives labeled as low odor or environmentally friendly. Some adhesives may emit strong odors or contain harmful chemicals, so be mindful of the environmental impact. There are also adhesives available that are specifically designed for recycling purposes, making them a great choice if you plan on recycling your cardboard project in the future.
Preparing the Surfaces for Gluing
Prepare to embark on a thrilling gluing adventure as we delve into the art of bonding cardboard to cardboard. But before we dive headfirst into the world of adhesives, it’s imperative that we lay down the groundwork for a robust and unyielding bond. After all, we wouldn’t want our masterpieces to crumble into oblivion after all our hard work.
First and foremost, cleanliness reigns supreme. Grab a damp cloth or sponge, and with sweeping motions, wipe away any dirt, dust, or greasy residue that may lurk on the surfaces of both pieces of cardboard. We want those surfaces to gleam with pristine purity, ensuring optimal adhesive effectiveness.
Now, let’s roughen things up a bit, shall we? Cardboard’s smooth texture can be quite the adversary when it comes to glue adherence. But fear not. Arm yourself with some fine-grit sandpaper and gently abrade both pieces of cardboard. This will create a rugged landscape for bonding, allowing the glue to seep deep into the fibers of the cardboard. A robust bond is on the horizon.
But wait, our gluing party won’t allow any unwanted debris to crash in. Take a clean cloth or brush and meticulously sweep away any remnants of dust or pesky bits of cardboard left from the sanding process. We want our surfaces to be pure and untarnished, ready for the ultimate adhesive showdown.
Ah, priming – the secret sauce that some adhesives crave. Check the instructions on your glue packaging to see if it yearns for priming. Some adhesives demand an extra boost to enhance their adhesion prowess. Respectfully follow the manufacturer’s recommendations and give your surfaces the priming they deserve.
But hold on just a moment. Let’s ensure that our puzzle pieces fit flawlessly together. Inspect your cardboard for any rough edges or uneven surfaces. If you encounter any, take a moment to trim or smooth them out, guaranteeing a snug fit and an unshakeable bond.
Now that our surfaces are prepared and ready, it’s time to unleash the glue. With precision and care, apply your adhesive of choice to one of the surfaces, diligently following the instructions on the packaging. Then, with gentle determination, press the two pieces of cardboard together, forging a union that shall withstand the test of time.
To safeguard our glued pieces while they dry, consider employing the aid of masking tape or clamps. These trusty companions will ensure that no shifting or separating occurs during the curing process. Safety first, my dear glue-loving comrades.
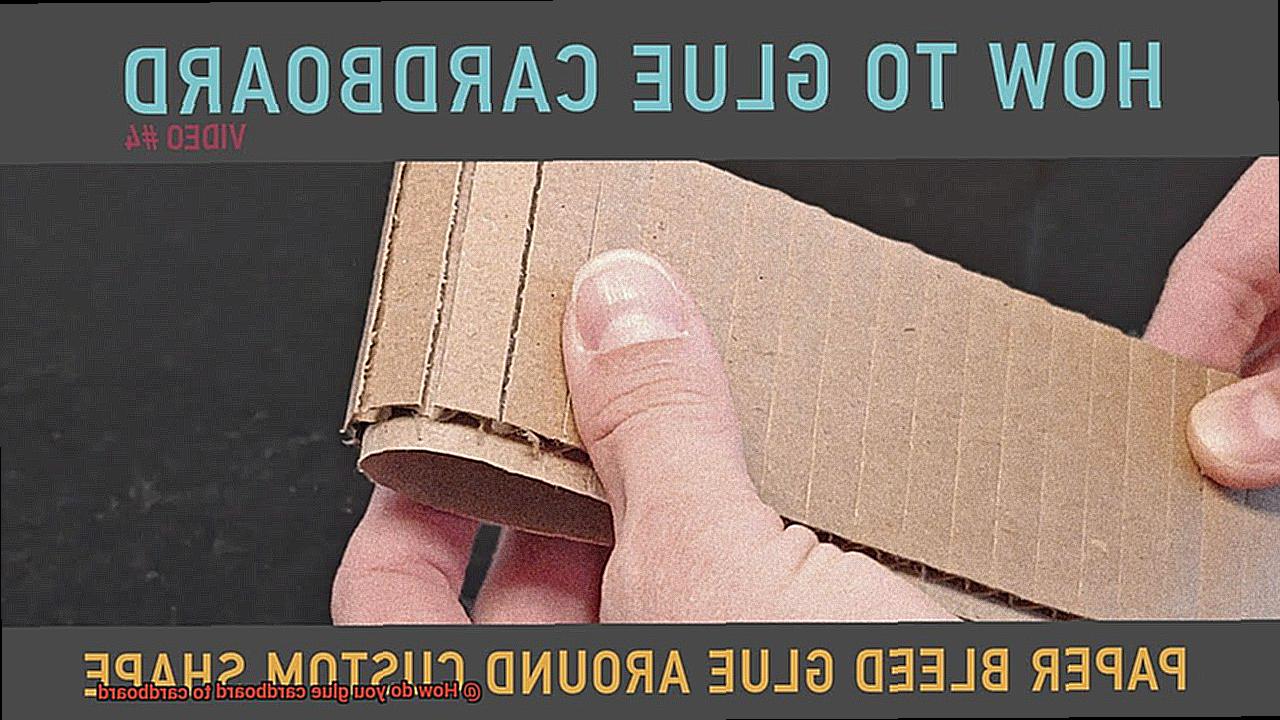
Applying the Adhesive to Cardboard
If you’re looking to achieve strong and durable bonds when gluing cardboard, you’ve come to the right place. In this comprehensive guide, we will explore the key steps required to apply adhesive properly, ensuring a reliable bond that stands the test of time. So, let’s dive into the secrets of mastering the art of bonding cardboard.
Choose the Right Adhesive:
To start our gluing adventure, it’s essential to select the right adhesive. Opt for adhesives specifically designed for bonding cardboard, such as white glue, craft glue, or specialized cardboard glues. These adhesives have properties that ensure a reliable bond.
Prepare the Surface:
Before diving into the gluing process, prepare the surface of the cardboard. Cleanliness is key. Ensure that the surfaces you plan to glue are clean, dry, and free from any dust or debris. This creates an optimal bonding environment.
Apply a Thin, Even Layer:
Now comes the fun part – applying the adhesive. To avoid a messy appearance, use a small brush or spatula to apply a thin and even layer of adhesive. This prevents excessive glue from seeping out and creating an unsightly mess.
Consider Using a Glue Gun:
For efficiency and instant bonding, consider using a glue gun. These nifty tools work wonders on porous materials like cardboard. However, keep in mind that glue guns may not be suitable for all projects, so assess your specific requirements before opting for this method.
Allow Proper Drying Time:
Once you’ve applied the adhesive, exercise patience and allow sufficient drying time. This step is crucial in ensuring a strong and secure bond. Refer to the manufacturer’s instructions for the recommended drying time, as different adhesives may have varying requirements.
Apply Pressure:
To enhance bonding strength, apply pressure on the glued area. Clamping or placing heavy objects on top of the glued cardboard allows the adhesive to penetrate the fibers, creating a stronger bond.
Test the Bond:
After the adhesive has dried, put your bond to the test. Gently tug or apply pressure to ensure a secure bond with no loose or weak areas. If any issues are detected, additional adhesive can be applied to strengthen the bond.
Pressing the Surfaces Together
Today, we embark on a captivating journey into the fascinating world of cardboard bonding. Prepare to unlock the secrets behind achieving strong and durable connections by mastering the art of pressing surfaces together. Get ready to elevate your gluing game.
Step 1: Cleanliness is Key
Before diving into the pressing process, ensure that your cardboard surfaces are squeaky clean. Dust, dirt, and grease can sabotage the adhesive’s ability to bond effectively. Grab a gentle detergent or soap mixed with water, and let’s start our cleansing crusade. Gently scrub those surfaces, rinse them thoroughly, and allow them to bask in the glory of complete dryness.
Step 2: Choosing the Right Adhesive
In this vast universe of bonding options, selecting the perfect adhesive is paramount. Will you opt for the trusty glue stick, the versatile liquid glue, or a specialized adhesive designed solely for cardboard? Once you’ve made your selection, apply a thin layer evenly onto one of the cardboard pieces. Brush it on, roll it on – whatever floats your glue boat. But remember, less is more. Avoid drowning those surfaces in excess adhesive.
Step 3: The Perfect Alignment
Now comes the moment of truth – aligning those two cardboard pieces in perfect harmony. Take a deep breath and embrace the precision required here. Patience is your greatest ally. Ensure a flawless match before proceeding to press them together. And when you do, apply even pressure across every inch of those surfaces. This is where true strength is born.
Step 4: The Waiting Game
Ah, patience – the virtue we must embrace during this gluing odyssey. Allow ample time for the adhesive to dry and cure completely. Respect the manufacturer’s instructions regarding drying times and pressing pressure requirements. During this phase, be still like a gluing ninja, avoiding any movement that may disrupt the sacred bonding process.
Step 5: Testing, Testing
The moment of truth has arrived. It’s time to put your newfound strength to the test. Gently pull, twist, or challenge those glued cardboard pieces to reveal their true resilience. If weak spots are detected, fear not. It’s simply an invitation to reapply adhesive and repeat the pressing process. Embrace the opportunity to perfect your craft.
Allowing Proper Drying Time
Whether you’re a seasoned scholar or an aspiring academic, understanding the significance of allowing proper drying time for your research notes is paramount to ensuring their longevity and integrity.
In this comprehensive guide, we will delve into the research behind this essential process and provide you with invaluable tips to guarantee that your precious notes endure the test of time.
The Drying Process:
Different inks, different drying times:
- Each type of ink has its own unique drying time.
- It is crucial to refer to the manufacturer’s instructions for accurate information.
Embrace patience:
- Hastening the drying process can lead to smudging and fading.
- Allow a minimum of 24 hours for optimal results, although longer durations are recommended if feasible.
Environmental Factors:
Temperature and humidity influence drying time:
- Higher temperatures and lower humidity levels expedite the drying process.
- Conversely, lower temperatures and higher humidity levels may prolong it.
Ideal conditions for drying:
- Place your research notes in a well-ventilated area.
- Adequate air circulation aids in the evaporation of moisture from the ink.
Additional Tips for Success:
Avoid contact and friction during drying:
- Touching or rubbing against wet ink can cause smearing and blurring.
- Misalignment and compromised legibility may occur as a result.
Weighted protection for pristine pages:
- Consider using weights or gentle pressure to keep your research notes flat and secure.
- This helps maintain even pressure across the pages, preventing distortion or damage.
Reinforcing the Bond with Additional Materials
Imagine completing a magnificent cardboard creation, only to worry about its long-term durability. Fear not, fellow crafters. In this comprehensive guide, we will explore various additional materials that can reinforce the bond between cardboard pieces. Let’s don our creative hats and delve into the world of glues, tapes, braces, and coatings.
Types of Adhesives:
- Craft Glue: A versatile adhesive perfect for lightweight materials like cardboard. Its ease of use, clear drying properties, and strong hold make it ideal for most projects.
- Super Glue: The go-to option for quick and secure bonding. Its fast-drying nature makes it perfect for small repairs or attaching smaller cardboard pieces.
- Epoxy Resin: For heavy-duty bonds, epoxy resin is unbeatable. It forms an incredibly strong bond and is resistant to water and heat, ensuring optimal durability.
Application Techniques:
- Evenly apply glue: Before bonding the cardboard pieces together, ensure an even layer of glue on both surfaces. This maximizes adhesion and eliminates weak spots in the bond.
- Utilize clamps or weights: To achieve a tight bond between cardboard pieces, consider using clamps or weights while the glue dries. This maintains pressure and enhances bond strength.
- Allow sufficient drying time: Patience is key. Different glues have varying drying times, so consult the manufacturer’s instructions. Rushing the drying process can result in a weaker bond.
Reinforcement Options:
- Fabric or Mesh Tape: Strengthen bonds by applying tape made from durable materials like fiberglass or nylon along seams or edges. This creates a robust bond capable of withstanding pressure and weight.
- Corner Braces or Metal Brackets: Enhance joint stability by attaching small metal pieces using screws or glue to the corners of cardboard pieces. These braces provide additional support, preventing separation.
- Epoxy Resin or Construction Adhesive: For challenging projects demanding exceptional strength, consider alternative adhesives. These materials offer superior bonding capabilities, ensuring a secure connection.
Waterproofing and Protection:
Sealants or Coatings: Safeguard your project from water damage by applying waterproof materials over glued areas. These protective layers prevent moisture penetration, preserving the bond’s integrity.
Important Considerations:
Compatibility: Verify that additional materials are compatible with cardboard to avoid damage or weakening. Always follow manufacturer instructions and test small areas before applying to the entire project.
Testing the Bond Before Use
Cardboard is like the unsung hero of crafting and packaging, ready to transform into whatever our imagination desires. But before we dive headfirst into gluing cardboard together, it’s crucial to test the bond. In this blog post, we will delve into the importance of testing the bond, explore various testing methods, and provide tips on selecting the right adhesive for your project.
Why Test the Bond?
Imagine spending hours constructing a beautiful cardboard sculpture, only to have it collapse due to a weak bond. Testing the bond before use is essential to prevent disappointment and ensure that your creations stand the test of time. It allows you to assess the strength and durability of the bond, guaranteeing it will hold up even under extreme conditions. Not only does this save you from heartbreak, but it also prevents accidents or injuries caused by a failed bond.
Methods of Testing:
- Pull Test: Apply a small amount of glue onto a scrap piece of cardboard and firmly press another piece on top. Once dry, channel your inner Hercules and attempt to pull the two pieces apart. If the bond holds strong and refuses to budge, you can trust it for gluing larger pieces together.
- Stress Test: Give your glued creation a taste of its future challenges by subjecting it to bending, twisting, or applying pressure. This real-life simulation helps evaluate the strength of the bond and ensures that your sturdy cardboard box or structure will endure any unexpected forces.
- Environmental Test: Cardboard isn’t impervious to environmental factors like temperature, humidity, and moisture. To account for these variables, conduct tests in different conditions. This way, you can be confident that your glued creation will remain steadfast regardless of whether it’s in a hot attic or a damp basement.
Choosing the Right Adhesive:
Not all glues are created equal when it comes to bonding cardboard. For a strong and reliable connection, it is crucial to select an adhesive specifically designed for this material. Experiment with different options and test their strength and durability. Find the glue that becomes the steadfast partner of your cardboard creations.
Tips for Successfully Gluing Cardboard to Cardboard
Gluing cardboard to cardboard may pose some challenges, but with the right techniques, you can create durable bonds that make your projects stand out. In this article, we’ll explore expert tips for successfully gluing cardboard together.
Choose the Right Glue:
Selecting the appropriate adhesive is crucial when gluing cardboard to cardboard. Opt for strong adhesives like epoxy or wood glue, or consider using white glue or craft glue. These glues have excellent bonding properties and are ideal for cardboard.
Prep the Surfaces:
Properly preparing the surfaces is essential before diving into gluing. Ensure both pieces of cardboard are clean by wiping them down with a cloth or paper towel to remove dirt and grease. This step guarantees better adhesion and a stronger bond.
Apply Glue Evenly:
When applying glue, aim for an even distribution across the cardboard surface. Use a brush or small spatula to spread a thin layer of glue. This technique prevents lumps and bumps, resulting in a smooth finish and a sturdy bond.
Press Firmly:
After applying the glue, press the two pieces of cardboard firmly together. Apply even pressure across the entire surface, leaving no gaps or air bubbles. Use your hands or place something heavy on top while the glue dries to ensure a secure bond.
Allow Ample Drying Time:
Different glues require varying drying times, so be patient and follow the manufacturer’s instructions. Avoid moving or disturbing the glued area until it’s completely dry, as this can weaken the bond. Give it enough time to set and ensure long-lasting results.
P–8TLM_SxE” >
Conclusion
When it comes to gluing cardboard to cardboard, there are a few techniques you can employ.
One method is to use a strong adhesive like craft glue or wood glue. Apply the glue evenly on one piece of cardboard and press the second piece firmly against it.
Make sure to align the edges for a seamless bond. Another option is using hot glue, which provides quick and sturdy adhesion.
Simply apply the hot glue onto one piece of cardboard and press the other piece onto it before it cools down. For an extra secure hold, consider reinforcing the glued area with tape or clamps until the adhesive fully dries.
Whichever method you choose, remember to work in a well-ventilated area and follow all safety precautions.