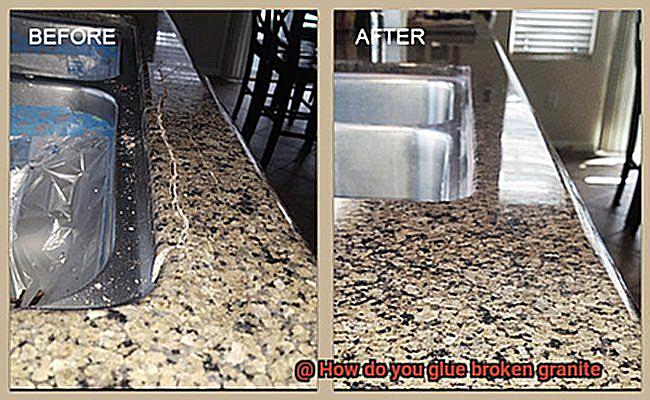
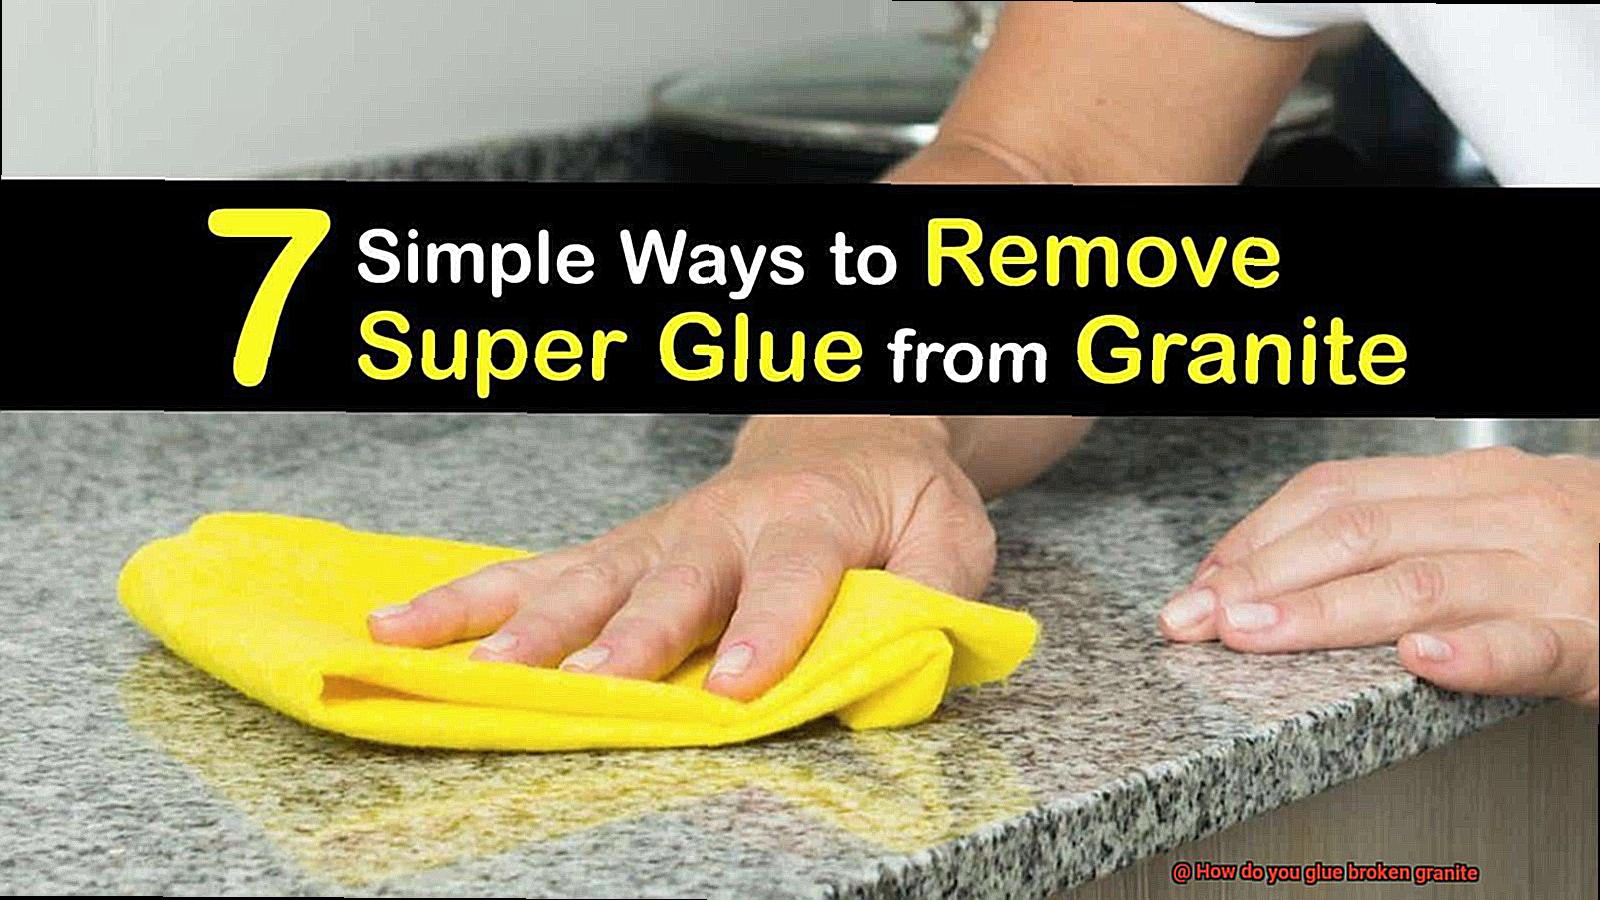
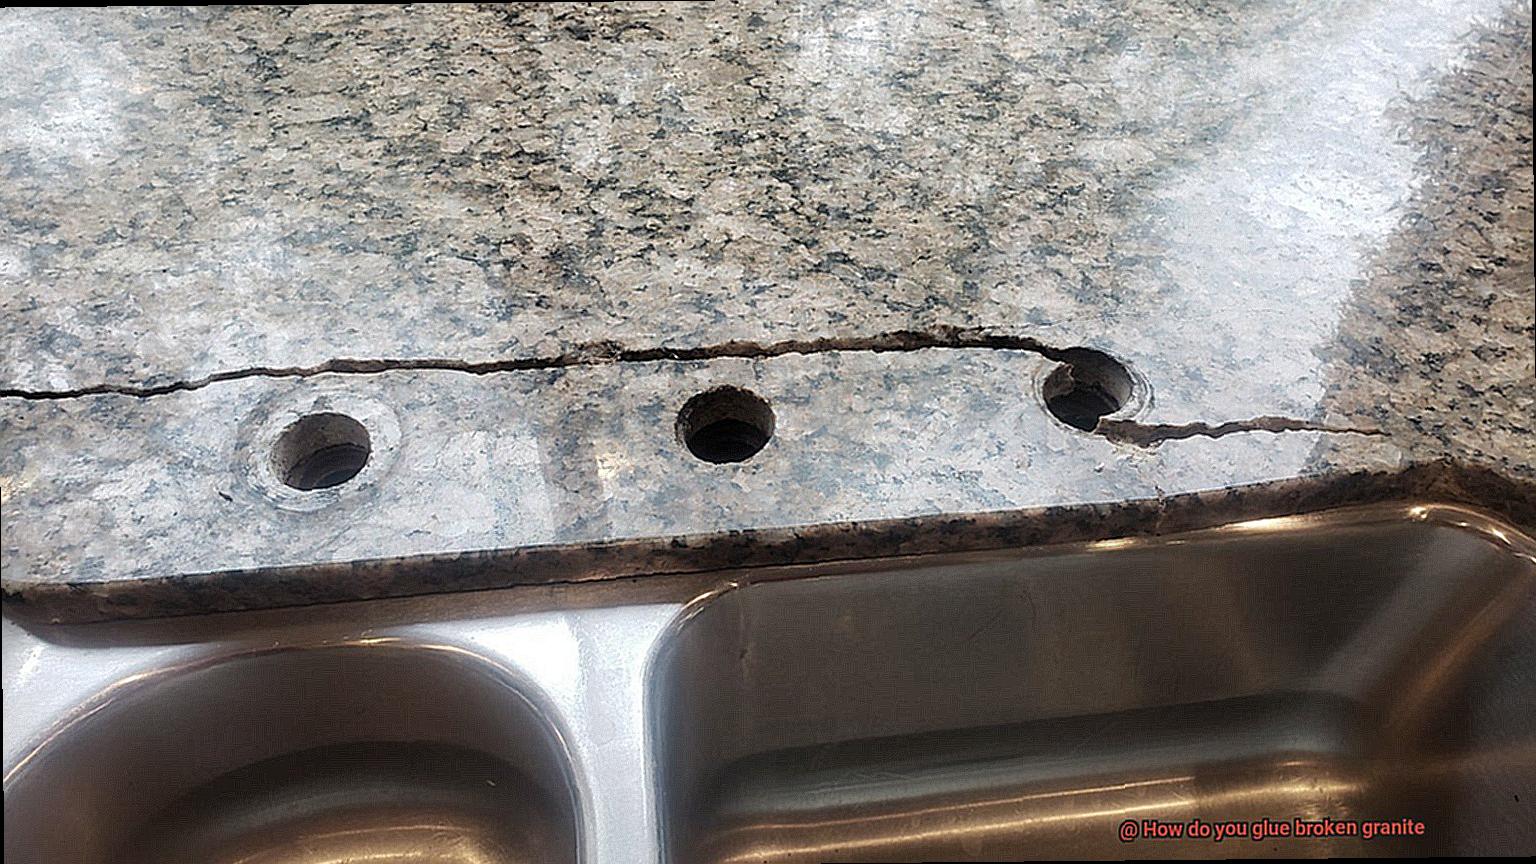
Picture this: your stunning granite countertop, once the centerpiece of your kitchen, now lies shattered into pieces. It’s enough to make your heart skip a beat. But fear not, my fellow granite enthusiasts.
I’m here to share with you the magic formula for restoring your broken granite masterpiece. In this guide, we’ll take you by the hand and walk you through every step of the glueing process, so you can bring back that jaw-dropping beauty and rock-solid strength. So grab your tool belt and let’s embark on this epic journey of granite resurrection.
Choosing the Right Adhesive for the Job
Contents
- 1 Choosing the Right Adhesive for the Job
- 2 Preparing the Broken Edges of the Granite
- 3 Mixing and Applying the Epoxy Resin
- 4 Pressing the Pieces Together and Allowing Curing Time
- 5 Sanding Down Excess Glue or Uneven Edges
- 6 Cleaning the Repaired Area Thoroughly
- 7 Special Considerations for Significant Damage or Structural Issues
- 8 Safety Precautions to Take When Gluing Broken Granite
- 9 Conclusion
When it comes to gluing broken granite, selecting the right adhesive is crucial for a successful repair. Not all adhesives are suitable for granite due to its unique properties and the need for a strong bond. In this article, we will discuss the importance of considering various factors when choosing an adhesive for gluing broken granite.
First and foremost, the size and type of break are key factors to consider. For small cracks or chips, a fast-setting adhesive like cyanoacrylate (super glue) may be sufficient. However, for larger breaks or structural issues, a stronger adhesive such as epoxy or polyester resin is recommended.
The location of the granite is another factor to keep in mind. If the repair will be indoors, you can opt for an adhesive that is not affected by moisture or temperature changes. However, if the granite is located outdoors, it is essential to choose an adhesive that is weather-resistant and can withstand exposure to UV rays and water.
The desired aesthetic outcome also plays a role in adhesive selection. Some adhesives dry clear and are virtually invisible when applied, making them ideal for repairs where aesthetics are important. Others may have a tint or color that matches the granite, creating a seamless repair.
Now that we understand the factors that need to be considered let’s discuss two common adhesives used for gluing broken granite: epoxy and polyester resin.
Epoxy is a popular choice for repairing broken granite due to its strength and durability. It consists of a resin and a hardener that are mixed together to form a strong bond. Epoxy is known for its excellent adhesion to various surfaces, including granite. It dries clear and can be sanded down to create a seamless repair.
Polyester resin is another adhesive commonly used for gluing broken granite. It is a two-part adhesive that consists of a resin and a catalyst. Polyester resin is known for its fast-setting properties, making it suitable for quick repairs. However, it may not be as strong as epoxy and may require additional reinforcement for larger breaks.
Preparing the Broken Edges of the Granite
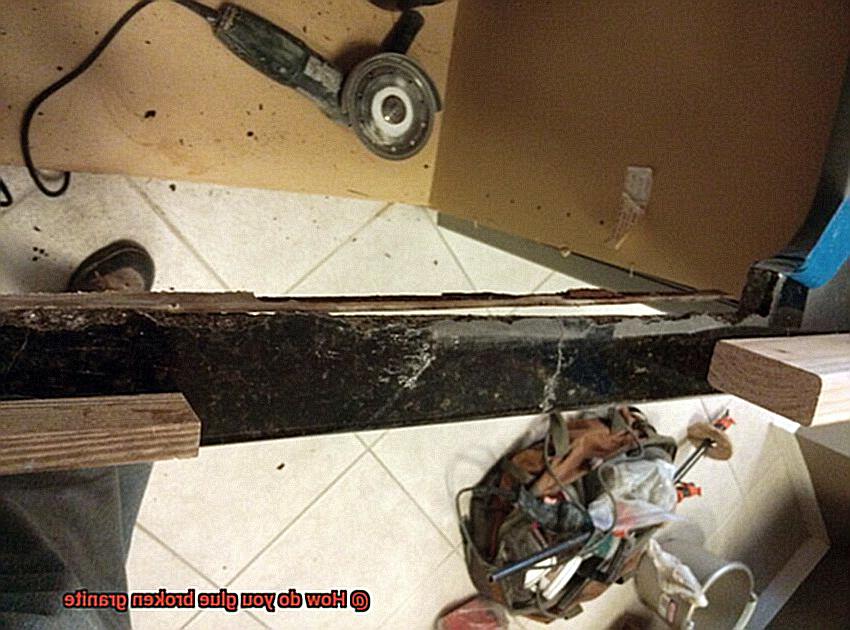
You’ve got a broken piece of granite and you’re ready to put it back together. But before you reach for that adhesive, it’s crucial to prepare the broken edges properly. This will ensure a strong and durable bond that will stand the test of time. In this comprehensive guide, we’ll walk you through the process of preparing broken edges of granite for gluing, so let’s get started.
Step 1: Clean the Edges
The first step in preparing the broken edges is to clean them thoroughly. Any dirt, dust, or debris on the surfaces can hinder the bonding process. Grab a soft cloth or brush and remove any loose particles. Then, wipe the edges with a mild detergent solution to get them squeaky clean.
Step 2: Roughen the Surfaces
Next, it’s time to roughen the surfaces of the broken edges. This step is crucial for creating a secure bond between the pieces. You can use sandpaper or a diamond blade to accomplish this. Gently sand the edges in a back-and-forth motion until they feel slightly rough to the touch. This rough texture will increase the surface area for better adhesion.
Step 3: Repair Imperfections
In some cases, the broken edges may have chips or uneven surfaces. It’s crucial to repair these imperfections before gluing. Use an epoxy-based granite filler or a similar product to fill in any gaps or chips. Follow the manufacturer’s instructions for application and allow sufficient drying time before proceeding. This step ensures that your repaired granite will have a smooth and seamless appearance.
Step 4: Check for Proper Fit and Alignment
Once the broken edges are cleaned, roughened, and repaired if necessary, it’s time to check for proper fit and alignment. This step is essential to ensure that your pieces will fit together perfectly when glued. Align the pieces together and examine them closely. If there are any gaps between the broken pieces, use shims or small spacers to maintain an even gap throughout. This will prevent excessive pressure on one side during the gluing process and provide a more secure bond.
Step 5: Ensure Drying is Complete
Before proceeding with gluing, it’s crucial to make sure the prepared edges are completely dry. Moisture can interfere with adhesive performance and weaken the bond over time. Allow sufficient time for the surfaces to air dry naturally or use a hairdryer on a low heat setting to accelerate the drying process. Take your time with this step to ensure that the surfaces are fully dry before moving on.
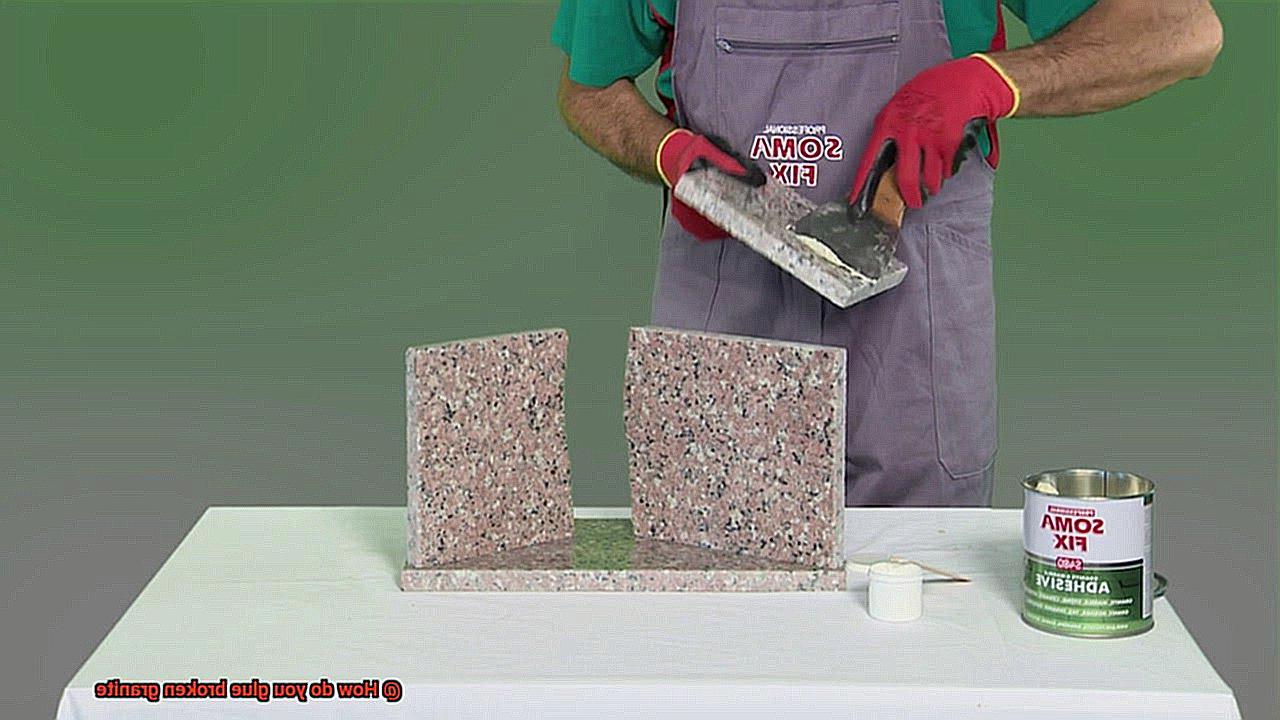
Mixing and Applying the Epoxy Resin
In this comprehensive guide, we will explore the process of mixing and applying epoxy resin like a seasoned pro. Get ready to unleash the magic of epoxy resin as it transforms your broken granite into a flawless masterpiece. Let’s dive in.
Materials Checklist:
Before we dive into the mixing and applying process, make sure you have all the necessary materials on hand:
- Epoxy resin (the star of the show.)
- Hardener (its trusty sidekick)
- Gloves (to protect your hands in style)
- Mixing container (your epoxy resin’s new home)
- Spatula or stirring stick (for some serious mixing action)
- Color additives (if you want to add a touch of personality)
Mixing It Up:
Now that we have everything we need, it’s time to become a master mixologist. Follow these steps for a strong bond between your granite pieces:
- Don your gloves like a true epoxy superhero.
- Pour the required amount of resin into the mixing container, ensuring sufficient coverage for the broken area.
- Add the precise amount of hardener according to the manufacturer’s instructions – this is where the magic happens.
- Give your resin and hardener duo a thorough stir using your trusty spatula or stirring stick. No streaks allowed – we’re aiming for perfection.
If you want to elevate your repair job, add some color additives to match your granite’s hue. It’s like giving it a personality boost.
Apply and Restore:
- Now comes the exciting part – bringing your broken granite pieces back together.
- Using a spatula or putty knife, apply the epoxy resin mixture evenly on both surfaces of the broken granite. Think of it as frosting a cake, but way cooler.
- Press the broken pieces together firmly, aligning them as accurately as possible. Apply pressure for a few minutes to ensure a rock-solid bond.
- Excess epoxy resin oozing out? Don’t panic. Simply grab a cloth or paper towel dampened with acetone or a recommended epoxy resin cleaner and clean up the mess. No unsightly marks allowed.
Curing and Finishing Touches:
- Allow your epoxy resin to cure per the manufacturer’s instructions. This may require some waiting time, but trust us, it’s worth it.
- Once fully cured, step back and admire your handiwork. Your broken granite is now restored to its former glory, ready to withstand whatever life throws its way.
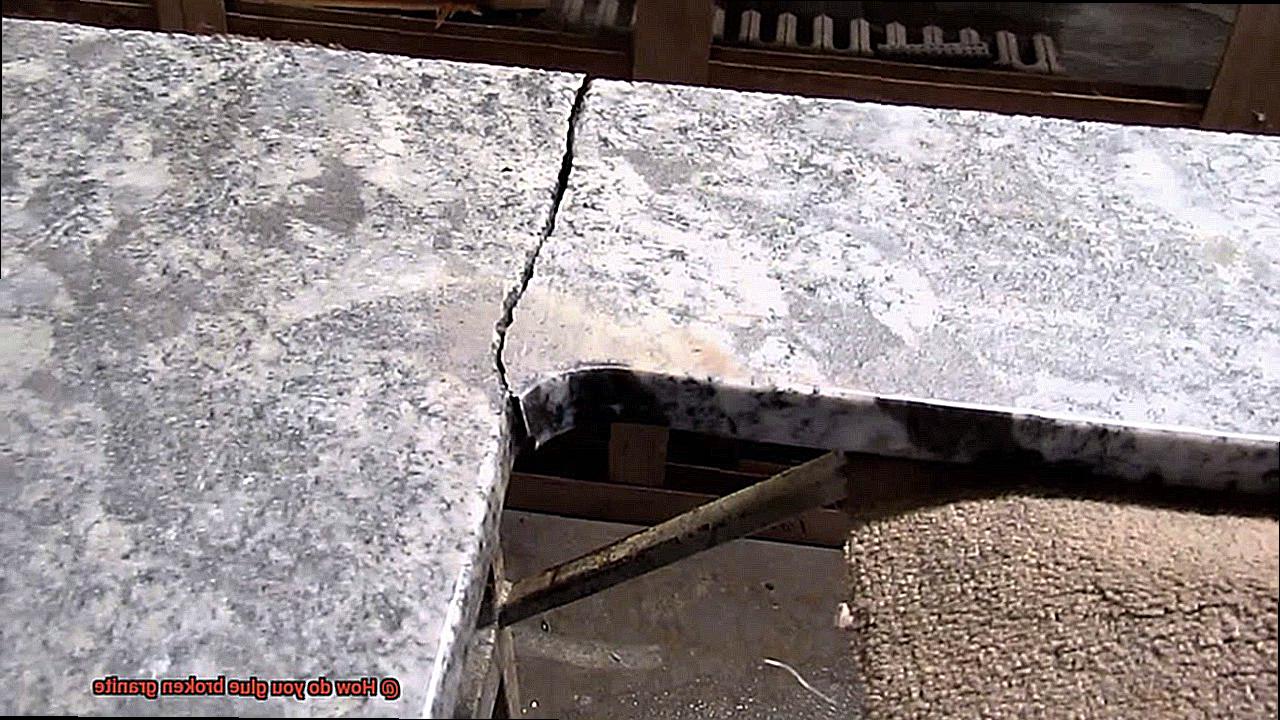
Pressing the Pieces Together and Allowing Curing Time
Imagine the heartbreak of seeing your once pristine granite countertop marred by an unfortunate accident. But fear not. With the right techniques and adhesive, you can repair broken granite and restore its original beauty. In this comprehensive guide, we will explore the importance of pressing the pieces together firmly and allowing sufficient curing time for the adhesive used in gluing broken granite.
The Power of Pressure
To ensure a bond that can withstand the test of time, it is crucial to apply pressure when joining the broken pieces. This can be achieved by strategically placing heavy objects or clamps on top of the glued area. By exerting pressure, you create optimal contact between the adhesive and the granite surfaces, resulting in a bond that is unyielding and durable.
Aligning for Perfection
Before applying the adhesive, meticulous alignment of the broken edges is vital. This step guarantees a seamless repair, eliminating any unsightly gaps or misalignments that could compromise both the aesthetic appeal and structural integrity of the repaired granite. Take your time to ensure precise alignment, as even the slightest deviation can have a significant impact on the final result.
Patience is Key – Curing Time
The curing time for adhesives used in gluing broken granite can vary depending on the specific product and manufacturer’s instructions. It is of utmost importance to adhere strictly to these guidelines. Some adhesives may require an initial curing period before applying pressure, while others allow immediate clamping. Rushing this process may lead to a weakened bond and potential future damage.
Optimal Curing Conditions
During the curing process, providing optimal conditions for the adhesive is crucial. Place your repaired granite in a well-ventilated area with moderate temperature and humidity levels. This environment promotes the chemical reactions necessary for the adhesive to achieve its maximum strength. Be aware that extreme temperatures or high humidity can negatively impact the curing process, compromising the bond’s integrity.
Time is of the Essence
Leaving clamps or heavy objects in place until the adhesive has fully cured is highly recommended. The duration of the curing process can vary, ranging from a few hours to several days, depending on the adhesive used. Remember, patience is an essential virtue when it comes to achieving a repair that will stand the test of time.
Section 6: Finishing Touches
After the curing time has elapsed, it’s time for the finishing touches. Carefully remove any excess adhesive that may have squeezed out during the pressing process. Use a razor blade or a suitable cleaning agent while following proper safety precautions and manufacturer guidelines for handling and disposing of adhesive residues. Inspect the repaired granite for any remaining imperfections or unevenness, utilizing fine-grit sandpaper if necessary to achieve a flawlessly smooth surface.
Sanding Down Excess Glue or Uneven Edges
Sanding Down Excess Glue or Uneven Edges on Broken Granite Surfaces: Achieving a Flawless Finish
Introduction:
Granite, a stunning and resilient natural stone, adds a touch of elegance to any space. However, accidents happen, and broken granite surfaces can be a headache. But fear not. With the right tools and techniques, you can restore your granite to its former glory. In this guide, we will focus on the crucial step of sanding down excess glue or uneven edges, providing clear instructions to achieve a flawless finish.
Tools and Materials:
- Coarse, medium, and fine-grit sandpaper
- Sanding block or power sander
- Dust mask
- Safety goggles
Step-by-Step Process:
- Ensure the glued area is completely dry: Before diving into the sanding process, it is vital to allow the adhesive to dry fully. Moisture can wreak havoc on the sanding process and compromise the repair.
- Remove excess glue or high spots: Grab your coarse-grit sandpaper and get rid of any globs of glue or high spots on the surface. Apply even pressure while sanding to avoid creating additional irregularities.
- Smooth out the surface: Transition to medium-grit sandpaper and continue sanding in a back-and-forth motion. This will eliminate excess glue and level the edges with the surrounding granite, ensuring a seamless finish.
- Achieve a polished finish: Switch to fine-grit sandpaper for final smoothing. This last step will give your repaired area that perfect polished look and blend it seamlessly with the rest of the granite surface.
- Protect yourself during the process: Don’t forget to prioritize safety. Shield yourself from inhaling fine particles by wearing a dust mask and safeguard your eyes with safety goggles.
- Clean the repaired area: Once you’ve sanded down excess glue or uneven edges, it’s time to give the repaired area a thorough cleaning. Use a damp cloth or sponge to remove any dust or debris. Allow the area to dry completely before moving on to the next steps in the granite repair process.
Cleaning the Repaired Area Thoroughly
Cleaning the repaired area thoroughly is crucial for achieving a professional and long-lasting repair on broken granite. Here are the steps to effectively clean the repaired area:
- Remove loose debris: Begin by gently brushing or sweeping the surface with a soft-bristle brush or broom. This will eliminate any loose dust or debris from the repaired area. Avoid using abrasive materials that could potentially scratch or damage the granite.
- Choose the right cleaner: Select a mild detergent or stone cleaner specifically designed for natural stone. Common household cleaners can be too harsh and may cause damage to the granite. Follow the manufacturer’s instructions for proper mixing with water.
- Apply the cleaning solution: Use a soft cloth or sponge to apply the cleaning solution to the repaired area. Gently scrub in circular motions, paying extra attention to visible stains or residue on the surface. This thorough cleaning will ensure a flawless finish.
- Rinse thoroughly: After scrubbing, thoroughly rinse the area with clean water to remove any remaining soap or cleaner. This step is crucial as any residue left behind can affect the bonding of the glue and compromise the repair.
- Dry completely: It is essential to dry the area completely before proceeding with further steps. Use a clean, dry cloth or towel to absorb any excess moisture. Leaving the surface wet can impact the bonding of the glue and compromise the repair.
- Protect surrounding surfaces: While cleaning, take care to protect adjacent tiles, countertops, or cabinets. Avoid spilling any cleaning solution on these surfaces. If necessary, use masking tape or plastic sheets to cover and safeguard these areas from potential damage.
By following these steps and ensuring proper cleaning of the repaired area, you can achieve a flawless finish on your broken granite. Taking the time to clean and prepare the surface properly will help guarantee that the glue bonds securely and that the repaired area blends seamlessly with the surrounding granite.
In addition to thorough cleaning, regular maintenance is important for the longevity and beauty of your repaired granite. Use appropriate cleaners and avoid abrasive materials to preserve its natural shine and durability.
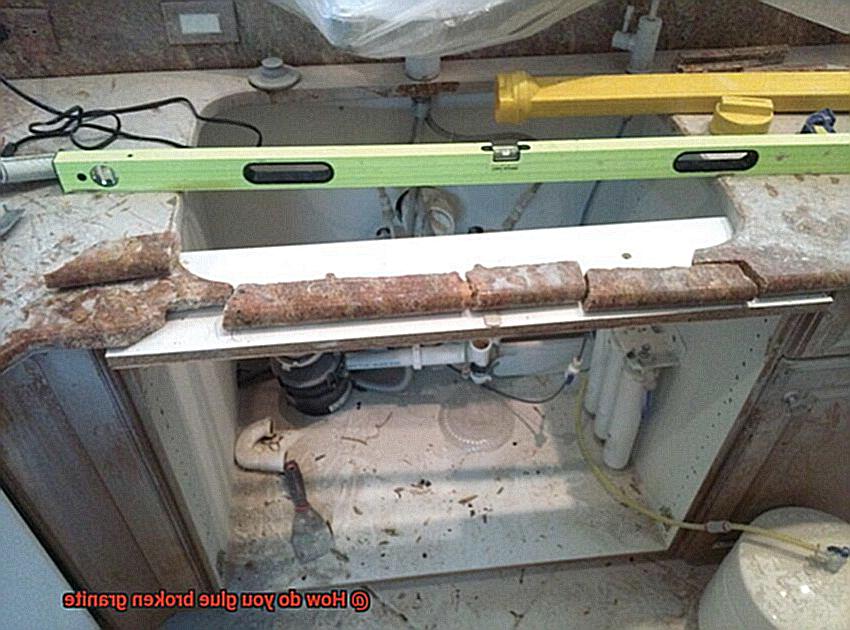
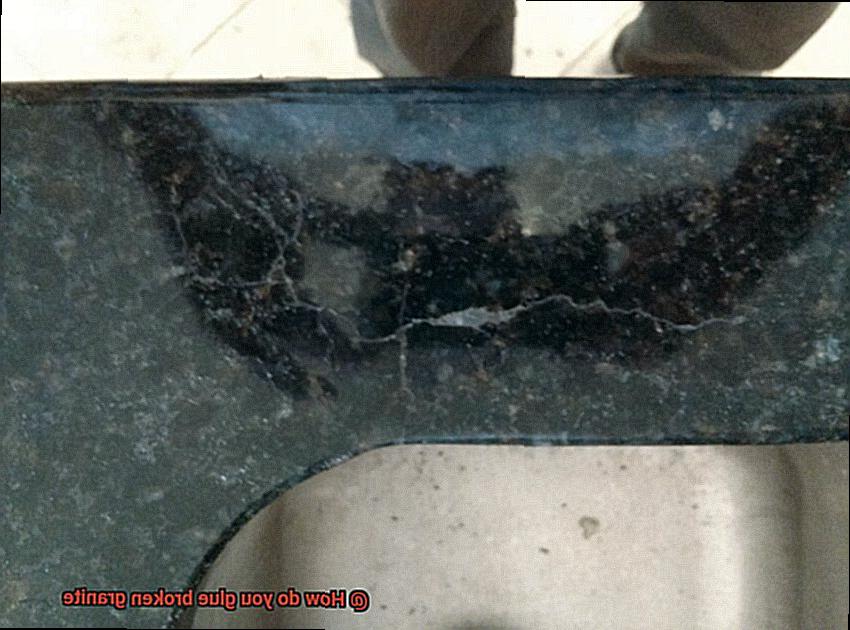
Special Considerations for Significant Damage or Structural Issues
Granite, cherished for its natural beauty and remarkable durability, is a popular choice for countertops, flooring, and various applications. However, when faced with significant damage or structural issues, caution and specific guidelines must be followed to achieve successful repairs. In this article, we will delve into the special considerations involved in repairing broken granite, with a particular focus on the adhesive used in the restoration process.
Assessing the Damage:
To begin repairing broken granite, it is crucial to assess the extent of the damage. If the granite has shattered into small pieces or suffered severe fractures, it may not be feasible to repair and might necessitate replacement instead.
Identifying Underlying Structural Issues:
To ensure long-lasting repairs, it is essential to identify any underlying structural issues that may have contributed to the breakage. This involves examining the support system, checking for water damage, and inspecting for movement or settling in the foundation. Addressing these issues is pivotal in preventing future damage.
Consulting with Professionals:
Before embarking on repairs, seeking advice from professional stone restoration experts or qualified contractors specializing in granite repairs is highly recommended. Their expertise and experience enable accurate assessment of the situation and provision of appropriate solutions.
Choosing the Right Adhesive:
Not all adhesives are suitable for repairing broken granite. Epoxy-based adhesives reign supreme due to their superior bonding properties and ability to withstand heavy loads. Selecting an adhesive with the requisite strength and compatibility with the stone material is paramount.
Proper Surface Preparation:
Prior to applying any adhesive, meticulous surface preparation is critical for optimal bonding. Thoroughly cleaning the broken edges of the granite to remove debris, dust, or previous adhesive residue is essential. Utilizing a solvent such as acetone facilitates achieving a pristine surface.
Applying the Adhesive:
During the repair process, precise alignment of broken pieces and even application of adhesive along the fracture lines are imperative. Clamps or braces can be employed to hold the pieces together until the adhesive cures completely.
Removing Excess Glue and Finishing:
Once the adhesive has dried and cured, meticulous removal of excess glue using appropriate tools and techniques ensures no damage to the granite surface. Sanding or polishing may be necessary to achieve a seamless, smooth finish.
Preventive Measures:
Upon completing repairs, implementing preventive measures becomes crucial to safeguard the repaired granite from future damage. This entails avoiding excessive weight or impact on the repaired area, regular maintenance to ensure structural integrity, and addressing any underlying issues that contributed to the initial breakage.
Safety Precautions to Take When Gluing Broken Granite
When it comes to repairing broken granite, safety should always be a top priority. Whether you’re a DIY enthusiast or a professional, taking the right precautions can help prevent accidents and ensure a successful restoration. In this blog post, we will explore the key safety measures to take when gluing broken granite.
Personal Protective Equipment (PPE):
To protect yourself during the gluing process, it’s essential to wear the appropriate personal protective equipment (PPE). Remember these three essential items:
- Safety goggles shield your eyes from debris and splashes.
- Gloves protect your hands from sharp edges and adhesive chemicals.
- A dust mask prevents you from inhaling dust particles released during the gluing process.
Proper Ventilation:
Working in a well-ventilated area is crucial to minimizing exposure to adhesive fumes and promoting air circulation. Here’s what you can do:
- Open windows and doors to allow fresh air in.
- Use fans to remove potentially harmful vapors.
Secure Work Area:
A clutter-free and well-organized work area is essential for preventing accidents while handling broken granite pieces. Follow these steps:
- Clear your work area of any obstructions or tripping hazards.
- Keep the space organized to maintain a safe environment.
Handling Sharp Edges:
The edges of broken granite can be extremely sharp, posing a risk of cuts and injuries. Take these precautions:
- Wear gloves that provide adequate protection for your hands.
- Handle broken granite pieces with caution.
Adhesive Safety:
Different adhesives have different safety guidelines, so always read and follow the manufacturer’s instructions carefully. Some additional considerations are:
- Certain adhesives may require wearing a respirator or working in a well-ventilated area.
- Adhere strictly to the recommended application techniques and quantities.
Proper Handling Techniques:
To avoid strains or injuries while lifting and moving broken granite pieces, follow these guidelines:
- Lift and move broken granite using proper lifting techniques.
- Maintain a firm grip on the stone and lift with your legs, not your back.
Secure Work Surface:
Before applying the adhesive, ensure that your work surface is stable and secure. This step prevents any unwanted movement or shifting of the granite during the gluing process.
Time and Patience:
Rushing the gluing process can lead to mistakes or accidents. Take your time, follow the instructions carefully, and allow sufficient drying time for the adhesive to ensure a successful restoration.
i8KqJbMURX4″ >
Conclusion
Gluing broken granite can be a daunting task, but with the right techniques and materials, it is possible to restore your granite surfaces to their former glory. Whether it’s a small chip or a larger break, there are several steps you can take to effectively repair and bond the pieces back together.
Firstly, it is crucial to clean the broken edges of the granite thoroughly. Use a mild detergent and warm water to remove any dirt, debris, or adhesive residue. Once the surface is clean and dry, you can proceed with the gluing process.
Next, choose an appropriate adhesive for bonding granite. Epoxy resin-based adhesives are commonly used for this purpose as they offer excellent strength and durability. Make sure to select an epoxy that is specifically designed for stone repairs.
Before applying the adhesive, carefully align the broken pieces of granite. Take your time to ensure a precise fit and hold them in place using clamps or heavy objects if necessary. This step is crucial for achieving a seamless repair.
Now it’s time to mix the epoxy resin according to the manufacturer’s instructions. Be sure to wear protective gloves and work in a well-ventilated area. Mix equal parts of resin and hardener thoroughly until they form a consistent color.
Using a small brush or spatula, apply a thin layer of epoxy onto both sides of the broken granite edges. Make sure to cover the entire surface evenly without excess adhesive seeping out from the joint.
Once you have applied the epoxy, carefully press the broken pieces together firmly but gently. Wipe off any excess adhesive immediately using a clean cloth dampened with acetone or denatured alcohol.
After joining the pieces together, leave them undisturbed for at least 24 hours to allow the epoxy to cure completely. Avoid placing any weight or stress on the repaired area during this time.
Once cured, inspect your repair carefully. If necessary, use fine-grit sandpaper or a diamond polishing pad to smooth out any unevenness or rough edges. This will help blend the repair seamlessly with the rest of the granite surface.
In conclusion, gluing broken granite requires patience, precision, and the right materials. By following these steps and taking your time throughout the process, you can achieve a strong and visually pleasing repair that restores the beauty of your granite surfaces.