Imagine this – you’re strolling along the sandy shores, your feet enveloped in the unmatched comfort of your trusty Birkenstocks. But then, disaster strikes. The sole of your beloved footwear starts peeling off, threatening to shatter your style and break your heart.
We’ve all experienced those shoe mishaps that make us want to scream into the void. But fear not, my friend, for we have the ultimate solution to revive your cherished Birkenstocks. With just a little glue and a sprinkle of tender loving care, you’ll be striding confidently once more.
In this blog post, we’ll take you on a journey through an easy-peasy process to securely glue back your Birkenstocks. No more bidding farewell to your favorite pair; it’s time to embrace the artistry of these iconic sandals again. So grab that glue and prepare yourself for a dive into the world of shoe restoration.
Identifying the Problem Areas
Contents
- 1 Identifying the Problem Areas
- 2 Preparing the Sandals for Glue Application
- 3 Choosing the Right Adhesive
- 4 Applying the Adhesive
- 5 Securing and Drying the Bond
- 6 Testing the Strength of the Bond
- 7 Long-Term Maintenance Tips
- 8 When to Replace Your Birkenstocks Instead of Gluing Them Back Together
- 9 Conclusion
Renowned for their comfort and durability, Birkenstocks may encounter issues with the glue that holds them together over time. To ensure an effective repair job and extend the lifespan of your favorite sandals, it is crucial to identify problem areas that require gluing. In this comprehensive guide, we will explore the key problem areas to look out for and provide step-by-step instructions on how to address them.
Sole Separation:
One prevalent problem area in Birkenstocks is sole separation, where the sole and upper part ways. Look for visible gaps between the sole and upper, as well as signs of adhesive residue. This issue can result from wear and tear or improper maintenance.
Cork Footbed Detachment:
Another problem area to address is when the cork footbed becomes loose or detaches from the shoe. This can occur due to weakened glue or excessive moisture exposure. Identify this issue by checking for movement or visible gaps between the footbed and the shoe when pressure is applied.
Strap Detachment:
Inspect the straps for signs of detachment, such as fraying edges or wear around attachment points. Regular use or strain can cause straps to become loose or separate from the shoe.
Comprehensive Inspection:
Thoroughly examine your Birkenstocks for any other potential problem areas that may require gluing. Look for cracks, tears in the material, weak stitching, or other structural problems that could compromise the overall integrity of the shoe.
Cleaning and Preparation:
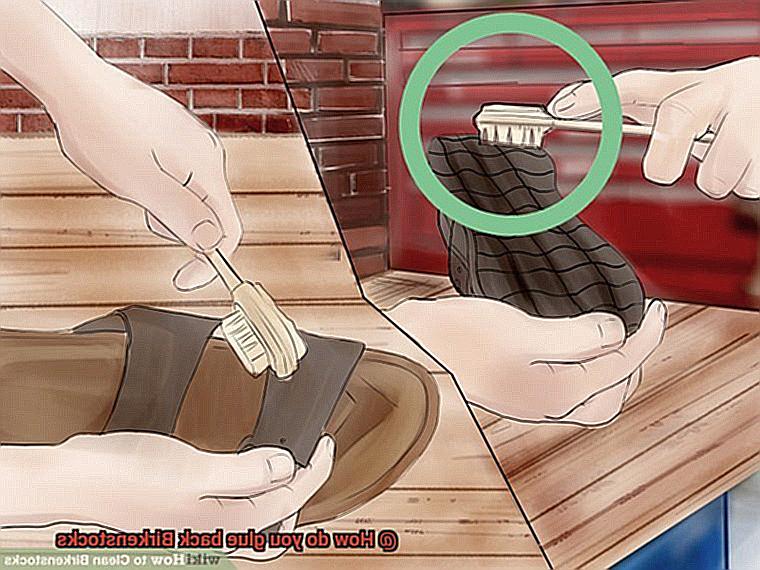
Before applying glue, ensure that surfaces are clean and free from dirt, debris, or old glue residue. Use a soft cloth or brush with mild soap to clean affected areas thoroughly.
Choosing the Right Adhesive:
Select an appropriate adhesive tailored for bonding rubber, leather, and cork materials. Popular options include E6000 Craft Adhesive, Shoe Goo, or Barge All-Purpose Cement.
Applying the Glue:
Apply a small amount of adhesive to both surfaces that require gluing. Spread the glue evenly using a toothpick or small brush. Avoid excessive application, as it may seep out under pressure.
Proper Bonding and Drying:
Press the surfaces firmly together and hold them in place for the recommended drying time specified by the adhesive manufacturer. Consider using clamps or heavy objects to provide additional pressure during the bonding process.
Reinforcement and Final Checks:
After allowing sufficient drying time, ensure that the bond is secure and strong. Apply additional adhesive if any areas require further reinforcement, and repeat the process as needed.
Preparing the Sandals for Glue Application
Preparing the sandals for glue application is an essential step in achieving a strong and long-lasting repair. To begin, it’s crucial to start with a clean slate. Grab a soft brush or cloth and gently remove any dirt, debris, or old glue residue that may be lingering on your sandals. This initial cleaning will create a smooth surface for the glue to adhere to.
Once your sandals are squeaky clean, it’s time for a thorough inspection. Check for any loose or damaged parts that might need some TLC before applying the glue. Are your straps holding up? Are there any frayed edges or loose threads? Take care of these issues now to avoid any future mishaps.
With your sandals in tip-top shape, it’s time to roughen up the area that will be glued. Grab some sandpaper or a fine-grit file and gently sand the surface. This step is crucial in creating a better bond between the adhesive and the material of your sandals.
After sanding, wipe away any dust or debris using a clean cloth or a damp paper towel. We want to ensure that the surface is completely clean and free from any residue before moving on to the next step.
To further enhance the bond, apply a small amount of rubbing alcohol to a cotton ball or pad and give the area that will be glued a gentle wipe-down. This will remove any oils or contaminants that may be lurking on the surface of your sandals, ensuring an extra strong bond between the glue and the material.
Choosing the Right Adhesive
Birkenstock sandals are not just a fashion statement; they are a way of life. These comfortable, durable shoes are built to last, but sometimes even the sturdiest of sandals need a little TLC. When it comes to repairing your Birkenstocks, choosing the right adhesive is crucial to ensure a strong and long-lasting bond. In this blog post, we’ll explore the key factors to consider when selecting an adhesive for your beloved Birkenstocks.
Factor 1: Material Compatibility
Birkenstocks are typically made of leather, cork, and rubber. It’s important to select an adhesive that works well with these materials. Look for a strong adhesive that bonds well with both leather and rubber for repairing straps and soles. For cork repairs, opt for an adhesive specifically designed for cork that can withstand moisture and flexibility.
Factor 2: Type of Repair
Consider the extent of the repair needed on your Birkenstocks. For minor repairs like reattaching loose straps or soles, a strong yet flexible adhesive will do the trick. However, for more extensive repairs like torn or damaged sections, a heavy-duty adhesive that can withstand constant wear and tear is necessary.
Factor 3: Drying Time
Time is of the essence when it comes to repairs. Some adhesives dry quickly, allowing for faster repairs, while others require longer drying times. Follow the manufacturer’s instructions regarding drying times to ensure proper bonding.
Factor 4: Ease of Application
Choose an adhesive that is easy to apply directly to the desired area. Look for adhesives that come in convenient applicator bottles or tubes, as they make application a breeze. Avoid adhesives that require additional tools or brushes unless you’re comfortable using them.
Factor 5: Water Resistance
If you plan on wearing your Birkenstocks in wet conditions or frequently exposing them to moisture, opt for a water-resistant or waterproof adhesive. This will prevent the adhesive from weakening or breaking down when exposed to water, ensuring your repair lasts.
Factor 6: Intended Use
Consider how you’ll be using your Birkenstocks after the repair. If you’ll be wearing them for high-impact activities or in outdoor environments, choose an adhesive that is durable and can withstand these conditions. Don’t let your repaired Birkenstocks give up on you when you need them the most.
Applying the Adhesive
Repairing your beloved Birkenstocks is like giving them a second chance at life, and choosing the right adhesive is like finding the perfect partner to ensure a strong and long-lasting bond. In this blog post, we will uncover the secrets to selecting the adhesive soulmate for your sandals, considering factors such as material compatibility, type of repair, drying time, ease of application, water resistance, and intended use.
When it comes to gluing back Birkenstocks, there are three types of adhesives that are commonly used: shoe glue, contact cement, and epoxy adhesive. Each type has its own unique properties that make it suitable for different repair situations.
Shoe glue is specifically designed for repairing shoes and offers excellent bonding strength. It works well with various materials commonly found in Birkenstocks, such as leather, cork, and rubber. The ease of application and quick drying time make it a convenient choice for many DIY enthusiasts.
Contact cement provides a strong bond and is ideal for repairing soles or attaching straps to the footbed. This adhesive works by applying a thin layer to both surfaces and allowing it to dry before joining them together. It is particularly suited for leather and rubber materials due to its exceptional adhesion properties.
For a versatile option that can be used on a wide range of materials including leather, cork, rubber, and plastic, epoxy adhesive is the way to go. It offers excellent bonding strength and is resistant to water and heat. However, it does require mixing before use and has a longer curing time.
Before applying any adhesive, preparing the surface is crucial for achieving a strong bond. Clean the area thoroughly by removing dirt, debris, or old adhesive residue. Use rubbing alcohol or a mild cleaner to ensure the surface is clean and free from any contaminants.
To apply the adhesive, follow the instructions provided by the manufacturer. In general, apply a thin layer of adhesive evenly on both surfaces to be glued together. Be sure to allow the adhesive to dry or set according to the manufacturer’s instructions before applying any pressure.
While the adhesive is drying, it’s important to hold or clamp the glued area together to ensure even pressure and a secure bond. You can use clamps or heavy objects to achieve this.
Depending on the specific adhesive being used, there may be additional steps or precautions to consider. Some adhesives may require heat or moisture for optimal bonding, so be sure to follow the instructions provided.
Lastly, always prioritize safety by following all precautions mentioned in the adhesive’s instructions. If you’re unsure about any step in the process, it’s best to consult with a professional shoe repair specialist for guidance.
Securing and Drying the Bond
Have you ever had a pair of Birkenstocks that you just couldn’t bear to part with? Maybe they’ve been your go-to summer sandals for years, and the thought of saying goodbye to them breaks your heart. Well, fear not. Gluing back Birkenstocks can be a simple and effective way to extend the life of your favorite footwear. But, like any relationship, it’s important to ensure that the bond created by the glue is strong and durable. So, let’s dive into the process of securing and drying that bond.
Step 1: Cleanliness is Key
Before you start gluing, it’s crucial to clean both surfaces that are going to be bonded together. Grab a mild detergent or soap and give those surfaces a good scrub. This will remove any dirt, oils, or residue that could prevent the glue from sticking properly. Think of it as creating a clean canvas for your adhesive masterpiece.
Step 2: The Glue that Holds it All Together
Now that your surfaces are spick and span, it’s time to choose the right adhesive for the job. Look for a high-quality adhesive that is specifically designed for shoe repairs. These adhesives are formulated to withstand the rigors of everyday wear and tear. Follow the manufacturer’s instructions on how much glue to use and how to apply it.
Step 3: Press and Hold
Once you’ve applied the glue, carefully press the two surfaces together, ensuring that they align properly. Apply firm and even pressure to create a strong bond. If you have clamps or weights handy, use them to hold the surfaces together while the glue dries. You want that bond to be as tight as possible.
Step 4: Patience is a Virtue
Ah, patience – something we all need a little more of in our lives. Give the glue enough time to dry properly. Follow the manufacturer’s instructions on drying time, as different types of glue have varying drying times. Avoid using or putting any weight on the repaired area until the glue has completely dried. Trust me, it’s worth the wait.
Step 5: Air it Out
To speed up the drying process, find a well-ventilated area with good air circulation. This will help those solvents in the glue evaporate faster and promote quicker drying. But don’t get too excited and put your glued Birkenstocks near direct heat sources like heaters or hairdryers. Excessive heat can affect the integrity of the bond, and we definitely don’t want that.
Step 6: Inspect and Repeat if Needed
Once the glue has dried completely, inspect the bond for any signs of weakness or detachment. If you spot any issues, don’t panic. Simply apply an additional layer of glue and repeat the securing and drying process. Your Birkenstocks will thank you for it.
Testing the Strength of the Bond
If so, you understand the unparalleled comfort and style these sandals offer. However, as time goes on, the bond between the sole and upper may weaken, compromising their durability. But fear not. In this article, we will explore the process of testing the strength of the bond in your beloved Birkenstocks, guaranteeing a successful and long-lasting repair.
Flexing and Pressing:
To embark on this journey, begin by gently flexing your sandals. Do you notice any movement or separation between the sole and upper? If so, this is a clear indication that the bond requires attention. Another effective test involves pressing down firmly on different parts of the sole. Any give or shifting in the upper suggests that it’s time to reestablish the bond.
Inspecting the Edges:
Now, let’s closely examine where the sole and upper meet. Are there any visible gaps or signs of separation? If you detect such indicators, it’s a surefire sign that gluing is necessary. Remember, a strong bond is vital for both your comfort and the longevity of your cherished Birkenstocks.
Thorough Cleaning:
Before applying any adhesive, thoroughly clean the areas where you intend to glue. Say goodbye to dirt, dust, and residues that could potentially hinder a solid bond. Lightly touch the surface with your finger – if any debris sticks, additional cleaning is needed.
Adhesive Testing:
Now that your sandals are spotless, it’s time for an adhesive test drive. Apply a small amount of adhesive to a non-visible area of your sandal and follow the manufacturer’s instructions for curing time. This step will determine if the chosen adhesive is compatible with Birkenstock materials and provides a reliable bond.
Applying the Adhesive:
Once you’ve found the perfect adhesive, apply it to the edges where the sole and upper meet. Be sure to follow the application instructions provided by the adhesive manufacturer. Remember, a little bit goes a long way.
Press and Hold:
To ensure a robust bond, gently press the sole and upper together. Consider using clamps or heavy objects to provide additional pressure. Allow the adhesive to cure for the recommended time before inspecting the bond’s strength once more.
Patience is Key:
Keep in mind that different adhesives have varying curing times and durability levels. So, exercise patience and allow the glue to work its magic.
Final Inspection:
After the curing period, comes the moment of truth. Test the strength of the bond again by flexing and pressing your Birkenstocks. If everything feels secure, congratulations. Your repair has been successful.
Long-Term Maintenance Tips
Fear not. This article delves into the importance of long-term maintenance for Birkenstocks and provides invaluable tips for keeping them in pristine condition. So, let’s embark on this journey to preserve the magic of your Birks.
Assess and Prepare: Laying the Foundation
Before reaching for the adhesive, take a discerning look at your Birkenstocks. Are the soles separating? Have the straps or footbed come loose? Once you’ve identified problem areas, embark on a gentle cleaning ritual using mild soap and water. Bid farewell to dirt, debris, and lingering glue residue that may hinder a strong bond.
Choose the Right Adhesive: Crafting a Strong Connection
Not all adhesives are created equal. For Birkenstock repairs, opt for a formidable adhesive that suits rubber, leather, and cork. Popular options such as E6000 Craft Adhesive or Shoe Goo work wonders. Apply a modest amount to both surfaces requiring bonding, spreading it evenly with a toothpick or small brush.
Press and Hold: A Dance of Unity
Now comes the enchanting part. With utmost care, press the surfaces together and hold them firmly in place for the recommended drying time specified by the adhesive manufacturer. Should you desire additional pressure during this bonding ballet, employ clamps or substantial objects. Remember, grace is key – too much adhesive can tarnish the performance.
Check and Reinforce: A Symphony of Vigilance
After allowing ample drying time, inspect your sandals to ensure a secure and robust bond. Should any areas require further reinforcement, apply additional adhesive and repeat the process. Patience serves as your virtuoso conductor in this symphony of repair.
Regular Maintenance is Key: A Sustained Overture
Prevention triumphs over restoration. To avoid future damage, safeguard your Birkenstocks from extreme heat or moisture. Regularly inspect them for signs of wear or loose parts, promptly addressing any concerns to prevent further harm.
When to Replace Your Birkenstocks Instead of Gluing Them Back Together
We’ve all experienced the heartache of parting ways with a well-worn pair that has accompanied us on countless adventures. But when is it truly time to bid adieu and invest in a new pair instead of reaching for that trusty tube of glue? Today, we’re delving into the specifics of when it’s best to replace your Birkenstocks instead of attempting to glue them back together.
Assessing the Damage:
Before hastily reaching for the glue bottle, take a close look at the extent of the damage. Loose straps or minor cork footbed issues can often be remedied with adhesive magic. However, if your soles have significantly worn down or there are deep cracks resembling a road map on the cork footbeds, it’s time to seriously consider waving goodbye.
Glue vs. Durability:
While glue can act as a temporary fix, it simply does not possess the longevity required for a lasting solution. The constant pressure and movement on the glued areas will inevitably cause them to separate again, leaving you with another broken-hearted pair. If you desire a more enduring relationship with your Birkenstocks, replacement is the way to go.
Considering Overall Condition:
Take a moment to contemplate the overall condition of your Birkenstocks. Have they been through thick and thin with you, displaying signs of extensive wear and tear? If so, repeatedly repairing them may end up costing more than investing in a new pair. Even the most magical glue has its limitations.
Cost and Effort:
Let’s now consider the cost and effort involved in gluing versus replacing. If you find yourself frequently resorting to the glue bottle and dealing with multiple repairs, it might be time to reevaluate. Calculate the cumulative cost of glue over time and factor in the hours spent repairing your Birkenstocks. Sometimes, the expense and effort outweigh the benefits.
Sentimental Value:
Ah, the sentimental value of a well-worn pair of Birkenstocks. If your heart holds tight to memories made in these faithful companions or if they have molded perfectly to your feet, gluing might be worth a shot. Nevertheless, remember that sentimentality can only take you so far if your Birkenstocks are beyond repair or causing discomfort due to extensive wear and tear.
WHq_4qhFy64″ >
Conclusion
When it comes to fixing your beloved Birkenstocks, you want a solution that will hold them together like they’re brand new. Gluing back Birkenstocks is a simple and cost-effective way to extend the life of your favorite footwear. With just a few easy steps, you can say goodbye to those pesky loose soles and hello to comfortable strides once again.
First things first, gather your supplies. You’ll need a high-quality adhesive that is specifically designed for shoe repairs. Look for one that is waterproof and flexible, ensuring long-lasting results. Additionally, grab some clamps or heavy books to apply pressure during the drying process.
Now, let’s get down to business. Start by cleaning the area where the sole has detached from the upper part of the shoe. Use a mild soap and warm water to remove any dirt or debris. Once it’s dry, apply the adhesive generously to both surfaces – the sole and the shoe upper.
Next, carefully press the two parts together and hold them firmly in place. This is where those clamps or heavy books come in handy. Apply pressure evenly across the entire surface for at least 24 hours to allow the glue to fully bond.
After patiently waiting for the glue to dry, inspect your handiwork. If there are any excess adhesive visible, gently remove it with a cotton swab dipped in rubbing alcohol. This will leave your Birkenstocks looking pristine and ready for action.
Remember, prevention is key. To avoid future mishaps with your beloved Birkenstocks, be mindful of how you wear them and take care not to put excessive strain on their soles. Regularly inspecting them for any signs of wear and tear can also help catch any potential issues before they become major problems.
So there you have it – a simple yet effective way to glue back Birkenstocks and keep them going strong for many more adventures ahead.