Are you tired of waiting forever for your Liquid Nails adhesive to set? Whether you’re a DIY enthusiast or a seasoned contractor, we all want to get our projects done quickly without sacrificing quality. That’s why in this blog post, we’ll explore some simple yet effective techniques to help you speed up the setting time of Liquid Nails, so you can move forward with your project in no time.
Liquid Nails is a reliable and versatile adhesive that can bond various materials like wood, metal, drywall, and ceramics. By understanding a few tricks and implementing them correctly, you can significantly reduce the curing time while maintaining the strength and durability you need for your work.
So let’s jump right in and discover how you can make your Liquid Nails set faster. These tips will give you the edge to complete your projects swiftly and with precision.
Applying Heat to Accelerate Setting Time
Contents
- 1 Applying Heat to Accelerate Setting Time
- 2 Creating a Drier Environment
- 3 Using Thinner Layers of Liquid Nails
- 4 Choosing the Right Type of Liquid Nails
- 5 Following Manufacturer Instructions
- 6 Utilizing Specialized Products for Quicker Setting
- 7 Keeping the Surface Clean and Dry
- 8 Avoiding Excessive Amounts of Adhesive
- 9 Conclusion
When it comes to completing projects efficiently, time is of the essence. Waiting for glue or adhesive to dry and set can be frustrating, especially when you’re eager to move on to the next step. Luckily, there’s a simple solution: applying heat. In this article, we’ll explore how heat can accelerate the setting time of liquid nails, a versatile adhesive used in various applications. Whether you’re a DIY enthusiast or a professional contractor, this technique can help you save time and achieve faster results.
Understanding the Science Behind It:
Heat plays a crucial role in speeding up the chemical reactions involved in the curing process of liquid nails. By increasing the temperature, we can enhance the adhesive’s fluidity, allowing it to penetrate surfaces more effectively. Additionally, higher temperatures promote quicker evaporation of solvents in the adhesive, leading to faster drying and setting.
Choosing the Right Adhesive:
Not all adhesives are suitable for heat acceleration, so it’s essential to select the right type of liquid nails for your project. Some formulations are designed specifically for quick setting, while others may take longer to dry. Always refer to the product instructions or consult with the manufacturer to ensure compatibility with heat acceleration.
Applying Heat Safely:
There are different methods for applying heat to liquid nails, including using a heat gun, hairdryer, or heat lamps. When using a heat gun or hairdryer, make sure to maintain a safe distance from the adhesive and avoid overheating, as excessive heat can damage materials or compromise bonding strength. Heat lamps provide a more controlled and evenly distributed source of heat but still require caution to prevent overheating.
Creating an Optimal Environment:
In addition to applying direct heat, creating a drier environment can also expedite drying and setting time. Moisture in the air can hinder the curing process, so reducing humidity levels with dehumidifiers or proper ventilation can help the glue dry faster. Applying thinner layers of liquid nails also promotes better airflow and evaporation, leading to quicker setting.
Following Proper Application and Curing Instructions:
To achieve optimal results, it’s crucial to follow the manufacturer’s instructions. These guidelines often include recommended drying times, temperature ranges, and specific factors that can affect setting time. Adhering to these instructions ensures a successful bond and prevents any potential damage or adverse effects.
Creating a Drier Environment
Well, fret no more because I’ve got some tips and tricks to help you create a drier environment that will speed up the setting time of your favorite adhesive. So, let’s dive right in.
Reducing Humidity Levels:
Humidity is the enemy of quick-drying adhesive. To combat this moisture monster, consider using a dehumidifier in the room where you’ll be applying your liquid nails. This handy device sucks out excess moisture from the air, creating a drier environment that promotes faster curing.
Increasing Ventilation:
Fresh air is your ally in expediting the setting time of liquid nails. Open those windows and doors to allow for proper air circulation. If you really want to kick it up a notch, grab some fans or air movers to get that air flowing like a boss. Improved circulation helps evaporate moisture from the adhesive and gets those bonds forming faster.
Controlling Temperature:
Temperature plays a crucial role in the curing process of liquid nails. Aim for that sweet spot specified by the manufacturer on the packaging. If it’s too cold, use heaters to warm up the room; if it’s too hot, use air conditioners to cool things down. Finding that perfect temperature will give your liquid nails the optimal conditions they need to set quickly.
Using Absorbent Materials:
Let’s soak up that excess moisture like a sponge. Place some absorbent materials near your application area to help speed up drying. Desiccant packs or silica gel packets are perfect for this job. Strategically position them around the adhesive to absorb any lingering moisture and ensure faster curing.
Pre-Drying Surfaces:
Before you even think about applying your liquid nails, make sure your surfaces are bone dry. Wipe them down with a clean cloth or use a blow dryer on low heat to remove any moisture or contaminants. Trust me, this step is essential for proper adhesion and speedy drying.
Avoiding Rainy or Humid Days:
Mother Nature can be a real buzzkill when it comes to drying time. Try to choose a day with low humidity and no rain in the forecast when you plan to use liquid nails. Weather conditions can significantly impact drying time, so picking the right day can make all the difference.
Now, remember, my glue-loving friends, always follow the instructions provided by the manufacturer of your liquid nails product. They know their stuff and may have additional recommendations or precautions for achieving optimal bonding and drying.
By creating a drier environment using these techniques, you’ll be amazed at how quickly your liquid nails set and how strong and durable your bonds become. So go ahead, tackle those projects with confidence, and enjoy the satisfaction of completing them in record time.
Using Thinner Layers of Liquid Nails
If you’re tired of the waiting game that comes with using Liquid Nails, I have a game-changing solution for you – thinner layers of this adhesive powerhouse. By applying thinner layers, you’ll be able to breeze through your projects at lightning speed. Buckle up and get ready for a wild ride as we explore the benefits of this superhero-level technique.
The Science Behind Speed
Thicker layers of Liquid Nails take longer to dry because the solvent in the glue needs time to evaporate before the adhesive can fully set. By using thinner layers, you’re allowing better airflow around the adhesive, which facilitates faster evaporation. It’s like opening all the windows in a stuffy room – fresh air rushes in, and the stale air is pushed out.
Mastering the Art
To achieve those perfect thin layers, it’s crucial to use the right amount of adhesive for the job. We’re aiming for Goldilocks-level perfection here – not too thick, not too thin, but just right. Start by applying a small amount of Liquid Nails onto the surface you’re bonding. Use a caulking gun or a similar tool to control the amount of adhesive being dispensed.
The Spreading Spectacle
Now that you have the perfect amount of Liquid Nails on the surface, it’s time to spread the love (or adhesive) evenly. Grab a putty knife or a trowel and work your magic. This even spreading will create a thin and uniform layer that will dry in record time.
Thinning is Winning (Sometimes)
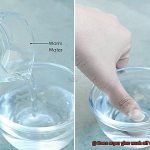
If necessary, you can thin out the Liquid Nails by adding a small amount of water. However, proceed with caution and only do this if recommended by the manufacturer. Thinning out the adhesive may affect its strength and durability, so it’s important to follow guidelines to maintain the bond’s integrity.
The Bonding Bonanza
Thinner layers not only speed up drying but also provide better adhesion. When you apply thick layers, there’s a higher chance of air pockets forming, which can weaken the bond. So, by using thinner layers, you’re ensuring a strong and sturdy connection between your materials.
Patience is Key

While thinner layers accelerate drying, it’s essential to follow the manufacturer’s instructions regarding drying time and curing process. Even with thinner layers, giving enough time for the adhesive to fully cure is crucial for achieving a strong bond. Resist the urge to rush and let time work its magic.
Airflow Accelerator
In some cases, you can further speed up the drying process by using a fan or providing additional airflow. Think of it as giving your Liquid Nails a breath of fresh air – invigorating. But be careful not to disturb or move the bonded materials while they’re drying.
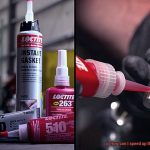
Choosing the Right Type of Liquid Nails
Are you searching for a glue that can conquer any project effortlessly? Look no further than Liquid Nails. With its robust adhesive properties and versatile applications, Liquid Nails is a go-to solution for countless DIY enthusiasts and professionals. But with a plethora of options available, how do you select the perfect Liquid Nails for your specific project? Let’s delve into the key factors to consider.
Surface Type:
Different types of Liquid Nails are formulated for specific materials, such as wood, metal, or concrete. Choosing a product designed to bond with your specific surface ensures a strong and enduring connection. Whether you’re working on a wooden furniture project or a metal fabrication, selecting the appropriate Liquid Nails formula will make all the difference.
Material Compatibility:
Ensure that the Liquid Nails you choose is compatible with the materials you are working with. Some formulas may chemically react with certain surfaces, compromising the bond strength and longevity. It’s crucial to review the product specifications and consult with experts if needed to ensure compatibility and avoid any potential issues.
Application Temperature:
Consider the temperature at which you will be applying the adhesive. Some Liquid Nails formulas are designed to perform better in high-temperature or high-humidity environments, while others excel in cooler or drier conditions. Selecting a formula that is compatible with your specific climate will guarantee optimal performance and prevent any mishaps.
Curing Time:
The drying time of the adhesive is another crucial factor to contemplate. If you’re working on a time-sensitive project or simply want to get things done quickly, choose a fast-drying formula. Some types of Liquid Nails can dry within minutes, while others may take several hours or even days to fully cure. Assess your timeline and choose accordingly to avoid delays or setbacks.
Bond Strength:
Consider the strength and durability required for your project. Some Liquid Nails formulas are specifically formulated for heavy-duty applications, while others are more suitable for lightweight projects. If you’re working on a project that requires a strong bond capable of withstanding heavy weight or stress, opt for a heavy-duty formula. This will ensure that your project stands the test of time and remains secure.
Finish:
Lastly, think about any specific features or properties you may require from the adhesive. For outdoor applications, look for formulas that offer waterproof or weatherproof capabilities to protect your project from the elements. If air quality is a concern for indoor projects, opt for a formula with low VOC content to minimize harmful emissions.
Following Manufacturer Instructions
Whether you’re a DIY pro or just embarking on your home improvement journey, one thing is crystal clear: choosing the right adhesive is paramount for achieving impeccable results. When it comes to liquid nails, the secret to success lies in meticulously adhering to the manufacturer’s instructions. In this guide, we’ll explore why these instructions are your golden ticket to faster setting and stronger bonds.
Read. Understand. Conquer.
The first step on your path to victory is taking a deep dive into the manufacturer’s instructions. Don’t skim or brush them aside – they hold the key to unlocking the full potential of liquid nails. Absorbing these insights will equip you with the knowledge needed to flawlessly apply and utilize liquid nails for optimal results. Remember, this step is your guiding light towards triumph.
Timing is Everything.
Within those hallowed instructions lies a crucial nugget of wisdom – the recommended drying time. This vital period allows the adhesive to set and cure fully, arming it with invincible strength. Rushing this process is a recipe for disaster, as it can compromise the bond’s tenacity and lead to utter failure. Patience becomes your weapon of choice on this journey.
Temperature Tango and Humidity Hustle.
Liquid nails thrive in specific temperature and humidity conditions – their ultimate performance playground. By religiously adhering to these recommendations, you ensure a dance of perfect bonding and accelerated drying times. Avoid applying the adhesive in extreme temperatures or under high humidity’s sultry sway, as it can throw off its groove.
Surface Preparation: The Prelude to Brilliance.
Some liquid nails products demand a dance of preparation before application swirls onto the scene. This prelude might involve cleansing surfaces, banishing contaminants, or roughening them up for a better grip. Follow these steps as instructed, and watch as faster setting times and a stronger bond take center stage.
Mastering the Art of Application.
The art of applying liquid nails lies in the fine balance of thickness and amount. Too much or too little adhesive can throw off the groove, affecting drying time and overall bond strength. Embrace the manufacturer’s guidelines on application techniques, and witness the magic of faster setting times unfold before your eyes.
Unleash the Extraordinary.
The manufacturer, a guardian of adhesive secrets, often bestows upon you extra tips for hastening the drying process. These pearls of wisdom might include harnessing heat sources, ensuring ample ventilation, or utilizing specially designed curing accelerators. However, tread with caution. Not all products dance to the same beat, so consult the manufacturer’s recommendations before embarking on any shortcuts.
Utilizing Specialized Products for Quicker Setting
Utilizing specialized products for quicker setting offers a range of advantages that can revolutionize your DIY projects or professional contracting work. Waiting for glue to dry can be a frustrating and time-consuming process, but fear not. There are specialized products available that can significantly speed up the setting time of liquid nails, saving you precious time and allowing you to move forward with your project more efficiently.
One of the most effective options is quick-setting adhesives. These specially formulated adhesives dry faster than regular liquid nails, enabling you to get back to work in no time. They typically come in convenient tubes or cartridges, making application a breeze. Simply apply the adhesive directly onto the surface you want to bond, and watch as it sets in record time. No more twiddling your thumbs and waiting for eternity for your glue to dry.

If you’re looking for an extra boost in speed, bonding accelerators are the way to go. These magical potions are applied to one of the surfaces you want to bond before applying the liquid nails. The accelerator works its magic by speeding up the chemical reaction between the adhesive and the surface, resulting in a lightning-fast setting time. Just follow the manufacturer’s instructions to ensure a strong bond and enjoy the benefits of quicker setting.
But there’s even more. Some manufacturers offer spray activators that can be used alongside their liquid nails products. These nifty sprays are applied after you’ve applied the adhesive and help promote even faster curing. However, it’s important to note that not all liquid nails products are compatible with spray activators, so be sure to check the instructions or consult with the manufacturer before going trigger happy.
It’s essential to choose the right product for your specific needs and consider any limitations or requirements for your project. Some quick-setting adhesives may have temperature or humidity restrictions, while others may not work well with certain materials or surfaces. Take the time to read and follow the manufacturer’s instructions carefully to ensure optimal results.
Keeping the Surface Clean and Dry
In this blog post, we’ll uncover the secret to faster drying times and stronger bonds when using liquid nails. The key lies in keeping the surface clean and dry. Read on to discover why this simple step is crucial for successful gluing.
Why Cleanliness Matters:
A clean surface is essential for proper adhesion. Dirt, dust, grease, or debris act as barriers, hindering the curing process and potentially weakening the bond. Additionally, a dirty or damp surface can prolong drying times. So, by starting with a clean surface, you’ll achieve faster drying times and save precious minutes on your projects.
Tips for Cleaning the Surface:
To ensure a pristine surface, follow these tips:
- Use the Right Tools: Scrub the surface with a soft brush or cloth and a mild detergent suitable for the material. For stubborn dirt or stains, use a solvent recommended for cleaning that particular surface.
- Rinse Thoroughly: After cleaning, make sure to rinse off any residue completely. Leaving behind detergent or solvent residue can affect the adhesive properties of liquid nails.
Why Dryness is Crucial:
To optimize adhesive performance, the surface must be completely dry before applying the glue. Moisture can impede the adhesive properties of liquid nails, compromising the strength of the bond. So make sure your surface is bone dry before proceeding.
Consider Temperature and Humidity:
Working in ideal conditions can speed up drying times. Aim to work in an environment with temperatures between 60°F and 90°F (15°C and 32°C) and humidity levels below 60%. These conditions optimize the performance of liquid nails and ensure faster curing.
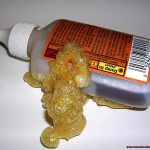
Avoiding Excessive Amounts of Adhesive
Liquid Nails is a versatile adhesive that finds its application in various projects, from woodworking to construction. However, excessive amounts of adhesive can hinder the drying process and compromise the bond’s strength. In this article, we will delve into effective techniques for utilizing liquid nails efficiently, thus avoiding excessive amounts of adhesive and achieving faster setting times.
Apply the Right Quantity:
To optimize results, it is imperative to adhere to the manufacturer’s instructions regarding the recommended amount of adhesive to use. By applying a thin and even layer of liquid nails, you not only expedite the setting process but also ensure a stronger bond. Remember, when it comes to adhesive application, less is often more.
Prepare the Surface Properly:
Proper surface preparation plays a pivotal role in minimizing the need for excessive adhesive. Ensure that the surfaces you intend to bond are clean and devoid of dust, dirt, grease, or any other contaminants. Employing mild detergent or rubbing alcohol can effectively eliminate stubborn residues. A pristine surface guarantees superior adhesion and reduces the necessity for surplus adhesive.
Choose the Appropriate Liquid Nails Variant:
Different formulations of liquid nails cater to specific materials and applications. Selecting the appropriate adhesive variant for your project is crucial in achieving optimal results. Doing so ensures faster setting times and stronger bonds.
Secure Bonded Surfaces:
Utilizing clamps or other securing methods while the adhesive sets minimizes the requirement for excess adhesive. This technique not only holds the materials in place but also prevents any shifting or movement that might compromise the bond’s integrity.
Control Temperature and Humidity Levels:
Temperature and humidity significantly impact liquid nails’ setting time. Higher temperatures and lower humidity accelerate the process, whereas colder temperatures and higher humidity slow it down. Working in a well-ventilated environment with moderate temperatures facilitates optimal drying times.
By adhering to these strategies—applying the right quantity of adhesive, preparing the surface properly, choosing the appropriate liquid nails variant, securing bonded surfaces, and controlling temperature and humidity levels—one can avoid excessive amounts of adhesive while achieving faster setting times. Remember, employing a judicious amount of adhesive goes a long way in ensuring successful adhesive application.
4xCMCSwzluI” >
Conclusion
To speed up the setting process of your liquid nails, there are a few tricks you can try.
First, ensure that the surfaces you’re bonding are clean and free from any dirt or debris. This will allow for better adhesion and quicker drying time.
Secondly, consider using a hairdryer or heat gun to gently apply heat to the area where the liquid nails have been applied. The warmth will help accelerate the curing process.
Another tip is to use thinner layers of liquid nails instead of applying a thick coat. Thinner layers tend to dry faster and more evenly.
Additionally, make sure to follow the manufacturer’s instructions regarding temperature and humidity conditions as these factors can greatly affect drying time. Lastly, if you’re in a hurry, you can also consider using a fast-setting liquid nails product specifically designed for quick drying.
These specialized formulas are formulated to set in a shorter amount of time compared to regular liquid nails.