It’s the superhero of adhesives, saving the day on all your DIY projects and household fixes. But let’s be real, waiting for it to dry can sometimes feel like watching paint dry – painfully slow. Lucky for you, we’ve got some tricks up our sleeves to help speed up that drying process.
Now, before we get into the nitty-gritty of making your E6000 dry faster, let’s talk about balance. We want to save you time without sacrificing quality. After all, what good is a speedy drying time if the bond is weak or the adhesion is subpar? So, as we explore these techniques together, keep in mind that there might be a few risks involved.
Ready? Alrighty then. In the following sections, we’re going to dive deep into specific strategies that’ll have your E6000 glue drying faster than a cheetah chasing its prey. So buckle up and get ready to maximize efficiency without compromising durability.
What is E6000 Glue?
Contents
This adhesive is renowned for its exceptional bonding capabilities and versatility, but we all know the frustration of waiting for it to dry. Fear not. In this blog post, we will share tried and tested techniques to expedite the drying time of E6000 glue, ensuring you can complete your projects in no time.
Apply Heat:
Intensify the drying process by adding some heat. Gently warm the glued area with a hairdryer or heat gun. Remember to keep the heat source moving and maintain a safe distance to prevent any damage.
Increase Air Circulation:
Boosting air circulation around the glued area can significantly speed up drying. Use a fan or find a well-ventilated space for your project to encourage faster evaporation of the solvents in the glue.
Reduce Humidity:
Don’t let high humidity levels dampen your spirits. Lower moisture levels by using a dehumidifier or working in an air-conditioned room. This will aid in faster evaporation and drying.
Use Acetone (with caution):
For a quicker drying time, consider adding a small amount of acetone or nail polish remover to the E6000 adhesive. However, exercise caution as these substances may weaken the bond or damage certain materials. Always test this method on a small, inconspicuous area before applying it widely.
Apply Thinner Layers:
Thin is in when it comes to E6000 glue. Apply thinner coats to reduce drying time. Thick layers contain more solvents that need to evaporate, resulting in longer drying times. By using thinner layers, you can expedite the overall process.
Patience is Key:
While we understand the urge to rush the drying process, it’s crucial to exercise patience. E6000 glue is designed to create a strong and durable bond, and rushing may compromise its quality. Adhere to the manufacturer’s instructions and allow sufficient time for the glue to dry properly.
Common Frustrations with E6000 Glue
Working with E6000 glue can be a rollercoaster of emotions. From the anticipation of waiting for it to dry to the frustrations that come along the way, this adhesive has its fair share of common annoyances that can test even the most patient DIY enthusiast.
One of the biggest gripes with E6000 glue is its painfully long drying time. This adhesive takes its sweet time to fully dry and cure, which can be a real thorn in your side, especially when you’re working on time-sensitive projects or need to apply multiple layers of glue. Blame it on the chemical composition of E6000, which contains potent ingredients like toluene and methyl ethyl ketone (MEK) that create a strong bond but also slow down the drying process. So, if you’re in a hurry, you might want to consider using a different adhesive that doesn’t test your patience.
But oh, the tackiness. Even after several hours, E6000 glue can still feel sticky or tacky to the touch. It’s like waiting for that last drop of water to evaporate during a scorching summer day. And guess what? This stickiness attracts dust and debris like a magnet, leaving your project looking less than perfect. To combat this frustrating scenario, keep the glued surfaces clean and free from potential contaminants while waiting for the glue to dry. It’s like playing a game of dodgeball with dust particles – you’ve got to be on your toes.
And let’s not forget about the smell. E6000 glue has a pungent chemical odor that can knock you off your feet, especially when working in enclosed spaces. It’s like getting hit by a wave of toxic fumes – not exactly a pleasant experience. So make sure to crack open a window or use a fan to get some fresh air circulating and avoid any respiratory discomfort while using this adhesive.
To add insult to injury, E6000 glue can become a thick and clumpy mess over time if not stored properly. It’s like trying to squeeze toothpaste out of a tube that has seen better days – frustrating, to say the least. So do yourself a favor and store your E6000 glue in a cool and dry place, far away from any potential heat or moisture, to avoid this sticky situation.
Heat Acceleration Method
The heat acceleration method is a popular technique used to speed up the drying time of E6000 glue. By applying heat directly to the glue, you can activate its curing process and reduce the overall drying time. There are a few different ways to apply heat and expedite the drying process.
One option is to use a hairdryer. Set it to its highest heat setting and hold it a few inches away from the glued area. Move it back and forth to evenly distribute the heat. Imagine giving your glue a warm hug and encouraging it to dry faster. It’s like a hairdryer superhero saving the day.
If you’re feeling fancy, you can use a heat gun instead. This tool is specifically designed for applying heat to various materials. Set it to a high temperature and hold it at a safe distance from the glued area. But be careful not to get too close or hold it for too long – we don’t want any casualties in the glue department.
Here are a couple of additional tips to help speed up the drying time even more:
- Apply the glue in thin layers: Thick layers take longer to dry, and they may remain tacky even after using the heat acceleration method.
- Work in a well-ventilated area: Good air circulation helps evaporate solvents faster, which means quicker drying time.
Before you go all out with the heat acceleration method, there’s something you should know. While it does speed up drying time, it may affect the strength and durability of the bond. The glue might not have enough time to fully cure, resulting in a weaker bond. So, make sure to follow the manufacturer’s instructions and give it enough drying time for optimal results.
Increasing Air Circulation
Fear not. This blog post will take you on an exhilarating journey into the realm of increasing air circulation to slash the drying time of E6000 glue. With these tried and true strategies at your disposal, your projects will be completed in a flash. So brace yourself and let’s dive right in to unlock the secrets of becoming a glue-drying pro.
Fan-tastic Airflow:
Prepare to be blown away by the game-changing power of a strategically positioned fan. The airflow generated by this trusty companion disperses solvents and turbocharges evaporation, resulting in lightning-fast drying. For maximum impact, angle the fan towards the glued area to supercharge air circulation and accelerate drying like never before.
Hairdryer Magic:
Hold on to your seats, folks, because your reliable hairdryer is about to reveal its secret identity as a glue drying superhero. Set it on low heat and hold it a few inches away from the glued surface. As you move it in slow, enchanting circles, watch in awe as the warm air performs its magic, whisking away moisture and leaving your E6000 glue bone dry in record time.
Blow Away the Moisture:
For smaller projects, prepare to unleash the power of your breath or wield a handheld fan as a mighty air blower. Gently blow air onto the glued area and witness moisture dissipate into thin air as drying speeds up at a rapid pace. This simple yet effective technique will have you marveling at the wonders of increased air circulation.
Embrace Natural Ventilation:
Unlock the doors and open those windows wide. Embracing fresh air not only facilitates swifter drying but also banishes any lingering odors from the glue that might dampen your spirits. Embrace the awe-inspiring force of nature to elevate air circulation and expedite the drying process.
Dehumidifier Delight:
Prepare to be captivated by the prowess of dehumidifiers when tackling larger projects or immovable items. These marvels remove excess moisture from the air, creating an environment that encourages rapid drying of E6000 glue. Let the dehumidifier take center stage as it orchestrates a symphony of swift drying.
Elevate for Success:
Don’t let gravity hold you back. Elevate your glued object on a wire rack or raised surface, liberating air to caress every inch of the adhesive. This ingenious move guarantees uniform drying throughout, leading to flawlessly dried projects that will leave you beaming with pride.
Harness the Wind:
Prepare to be whisked away by the exhilaration of working outdoors or in a well-ventilated space. Maximize natural air circulation by positioning your glued item in a breezy spot or employing a portable fan as your trusty sidekick. Ride the currents of wind and witness time bending to your crafting prowess as drying accelerates.
Using a Dehumidifier to Reduce Humidity
Well, I’ve got some good news for you – there’s a solution that can speed up the drying process and reduce your frustration. It’s called a dehumidifier.
So, how exactly does a dehumidifier work its magic? Let me break it down for you. This magical device extracts excess moisture from the air, creating an environment that’s perfect for faster drying times. And when it comes to E6000 glue, which relies on evaporation to dry and harden, reducing humidity is the key.
When you turn on a dehumidifier, it draws in moist air and puts it through a cooling process. This cooling causes the water vapor in the air to condense into liquid droplets, which are then collected and removed. As the dehumidifier continues to extract moisture, the humidity levels decrease, creating an environment that’s ideal for faster drying.
But before you rush out to buy a dehumidifier, make sure you choose one with the right capacity for your drying area. Too small, and it won’t effectively reduce humidity. Too large, and you risk over-drying or excessive removal of moisture.
To optimize your drying conditions even further, place your E6000 glue in a well-ventilated area. This will help with airflow and allow for better evaporation of moisture from the glue. And don’t forget to monitor humidity levels using a hygrometer – aim for that sweet spot between 40% and 50%.
While a dehumidifier can work wonders for speeding up drying times, keep in mind that other factors also play a role. Temperature, thickness of the glue application, and air circulation all have an impact too. So, embrace the power of a dehumidifier, but be mindful of these other factors.
Adding Acetone or Nail Polish Remover to the Glue
No longer do you have to endure the agonizing wait for glue to dry. Today, I’m here to unveil a secret weapon in your crafting arsenal – the incredible abilities of acetone and nail polish remover.
Now, you may be skeptical. After all, aren’t these solvents meant for removing nail polish? How could they possibly aid in glue drying? Well, my friend, prepare to be amazed. Acetone and nail polish remover can actually expedite the drying process of specific glues, including the ever-popular E6000.
By introducing small quantities (around 10-20% by volume) of acetone or nail polish remover, you can effectively thin out the glue and facilitate faster evaporation. It’s like giving your glue a turbo boost, propelling it towards rapid drying – a crafter’s dream come true.
Before you dive headfirst into this newfound glory, let’s address a few important considerations. First and foremost, not all glues react uniformly to acetone. While E6000 is known to be compatible, prudence dictates conducting a preliminary test on a scrap material.
When employing acetone or nail polish remover, exercise caution and use sparingly. Excessive amounts can result in overly thin glue that compromises its adhesive strength. Begin with a modest quantity, gradually increasing if necessary.
Ventilation is key. The potent fumes released by acetone and nail polish remover necessitate working in well-ventilated areas. Open windows wide or invite a trusty fan to ensure a steady stream of fresh air.
However, it is crucial to recognize that while acetone or nail polish remover can expedite drying time, they may also impact the overall strength and durability of the glue. Thus, if your project hinges on robust adhesion, adhering to the manufacturer’s recommended drying time is advisable.
Not all glues are created equal. Each type possesses a distinct chemical composition, and some may not respond favorably to solvents like acetone. Therefore, always consult the label or manufacturer’s guidelines before embarking on any mad scientist endeavors with your glue.
Applying Thinner Layers of Glue
Firstly, thinner layers of glue dry faster than thick ones. Less material to dry means less waiting time for you. Who wants to twiddle their thumbs while waiting for glue to dry? Not me.
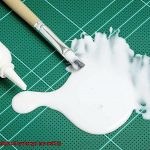
To achieve those thin and even layers, using a brush or small spatula is crucial. It helps spread the glue evenly, ensuring quicker drying time. Thinner layers also provide better adhesion because they have more surface area to bond with the materials being glued. So not only do you save time, but your project gets a stronger hold. Win-win.
Here’s a pro-tip: instead of one thick layer, go for multiple thin layers. Each layer dries quickly and ensures proper bonding. Just wait for each layer to dry before applying the next one. Patience is a virtue.
Applying thinner layers prevents excess glue from seeping out and creating a mess. No more sticky fingers or crafty superglue mishaps. Keep things neat and tidy with those thin layers.
But wait, there’s more. To speed up drying, use a thinning agent or solvent designed for your glue type. Follow the manufacturer’s instructions and guidelines when using these magical potions.
However, remember that thinner layers may not provide the same strength as thicker ones. Consider your project’s requirements before going all-in on thin layers.
Benefits of Patience
Today, we’re diving into the world of E6000 glue and exploring the incredible benefits that come with practicing patience. Whether you’re an experienced crafter or just starting out, understanding the advantages of patience can elevate your glue game to new heights. So, let’s delve into the magic that happens when we slow down and wait.
Improved Results:
Patience truly is a virtue when it comes to achieving flawless results. Rushing the drying process with E6000 glue can lead to uneven bonding and weak adhesion. By exercising patience and allowing the glue to dry for the recommended time, you ensure proper curing and a strong bond. Remember, good things come to those who wait.
Long-Lasting Bond:
E6000 glue is renowned for its durability and ability to create strong connections between various materials. However, rushing the drying process can compromise the strength of the bond, resulting in potential failures over time. By patiently allowing E6000 to dry completely, you guarantee a solid and enduring bond that will withstand regular wear and tear.
Avoiding Mess and Accidents:
We’ve all experienced the frustration of handling glued items prematurely, resulting in smudging, shifting, or even complete detachment. Patience in letting E6000 dry not only ensures better results but also helps prevent messy accidents. By exercising patience, you minimize the risk of mishaps and save yourself from potential frustration. Trust us; it’s worth the wait.
Time Efficiency in the Long Run:
While it may seem counterintuitive, practicing patience with E6000 glue can actually save you time in the long run. Rushing the drying process may lead to inadequate bonding, requiring reapplication and additional waiting periods. By allowing sufficient drying time from the start, you ensure a successful outcome without wasting resources or precious time.
Learning Patience as a Virtue:
In today’s fast-paced world, where instant gratification is often sought, working with E6000 glue can be an opportunity to cultivate patience as a personal virtue. By embracing the waiting period required for drying, you develop patience and learn to appreciate the process rather than solely focusing on the end result. This mindset shift can positively impact other areas of your life too.
SBoLZJBGM5o” >
Conclusion
Looking to speed up the drying time of your E6000 adhesive? We’ve got you covered. Here are some tips and tricks to help you get that project finished in no time.
- Increase air circulation: One way to expedite the drying process is by improving air flow in the area where you’re working. Use a fan or open windows to allow fresh air to circulate around the adhesive, helping it dry faster.
- Apply heat: Another effective method is to apply gentle heat to the adhesive. You can use a hairdryer on a low setting or a heat gun (carefully.) to speed up the drying time. Just make sure not to overheat the adhesive, as it may affect its effectiveness.
- Thin layers: When applying E6000, try using thin layers instead of thick ones. Thinner layers tend to dry faster because there’s less material for the solvent in the adhesive to evaporate from.
- Reduce humidity: High humidity levels can significantly slow down the drying process of E6000. If possible, work in a well-ventilated area with low humidity or use a dehumidifier to remove excess moisture from the air.
- Use accelerators: There are accelerators available on the market specifically designed to speed up the drying time of adhesives like E6000. These products can be applied directly onto the adhesive or mixed in before application.
- Follow manufacturer’s instructions: Always refer to the manufacturer’s instructions for proper usage and drying times of E6000 adhesive. They have tested their product extensively and know what works best for optimal results.
By implementing these techniques, you’ll be able to cut down on waiting time and complete your projects with ease. Remember, though, that rushing through may compromise the quality of your bond, so exercise caution and patience throughout the process.