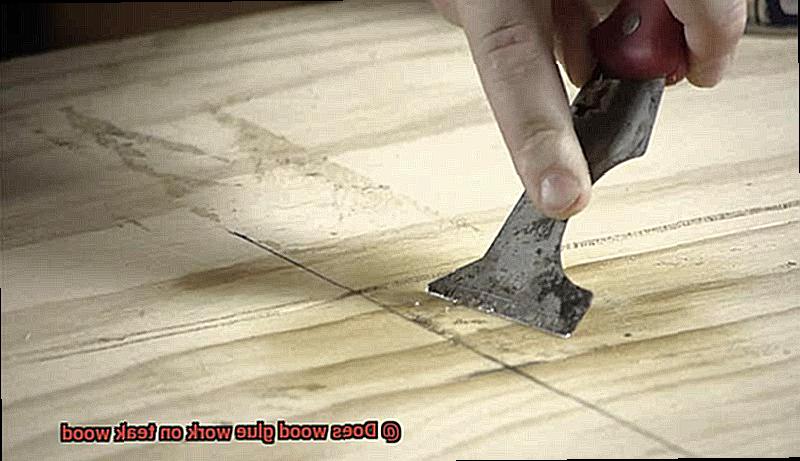
Today, we’re tackling a question that has left many DIY enthusiasts scratching their heads: does wood glue work on teak wood? Teak, with its durable nature and stunning golden hue, is a sought-after timber in furniture making.
But when it comes to joining pieces together with wood glue, will it stand the test of time? Join us as we explore the effectiveness of wood glue on teak wood, giving you the answers you need to create strong, beautiful projects.
Get ready, fellow woodworkers, because things are about to get sticky.
What is Teak Wood?
Contents
- 1 What is Teak Wood?
- 2 Challenges of Glue Adhesion on Teak Wood
- 3 Choosing the Right Glue for Teak Wood
- 4 Preparing the Surface of Teak Wood for Glue Application
- 5 Applying Wood Glue to Teak Wood
- 6 Clamping the Glued Surfaces Together
- 7 Drying and Curing Time for Glue on Teak Wood
- 8 Reinforcing the Joint with Mechanical Fasteners
- 9 Conclusion
Step into the world of teak wood, where endurance and beauty intertwine to create a masterpiece. Whether you seek furniture that withstands the test of time or a natural charm that captivates the eye, teak wood offers it all. Join us on this journey as we explore the wonders of this remarkable hardwood, its natural resistance to decay and pests, and its unparalleled aesthetic appeal.
Durability and Strength:
Teak wood, derived from the majestic Tectona grandis tree native to Southeast Asia, stands tall in both durability and strength. Its high density, combined with a rich abundance of natural oils and silica content, grants it an extraordinary ability to resist impact damage. Dents and scratches become mere whispers in the face of teak’s resilience.
Natural Resistance to Decay and Pests:
Teak wood’s illustrious reputation is built upon its exceptional resistance to decay and pests. The golden-brown hue that graces its surface is not merely an aesthetic delight but a testament to the natural oils present within it.
These oils act as guardians, protecting the wood from water damage while ensuring longevity. Furthermore, the high silica content of teak wood acts as a formidable shield against fungi and insects, preserving its integrity for generations.
Aesthetic Appeal:
Beyond its durability lies an enchanting allure that mesmerizes all who encounter it. Teak wood boasts a captivating grain pattern that dances across its surface, creating a symphony of beauty. From straight to wavy lines, each stroke of nature’s brush paints a unique story on every piece of teak wood furniture or structure.
The colors range from light brown to dark brown or even deep red, evoking emotions and infusing spaces with warmth and character.
Outdoor Applications:
Teak wood reigns supreme when it comes to outdoor applications, defying the elements with grace and resilience. Its ability to endure extreme weather conditions without warping or cracking makes it the ideal choice for garden furniture, decking, and boat building. The natural oils present in teak wood form a protective barrier, shielding it from the ravages of moisture, UV rays, and temperature changes. As a result, your outdoor teak furniture remains a beacon of beauty and functionality for years to come.
Versatility:
Teak wood’s versatility knows no bounds, adapting seamlessly to a myriad of applications. For centuries, it has graced the construction of boats, flooring, indoor furniture, and even architectural structures. Its unrivaled strength and endurance make it a reliable companion in any endeavor.
Challenges of Glue Adhesion on Teak Wood
Teak wood, renowned for its durability and captivating beauty, is a popular choice for furniture, flooring, and outdoor structures. However, achieving strong and long-lasting glue adhesion on teak wood poses a few challenges that demand attention.
The primary challenge lies in teak wood’s high oil content. These natural oils create a barrier between the wood surface and the glue, impeding effective bonding. Overcoming this obstacle requires the selection of a glue specifically designed for oily woods. These specialized adhesives possess properties that enable them to bond effectively despite the presence of oil.
Another challenge is the extended drying time of glue on teak wood. The wood’s natural oils slow down the drying and curing process, which can be problematic for projects with tight deadlines or requiring quick assembly. Allotting ample time for the glue to fully cure is essential, accounting for this extended drying period when planning a project.
Teak wood’s dense and hard nature also presents challenges for glue adhesion. The adhesive may struggle to penetrate the surface, hindering bond strength. Proper surface preparation becomes crucial in improving adhesion. Ensuring a clean, dry surface free from contaminants or oils is vital. Additionally, lightly sanding the surface can facilitate more even glue spreading and a uniform bond.
The natural variations in teak wood grain patterns further complicate glue adhesion. These irregularities can cause gaps or uneven surfaces that compromise bond strength. Applying consistent pressure when clamping or pressing glued surfaces together ensures optimal contact between wood and adhesive.
In some cases, using specialized adhesive enhancers or primers formulated for oily or dense woods can augment bonding capability. These products enhance bond strength and durability, creating a more reliable joint.

Depending on the intended use, additional mechanical fastening methods like screws or dowels may be necessary for added strength and stability, especially in load-bearing applications or projects exposed to moisture or outdoor conditions.
Choosing the Right Glue for Teak Wood
Teak wood, with its tough and oily nature, can be a formidable opponent when it comes to glue adhesion. But fret not, my fellow woodworkers. Armed with the right techniques and specialized adhesives, you can conquer this oily foe and create bonds that are strong, durable, and built to last.
Teak wood is renowned for its durability and resistance to moisture, making it a popular choice for outdoor furniture, boats, and other applications where it will be exposed to the elements. However, its high oil content creates a slippery barrier that poses a challenge for bonding. Thankfully, there are glues out there specifically designed to combat this dilemma.
One of the top contenders for bonding teak wood is epoxy glue. This remarkable adhesive consists of two components – resin and hardener – that must be mixed together before application. With its exceptional adhesion properties and water resistance, epoxy glue is like having a secret weapon against the oily enemy.
Another worthy option is polyurethane glue. Similar to epoxy glue, polyurethane glue is also resistant to water and delivers a strong bond. It is available in both liquid and gel form, allowing for versatile application methods. This adaptable adhesive expands as it cures, effectively filling in gaps and creating an unyielding connection. However, be forewarned – working with polyurethane glue can be messy; thus, careful application is essential.
For those who find themselves pressed for time or tackling smaller projects, cyanoacrylate glue (super glue) can also be employed on teak wood. This quick-bonding adhesive provides a strong hold; however, it may not possess the same degree of moisture resistance as epoxy or polyurethane glue.
Regardless of the type of glue selected, proper surface preparation is paramount in achieving a robust bond. Ensure that the surfaces to be bonded are meticulously clean, dry, and free from any dirt or debris. This prepares the battleground for a fair fight.
Before applying the glue, it is advisable to sand the surfaces to enhance adhesion. This process roughens the surface and creates more contact points for the glue to grip onto, laying a solid foundation for success.
And let us not forget the power of clamps. Firmly clamping the glued surfaces together during the curing process ensures a tight bond. This prevents any movement or separation while the glue sets, forging a connection that can withstand any challenge.
Preparing the Surface of Teak Wood for Glue Application
Today, we embark on a journey through the world of teak wood and discover how to overcome its notorious oily nature. Fear not, for with expert techniques and the right adhesive, you can conquer the challenges of gluing teak wood and create strong, long-lasting bonds. So grab your sandpaper, put on your thinking cap, and let’s dive into the art of preparing teak wood for glue application.
Step 1: Cleanliness is Key
Before delving into the gluing process, ensure that your teak wood is squeaky clean. Mix a mild detergent or soap with water and scrub the surface vigorously. Employ a soft brush or sponge to remove any dirt, grease, or contaminants that could hinder the bonding process. Rinse the wood thoroughly with clean water and allow it to dry completely before proceeding.
Step 2: Sanding for Success
Now that your teak wood is pristine, it’s time to create a rough texture for optimal adhesion. Grasp your medium-grit sandpaper and gently sand in the direction of the wood grain. This will eliminate any existing finish, smooth out imperfections, and open up those precious pores. Remember, even pressure is crucial – preserve the integrity of the wood.
Step 3: Wipe away the Dust
After vigorous sanding, some dust will inevitably settle on your teak wood surface. Fear not. Grab a tack cloth or lint-free cloth and meticulously wipe away any lingering dust or debris. This step guarantees a clean surface ready for glue application.
Step 4: Primer Power
Consider incorporating a primer or sealer into your process to enhance the bonding strength between wood and glue. Choose a primer specifically designed for teak wood and follow the manufacturer’s instructions for application. This additional layer of protection can make a world of difference in ensuring a strong bond.
Step 5: Glue Selection
Choosing the right glue is paramount when working with teak wood. Opt for adhesives specially formulated for hardwoods or oily woods. These specialized glues penetrate and bond well with teak wood’s natural oils and resin. Read the product label or consult an expert to select the perfect glue for your project.
Step 6: Test, Test, Test.
Before committing to gluing your actual project, conduct a test run on a scrap piece of teak wood. Apply a small amount of glue to the prepared surface and join it with another piece of teak wood. Allow the glue to dry according to the manufacturer’s instructions, then put it to the test. Pull, twist, and bend – ensure that the bond is unyielding and secure.
Applying Wood Glue to Teak Wood
Teak wood, known for its stunning beauty and natural oils, can pose a challenge when it comes to bonding with adhesives. However, with the right preparation and application techniques, wood glue can successfully be used on teak wood, creating a strong and durable bond that will stand the test of time.
The first step in applying wood glue to teak wood is to properly prepare the surface. It is crucial to ensure that the surfaces are clean, dry, and free from any oil or debris. This can be achieved by lightly sanding the surfaces and wiping them down with a clean cloth. By removing any impurities, the wood glue will have a better chance of adhering effectively.
Choosing the right glue is also essential for a successful bond. Not all glues are created equal, especially when it comes to teak wood. It is recommended to opt for a high-quality wood glue that is specifically designed for outdoor or marine applications. These types of glues are formulated to withstand moisture and temperature changes, making them perfect for teak wood.
Once the surface is prepared and the appropriate glue is chosen, it’s time to apply the adhesive. Using a brush or spatula, spread an even layer of wood glue onto both surfaces that need to be bonded together. It is important not to go overboard with the amount of glue applied – excess glue can lead to weak bonds or visible glue lines. A thin, even layer is sufficient for creating a strong bond.
After applying the wood glue, firmly press the two pieces of teak wood together. Applying pressure is essential for ensuring a strong bond. Consider using clamps or heavy objects to hold the pieces in place while the glue dries. It is crucial to follow the manufacturer’s instructions regarding drying and curing time for the specific wood glue being used. This will ensure that the bond is given enough time to set properly.
Once the glue has dried and cured, it’s time for the finishing touches. Remove any excess glue that may have squeezed out during the bonding process using a chisel or scraper. For a smooth finish, lightly sand the glued area. This will help create a seamless look and ensure that the bond is not compromised.
It’s worth noting that while wood glue can work well on teak wood, there are stronger adhesives available, such as epoxy or polyurethane glues. These types of glues offer maximum strength and are better suited for applications where durability is key. Consider the specific requirements of your project and choose the adhesive accordingly.
Clamping the Glued Surfaces Together
When it comes to woodworking projects using teak wood and wood glue, clamping the glued surfaces together is a critical step that should never be overlooked. This step ensures a strong and durable bond that will stand the test of time. So, let’s explore why clamping is important and how you can achieve the best results.
First and foremost, before clamping, it is crucial to prepare the surfaces properly. Ensure they are clean, free from any dust or debris that could hinder proper adhesion. Give them a thorough wipe-down with a brush or cloth to create a solid foundation for the glue.
Next, apply the wood glue generously, but not excessively. You want enough glue to create a strong bond without creating a messy situation. Take your time and apply the glue evenly on both surfaces for optimal results.
Now, let’s talk about clamping. It’s important to choose the right type of clamp for your project. Whether it’s bar clamps, pipe clamps, or hand screw clamps, select the ones that suit your needs best.
Strategically position the clamps along the glued joint to distribute even pressure across the entire area. This prevents gaps or air pockets from forming and ensures a secure bond. Remember not to let the clamps interfere with the alignment of your pieces.
When tightening the clamps, do so gradually and evenly. Avoid putting too much stress on the wood or risking misalignment. Take your time and tighten with care to achieve optimal results.
Once everything is securely clamped together, it’s time to let the glue work its magic. Refer to the manufacturer’s instructions for drying and curing times. Patience is key here – give the glue enough time to fully cure for a rock-solid bond.
After curing, remove the clamps and wipe away any excess glue squeeze-out with a damp cloth. This final step ensures a clean and professional finish.
Drying and Curing Time for Glue on Teak Wood
Teak wood, with its captivating beauty and remarkable durability, is a prized material for woodworking projects. However, due to its high oil content, bonding teak wood can be a perplexing task. Fear not, fellow craftsmen. In this comprehensive guide, we will delve into the depths of gluing teak wood and reveal the secrets to achieving an unyielding bond by understanding the recommended drying and curing time for various types of adhesive.
PVA Glue – The Reliable Ally:
Polyvinyl acetate (PVA) glue stands as a stalwart companion in the realm of woodworking projects. When bonding teak wood, grant it a generous 24 hours to fully dry and cure. Beware of the mischievous effects of humidity levels, for they can sway the drying time like a capricious wind. Adjust your expectations accordingly.
Epoxy – The Slow and Steady:
Epoxy emerges as another remarkable contender for bonding teak wood. Its two-component formula necessitates the careful amalgamation of resin and hardener before application. Patience becomes your virtue as epoxy may take anywhere from 24 to 48 hours to achieve its full potential, contingent upon the specific product and prevailing conditions.
Cyanoacrylate – The Instant Fixer:
For those who find themselves ensnared in the clutches of time, cyanoacrylate (super glue) emerges as a swift savior. Though it forms an instantaneous bond, allow a resolute 24 hours for maximum strength to take hold before subjecting the glued joints to stress or strain.
Surface Preparation – The Foundation of Success:
Prepare your teak wood surfaces with meticulous care by sanding and cleansing them thoroughly. This sacred ritual bestows upon you a clean and even bonding surface, amplifying the efficacy of any adhesive you employ.
Clamping – The Final Puzzle Piece:
Just as a conductor harmonizes the symphony, clamping plays an indispensable role in achieving a resolute bond on teak wood. Select the appropriate type of clamp for your particular project and position them strategically to apply uniform pressure across the bonded surfaces.
Gradual Tightening – The Gentle Approach:
When tightening the clamps, embrace a measured pace. Rushing with excessive force can lead to misalignment or uneven pressure, thus jeopardizing the strength of your bond. Allow patience to be your guiding principle.
Patience is Key – The Virtue of Curing:
In the face of impatience, resist the temptation to hasten the drying and curing process. Permit the glue to undergo its full transformation before subjecting your masterpiece to the burdens of stress or load. Remember, greatness rewards those who exercise restraint.
Reinforcing the Joint with Mechanical Fasteners
When it comes to ensuring the strength and longevity of joints in teak wood, mechanical fasteners are an indispensable tool. Screws and nails, when chosen and installed with care, can forge a bond that endures the test of time. Here, we will delve into the art of reinforcing joints with mechanical fasteners on teak wood, exploring key considerations and techniques.
- Choose the Right Fastener: Stainless steel screws or nails are the darlings of teak wood joint reinforcement due to their steadfast resistance against corrosion. This is especially vital considering teak wood’s innate ability to defy moisture and decay.
- Size Matters: To craft a joint that holds true, select a fastener that matches the thickness of the wood and bestows ample strength. An undersized or oversized fastener can undermine the integrity of the joint, rendering it vulnerable to failure.
- Pre-drill Pilot Holes: Teak wood, dense and unyielding, demands a gentle touch. Before inserting screws or nails, it is imperative to pre-drill pilot holes. This ensures that the wood remains intact, free from unsightly splits or fractures during installation.
- Countersink for a Flush Finish: The pursuit of perfection demands more than brute force. Utilize a countersink tool to create a recessed cavity for the screw head. This allows it to nestle seamlessly with the wood’s surface, creating an aesthetically pleasing finish.
- Drive Straight: The path to joint fortification lies in the straight and narrow. When driving fasteners into teak wood, ensure they enter at a right angle rather than at an oblique tilt. An angled approach weakens the joint’s resolve, compromising its strength over time.
- Consider Waterproof Adhesive or Sealant: To fortify your joint against the erosive forces of water, contemplate the use of a waterproof adhesive or sealant. This additional layer of protection shields against the ravages of moisture, safeguarding the joint’s resilience.
gPsBLealwwY” >
Conclusion
Wood glue is an essential tool for any woodworking project.
But when it comes to teak wood, does wood glue work its magic? The answer is a resounding yes.
Teak wood, known for its durability and resistance to moisture, can be effectively bonded with wood glue. This adhesive forms a strong bond between the teak wood pieces, ensuring that your project stays intact for years to come.
So whether you’re repairing a teak chair or building a teak table, rest assured that wood glue will do the job with precision and reliability.