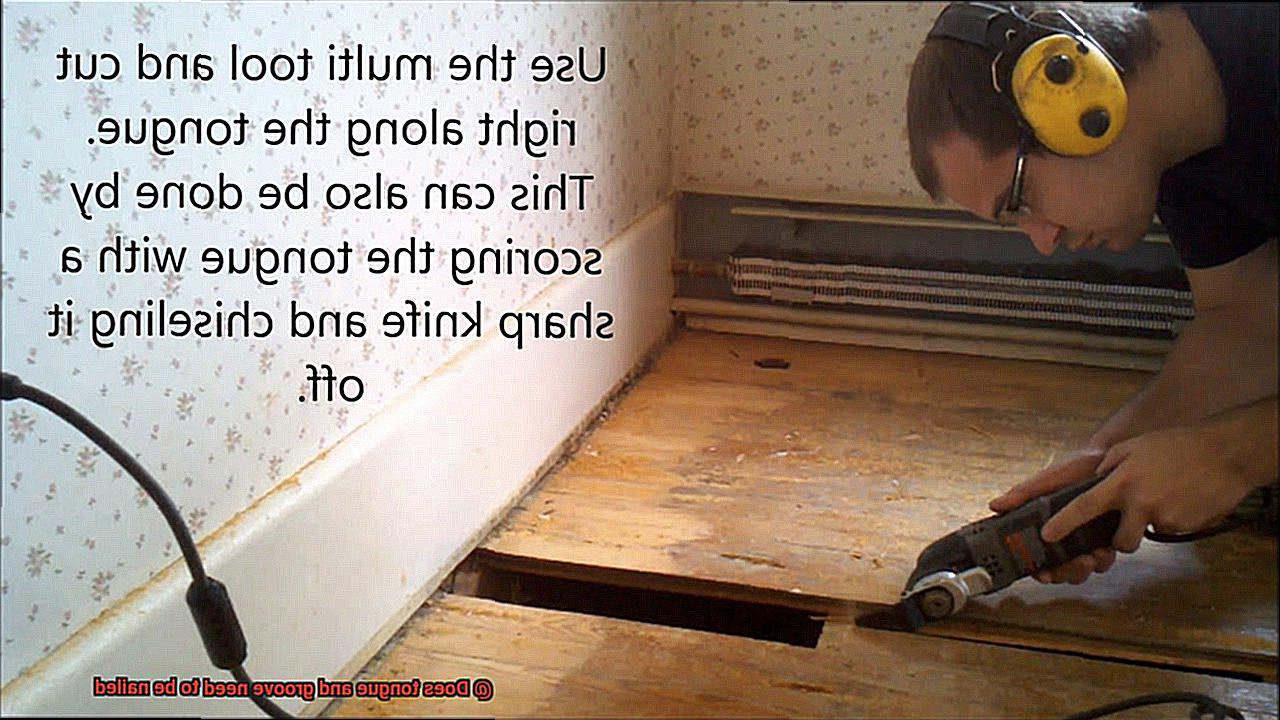
In the world of woodworking, there’s a magical technique that brings timber together in a way that’s both structurally sound and visually stunning – tongue and groove joints. But here’s the burning question: do you really need to nail them? Prepare to be captivated as we dive into this seemingly small detail that holds immense significance for your woodworking projects.
Imagine gazing at a breathtaking hardwood floor or admiring an exquisite wooden ceiling. What you might not realize is the secret behind their flawless finish – those inconspicuous nails discreetly securing the tongue and groove joints. These unsung heroes work tirelessly behind the scenes, hammering strength, stability, and an enchanting aesthetic allure into every inch.
Nailing tongue and groove joints is no mere afterthought; it’s a vital step that fortifies the bond between boards, preventing any unwanted movement, separation, or annoying creaks over time. Without these trusty nails, even minor changes in temperature or humidity could cause boards to loosen, leading to an unsightly and potentially hazardous surface.
But nailing tongue and groove joints isn’t just about functionality; it elevates craftsmanship to another level. Each nail driven into the hidden groove serves as a testament to meticulous attention to detail. It transforms a simple assembly of planks into a symphony of interlocking pieces, bringing satisfaction to both artisans and admirers alike.
As we delve deeper into this topic, we’ll explore various techniques, tips, and considerations surrounding nailing tongue and groove joints. Join us on this captivating journey where we unravel the secrets behind creating enduring works of art that seamlessly blend structural integrity with breathtaking beauty. Whether you’re a seasoned woodworker or an aspiring enthusiast, embracing the importance of nailing tongue and groove joints will undoubtedly enhance your woodworking endeavors while producing results that stand the test of time.
What is Tongue and Groove?
Contents
- 1 What is Tongue and Groove?
- 2 Does Tongue and Groove Need to be Nailed?
- 3 Factors to Consider When Deciding Whether to Nail
- 4 Types of Subfloors/Wall Surfaces that May Require Nailing
- 5 How to Properly Nail Tongue and Groove Boards
- 6 Advantages of Nailing Tongue and Groove Boards
- 7 Disadvantages of Nailing Tongue and Groove Boards
- 7.1 Challenging and Time-Consuming Installation:
- 7.2 Risk of Damaging the Boards:
- 7.3 Movement and Shifting:
- 7.4 Unsightly Surface:
- 7.5 Limited Flexibility for Future Modifications or Repairs:
- 7.6 Restriction of Natural Wood Movement:
- 7.7 The Glue Solution:
- 7.8 Easy and Efficient Installation:
- 7.9 Damage-Free Installation:
- 7.10 Enhanced Stability:
- 7.11 Seamless Surface:
- 7.12 Flexibility for Future Modifications or Repairs:
- 7.13 Accommodates Natural Wood Movement:
- 8 Professional Advice on Using Nails with Tongue and Groove
- 9 Conclusion
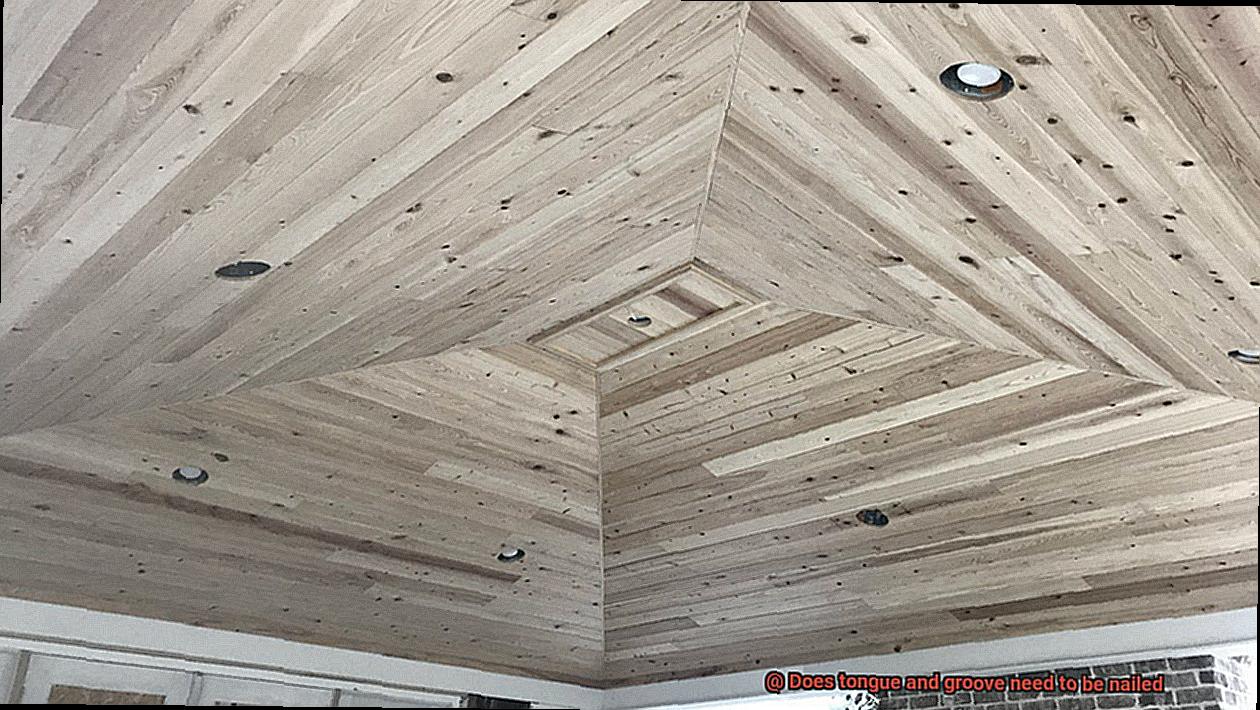
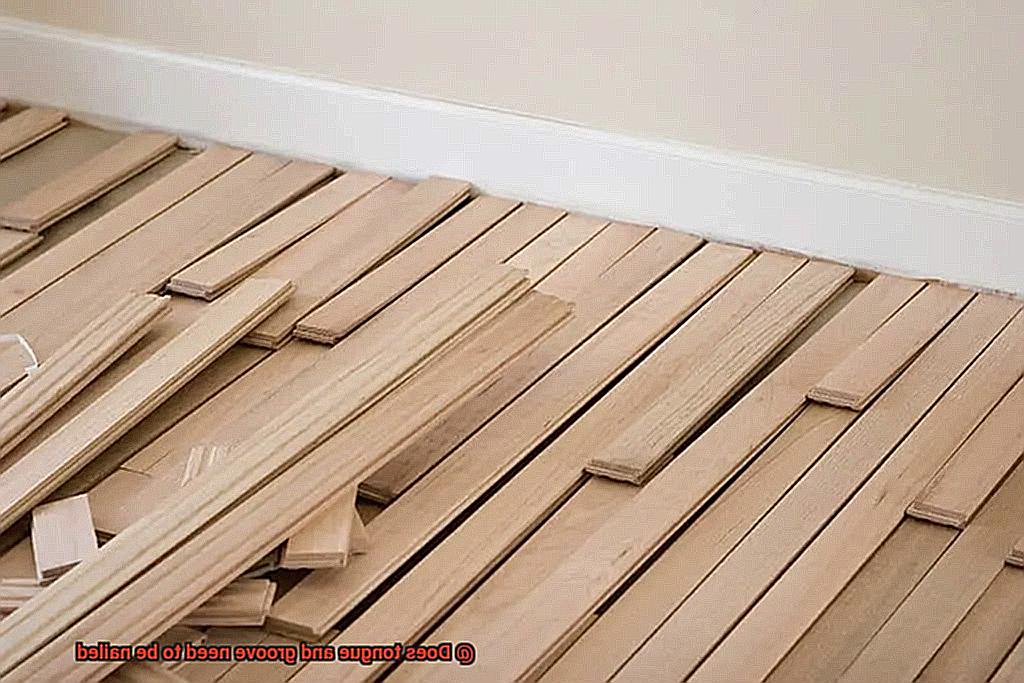
Tongue and groove, a method of joining wood boards together, has been trusted for centuries for its strength, durability, and seamless appearance. Whether you’re considering tongue and groove flooring, paneling, or woodworking projects, understanding this interlocking technique is essential. In this article, we’ll delve into the details of tongue and groove, its advantages, and when additional reinforcement may be needed.
The Anatomy of Tongue and Groove:
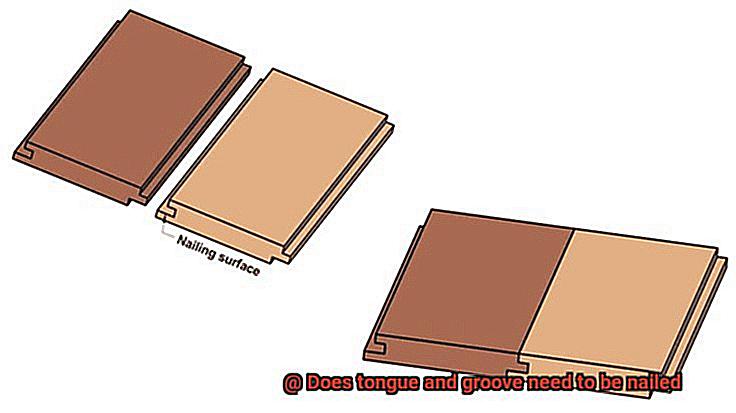
At the heart of tongue and groove lies two key components: the tongue and the groove. The tongue refers to a slender strip that confidently protrudes from one board’s edge like a warrior ready for battle. On the opposing board, the groove awaits with open arms – a channel cut into its edge, patiently waiting for its counterpart. When these two come together, they form a sacred bond that ensures a secure joint without any gaps or movement between the boards.
Advantages of Tongue and Groove:
- Strength and Stability: The tight fit of tongue and groove joints acts like an impenetrable shield against external forces. It evenly distributes weight across the boards, making it ideal for stable flooring applications. Additionally, it strengthens the overall structure, reducing the risk of warping or bowing.
- Seamless Appearance: When correctly installed, tongue and groove joints create an enchanting illusion of perfection – a surface that appears to be one cohesive unit. This visual magic makes it a favored choice for hardwood flooring, where beauty is paramount.
- Easy Installation: The interlocking design of tongue and groove makes installation as effortless as a river flowing downstream. No additional fasteners or adhesives are necessary; simply slide the tongue into the groove, like two hands clasping in harmony, for a tight and secure connection.
When Additional Reinforcement May Be Needed:
While the strength of tongue and groove joints stands firm on its own, there are instances where reinforcements may be necessary to ensure an unbreakable bond:
- High-Traffic Areas: In bustling spaces where feet tread heavily or furniture loads loom large, additional nailing can provide an extra layer of fortification. These nails anchor the connection between boards, preventing any potential movement or gaps from forming over time.
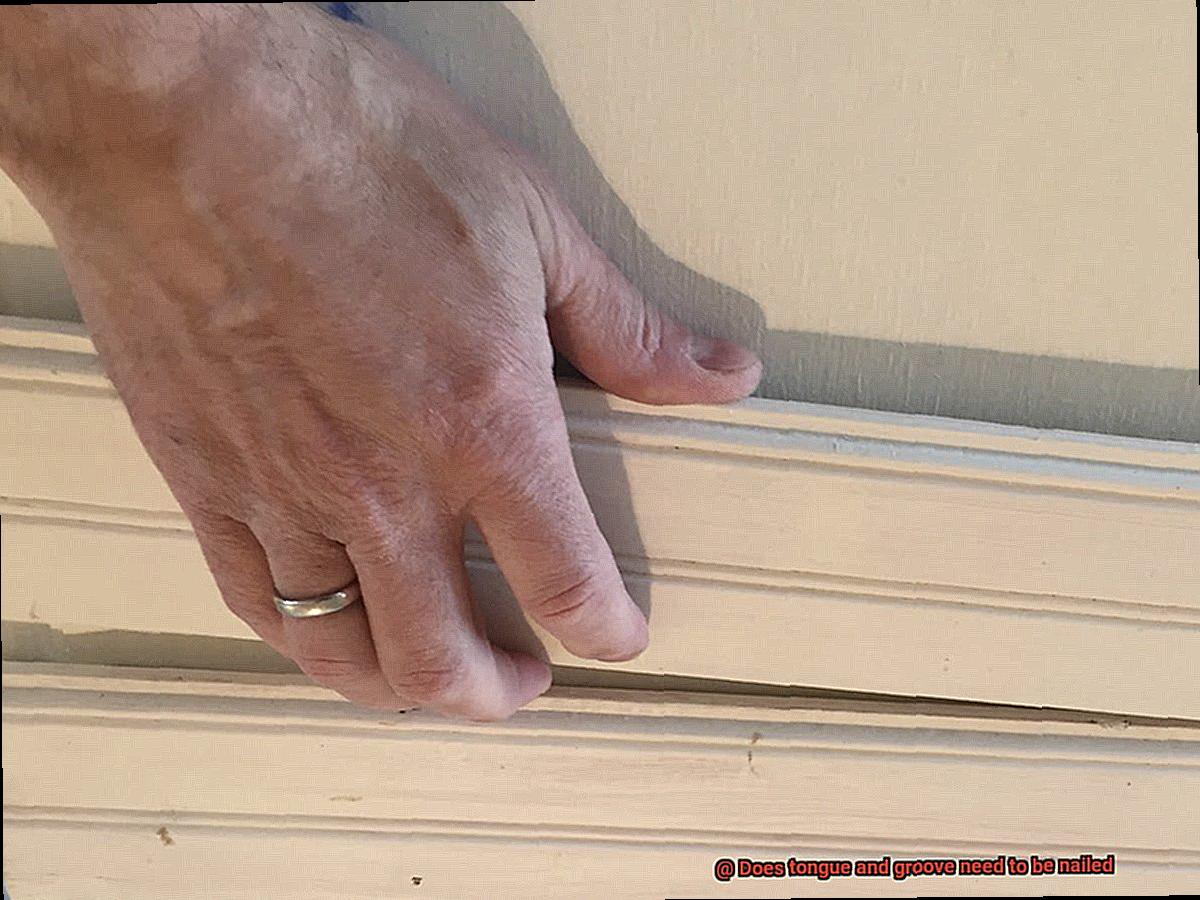
- Subfloor or Wall Surface: When installing over plywood subfloors or drywall, it is recommended to employ the power of nails. By securing the tongue and groove joint with these trusty allies, you can ensure a secure attachment and minimize any potential squeaking or shifting.
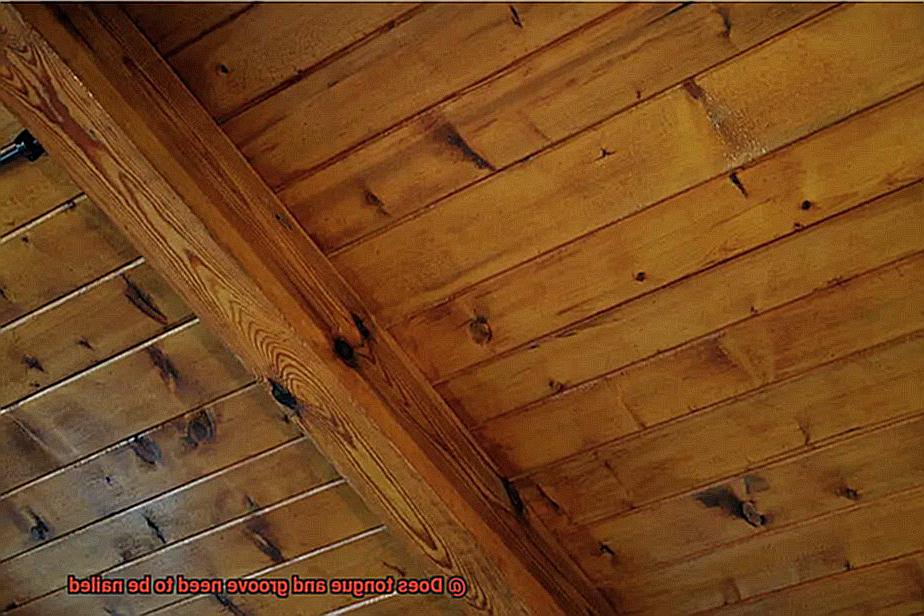
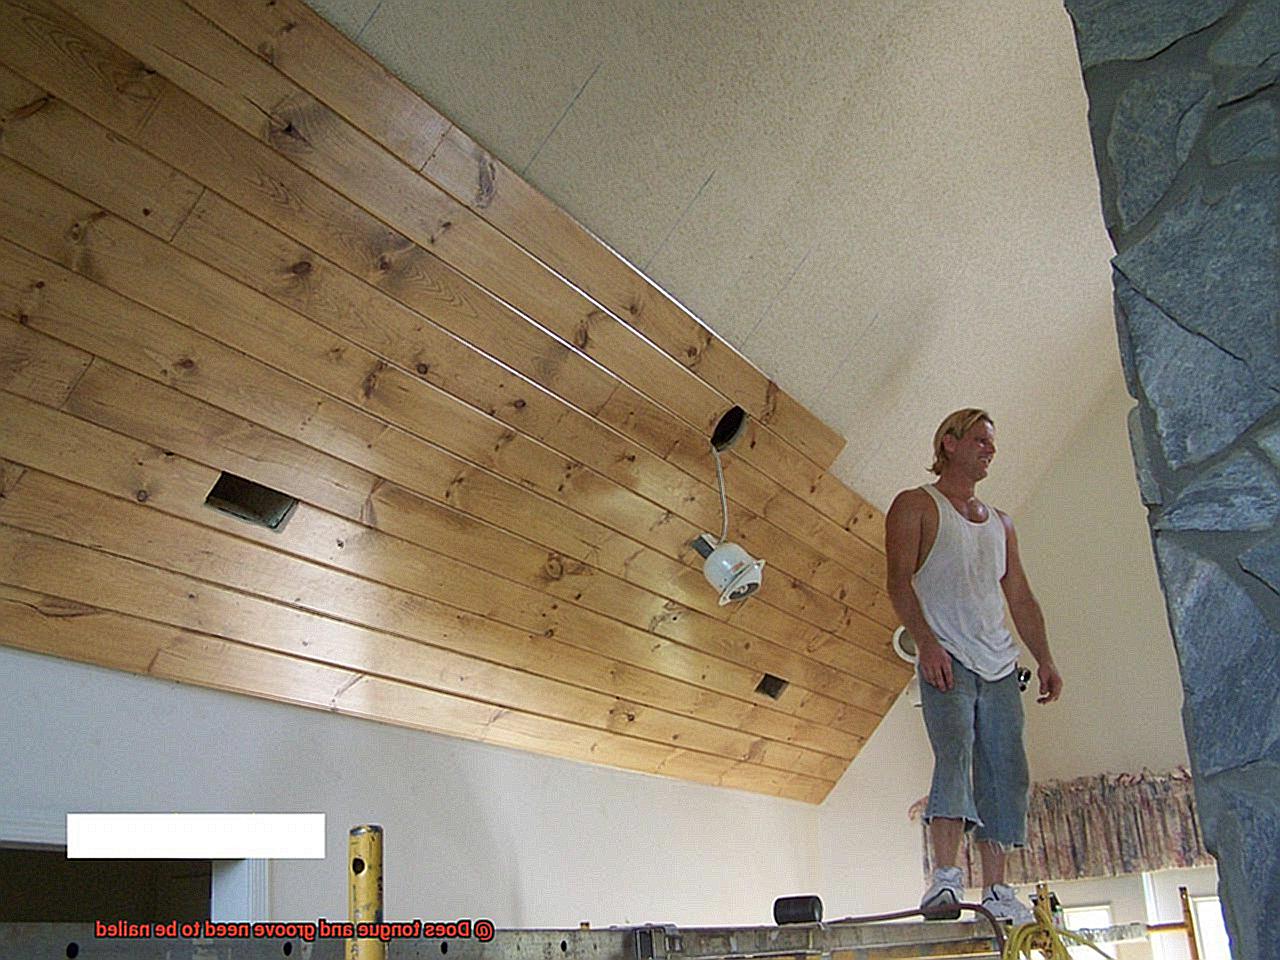
Does Tongue and Groove Need to be Nailed?
Well, the answer is not as straightforward as you might think. While the tight fit of the joint typically provides ample strength and stability, there are instances where nailing can be beneficial. In this article, we’ll explore the pros and cons of nailing tongue and groove boards, as well as delve into the alternative option of using glue.
The Advantages of Nailing:
Added Stability:
Nailing can provide extra support, especially when dealing with uneven subfloors or wide boards that may be prone to movement. It helps ensure that the boards stay securely in place, reducing the risk of gaps or squeaks over time.
Easier Installation:
Nails can act as temporary fasteners during installation, holding the boards in position while the glue dries. This can be particularly helpful for vertical installations where gravity is working against you.
Quick Repairs:
In case of damage or wear, nailed tongue and groove boards can be easily replaced without disturbing the entire floor or wall surface. Simply remove the damaged board by prying out the nails, and replace it with a new one.
The Disadvantages of Nailing:
Potential Weaknesses:
Nails can create stress points or weaken the wood at the point of penetration. This may compromise the integrity of the joint over time, leading to potential issues such as splitting or loosening.
Visible Nail Heads:
If aesthetics are a concern, nailing tongue and groove boards can leave visible nail heads that may not align with your desired look. This is particularly important for projects where the boards will be left exposed or require a seamless finish.
The Alternative: Gluing:
Enhanced Strength:
Using wood glue in combination with the tongue and groove joint can create a more solid and rigid connection. This eliminates the need for nails altogether, providing a cleaner and more seamless appearance.
Long-Term Durability:
Glue helps distribute the load across the entire joint, reducing the risk of localized stress points and potential weaknesses. This can result in a longer-lasting installation that withstands heavy use.
Aesthetically Pleasing:
Gluing tongue and groove boards eliminates visible nail heads, creating a sleek and professional finish that enhances the overall appearance of the project.
Factors to Consider When Deciding Whether to Nail
When it comes to installing tongue and groove materials, such as flooring, wall paneling, or ceiling planks, the decision between nailing or gluing can make all the difference.
Each method offers its own advantages and considerations, making it crucial to carefully weigh the factors before making your choice.
In this article, we will explore the key factors that should be considered when deciding whether to rely on nails or glue for your tongue and groove installation.
Type of Tongue and Groove:
Different types of tongue and groove materials require different installation methods. Solid wood, engineered wood, and laminate all have their own unique characteristics that dictate whether nails or glue should be used. Understanding the specific requirements of your chosen material is essential before proceeding with the installation.
Purpose of Installation:
Consider the purpose of your tongue and groove installation. If you’re working on a high-traffic area like a flooring project, nailing may offer added stability and durability. On the other hand, for purely decorative purposes like wall paneling or ceiling planks, gluing can provide a seamless finish without any visible nails disrupting the aesthetic.
Subfloor or Base Material:
The type and condition of the subfloor or base material play a significant role in determining the appropriate installation method. Concrete slabs or plywood subfloors may require adhesive properties for secure installation without the need for nails. Evaluating the compatibility of your base material with both nailing and gluing methods is crucial for a successful installation.
Climate and Environmental Conditions:
Take into account the climate and environmental conditions of your location. In areas with high humidity or fluctuating temperatures, wood naturally expands and contracts, which can affect the stability of tongue and groove installations over time. Nailing may offer additional support to counteract these changes, while gluing provides flexibility for natural movement.
Manufacturer’s Recommendations:
Always consult the manufacturer’s guidelines before deciding on an installation method. Manufacturers often provide specific instructions, including recommendations on whether nails or glue should be used. Following these guidelines ensures proper installation and prevents any potential warranty issues.
Personal Preference:
Lastly, consider your personal preference. Some individuals prefer the added security of nails for a more rigid installation, while others prioritize a seamless appearance achieved through gluing. Assess your priorities and desired outcome to make an informed decision that aligns with your tastes and expectations.
Types of Subfloors/Wall Surfaces that May Require Nailing
Are you considering installing tongue and groove flooring or paneling? Wondering if nailing or using glue alone is the best method for a secure installation?
In this blog post, we’ll explore the types of subfloors and wall surfaces that may require nailing, while discussing the benefits of using glue. By combining both methods, you can achieve a strong and durable installation that will stand the test of time.
Plywood Subfloors: Reinforcing for Resilience
When installing tongue and groove flooring over plywood subfloors, nailing is often recommended. Plywood provides a solid base, but adding nails ensures extra reinforcement. This prevents potential movement or squeaking, creating a stable foundation. By using both glue and nails, you can create a resilient floor that will last for years.
Concrete Subfloors: Bolstering Against Unevenness

Concrete subfloors can be uneven or susceptible to moisture, impacting the stability of tongue and groove flooring. While gluing boards directly to concrete is an option, nailing them down provides added security. Specialized fasteners like concrete nails or masonry screws securely attach the boards to the concrete surface, bolstering against any unevenness.
OSB Subfloors: Combating Flexing
Similar to plywood, oriented strand board (OSB) subfloors benefit from both glue and nails when installing tongue and groove flooring. OSB is less stable due to its compressed wood strands. Nailing the boards down helps minimize movement or flexing, ensuring a secure installation. Combining glue with nails creates a strong bond that withstands everyday wear and tear.
Drywall Wall Surfaces: Nails for Support
Installing tongue and groove paneling on drywall wall surfaces often requires nailing for a secure attachment. Drywall is relatively soft and prone to damage from excessive force. Using nails designed for drywall installations, along with glue, provides extra support without harming the surface. This ensures a long-lasting and visually appealing installation.
Manufacturer’s Guidelines: The Key to Successful Installation
Always refer to the manufacturer’s instructions for your specific tongue and groove flooring or paneling. They provide detailed information on recommended installation methods, including whether nailing is necessary. Following these guidelines ensures proper installation and protects any warranties associated with the product.
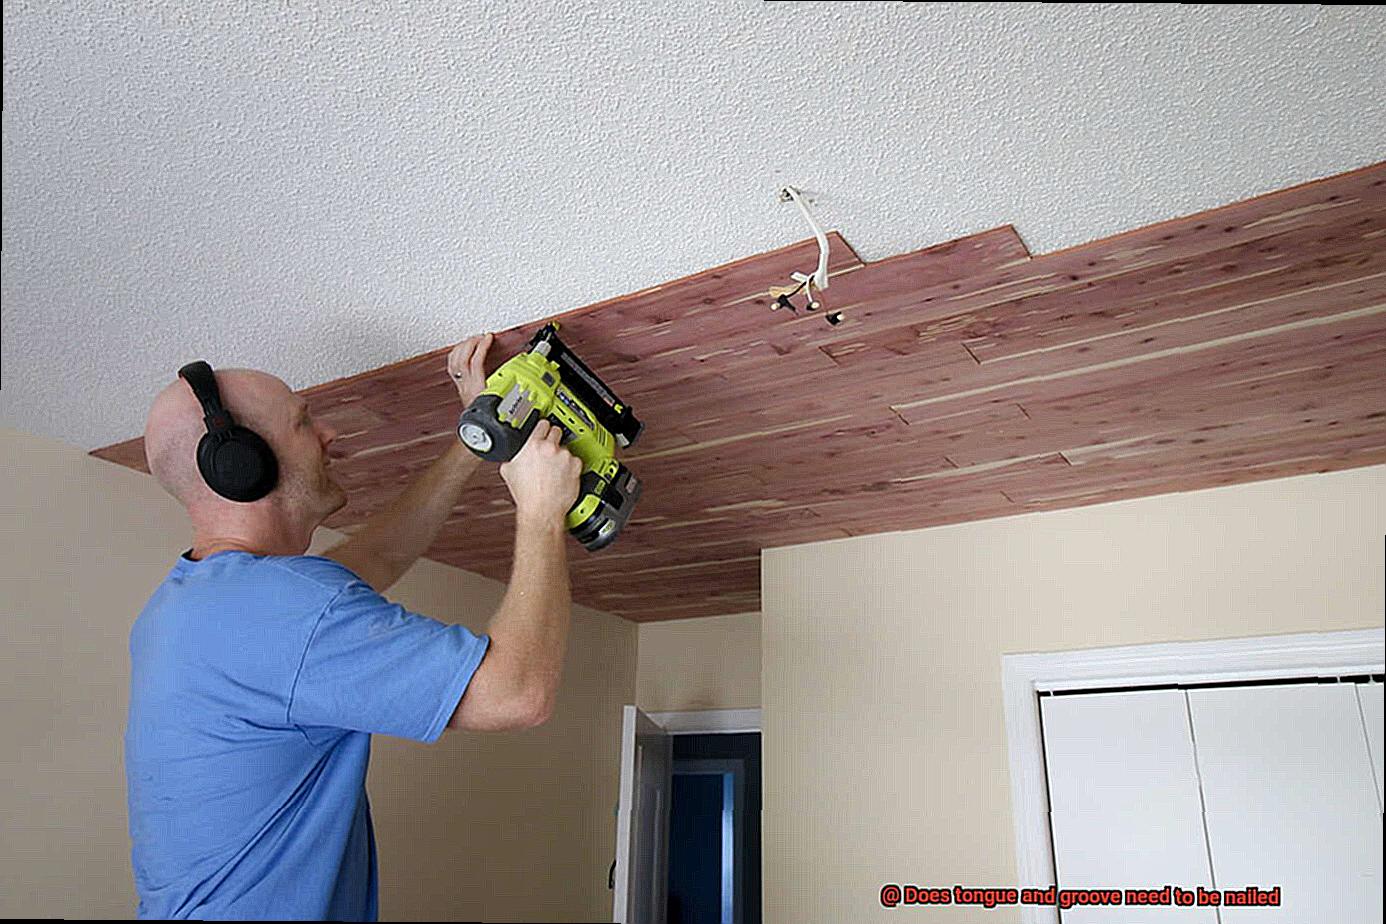
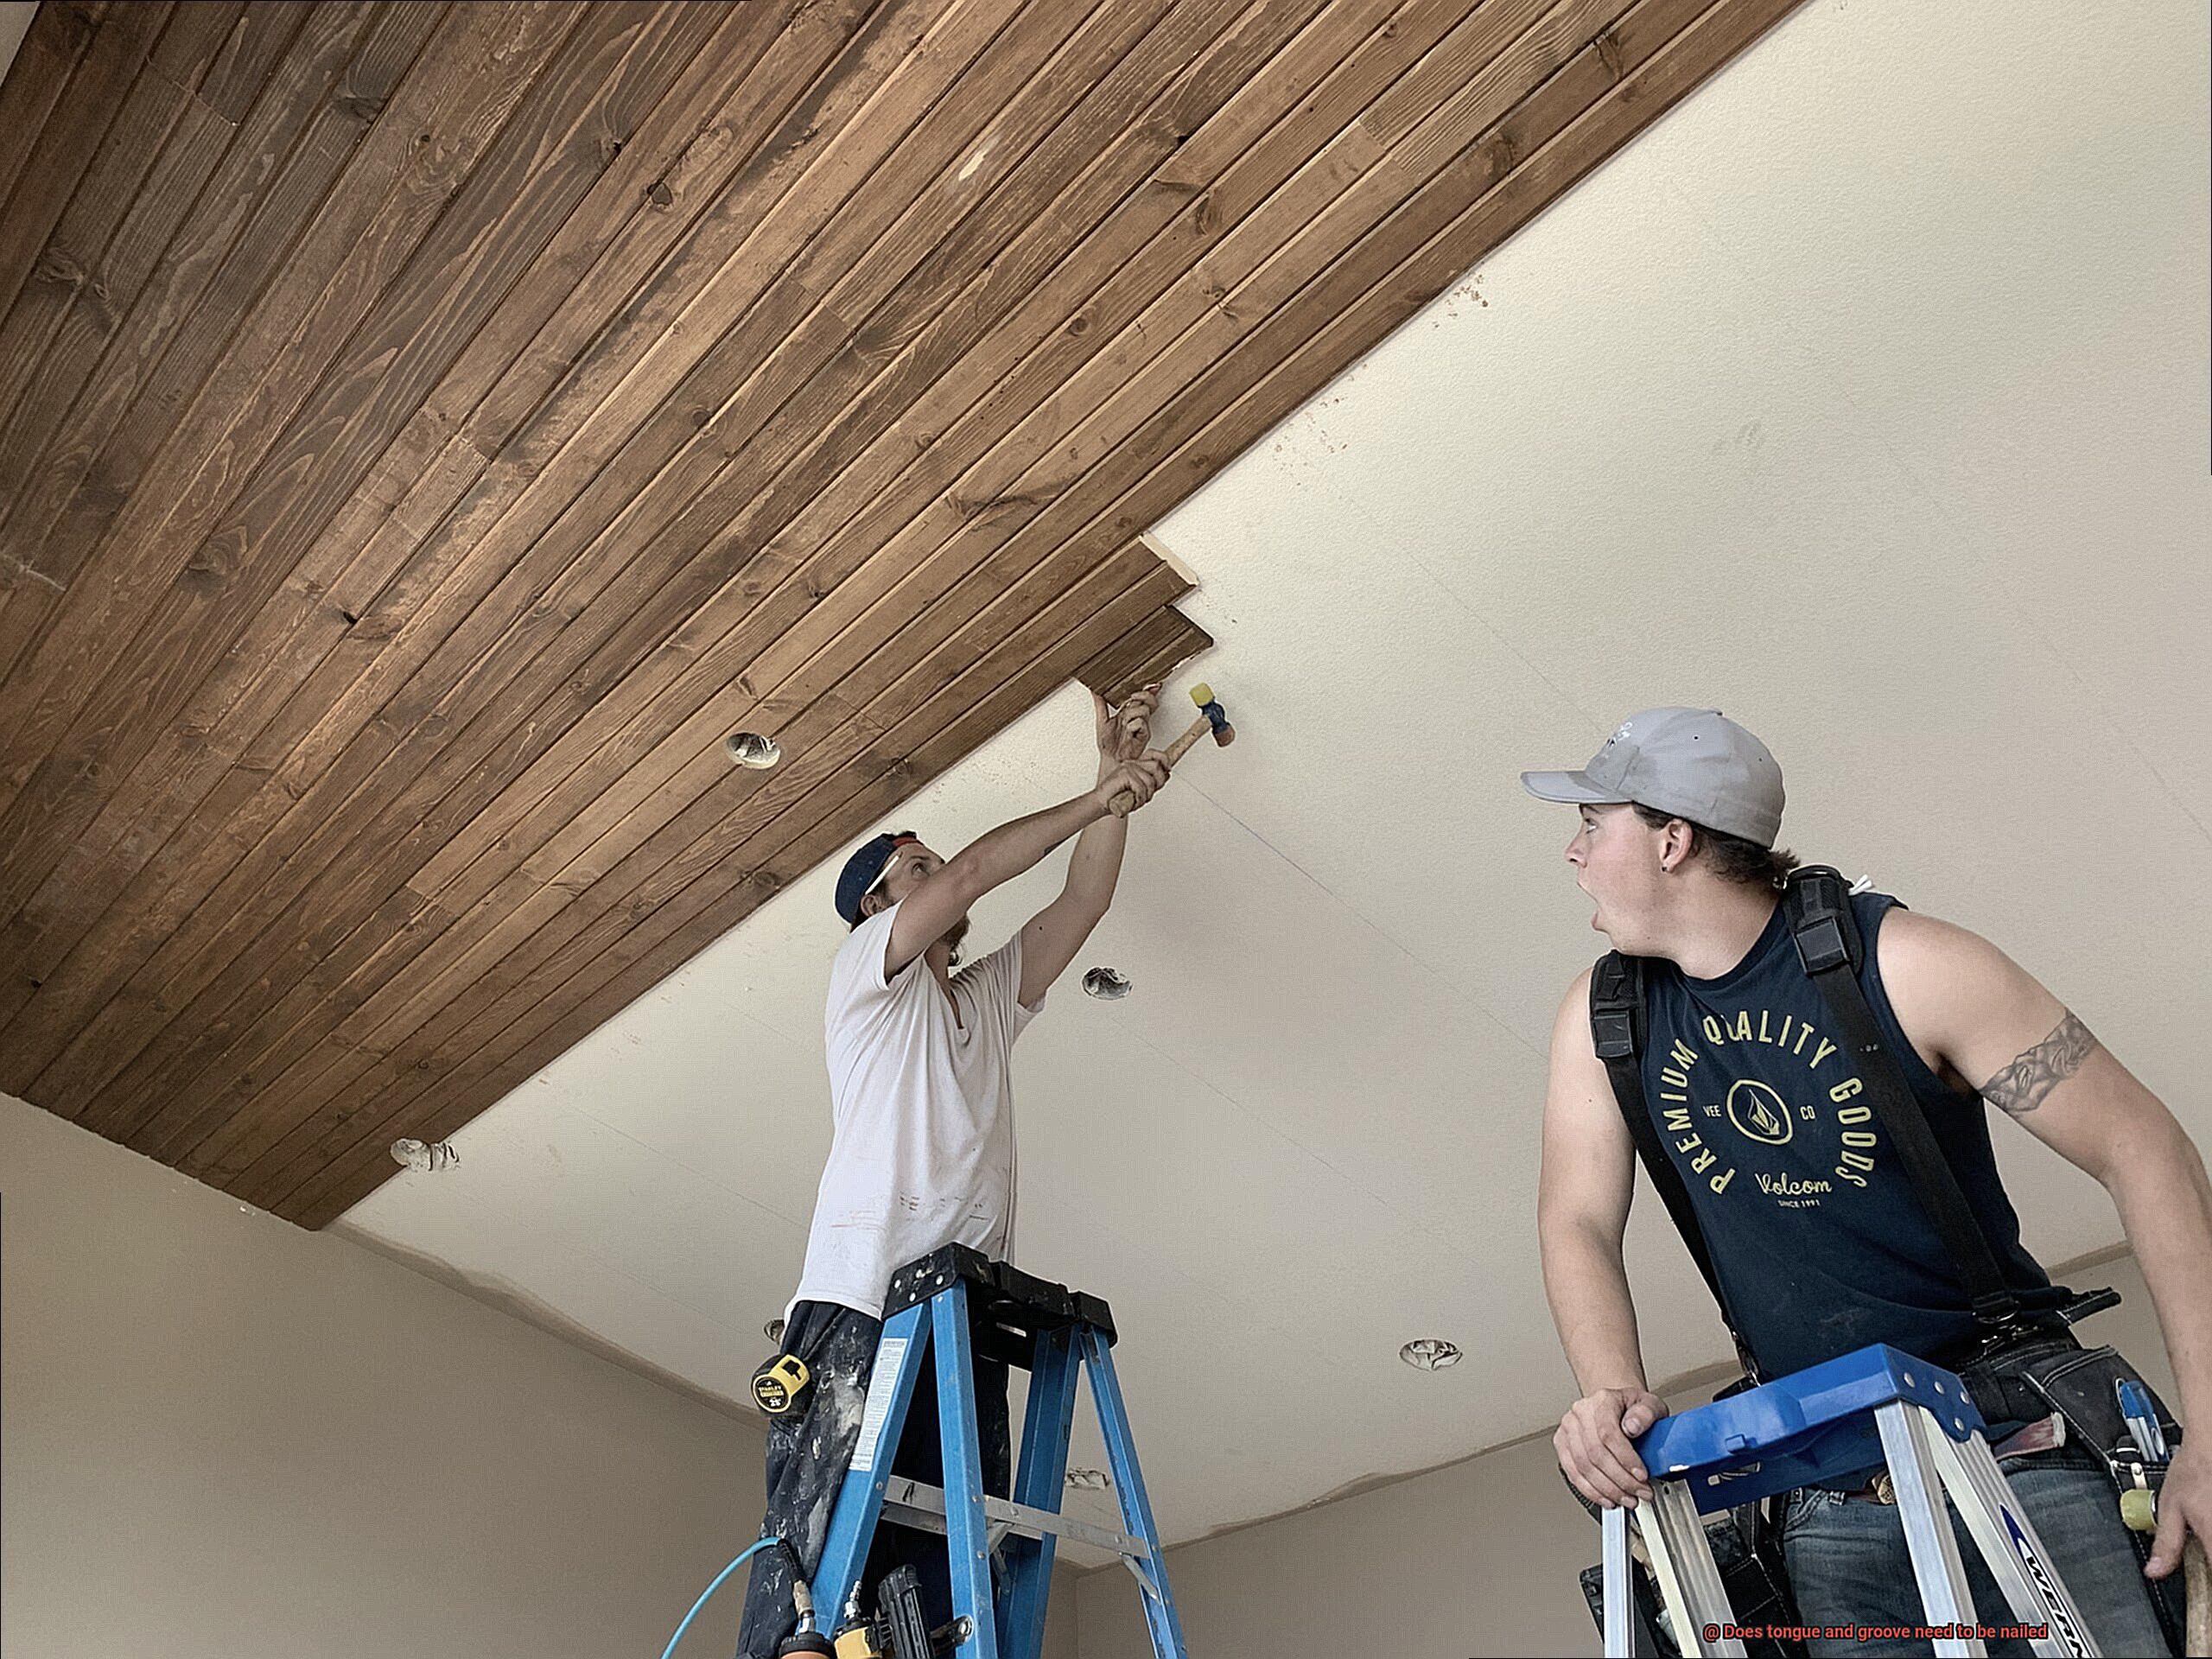
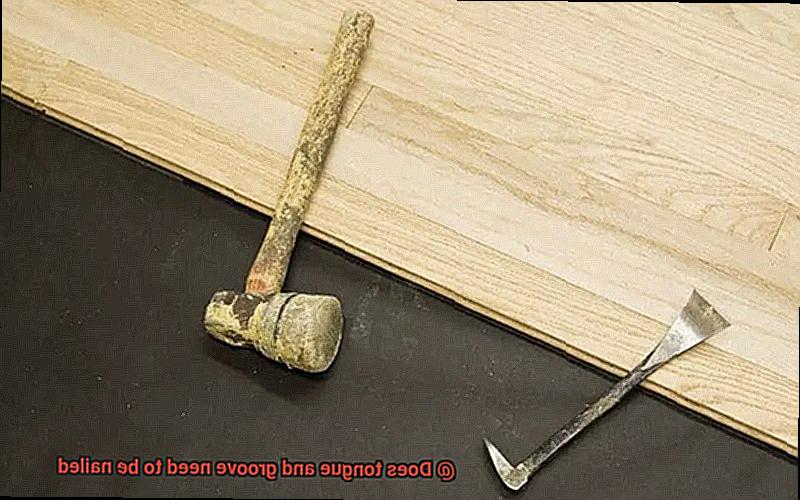
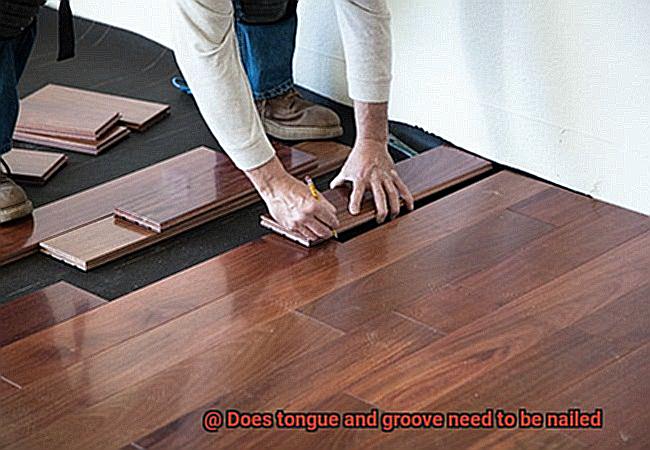
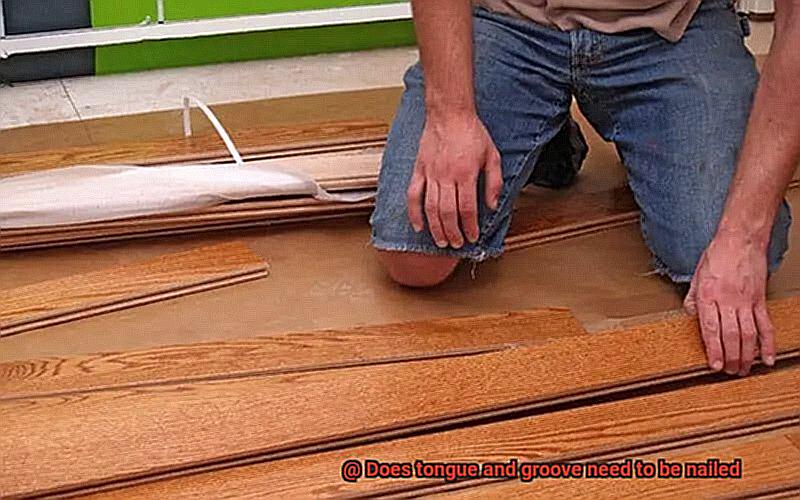
How to Properly Nail Tongue and Groove Boards
Nailing is a popular method for installing tongue and groove boards, ensuring a secure and long-lasting installation. This guide will walk you through the key steps to properly nail tongue and groove boards, providing you with the knowledge to tackle your own projects.
Choose the Right Type of Nails:
To guarantee durability, opt for stainless steel or galvanized nails. These nails are resistant to rust and corrosion, keeping your installation strong for years to come.
Determine the Nail Size:
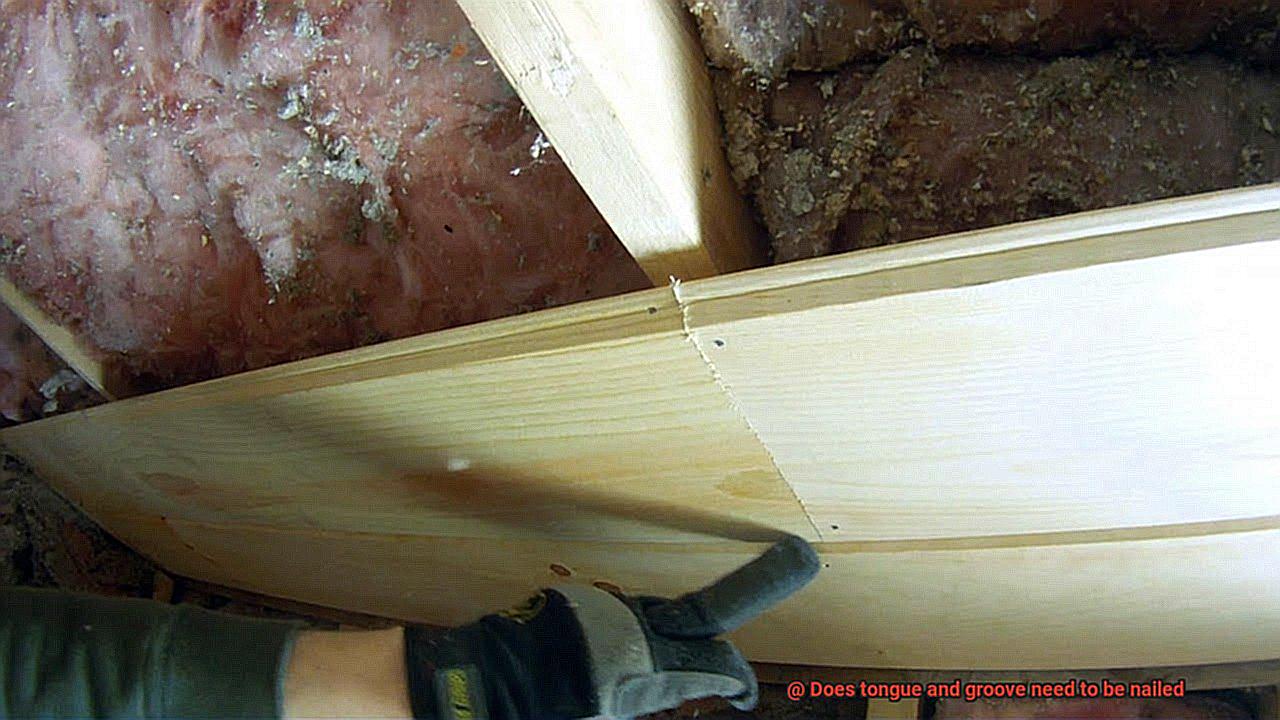
The size of the nails depends on the thickness of your boards. For 1-inch thick boards, use 2-inch nails; for 1.5-inch thick boards, opt for 2.5-inch nails. Choosing the right length ensures that the nails penetrate both the tongue and groove, providing maximum stability.
Pre-drill Holes:
Prevent splitting or cracking of the tongue by pre-drilling holes before nailing. Use a slightly smaller drill bit than the diameter of the nails you’re using. This step guides the nails into place without damaging the wood.
Angle the Nails:
Ensure a tight fit between the boards by angling the nails slightly towards the joist or subfloor. This technique provides better holding power and reduces the risk of splitting.
Nail Placement:
Place nails approximately 1 inch from each end of the board, ensuring they go through both the tongue and groove. Space additional nails every 12 inches along the length of the board. This spacing allows for expansion and contraction of the wood while providing a secure attachment.
Use a Nail Set:
After nailing the boards, use a nail set to countersink the nails slightly below the surface of the wood. This step allows you to fill the holes with wood putty or filler, creating a smooth and seamless finish.
Advantages of Nailing Tongue and Groove Boards
Well, look no further than nailing tongue and groove boards. This classic installation method has stood the test of time for good reason. Let’s dive into the advantages of nailing tongue and groove boards, shall we?
First and foremost, let’s talk about stability and durability. When you properly nail these boards, they interlock tightly, creating a bond that can withstand the test of time. No more worries about squeaky floors or uneven surfaces – nailing ensures a stable and durable foundation.
But it’s not just about strength; it’s also about ease of installation. Nailing tongue and groove boards is a breeze, whether you’re a seasoned professional or a DIY enthusiast. The snug fit of the boards makes alignment and securing them with nails a cinch. Say goodbye to complicated adhesives or floating floors – nailing is straightforward and efficient.
Speaking of efficiency, nailed tongue and groove boards have a higher load-bearing capacity compared to other installation methods. The tight interlocking design distributes weight evenly across the entire surface, minimizing the risk of bending or breaking under heavy loads. Whether you have a high-traffic area or plan on placing heavy furniture or equipment, nailing provides the strength you need.
Wood naturally expands and contracts with changes in temperature and humidity. Fear not – nailing tongue and groove boards allows for this natural movement without compromising the integrity of your installation. The tight fit minimizes gaps that can occur during expansion, ensuring a beautiful finish while still accommodating necessary movement.
Versatility is another advantage of nailing tongue and groove boards. From flooring to paneling, ceilings to exterior siding, these boards can do it all. Nailing offers a versatile solution that can adapt to different design styles and preferences. Plus, if damage occurs or you want to switch things up in the future, individual boards can be easily removed and replaced.
Last but not least, nailing tongue and groove boards is cost-effective. The simplicity of the process and the availability of boards in various price ranges make it accessible to a wide range of budgets. And with the long-term durability and stability provided by nailing, you’ll save on costly repairs or replacements down the line.
Disadvantages of Nailing Tongue and Groove Boards
It’s time to explore an alternative method that offers convenience, durability, and a seamless finish. In this blog post, we will delve into the disadvantages of nailing tongue and groove boards and introduce you to the wonders of using glue as an alternative. Say goodbye to the tedious process of hammering and hello to a hassle-free installation.
Challenging and Time-Consuming Installation:
Nailing requires precise alignment and careful hammering, making it a tedious and time-consuming process, especially for larger areas or multiple boards.
Risk of Damaging the Boards:
Hammering too forcefully or at the wrong angle can cause splitting or cracking of the wood, compromising the integrity of the installation.
Movement and Shifting:
Nailed boards are prone to loosening over time due to foot traffic, temperature changes, or humidity fluctuations. This can lead to creaking floors, gaps between boards, and even complete detachment.
Unsightly Surface:
Nail heads can create visible indentations or bumps on the floor’s surface, which is both unattractive and uncomfortable to walk on.
Limited Flexibility for Future Modifications or Repairs:
Once boards are nailed down, it becomes challenging to remove or replace individual pieces without causing damage to neighboring boards.
Restriction of Natural Wood Movement:
By nailing boards in place, their ability to expand and contract with changes in moisture content is limited, increasing the risk of warping or buckling.
The Glue Solution:
Using glue as an alternative to nailing tongue and groove boards addresses these disadvantages, providing a convenient and durable flooring solution. Let’s explore the benefits:
Easy and Efficient Installation:
Glue allows for a quicker and hassle-free installation process, saving you time and effort.
Damage-Free Installation:
Glue eliminates the risk of splitting or cracking the boards, ensuring a pristine finish.
Enhanced Stability:
Glued boards are less likely to shift or loosen over time, providing a stable and quiet floor.
Seamless Surface:
Glue creates a smooth and seamless finish, free from unsightly nail heads or bumps.
Flexibility for Future Modifications or Repairs:
Glued boards can be easily removed or replaced without causing damage to neighboring pieces, offering flexibility for any future changes or repairs.
Accommodates Natural Wood Movement:
Glue allows the boards to expand and contract with changes in moisture content, reducing the risk of warping or buckling.
Professional Advice on Using Nails with Tongue and Groove
We’ve got you covered. This comprehensive guide will provide professional advice on using nails with tongue and groove joints. From selecting the right nails to driving them at an angle, we’ll cover all the essential tips to ensure a secure and durable connection. Let’s dive in.
Selecting the Right Nails:
Choose finishing nails or brads with small heads that can be easily concealed. These nails are ideal for creating a seamless finish.
Consider the thickness of the wood being joined. Use nails that are at least 1.5 times the thickness of the wood to ensure a strong connection.
Pre-drilling Pilot Holes:
Prevent wood splitting and damage by pre-drilling pilot holes slightly smaller than the nail diameter.
This technique allows for a tight fit and ensures a secure connection between the pieces of wood.
Driving Nails at an Angle:
Angle the nails slightly towards the center of the joint when driving them.
This technique ensures that the nails penetrate both pieces of wood, creating a stronger connection.
Avoid overdriving the nails to prevent wood damage and unsightly holes.
Other Reinforcement Options:

Consider alternative reinforcement methods such as screws, dowels, or adhesive for added strength.
The choice depends on project requirements and personal preference.
Screws provide excellent holding power, while dowels offer additional structural support.
Adhesive can be used in combination with nails or as a standalone reinforcement method.
Seeking Professional Advice:
Consult with a professional or experienced woodworker to determine the best approach for your specific project.
Their expertise will help you make informed decisions and achieve optimal results.
Keep in mind that some tongue and groove installations may not require additional reinforcement, relying solely on the interlocking nature of the joint.
Conclusion
The short answer is yes, tongue and groove flooring typically needs to be nailed. This type of flooring is designed to interlock, with one side having a protruding “tongue” and the other side having a corresponding groove. The purpose of this interlocking system is to create a tight and secure fit between each plank, preventing movement or gaps.
To achieve this secure fit, nails or fasteners are usually required. They are used to attach the tongue and groove planks to the subfloor, ensuring stability and preventing any shifting or loosening over time. Nailing also helps to keep the planks aligned properly, maintaining the integrity of the installation.
However, it’s important to note that not all tongue and groove flooring installations require nails. Some modern systems utilize adhesive or floating floor techniques that eliminate the need for nails altogether. These alternative methods can offer convenience and flexibility in certain situations.
Ultimately, whether you need to nail your tongue and groove flooring will depend on various factors such as the specific product you’re using, the subfloor conditions, and personal preference. It’s always best to consult the manufacturer’s guidelines or seek professional advice for your specific installation requirements.
In conclusion, while there are alternative methods available for installing tongue and groove flooring, nailing remains a common practice for achieving durability and stability.