Ready to unleash the untamed power of liquid nails? Today, we’re diving deep into the world of adhesives to tackle a burning question: does liquid nails set hard?
Brace yourself for a mind-blowing journey through the realm of magical glue in a tube. Get ready to witness the sheer might and unyielding strength of this wonder product.
So grab your tool belt, folks, because it’s time to embark on an epic adventure into the science behind this versatile adhesive.
Does Liquid Nails Set Hard?
Contents
- 1 Does Liquid Nails Set Hard?
- 2 The Curing Process of Liquid Nails
- 3 The Flexibility of Liquid Nails
- 4 Applications of Liquid Nails
- 5 Proper Application and Curing Time for Liquid Nails
- 6 Benefits of Using Liquid Nails
- 7 Potential Drawbacks of Using Liquid Nails
- 8 Tips for Working with Liquid Nails
- 9 Conclusion
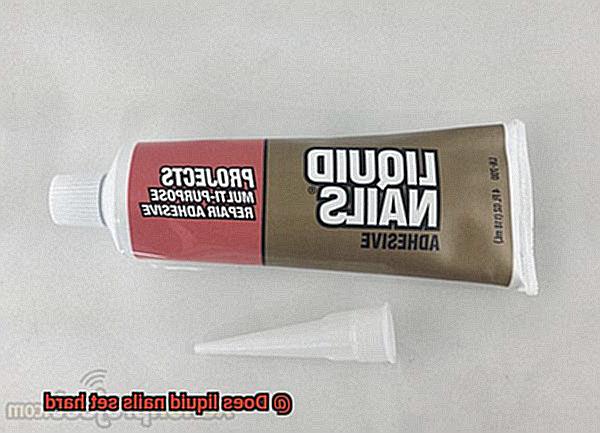
Whether you’re a DIY enthusiast or a pro in the construction industry, you’ve probably encountered Liquid Nails. This trusty construction adhesive is renowned for its ability to securely bond materials together. But the burning question remains: does Liquid Nails truly set hard? In this article, we’ll delve into the science behind its curing process and explore how various factors can influence it.
Understanding the Curing Process:
Liquid Nails starts as a thick liquid that effortlessly spreads onto surfaces. However, it undergoes a remarkable transformation over time through a chemical reaction called polymerization. This process allows the adhesive to change from its initial liquid state to a solid state, creating a durable bond.
Factors Affecting Curing Time:
The curing time of Liquid Nails can vary due to several factors. Temperature, humidity, and the materials being bonded all play a role in determining how quickly the adhesive sets hard. Generally, it takes approximately 24 hours for Liquid Nails to fully cure and reach its maximum strength. However, please note that different product variants may have slightly different curing times. For precise information, always consult the manufacturer’s instructions.
Flexibility and Durability:
Although Liquid Nails sets hard once cured, it still maintains a degree of flexibility. This unique characteristic enables slight movements or vibrations without compromising the bond’s integrity. It proves particularly beneficial when bonding materials prone to shifting or expanding, such as wood or metal. Rest assured that this flexibility ensures your bond remains unyielding even under stress or varying environmental conditions.
Versatility and Applications:
Thanks to its ability to set hard, Liquid Nails serves as an ideal choice for diverse applications. Whether you’re bonding wood, metal, ceramics, concrete, or certain plastics, this adhesive provides a robust and long-lasting bond. From construction projects to repairs and even artistic endeavors, Liquid Nails has got you covered.
The Curing Process of Liquid Nails
The curing process of Liquid Nails, the renowned construction adhesive, is a fascinating transformation from a liquid to a solid state that creates incredibly strong bonds. Let’s explore this process in detail and understand how it impacts the strength of the bond.
Liquid Nails consists of polymers, solvents, and fillers. When applied to surfaces, the adhesive initiates drying upon exposure to air. This drying process allows the solvent to evaporate, leaving behind solid components that form the bond. As the adhesive dries, it begins to harden and gain strength.
The initial hardening phase typically takes several hours. During this time, the adhesive becomes tacky and starts holding the bonded materials in place. It’s crucial at this stage to ensure that the materials being bonded are firmly held together to facilitate proper curing.
The curing process doesn’t stop at initial hardening; it continues through further chemical reactions. These reactions cause cross-linking of molecules within the adhesive, enhancing the bond’s strength and durability. This cross-linking process is time-consuming and can last up to 7 days or even longer, depending on environmental conditions.
Environmental factors like temperature and humidity greatly influence Liquid Nails’ curing time. Higher temperatures accelerate the process while lower temperatures may delay it. Similarly, lower humidity levels can slow down curing. Following the manufacturer’s instructions regarding curing time and conditions is vital for achieving optimal bond strength.
To summarize, Liquid Nails undergoes a remarkable transformation from a liquid state to a solid bond. The curing process involves drying, initial hardening, and subsequent chemical reactions leading to cross-linking of molecules. Understanding this process is essential for achieving strong and durable bonds in DIY projects or professional construction jobs.
The Flexibility of Liquid Nails
When it comes to construction and DIY projects, finding the right adhesive can make all the difference between a successful endeavor and a frustrating mess. That’s where Liquid Nails steps in, bringing its unique blend of strength and flexibility to the table. In this article, we will explore how the flexibility of Liquid Nails makes it a reliable adhesive for various applications, diving into its versatility and providing real-life examples that showcase its magical powers.
Flexibility that Defies Gravity:
Unlike other adhesives that become rigid and brittle once dry, Liquid Nails dances to its own beat. Even after it sets, it retains a certain degree of flexibility that allows for expansion and contraction of materials. Imagine bonding two pieces of wood together using Liquid Nails – as the humidity or temperature fluctuates, the wood naturally expands and contracts. But fear not. Liquid Nails flexes with these movements, reducing the risk of your precious bond breaking.
The Art of Differential Expansion:
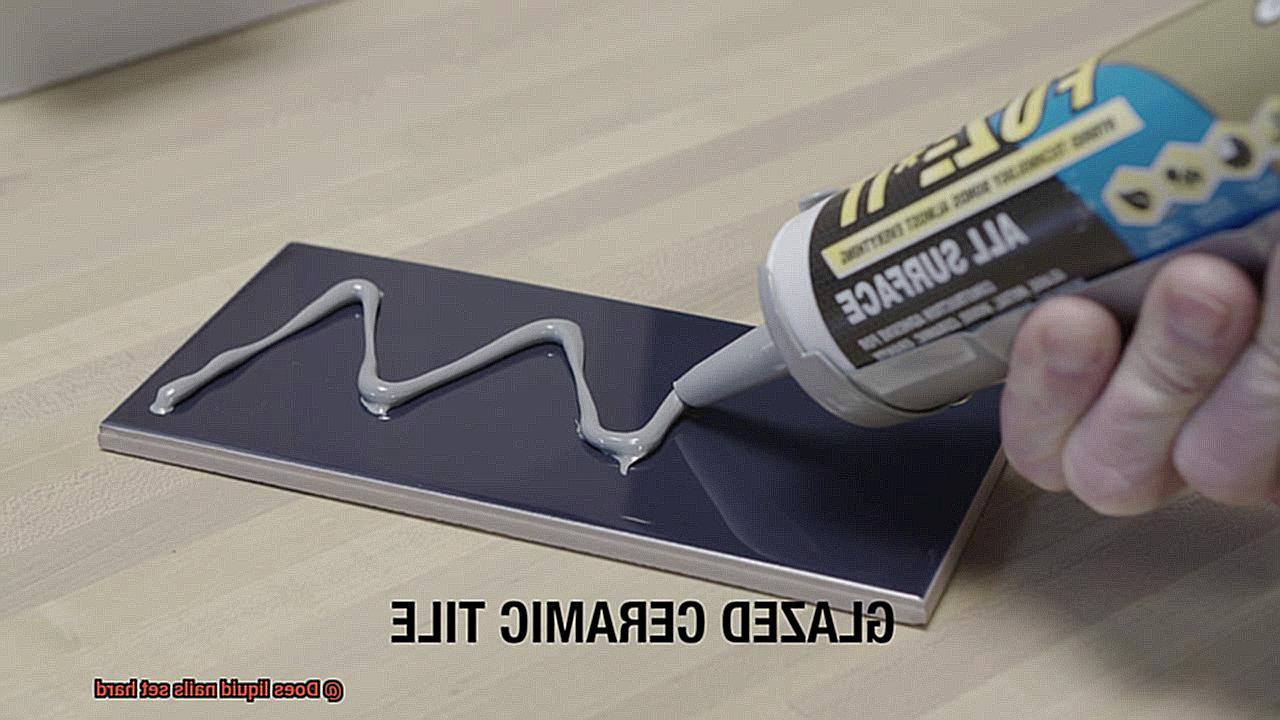
But wait, there’s more. Liquid Nails is not limited to simple wood bonding. It excels in scenarios where materials with different coefficients of expansion need to join forces. Picture this: you’re installing beautiful ceramic tiles on a substrate. Over time, temperature changes may cause these materials to expand and contract at different rates. Here’s where Liquid Nails shows its magic – it absorbs the stress caused by this differential expansion, preventing cracks from forming in your perfect tile installation.
Shock Absorption like No Other:
Liquid Nails isn’t just flexible; it’s also a master at absorbing shocks and vibrations. Think about attaching baseboards or crown molding – they may experience slight movements or impacts over time. Fear not. Liquid Nails has your back, providing a reliable bond that can withstand these minor disturbances without compromising its integrity.
Strength Meets Flexibility:
Now, you may be wondering, does this flexibility compromise the adhesive’s strength? Absolutely not. Liquid Nails remains steadfast in its commitment to holding materials securely together. Its flexibility is simply an added bonus that allows for some movement without sacrificing durability.
The Right Potion for Every Project:
It’s important to note that not all Liquid Nails formulas are created equal. Different products in the range may have slightly different properties, tailored to specific project requirements. So, when wielding this adhesive wizardry, make sure to choose the right potion based on your project’s needs.
Applications of Liquid Nails
With its remarkable bonding capabilities and adaptability to different materials and conditions, Liquid Nails is the go-to adhesive for various applications.
When it comes to trim work, such as baseboards and crown molding, Liquid Nails excels. It creates a secure bond between the trim and the wall, ensuring a long-lasting installation that won’t budge over time. But Liquid Nails doesn’t stop there – it can also bond materials like wood, metal, concrete, and ceramic, making it perfect for woodworking projects or repairing household items.
But wait, there’s more. Liquid Nails is also a champion when it comes to installing wall coverings like paneling and drywall. Its robust bond helps prevent warping or loosening of the panels, resulting in a durable and visually appealing finish. And don’t forget about tiles – with Liquid Nails, you can confidently adhere tiles to walls or floors, creating a reliable and long-lasting surface.
But it doesn’t end with construction projects. Liquid Nails is also your ally in furniture assembly, crafting projects, and even repairing household items. Its ability to withstand different conditions and materials makes it a reliable choice for any DIY project you have in mind.
Proper Application and Curing Time for Liquid Nails
Liquid Nails, the superhero of adhesives, is ready to save the day and provide maximum strength and durability for all your bonding needs. But how do you properly apply it to ensure a powerful bond that can withstand the test of time? Fear not. We have compiled a step-by-step guide to help you achieve professional results every time.
Step 1: Prepare the Surface
Before unleashing the power of Liquid Nails, prepare the surface properly. Channel your inner cleanliness freak and clean it thoroughly, eliminating any dirt, dust, or grease that may hinder adhesion. Remember, a clean surface is the secret to a mighty bond.
Step 2: Apply the Adhesive
Now it’s time to wield the power of Liquid Nails. Grab your trusty caulk gun or squeeze the adhesive directly from the tube. But be strategic. Apply it in a continuous bead, either in vertical or horizontal lines. This ensures proper coverage and bonding, leaving no weak spots for villains to exploit.
Step 3: Press Surfaces Together
Within 10 minutes of applying the adhesive, summon your strength and firmly press the two surfaces together. This step is crucial for proper adhesion and prevents the adhesive from drying out before bonding. Applying pressure will create an unbreakable bond that even Superman would envy.
Step 4: Use Clamps for Extra Strength
For those heavy-duty applications where maximum strength is required, call upon the aid of clamps or other methods to hold the bonded surfaces together until the adhesive cures. These sidekicks will provide extra stability and reinforce the bond in times of need.
Step 5: Allow Curing Time
Patience is a virtue when it comes to Liquid Nails. The curing time can vary depending on factors like temperature, humidity, and the materials being bonded. To ensure its full potential is realized, allow 24 hours for complete curing. However, don’t fret. The adhesive may develop initial strength within 30 minutes to an hour, providing a glimmer of hope while you wait.
Step 6: Avoid Stress on Bonded Surfaces
Until the adhesive has fully cured, shield the bonded surfaces from stress or heavy loads. Protect them from the forces that seek to weaken their bond and ensure their strength remains unyielding. Give them the time they need to set and solidify their alliance.
Step 7: Clean Up Excess Adhesive
If any excess adhesive escapes during the battle for bonding supremacy, swiftly remove it with a clean cloth or scraper before it dries. Liquid Nails, once hardened, becomes a formidable opponent to remove without damaging the surface. So be quick and nimble to maintain a clean and polished finish.
Benefits of Using Liquid Nails
If you’re tired of your DIY projects falling apart, or if you’re a professional who wants a reliable adhesive that can withstand the toughest conditions, look no further than Liquid Nails. This versatile construction adhesive offers a multitude of benefits that make it the go-to choice for professionals and DIY enthusiasts alike.
First and foremost, Liquid Nails boasts incredible bonding power. It sets hard and creates a durable bond between different surfaces, whether it’s wood, metal, concrete, or plastic. Say goodbye to weak adhesives that fail under pressure. With Liquid Nails, your projects will stay intact for years to come.
But what sets Liquid Nails apart from other adhesives on the market is its flexibility. While other adhesives become brittle over time, Liquid Nails remains flexible even after it sets. This means it can handle slight movement or expansion and contraction of the bonded materials without cracking or causing damage. So, whether you’re working on a building or a piece of furniture, Liquid Nails has got you covered.
But wait, there’s more. Liquid Nails is also resistant to water and weather conditions, making it perfect for both indoor and outdoor applications. It can withstand moisture, humidity, heat, and cold without losing its integrity or adhesion strength. So no matter the climate or environment, Liquid Nails will hold strong.
Applying Liquid Nails is a breeze too. Its convenient tube or cartridge can be used with a caulking gun, ensuring a quick and mess-free application process. The adhesive spreads easily and evenly, guaranteeing a strong bond between surfaces every time.
And let’s not forget about the cost-effectiveness of Liquid Nails. By eliminating the need for additional fasteners like nails or screws, it saves you time and money. Plus, its long-lasting performance means you won’t have to worry about repairs or replacements anytime soon.
Potential Drawbacks of Using Liquid Nails
Liquid Nails is a popular construction adhesive that offers numerous benefits for bonding various materials. However, it’s essential to understand the potential drawbacks before diving into your next DIY project. This article explores the limitations of Liquid Nails, including strong odor, drying time, high viscosity, limited compatibility, and removal challenges. By being aware of these concerns, you can make informed decisions and take appropriate precautions for successful bonding.
Strong Odor:
Liquid Nails contains volatile organic compounds (VOCs), resulting in a pungent odor during the drying process. While this may not be a dealbreaker for some, it can be bothersome in enclosed or poorly ventilated spaces. Ensure adequate ventilation or wear a mask to protect yourself from inhaling the fumes.
Drying Time:
Unlike fast-drying adhesives, Liquid Nails requires patience. It can take up to 24 hours or more to fully set and cure. This prolonged drying time can be inconvenient for time-sensitive projects or immediate bonding needs. Plan ahead and allocate ample time for proper drying before manipulating the bonded materials.
High Viscosity:
Liquid Nails’ high viscosity makes it thick and sticky, which can be advantageous for certain applications. However, it can also make even application and thin layers challenging. To ensure proper coverage and minimize uneven bonding risks, exert extra effort during application.
Limited Compatibility:
While Liquid Nails is compatible with various materials like wood, metal, concrete, and plastic, it is not recommended for use on surfaces such as polyethylene, polypropylene, and certain rubber types. Improper bonding with these materials may lead to weak adhesion or failure over time. Always consult the manufacturer’s instructions before using Liquid Nails on specific materials.
Removal Challenges:
Removing Liquid Nails can be daunting. The adhesive forms a strong bond that can be difficult to break without causing damage. This poses a problem when separating bonded materials or rectifying application mistakes. Use caution and proper techniques to minimize further damage during removal.
Tips for Working with Liquid Nails
Liquid Nails, the ultimate construction adhesive, holds the power to create bonds that withstand the test of time. Whether you’re a DIY enthusiast or a professional contractor, mastering the art of working with Liquid Nails can make a world of difference in your projects. This article reveals invaluable tips and tricks to maximize the effectiveness of Liquid Nails and achieve the strongest bonds imaginable.
Clean and Prepare the Surface:
A spotless surface is the foundation for a solid bond. Before applying Liquid Nails, ensure that the surface is pristine by removing any dust, dirt, or grease. This critical step guarantees optimal adhesion, paving the way for unbreakable bonds.
Use the Right Amount:
Finding the sweet spot when it comes to adhesive quantity is key. Consult the instructions on the adhesive tube or container to determine the recommended coverage rate. Applying too much or too little Liquid Nails can impact its performance, so precision is crucial.
Apply Evenly:
To create an unyielding bond, spread Liquid Nails evenly across the surface. Employ a putty knife or caulking gun to apply the adhesive smoothly and consistently. This technique ensures a secure and reliable connection between materials, leaving no room for compromise.
Allow Ample Drying Time:
Liquid Nails needs time to set and dry completely for its full strength to be unleashed. The drying time may vary depending on environmental factors like temperature and humidity. Patience is a virtue – allow at least 24 hours for the adhesive to cure before exposing it to stress or load. Your patience will be rewarded with an unwavering bond.
Use Clamps or Weight:
For projects that demand superhuman strength in their bonds, consider using clamps or weights to hold surfaces together while Liquid Nails sets. This technique applies extra pressure, creating a tighter grip and ensuring maximum strength in your connections.
Shield the Exposed:
When working on outdoor projects where Liquid Nails is exposed to the elements, shield it from potential damage. Apply a sealant or primer specifically designed for adhesives to enhance durability and longevity. Protecting your bond ensures it stands strong against moisture, UV rays, and other environmental hazards.
WSoaX4kgMeg” >
Conclusion
Liquid Nails, the renowned adhesive brand, indeed sets hard.
Once applied and allowed to cure, it transforms into a robust and durable bond that can withstand the test of time. This remarkable feature makes Liquid Nails an excellent choice for various construction and DIY projects.
Its ability to set hard ensures a reliable and long-lasting bond that won’t disappoint.